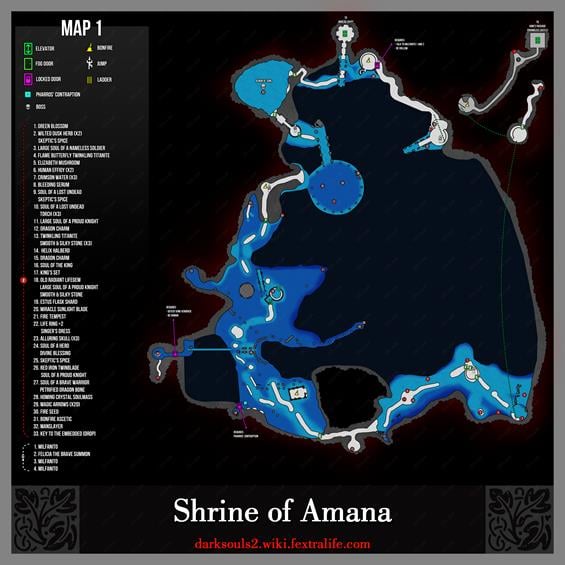
General Information
- Previous: King's Passage -from Drangleic Castle
- Next: Undead Crypt
- Recommended Levels: 95 to 105
- Boss: Demon of Song
- Bonfires: Tower of Prayer, Crumbled Ruins, Rhoy's Resting Place, Rise of the Dead
Shrine of Amana Map
NPCs in the Shrine of Amana
- Milfanito
- Two of three Milfanito sisters found through the area (Gives you Smooth & Silky Stone).
- Will reward you for helping them.
- After defeating the Demon of Song, immediately return to the 2 Milfanito to receive a Divine Blessing from each of them as a reward. Afterwards, free the Milfanito with the Key to the Embedded in Drangleic Castle and return to the 2 Milfanito. The Milfanito at the shrine will give you a Fire Seed as a reward, the other will give you another Divine Blessing.
- WARNING: Homing Soulmass and Crystal Homing Soulmass will auto-lock onto Milfanito as an enemy and kill them upon getting close to them (not sure if it's a glitch or not but it does do it as of 6/13/2014.)
Summons
Items
Consumables- Skeptic's Spice x2
- Soul of a Lost Undead x2
- Torch x3
- Large Soul of a Proud Knight x2
- Old Radiant Lifegem
- Wilted Dusk Herb x2
- Crimson Water x3
- Elizabeth Mushroom
- Flame Butterfly
- Twinkling Titanite x2
- Smooth & Silky Stone x5
- Dragon Charm x2
- Estus Flask Shard
- Fire Seed
- Sunlight Blade
- Soul of the King
- Fire Tempest
- Homing Crystal Soul Mass
- Alluring Skull x3
- Soul of a Hero
- Divine Blessing
- Petrified Dragon Bone
- Soul of a Proud Knight
- Green Blossom x2
- Large Soul of a Nameless Soldier
- Key to the Embedded (dropped from boss)
- Magic Arrow x20
- Bonfire Ascetic x4
- Manslayer
- Human Effigy x2
Enemies
- Basilisk
- Archdrake Pilgrim
- Amana Priestess
- Aldia Warlock (Prowling Magus)
- Amana Aberration
- Ogre
- Poison Brumer
- Great Poison Brumer
NPC Invasions
Boss
Notes
- In NG+ there is also a black phantom between the Priestess and the Ogre. *1
- Putting your Human Effigies in your Item Box doesn't seem to work, when trying to get your Hollowing reversed at the Milfanito Shrine; it appears you must really be out to get a free human restore.
Shrine of Amana Walkthrough
Access
From the Mirror Knight boss fight, head straight to the area with the circular platform ahead. Standing on the crest in the middle will activate it and send you down a long way. However before doing this, hug the short barrier on the left until you can turn into it and make a U-turn on it, to find a chest. This chest contains a Soul Bolt, Spell Quartz Ring +2, and 3x Bonfire Ascetic. At the bottom, proceed through the hole in the wall, and take a right at the torch. Here you'll find a Green Blossom, inclosed by roots -take your weapon to it, and claim your loot, then head in the other direction. Continue until you reach the Tower of Prayer Bonfire.
Meet-o Milfanito
From this bonfire, head down the stairs and take the door to your left. Through here you'll notice an item on some branches on your left that you cannot pick up, so break the branches that hold it up, so you can claim it later on. Right ahead you'll also find an Archdrake Pilgrim, and a trail leading to an opening on the right. In here you'll find a chest with 2x Wilted Dusk Herb and Skeptic's Spice, and a Basilisk. Head back to the ruined tower, and proceed down the staircase into an area, mainly submerged in water, and find a Large Soul of a Nameless Soldier under the stairs. There is also a Amana Aberrations by the exit that leads to the next area.
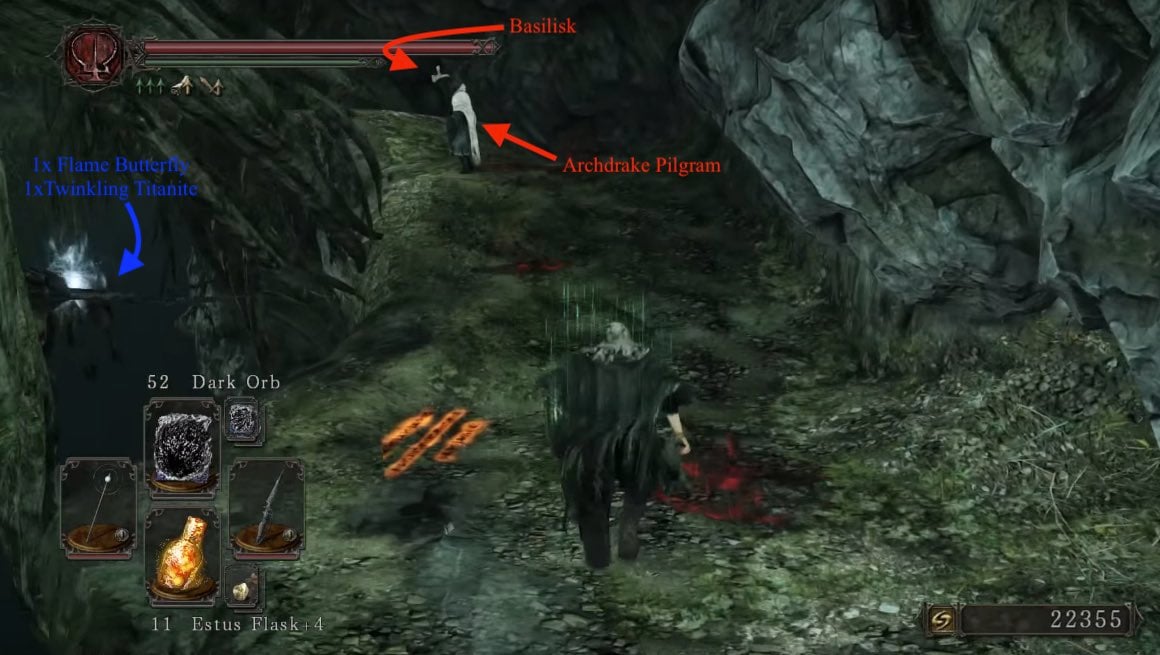
This room, and the coming ones are filled with partially submerged, walkable areas. You can walk into the water, but be careful not to fall through the deep pits. While these ledges are tough to see under the water, you can use a torch to see them more clearly; however, the light from the torch will attract any surrounding Amana Aberrations, so try to use Cast Light instead as it does the job without the added trouble.
Upon entering, you will see an Archdrake Pilgrim ahead and on the right, who will attack you on sight, and Amana Aberrations hiding in the water along the rocky trail for the rest of the area. Some noteworthy notes on these enemies:
- They are being kept calm by the beautiful song you've probably noticed by now.
- Beware though that going close to them or carrying a torch will aggro them.
- You can see the tops of their heads peek out of the water.
- If singing is present, a yellow sparkle effect over their locations.
- You can also lock onto them from a distance before they aggro.
To the right of the path, you'll notice some rocks sticking out of the water. Go to them and hug them -or use a light source to check where you can walk- and make your way around them to find a Flame Butterfly and a Twinkling Titanite. Head back and notice the left of the rocky path, if you search carefully, you'll find a chest containing Elizabeth Mushroom (the chest on the very left border before the deep water begins, start at the beginning of the rocky path, move to the left till you are at the border, and then move the border a bit upwards to find the chest). More obviously and still on the left, you'll find a small rocky platform holding a corpse with 2x Human Effigy. At the end of this path, you'll find a hut.
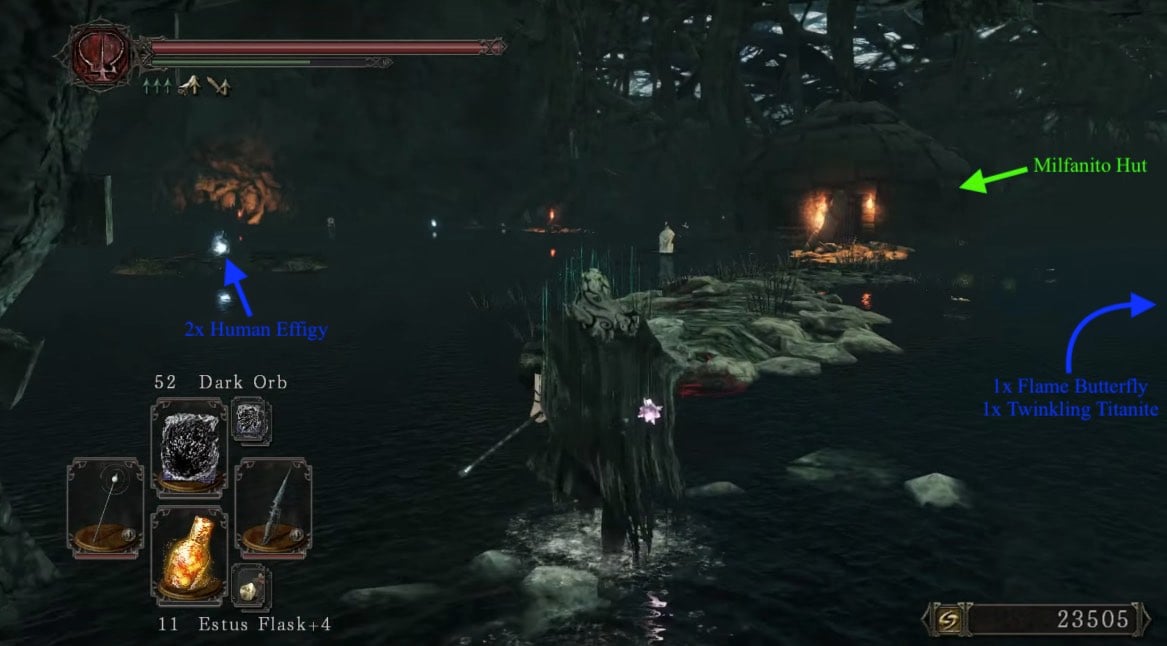
Once you get in close to the hut, the song will stop and any remaining Amana Aberrations will attack you. Inside the hut you will find Milfanito. She will tell you about her sisters, some lore, and will give you a Smooth & Silky Stone if you exhaust her dialog. If you circle around her hut, you'll find a chest with 3x Crimson Water and some curse jars. However tempting it may seem, do not kill any Milfanito! Antagonizing her or her sisters will revoke your ability to seek help from them to turn you human when you're out of Human Effigies!
Misty Cave
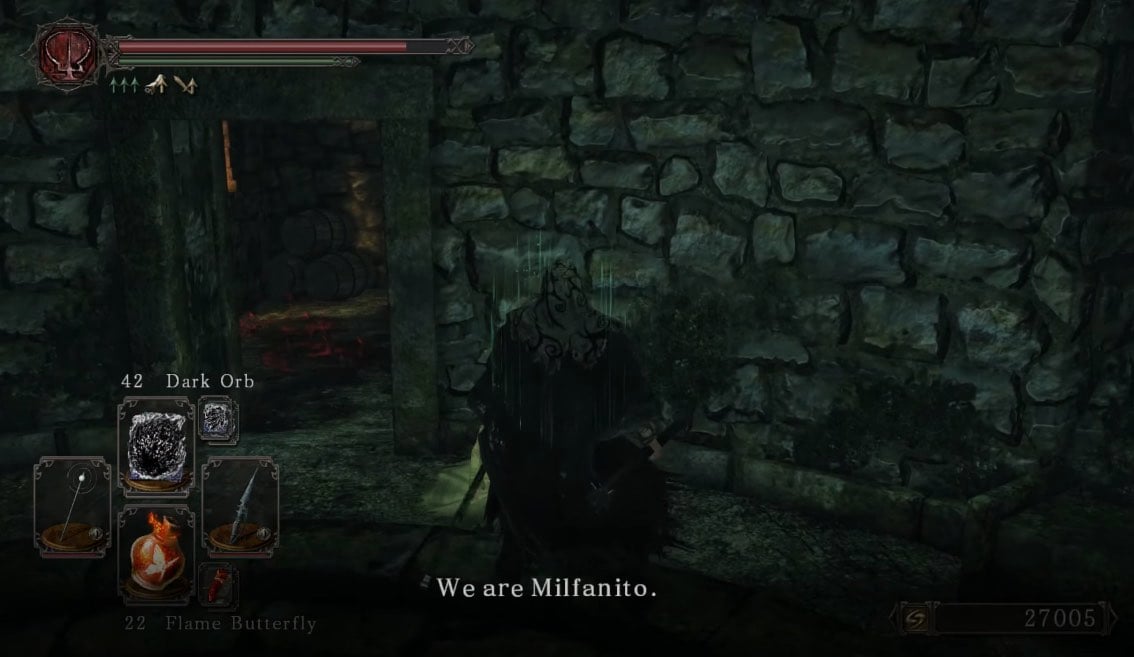
Proceed through the hut and open the door in the back to continue. This path will show several drops, Amana Aberrations, and three Archdrake Pilgrims at the far end of the cavern. The first drop you come across is a Bleeding Serum on the right, in the water. Right by it on the main path, you'll find a total of 2x Soul of a Lost Undead and a Skeptic's Spice, a Large Soul of a Proud Knight and 3x Torch. The Pilgrims mentioned earlier also attack you when you've reached this point. Right before abandoning the path, and heading into the cave, to the left you'll find an Amana Aberration guarding a partially submerged-chest in water, containing a Dragon Charm.
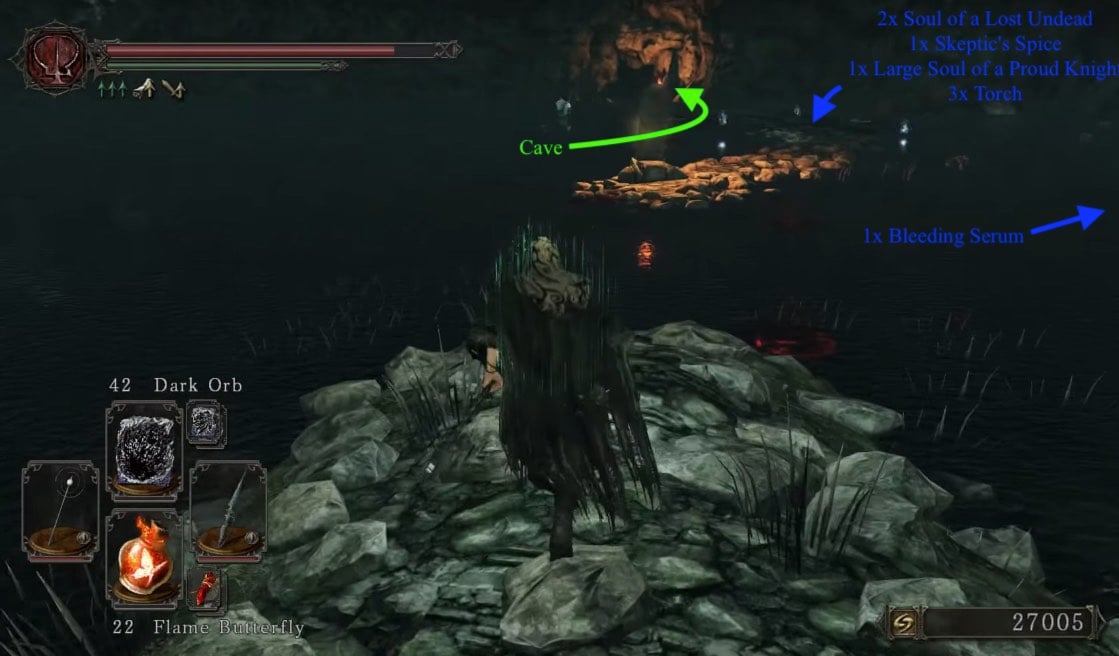
Inside the tunnel, the first cave-room on the left contains four Amana Aberrations and a chest containing a Twinkling Titanite and 3x Smooth & Silky Stone. A lone Poison Brumer will approach you around this mini cave. Come back out to the tunnel you were traversing, and continue until you hit a mist wall.
Another Dragonrider?
Upon exiting the mist and tunnel, ahead is another similar stone path with the crumbling ruins to your right, providing the Crumbled Ruins Bonfire inside. The smartest move right now is to go and rest at the bonfire since a death here is not so uncommon, and having to traverse the whole area you just did again, would not be ideal. Back on the path and way down the line is a new enemy type, the Amana Priestess, that will shoot homing soul arrows at you from a long distance which deal a lot of magic damage. They also usually have Amana Aberrations somewhere around them, so be careful when approaching them. Avoid fighting in the water unless it's absolutely necessary, ideally rushing the nearby Priestesses and pulling all the Aberrations onto the stone path before dealing with the further Priestesses.
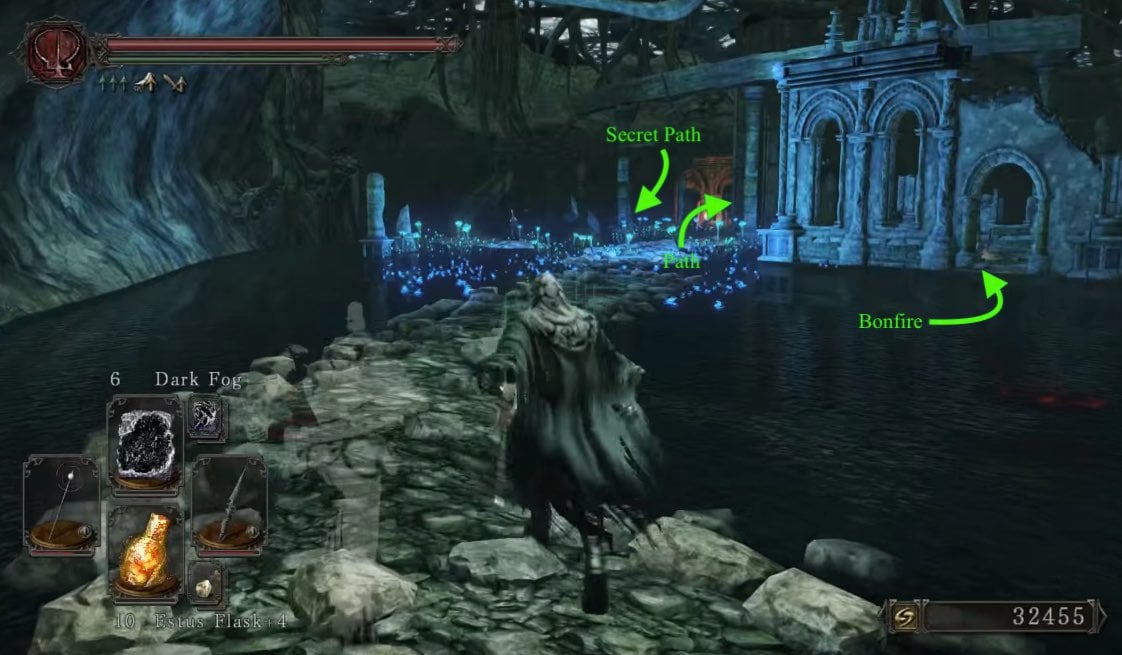
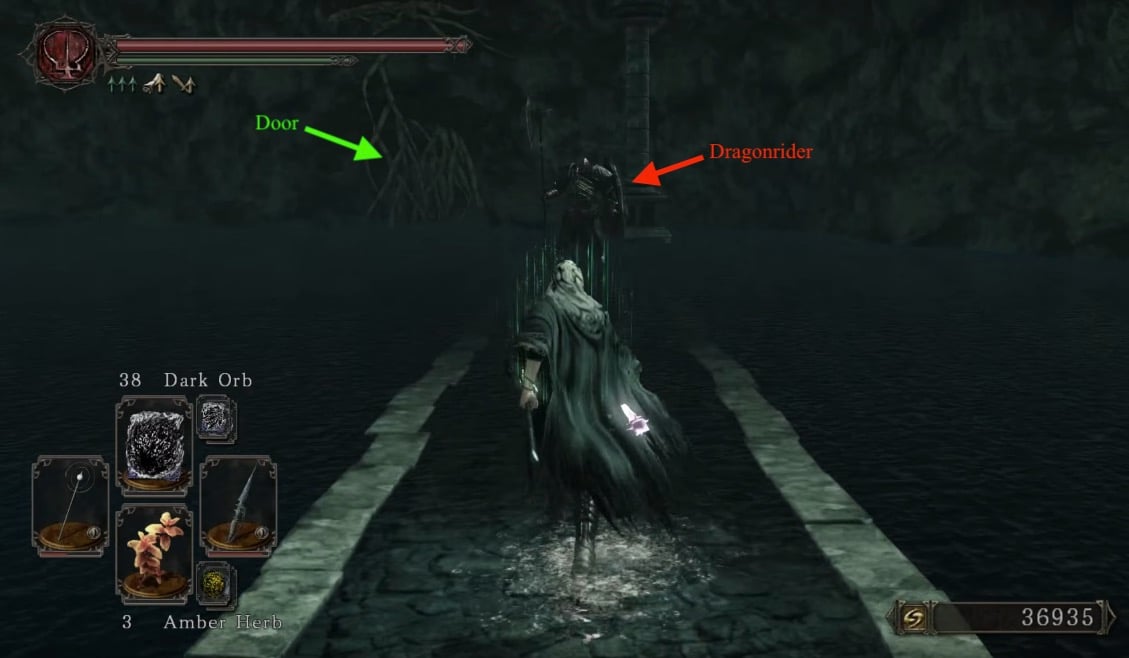
Near the area with the first Amana Priestess, you should notice a ramp leading into the air. Just past it and to the left, near the big gate, is a submerged Pharros' Contraption. Activate it to reveal a hidden wall, leading to a little cave with a chest containing the Helix Halberd. Also when passing the ramp on the right, an Old Knight wielding a hammer will approach and attack you. After dealing with this, look to the left for a hidden pathway in the water, close to the third Priestess. Ignore that path for now, as you need to find King Vendrick first and be in human form to open the door at the end of the path. There will also be a DragonRider guarding this path.
This is Getting Tricky
In the opposite direction of that path is another Amana Priestess waiting, with a corpse containing a Fire Seed next to her. Ahead on the left, you will notice a path with a Priestess who may or may not be already attacking you, next to an Ogre. Try to snipe her with a bow from here, then proceed towards the platform she was standing on, killing the Aberration that pops up before dealing with the Ogre. There will also be another Priestess by the upcoming hut that could do with some killing too. Follow the path killing any Aberrations that jump out, until you reach the second hut. Inside the hut there is an Old Radiant Lifegem, a Large Soul of a Proud Knight, and a Smooth & Silky Stone; as well as an summon sign for Lone Hunter Schmidt.
Quick Detour (Can be Skipped)
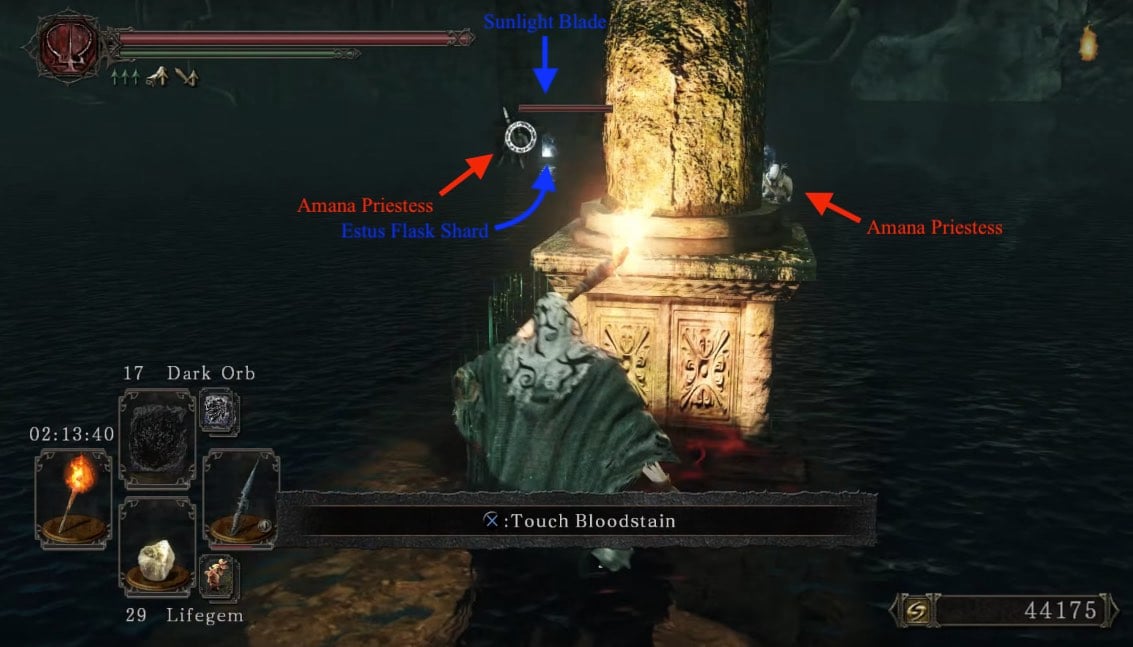
There is another more hidden and dangerous pathway in the water after the Ogre. The pathway is under the columns, is guarded by two Priestesses and a couple of Aberrations, and is very narrow so watch your step. An Estus Flask Shard and the Miracle Sunlight Blade (in the Chest behind the Corpse) is waiting there. The narrow path will begin on the right of the second column, after that, the path is going left of the columns. As with the other paths, a torch is not required, but helps finding the path.
Back to Tricky
Once you leave the hut, there will be an Archdrake Pilgrim a few meters ahead. Lure him then kill him, then before moving to the left, carefully check the right side. There is a hard-to-see chest which contains Fire Tempest. From the door, carefully head about stright-right, if you can't find it immidiately, circle around the border carefully. Be carefull to not go too close to circle of Cursed Urns, if they are in your way, get rid of them (a Bow and Iron Arrows works best here).
After that, going left from the hut, you will find yourself near the ruins. Come close to them but don't go any further as there are -you guessed it- another two Priestesses on the other end who will snipe you with Soul Arrows. Use cover and try to shoot them down. Be aware of Amana Aberrations and Archdrake Pilgrims that might pose a melee threat to you as well. There will be also one Priestess ahead who heals other enemies and herself instead of attacking you. After dealing with all threats, head a bit back, while looking to the walls on the right. You will eventually come across an cave opening with another Priestess and a Archdrake Pilgrim in front of it. Deal with them, then destroy the roots with your weapon. Inside, another Ogre and a corpse with Singer's Dress and a Life Ring +2 are waiting inside.
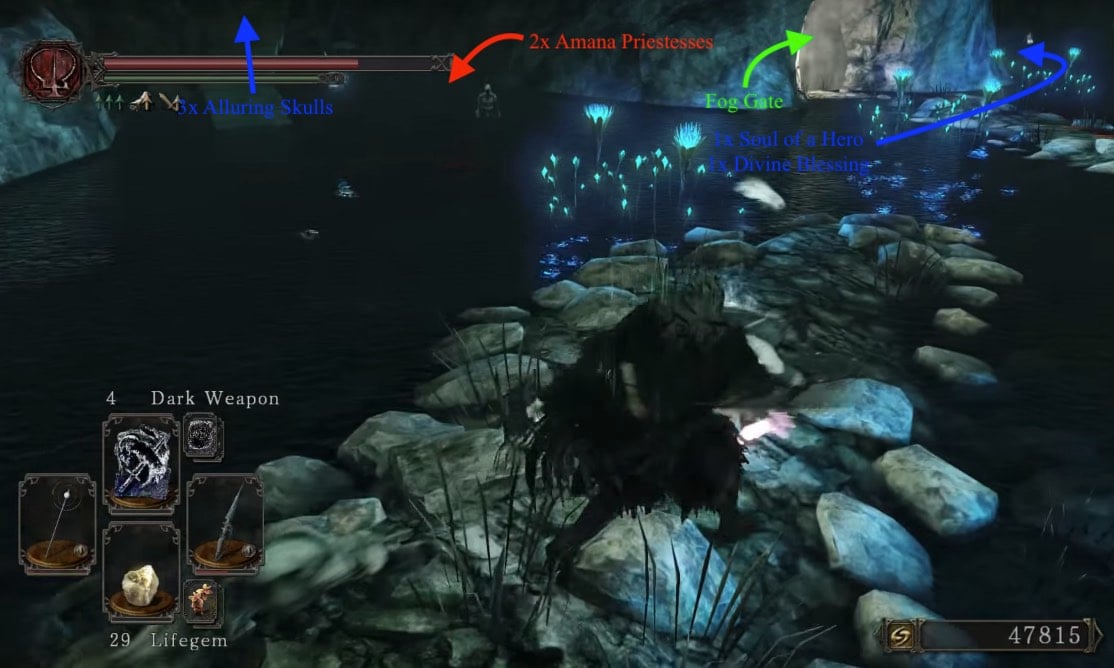
You may notice a fog gate but head to the left side of the area to find another two Priestesses next to a upward-sloping column holding a skeleton with 3x Alluring Skull, at the top. While to the right of the fog gate, is a very thin ledge with a corpse holding a Soul of a Hero and a Divine Blessing -HUG THAT WALL. There is another item visible from here, but we can't reach it from here.
Boss Fight: The Musical
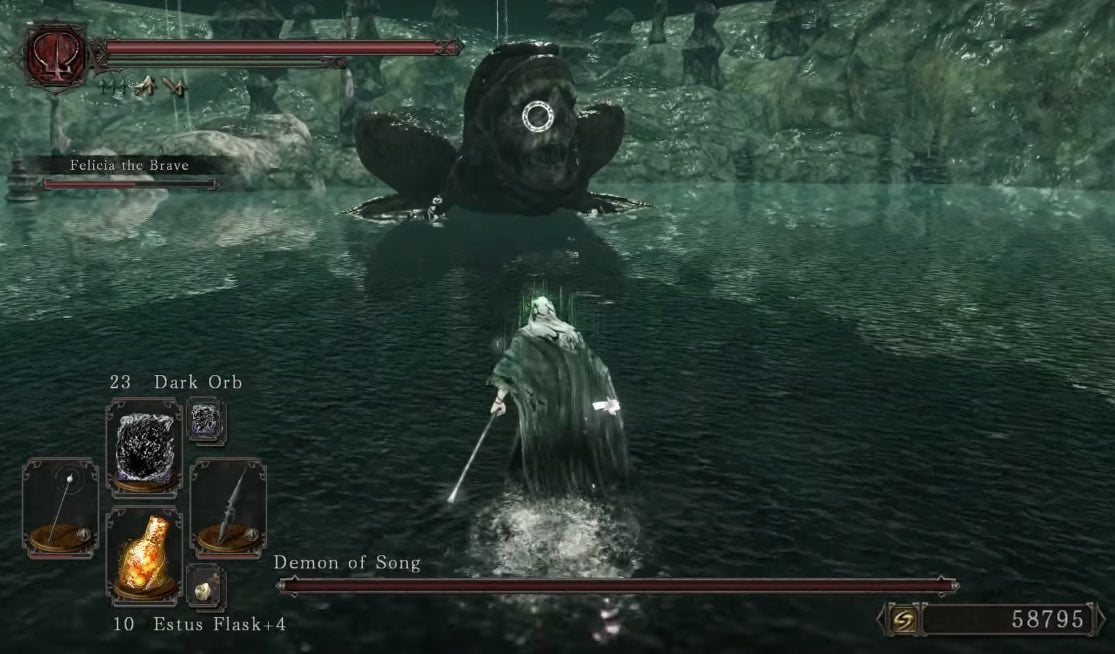
Once you have cleared the area, enter the mist into a cavern with a single file line of Poison Brumers; deal with them and use Rhoy's Resting Place bonfire on the left. You can summon Felicia the Brave her if you like, she is very helpful for the upcoming battle. On the way to the exit, more Poison Brumers as well as a Great Poison Brumer will be in the way. Once you exit the cavern, there will be a mix of Priestesses that will start shooting you from a distance and Archdrake Pilgrims that will attack you as well. Run forward towards the column that has a torch on it and snipe them from behind it. Moving to the right, continuing behind the columns, you will come across a corpse holding Homing Crystal Soul Mass. Moving to your left, kill the Amana Aberrations along the way, and Priestesses. Here you should pick up quite a bit of loot, this should include :
- 1x Sceptic's Spice
- Red Iron Twinblade
- 1x Soul of a Proud Knight
- 1x Soul of a Brave Warrior
- 1x Petrified Dragon Bone
- Homing Crystal Soul Mass
Head back to the exit of the cave and before going in, turn to the left. Follow the thin path (hug the wall) to retrive the item we ignored before: a Large Soul of a Proud Knight and a Green Blossom. Continue forward down the path and you will be invaded by Peculiar Kindalur. Make sure not to have homing soul mass or crystal homing soul mass as it will autolock onto the Milfanito as an enemy and kill her, as you want to free her. At the end of the path, near a pillar with a torch is another corpse with a Large Soul of a Proud Knight and a Green Blossom. After taking the items, go into the hut to free the second Milfanito (just "talk" with her and she will disappear into a cloud of light particles). Continue down and through the fog gate to face the boss.
BOSS FIGHT: Demon of Song
Path to the Crypt
Killing this boss grants you 19,500 souls, the Demon of Song Soul, and the Key to the Embedded. From where you came in, head into the cave on the right, until you return to a stone path in a submerged area. Follow this path to the end then continue straight, through the two doorways, and you will shortly arrive at a staircase and find a few Basilisk lurking. After taking care of them, head to the chest of them were guardiang to find 20x Magic Arrows. Take the stairs up the tower to find a petrified Hollow blocking your way. Use a Fragrant Branch of Yore to unpetrify him, then go inside to the Rise of the Dead bonfire.
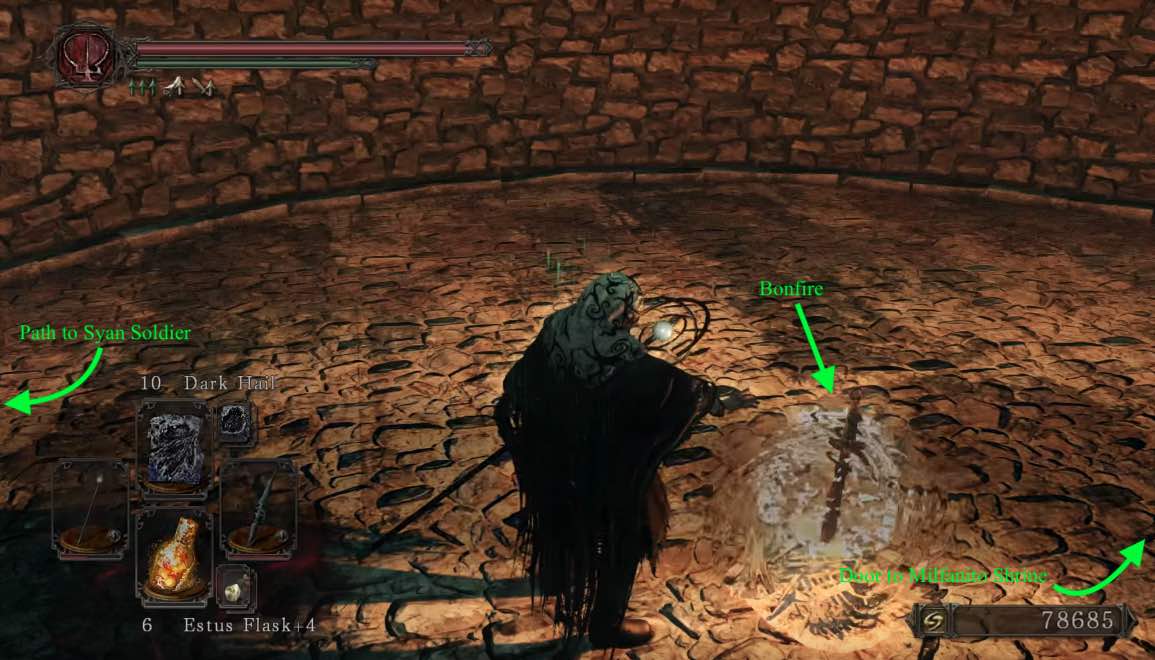
At the top of the stairs above the bonfire is a door that can only be opened when you are hollow. Behind the door, 3 Hollow Crawlers will greet you. After taking care of them, follow the path ahead, soon meeting a Hollow Pyromancer. Praying at the Altar in front of you lets you become human again, if you don't have any Human Effigys anymore (having any in your Inventory, Storage Chest and dropped them, the Altar does nothing).
Behind the Altar is another Milfanito, who whill reward you with a Fire Seed for rescuring her sister, as well as a Divine Blessing for defeating the Demon of Song. Exhausting her dialog, she gives you a Petrified Something.
Down the stairs by the altar you will find a Fire Seed in a cave at the bottom guarded by another Hollow Pyromancer, with another one waiting outside. On the left of the staircase outside is a chest, containing the Manslayer; following the thin ledge on the right of the staircase leads to a chest containing a Bonfire Ascetic.
Head back to the previous bonfire, then follow the rock path to the big door, guarded by a Syan Soldier. There's an elevator here that will get you to Undead Crypt.

