Brightstone Cove Tseldora
 Brightstone Cove Tseldora is a Location in Dark Souls 2. It is a large area full of dangerous enemies consisting of upper, Royal Army Campsite area and lower, Brightstone Cove Tseldora itself. It has 3 bonfires, one of which is locked away, and two bosses.
General Information
- Previous: Doors of Pharros
- Next: Shrine of Winter
- Recommended Levels: 90 to 100
- Boss: Prowling Magus and Congregation, The Duke's Dear Freja
- Bonfires: Royal Army Campsite, Chapel Threshold, Lower Brightstone Cove
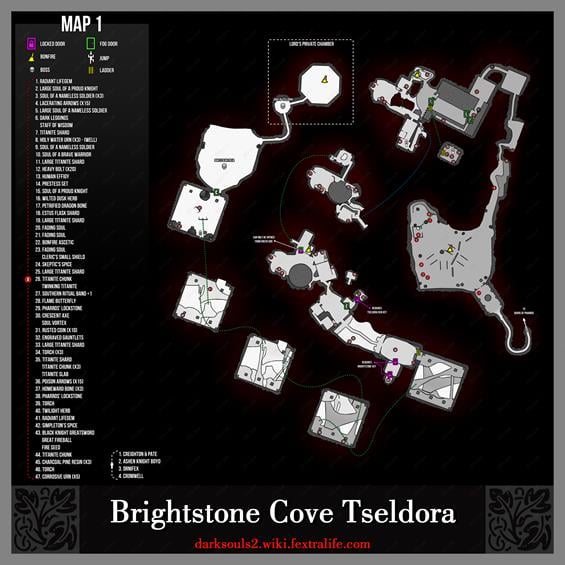
Brightstone Cove Tseldora Map
NPCs in Brightstone Cove Tseldora
NPC Summons
Items
Consumables- Estus Flask Shard x1
- Staff of Wisdom
- Fire Seed
- Fragrant Branch of Yore
- Great Fireball
- Heavy Bolt x 20
- Large Soul of a Proud Knight
- Lacerating Arrow x15
- Large Titanite Shard
- Petrified Dragon Bone
- Pharros' Lockstone
- Soul of a Nameless Soldierx5
- Soul Vortex
- Southern Ritual Band +1
- Titanite Shard x2
- Titanite Chunk x3
- Titanite Slab x2
- Twinkling Titanite
- Black Knight Ultra Greatsword
- Cleric's Small Shield
- Crescent Axe
- Pickaxe (Quest item, see weapon page for details)
- Dark Quartz Ring +1
- Engraved Gauntlets
- Priestess Set
- Dark Leggings
Enemies
- Undead Devourer
- Falconer
- Spider Drone
- Hollow Peasant
- Ducal Spider
- Hollow Mage
- Basilisk
- Prowler Hound (Petrification)
- Troll
- Basilisk (Trapped inside carriage)
- Great Basilisk
- Dragon Acolyte (only found here, have magical weapons and Witching Urn)
- Poison Brumer (Large, )
- Mirror Spirits
- Aslatiel of Mirrah (Brother of Lucatiel, Dark Spirit the one she recounts as "lost" to this land, not her herself.)
- Painting Guardian (NG+ only)
- Mimics
- Ogre
NPC Invaders
Boss
Notes
- In the village area, lure the boar all the way through the level to the room across the thorn bridge, into the spider falling room. Have it eat the mushroom in that room, and the Pickaxe will appear.
- On NG+ giant Boars appear in the royal camp, and The Duke's Dear Freja may appear on the cliff just before the first cavern.
- In NG+ and upwards, when you are in the narrow corridor after the first cliff with the boulders, and preceded by an earthquake, The Duke's Dear Freja will appear. Any damage you deal to her at this stage will carry on to the "real" boss fight later on.
- The 20x Heavy Bolt trap chest is replaced by 20x Magic Bol on NG+.
- In NG+, in the illusionary wall in the same house, you will still be able to obtain the same loot as in NG, however you will have to fight a Dark Spirit to do so.
Brightstone Cove Tseldora Walkthrough
NOTE: Ensure you aren't in the Company of Champions when you decide to head to the boss, as you need to summon an NPC here to complete their questline.
Obtaining the Wisest Staff
Entering from Doors of Pharros, you will find yourself in a room with a broken fountain and several jars. One of the jars to the left contains a corpse with a Radiant Lifegem. Exiting the room will bring you to an open area with the Royal Army Campsite Bonfire right in front of you. In this area are several Hollow Peasants, Hollow Falconers, and larger versions of the Undead Devourers (Pigs) that you might remember from Majula. While they may not appear to be too much of a threat, the Hollow Peasants have Dark-enchanted weapons, which make them not only swing pretty hard, but also cause curse build-up!
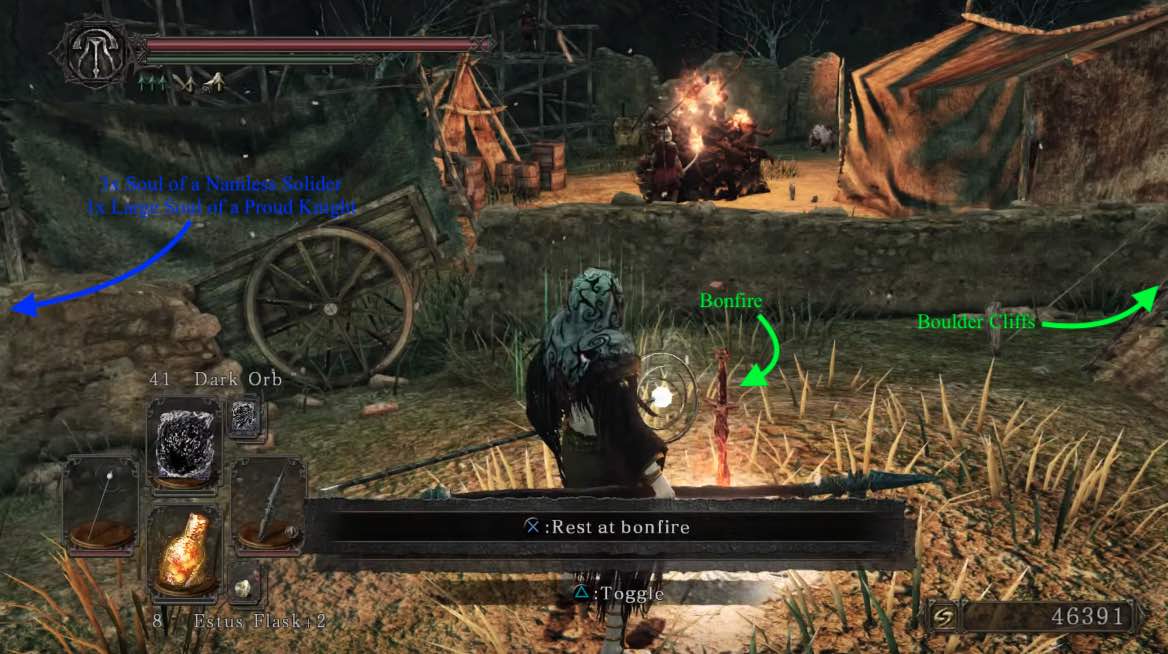
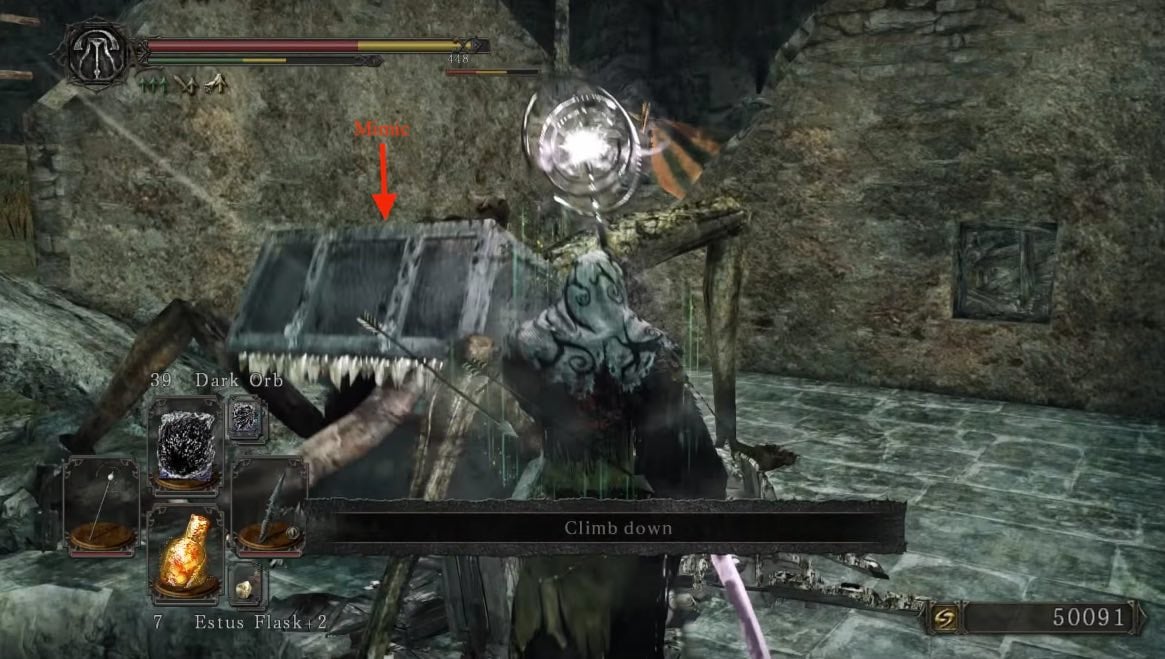
From the Bonfire, continue to the left and dispatch the first of many Hollow Peasants, standing by 4 corpses with a total loot of: 3x Soul Of a Nameless Soldier, 1x Large Soul Of a Proud Knight. While still using the tents and structures as cover from the archer enemies -feel free to take them out with ranged attacks- on the upper levels, proceed right, deeper into the camp to clear the ground floor of Falconers and Pigs. Once you have, attack the scaffolding with a corpse on it to drop the loot and grab the 15x Lacerating Arrows. Look for the ruined building and break the urns beside it to reveal a corpse holding a Large Soul Of a Nameless Soldier. The doorway of this building is blocked off so we're heading to the well on the right, Instead. If you can't find it, it's beneath the ramp holding one of the archers. Loot the corpse hanging over the well for a Titanite Shard, then head up the ramp to run off it, and down the well. At the bottom of the well is a corpse holding 3x Holy Water Urn and another Pig. Continue on and up the ladder to enter the building with the entrance that was blocked by rubble. Inside is a Mimic that drops the Dark Leggings, and the best sorcery staff in the game, the Staff of Wisdom. Climb up the rubble to exit the house.
Handicapped Mini-Boss
From here, head back to the bonfire and to the right of it this time, to arrive at the cliff edge. Follow the path down until you see a ladder. BEWARE as there is a trap that sets a huge rolling boulder down the platform above, and if it connects, will knock you down to your death. Use ranged attacks to kill the Peasant at the bottom of the ladder then make a beeline for it, picking up the Soul Of a Nameless Soldier before you rush up. There's a total of three Peasants and two boulder traps -one has almost definitely been set off, so set the other off by breaking its wooden support, to collect a Soul Of a Brave Warrior. Head back down and continue along the path ahead.
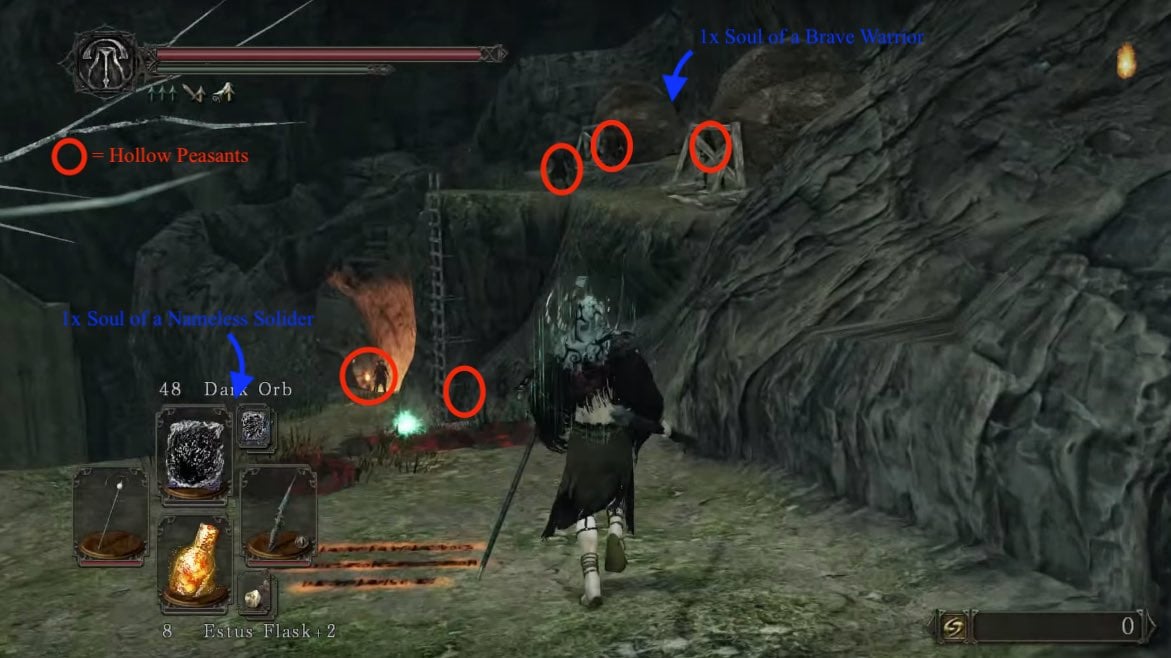
Hanging off the ledge on the right, is a corpse holding Large Titanite Shard. Continue on to find more Peasants guarding a large door. Once inside, head down past the first large room and into the second, which has multiple Ducal Spiders lying in wait, to ambush you. Kill them using a mix of range and melee attacks, then loot the Trap Chest for 20x Heavy Bolt. Continue through the iron door ahead to reach a room with a Boss Fog Gate. Breaking the urns here will grant you a Human Effigy. Before jumping in to progress, head straight from the door you just entered, to find an Illusory Wall -press the "use" button on your respective console to uncover it. Head up the stairs and down the hall (be carefull of the Ducal Spiders hanging from the walls) to find a Water Urn and a corpse holding Priestess Set. You can head back to the boss fog now, but there's one important link in a questline worth finishing , and extremely easy to miss or forget.
Summoning Benhart of Jugo
This is only one of four possible summons to successfully complete Benhart's questline, and you and everyone in Drangleic wants that shiny, shiny sword of his. Return back up to the Royal Army Campsite. Head inside the tent near the building that had the mimic in it to find the summon sign for Benhart of Jugo.
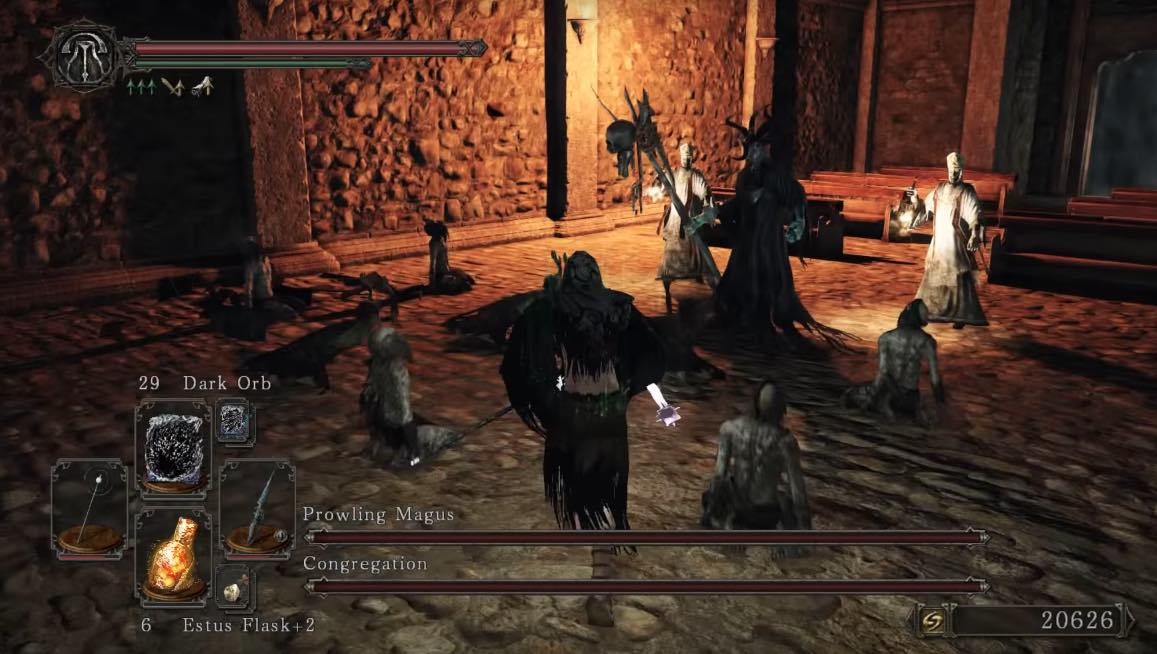
BOSS FIGHT: Prowling Magus and Congregation
Pate or Creighton
Killing this boss nets you a nifty 7,000 souls and a Titanite Slab. Go through the door ahead and face immediately left to find a ladder in the alcove of the wall. Head up to reach NPC Cromwell The Pardoner, 3 more (non-aggresive) Ducal Spiders and multiple corpses to plunder a total of 1x Bonfire Ascetic, 1x Cleric's Small Shield, 3x Fading Soul, and 1x Skeptic's Spice. Speaking to him, if your Faith is above 35, will grant you a Ring of Resistance. When you are ready, head back down the ladder. If you can do high range damage, you can move towards the cliff edge and try to snipe Crystal Lizard on the ledge below, but do not jump down to grab the loot, as you will be there very soon anyway.
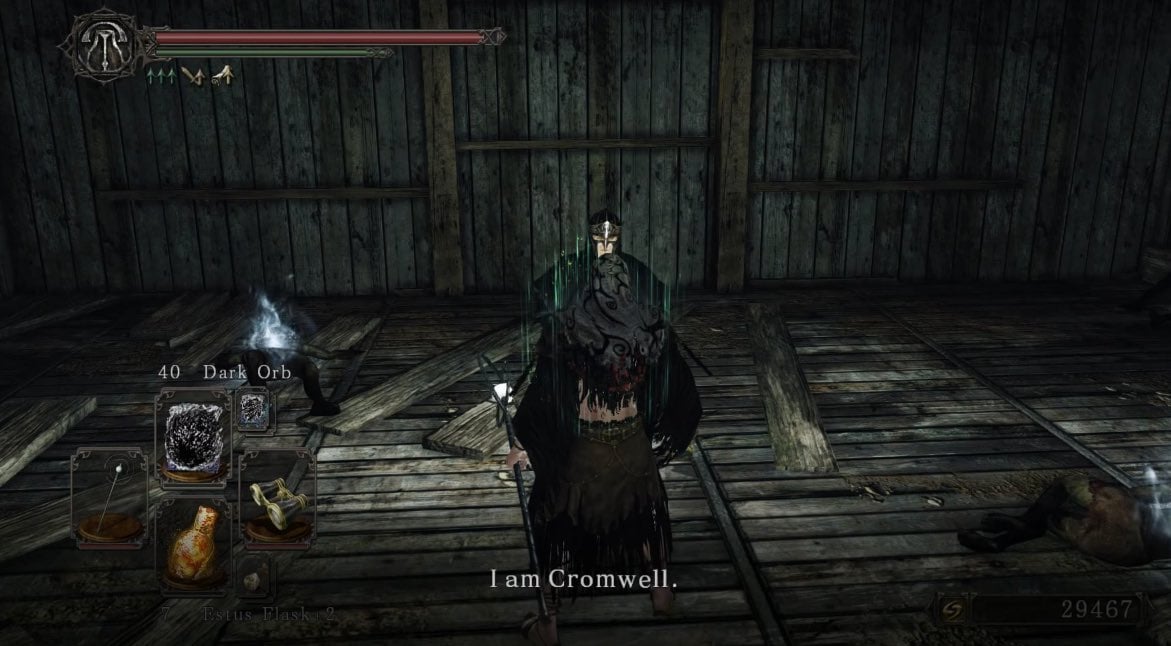
Head back to the boss door but this time enter the cave via the entrance on the right. Turn left before the ladder to access the Chapel Threshold Bonfire. Head down and look under the stairs to find Ducal Spider, and a corpse holding a Soul Of A Proud Knight. There will also be another passive Ducal Spider on the wall; this could possibly be an indicator of things to come. The room through the doorway, holds some urns containing 2x Wilted Dusk Herb, but most importantly, an ambush of Spiders as soon as you enter. Move forward to a Hollow Mage facing away from you, on the ledge, a very easy backstab target.
Take a zip-line which will bring you to the Crystal Lizard mentioned before. Head left towards the jars. Inside the building will be Mild Mannered Pate and Creighton Of Mirrah battling it out (if you have fully followed their storyline thus far). Choose an NPC to side with and attack the other:
- Loot the dead NPC and talk to the living NPC after the battle, exhausting their dialogue to receive the Tseldora Den Key.
- If you sided with Creighton, you'll also receive his armor set.
- Unless you've already collected his set from Earthen Peak, killing Pate will also grant you his armor set.
- While it may feel scummy, it is generally a good idea to also kill whoever you sided with, because (as you probably already know) they are both scumbags and wish you death.
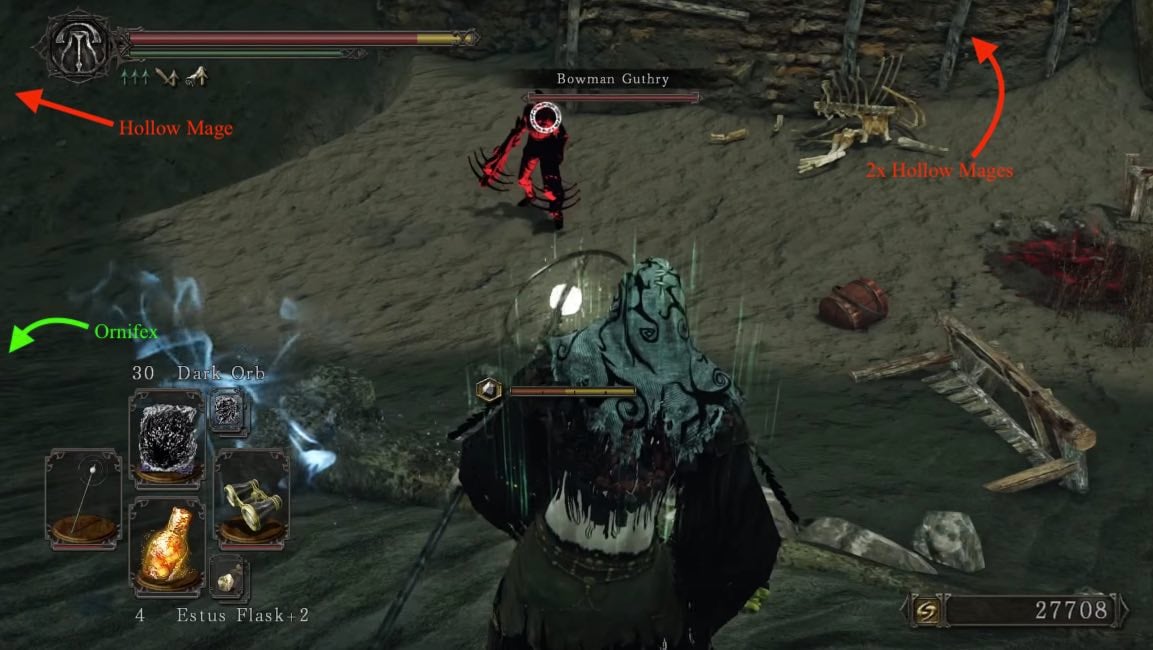
Break the jars in this room to reveal a corpse holding 3x Charcoal Pine Resin. There is a small room behind half-broken wooden door which does not contain any loot, however houses a Spider that emerges from a hole in the wall when the bookshelf hiding it, is destroyed. Leave this small room and head into the far left corner of the bigger room, into the bigger hole in the wall. Go through the first door and to find a corpse holding a Torch, on the right. Past the second door is another Crystal Lizard, killing it yields 2x Titanite Chunk and a Twinkling Titanite. On the left side of the ledge, kill the Spider Drone sitting there and the Spider hanging on wall. From here you can notice another ledge down below (there is a jar on it), drop down carefully. This ledge is circular so it does not matter which way to go, just pay attention to the Spiders on the wall. You will end up in the room with two more Spider Drones and a Spider. Smash a bookshelf to reveal the lever which will lower a platform above. To reach it, head back up the small stairs and make a carefully aimed jump towards it. In the chest is a Southern Ritual Band +1. From here the best things to do next is to simply Homeward Bone and head back across the zip-line.
An Orn Friend
Next three parts are optional, which can be done now, and will require Homeward Bone usage, or skip and return after second bonfire is opened. You will always start from the ledge outside the house where Mild Mannered Pate and Creighton Of Mirrah fought (zip-line brings you there), this place will be referred to as the starting point.
- Right beside the entrance to Pate's house, across the gap, you can see two stone platforms. Sprint to the first platform (you do not have to jump) and then drop down to the second. Loot a Titanite Chunk and a Twinkling Titanite from the corpse. Homeward Bone to the starting point.
- From the center of the ledge jump across the gap to the corpse in a small building on a wall (at first glance it will look like distance is too big for a jump but in reality its not). Grab the Large Titanite Shard. Homeward Bone to the starting point.
- Head left past the zip-line onto the wooden platform and drop down to reach a corpse holding a Large Titanite Shard. You need to drop down again, now onto the platform where a Hollow Mage resides, but this time it requires more precision, take it slow. Grab the Estus Flask Shard from the corpse. Homeward Bone but now do not take the zip-line.
Standing where the zip-line starts, turn right and drop down to the ledge below. Enter the doorway to reach a room with a big hole in the floor and two Hollow Mages standing near it. Notice all the Spiders in the hole and on the ceiling. It is recommended to kill them all now or they will ambush you later. Go through the small doorway ahead to reach a ladder. Climb down to reach a room with the third Bonfire and a door. Head out the door to reach the big open area with a sand pit in the center. There is a chance Bowman Guthry will invade you at this point.
Before going any further its a good idea to wipe out all enemies in this area: a Hollow Mage in front, several Ducal Spiders to your right, a hidden Basilisk, a red Red Crystal Lizard and a Hollow Mage to your left. To your right, you'll find a corpse holding a Petrified Dragon Bone, grab it and go back, then proceed into the first door. Inside you'll find an old friend if you freed her from the Shaded Woods, Weaponsmith Ornifex. In her room, you'll find jars and bookshelves to the left. Break them to find corpses holding a Flame Butterfly and a Pharros' Lockstone. Head back outside and carefully go around the sand pit. To your left, you will notice another door, open it to enter a room with several Ducal Spiders and a Spider Drone. Near the bracier, there is Bashful Ray's summon sign , behind the bookshelves ahead is a room with another Spider and a chest containing the Crescent Axe and Soul Vortex. Back in the main room, up the small hill, is a ledge that allows you to drop down to a small room with a corpse holding a Titanite Chunk on the left, and a door to the right (note that once you drop down this ledge, the only way to return to the earlier part of the level is to do an angled jump back to the ledge).
Trip to Freja
Through the door is a large courtyard, ahead is a Basilisk and another Spider Drone. Kill them and then head through the half broken wooden door ahead. Kill the Ducal Spiders inside then head up the stairs. In on of the Jars is a corpse holding 2x Torches and open the door to find a corpse with a Large Titanite Shard. Drop down back to courtyard. Ignore the obvious bridge for now and head towards the last closed door in this area. Trying to open it gives you the message "Too heavy to open". Smash that piece of kindling down with ranged attacks or else an un-dodgable sand burst will hit you.
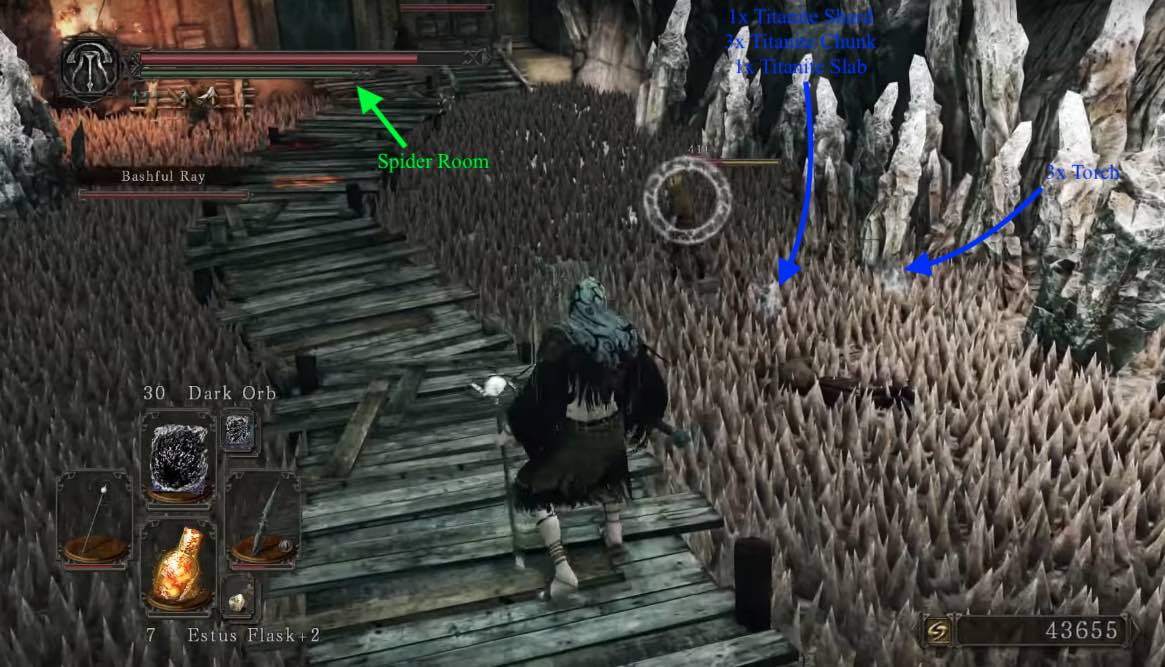
Go through the door and open the other door ahead with your Tseldora Den Key you received from either of the scumbags from earlier. Two chests are found in this room. The wooden one to the left is a Trap Chest containing 10x Rusted Coin, and the metal Chest contains the Engraved Gauntlets (upon opening the trap chest, you'll hear the dialogue between Pate and Creighton. However it does not occur if you killed both of them.) Collect them and head outside. Go through the archway to the bridge. You will notice two corpses to the right, lying in the spikes. Try to kill all the Hollows nearby before dropping from the bridge. Spikes will constantly do damage while you are moving so prepare to use healing items. Loot a Titanite Shard, 3x Titanite Chunk, and a Titanite Slab from the first corpse, and 3x Torch from the second one.
Now head towards the building, open the door and look up to find multiple Ducal Spiders are on the ceiling, so use ranged attacks or move ahead and let them drop down. To the right is a locked iron door, you need the Brightstone Key obtained after the boss battle to open it. To the left are Urns containing 15x Poison Arrows, on the right, behind one of the benches, is a corpse containing a Soul of a Hero and a Gold Pine Resin. Here you can also summon Manhunter O'Harrah for the upcoming boss fight. On the far wall are two doors, each with it's own lever. The door on the right holds an unnamed Red Phantom, and a corpse with 3x Homeward Bone. The door on the left holds a Spider Drone and a ladder heading up. Climb it to reach Freja's Lair.
In this room, you'll find many spider webs which serve as bridges, which as you step on, will trigger Ducal Spiders to engage you. This area is also very dark, so be sure to bring a lit Torch with you. Drop down from the ledge and move left, hugging the wall. Move down the first web and reach the far side. Behind the first pillar is a corpse holding a Torch. Careful, aa s Spider will drop down near here. Move forward towards the Jars on the far side. In them is a corpse holding Pharros' Lockstone . Move across the web to the left. At the end, drop to the large web to your left and follow it down. Halfway down is a corpse holding Radiant Lifegem. Go down to ground level and kill any spiders that attack. To your left is a small but wide web leading up to a platform above. On the far side, you'll notice a corpse holding a Twilight Herb. Return to the ground level and underneath the large web is a corpse holding a Simpleton's Spice. From here, head to the far right side of the room and behind the last pillar is a corpse holding 5x Corrosive Urn. As you may have noticed by now, there is a large Fog Door ahead; what you may not have noticed however, is the summon sign for Ashen Knight Boyd behind one of the pillars.
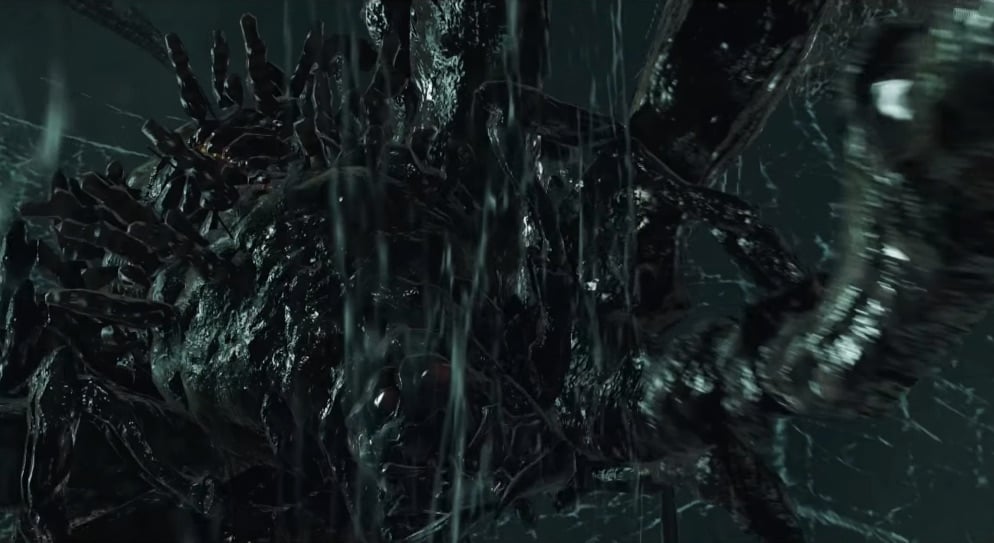
BOSS FIGHT: The Duke's Dear Freja
Death of Freja
Defeating her, means you can move towards the dragon and pick up the great soul. Head through the cave to the right to reach the Lord's Private Chamber where you will find Duke of Tseldora, back turned to the player while focusing on a table in front of him. Defeat the hollowed Duke to receive the Brightstone Key, a Fragrant Branch Of Yore and the Dark Quartz Ring +1. Down the stairs to the right is a Primal Bonfire - light it. If this is your fourth primal bonfire you've accessed, which means Aldia will appear. Keep in mind that his emerging knocks you back and interrupts bonfire lighting, so after you exhaust his dialog, don't forget to actually light the bonfire. Note: Don't forget to head back to Manscorpion Tark to get the Black Scorpion Stinger.
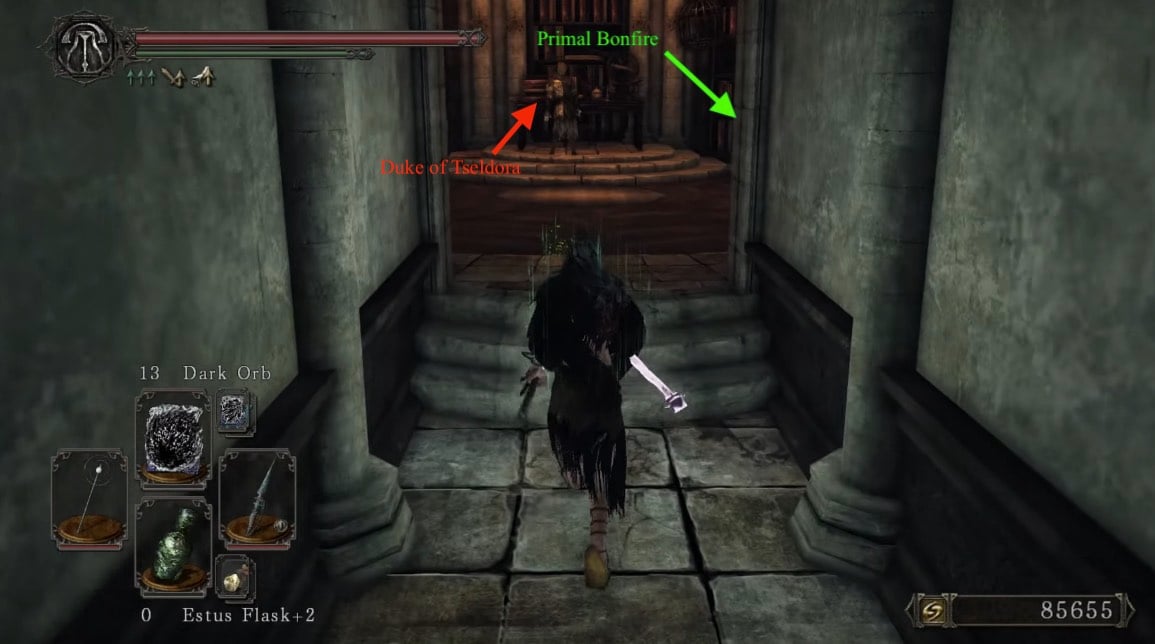
Now its time to come back to the locked iron door in the first chamber of the building and unlock it with the Brightstone Key you have just acquired. Once inside the room open another door and prepare for another Spider ambush. Kill them and loot the highly-valuable chest in the room for a Black Knight Ultra Greatsword, a Great Fireball, and a Fire Seed. There is no way to backtrack out of this area, so either Homeward Bone out or use the Primal Bonfire to get to Majula. Assuming this was your fourth Old One slain, head on to the Shrine Of Winter.
Return when you have the Ashen Mist Heart and activate the crystal within Freja's room to access the Memories of a Dragon.
General Information
- Previous: Doors of Pharros
- Next: Shrine of Winter
- Recommended Levels: 90 to 100
- Boss: Prowling Magus and Congregation, The Duke's Dear Freja
- Bonfires: Royal Army Campsite, Chapel Threshold, Lower Brightstone Cove
Brightstone Cove Tseldora Map
NPCs in Brightstone Cove Tseldora
NPC Summons
NPC Invaders
Items
Consumables
- Estus Flask Shard x2
- Fire Seed
- Fragrant Branch of Yore
- Great Fireball
- Heavy Bolt x 20
- Large Soul of a Proud Knight
- Lacerating Arrow x15
- Large Titanite Shard
- Petrified Dragon Bone
- Pharros' Lockstone
- Soul of a Nameless Soldier x5
- Soul Vortex
- Southern Ritual Band +1
- Titanite Shard
- Titanite Slab
- Twinkling Titanite
Equipment
- Black Knight Ultra Greatsword
- Cleric's Small Shield
- Crescent Axe
- Pickaxe(Quest item, see weapon page for details)
- Dark Quartz Ring +1
- Engraved Gauntlets
Boss
Enemies
- Prowler Hound (Petrification)
- Troll
- Basilisk (Trapped inside carriage)
- Great Basilisk
- Dragon Acolyte (only found here, have magical weapons and Witching Urn)
- Poison Brumer (Large, )
- Mirror Spirits
- Aslatiel of Mirrah (Brother of Lucatiel, Dark Spirit the one she recounts as "lost" to this land, not her herself.)
- Painting Guardian (NG+ only)
- Mimics
- Ogre
- Undead Devourer
- Spider Drone
- Hollow Peasant
- Ducal Spider
- Spider Drone
- Hollow Mage
- Basilisk
Notes
- In the village area, lure the boar all the way through the level to the room across the thorn bridge, into the spider falling room. Have it eat the mushroom in that room, and the Pickaxe will appear.
- In NG+ giant Boars appear in the royal camp, and The Duke's Dear Freja may appear on the cliff just before the first cavern.
- In NG+ and upwards, when you are in the narrow corridor after the first cliff with the boulders, and preceded by an earthquake, The Duke's Dear Freja will appear. Any damage you deal to her at this stage will carry on to the "real" boss fight later on.
- The 20x Heavy Bolt trap chest is replaced by 20x Magic Bol on NG+.
- In NG+, in the illusionary wall in the same house, you will still be able to obtain the same loot as in NG, however you will have to fight a Dark Spirit to do so.
Brightstone Cove Tseldora Walkthrough
Well Dweller
After having entered the area from the Doors of Pharros, continue forward past the break in the short wall, and enter the first tent on the right. Here is the first Bonfire of the area. In this area are several Hollow Peasants, and larger versions of the Undead Devourers (Pigs) that you might remember from Majula. While they may not appear to be too much of a threat, the Hollow Peasants have Dark-enchanted weapons, which make them swing pretty hard!

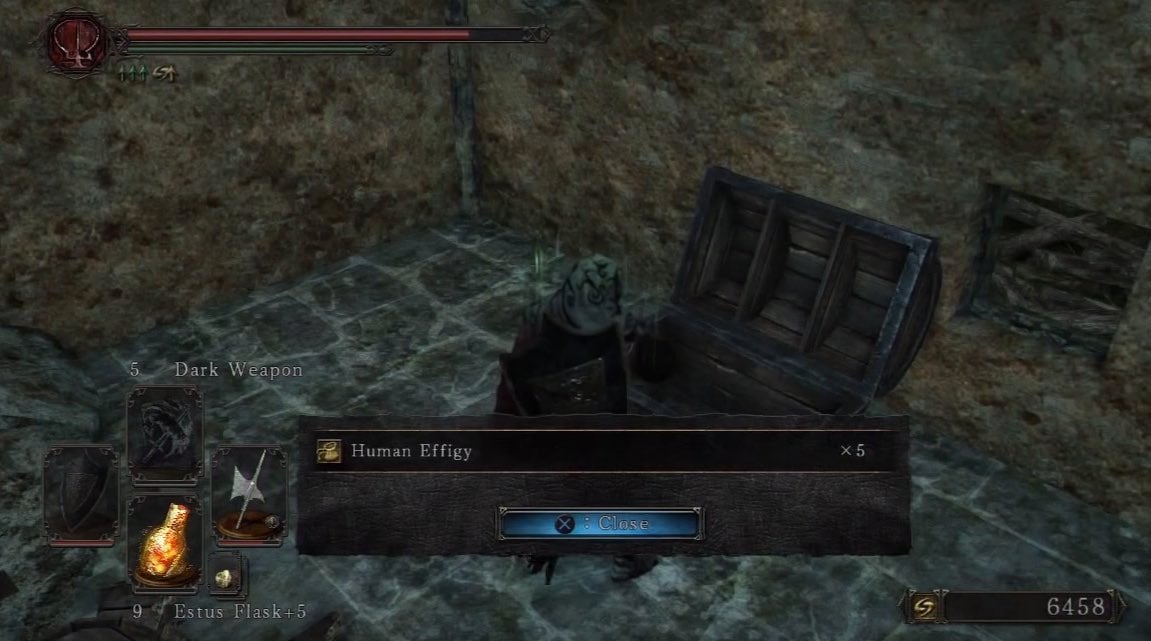
Beware of the other tents, as some hide Hollow Peasants. From the Bonfire, head into the tent on the left of the burning corpse pile to find a summon sign for Benhart of Jugo. Continue to the left and dispatch the first of many Hollow Peasants, standing by 4 corpses with a total loot of: 3x Soul Of a Nameless Soldier, 1x Large Soul Of a Proud Knight. Once you have, attack the scaffolding with a corpse on it to drop the loot and grab the 15x Lacerating Arrows. Look for the ruined building and break the urns beside it to reveal a corpse holding a Large Soul Of a Nameless Soldier. The doorway of this building is blocked off so we're heading to the well on the right, instead. Loot the corpse hanging over the well for a Titanite Shard, then head up the ramp to run off it, and down the well. At the bottom of the well is a corpse holding 3x Holy Water Urn. Continue on and up the ladder to enter the building with the entrance that was blocked by rubble. Inside is a chest containing 5x Human Effigy. Climb up the rubble to exit the house.
Handicapped Mini-Boss
From here, head back to the bonfire and to the right of it this time, to arrive at the cliff edge. Follow the path down until you see a ladder. BEWARE as there is a trap that sets a huge rolling boulder down the platform above, and if it connects, will knock you down to your death. Make a beeline for the ladder, picking up the Soul Of a Nameless Soldier before you rush up. There's a total of two Peasants and two boulder traps -one has almost definitely been set off, so set the other off by breaking its wooden support, to collect a Soul Of a Brave Warrior. Head back down and continue along the path ahead, where you will face another four Hollow Peasants.
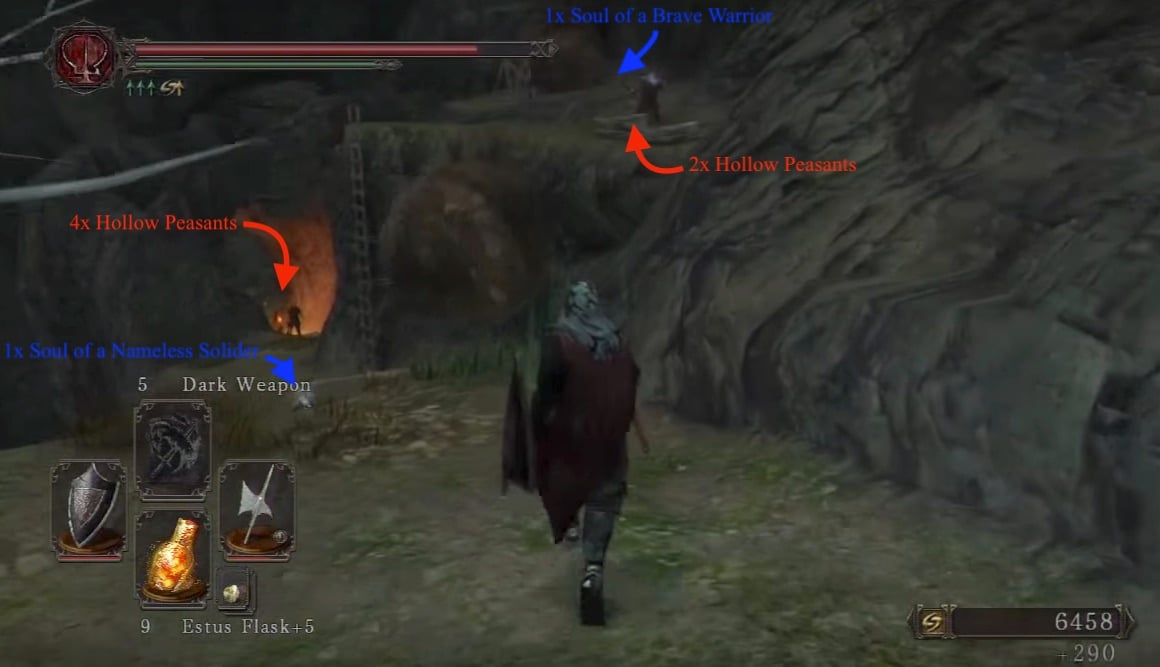
Hanging off the ledge on the right, is a corpse holding Large Titanite Shard. Continue on to find more Peasants guarding a large door. Once inside, head down past the first large room and into the second, which has multiple Ducal Spiders lying in wait, to ambush you. Kill them using a mix of range and melee attacks, then loot the Trap Chest for 20x Heavy Bolt. Continue through the iron door ahead to reach a room with a Boss Fog Gate. Breaking the urns here will grant you a Human Effigy. Before jumping in to progress, head straight from the door you just entered, to find an Illusory Wall -press the "use" button on your respective console to uncover it. Head up the stairs and down the hall to find a Water Urn and a corpse holding Priestess Set. Head back to the Boss Fog.
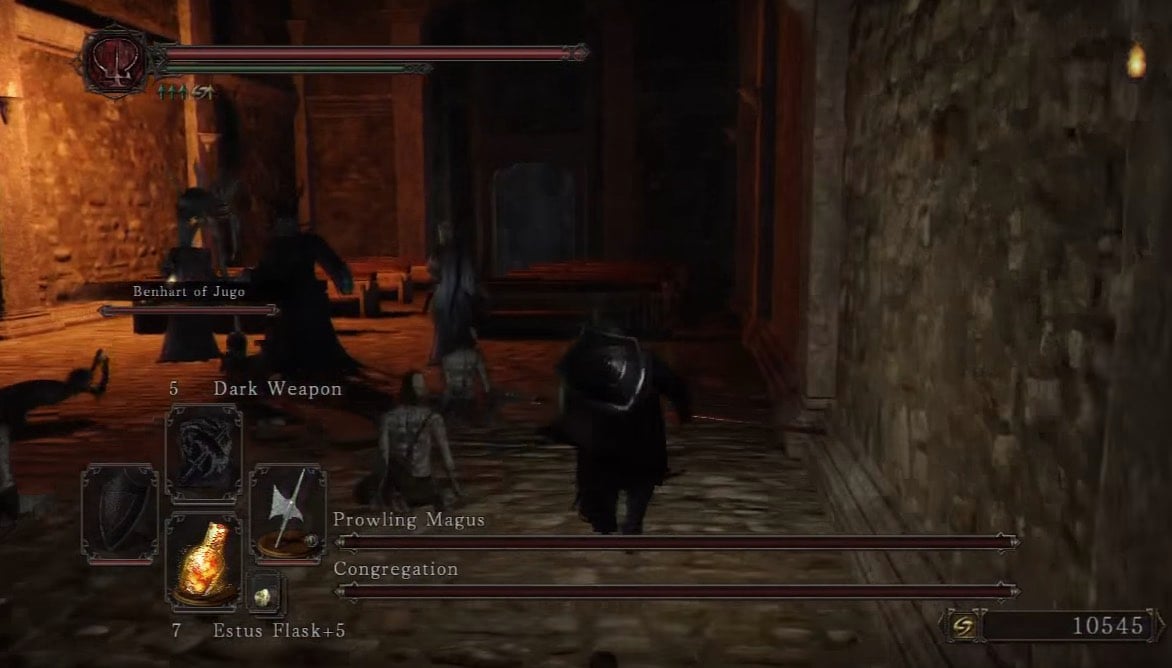
BOSS FIGHT: Prowling Magus and Congregation
Pate or Creighton
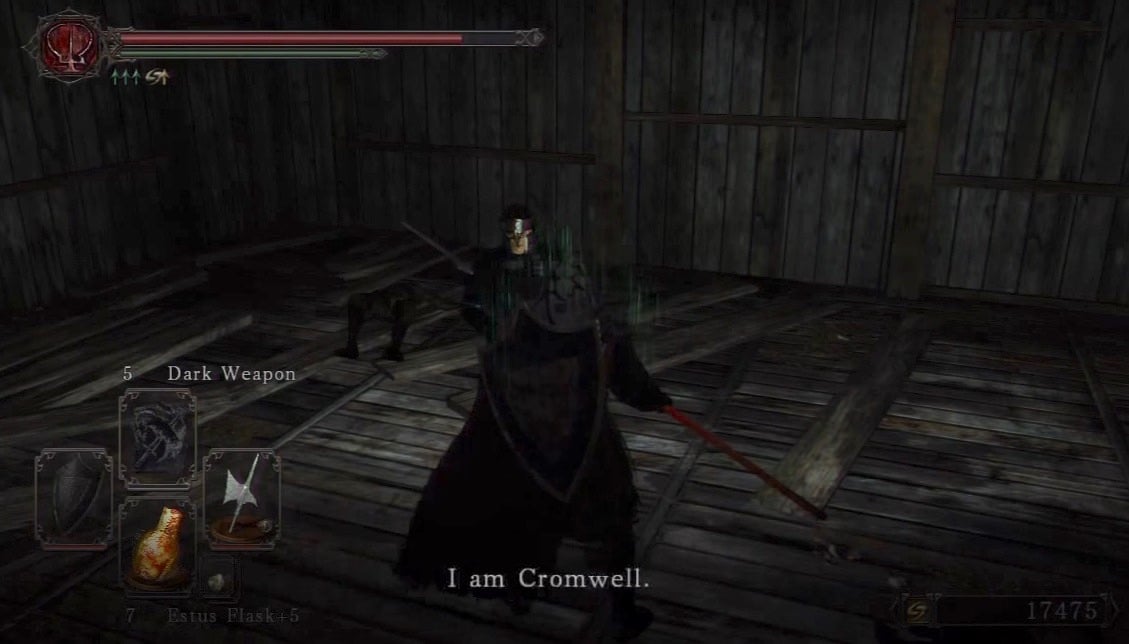
Killing this boss nets you a nifty 7,000 souls and a Titanite Slab. Go through the door ahead and face immediately left to find a ladder in the alcove of the wall. Head up to reach NPC Cromwell The Pardoner and multiple corpses to plunder a total of 1x Bonfire Ascetic, 1x Cleric's Small Shield, 3x Fading Soul, and 1x Skeptic's Spice. Speaking to him, if your Faith is above 35, will grant you a Ring of Resistance. When you are ready, head back down the ladder. If you can do high range damage, you can move towards the cliff edge and try to snipe Crystal Lizard on the ledge below, but do not jump down to grab the loot, as you will be there very soon anyway.
Head back to the boss door but this time enter the cave via the entrance on the right. Turn left before the ladder to access the Bonfire. Head down and look under the stairs to find Ducal Spider, and a corpse holding a Soul Of A Proud Knight. There will also be another passive Ducal Spider on the wall; this could possibly be an indicator of things to come. The room through the doorway, holds some urns containing 2x Wilted Dusk Herb, but most importantly, an ambush of Spiders as soon as you enter. Move forward to a Hollow Mage facing away from you, on the ledge, a very easy backstab target.
Take a zip-line which will bring you to the Crystal Lizard mentioned before. Head left towards the jars. Inside the building will be Mild Mannered Pate and Creighton Of Mirrah battling it out (if you have fully followed their storyline thus far). Choose an NPC to side with and attack the other:
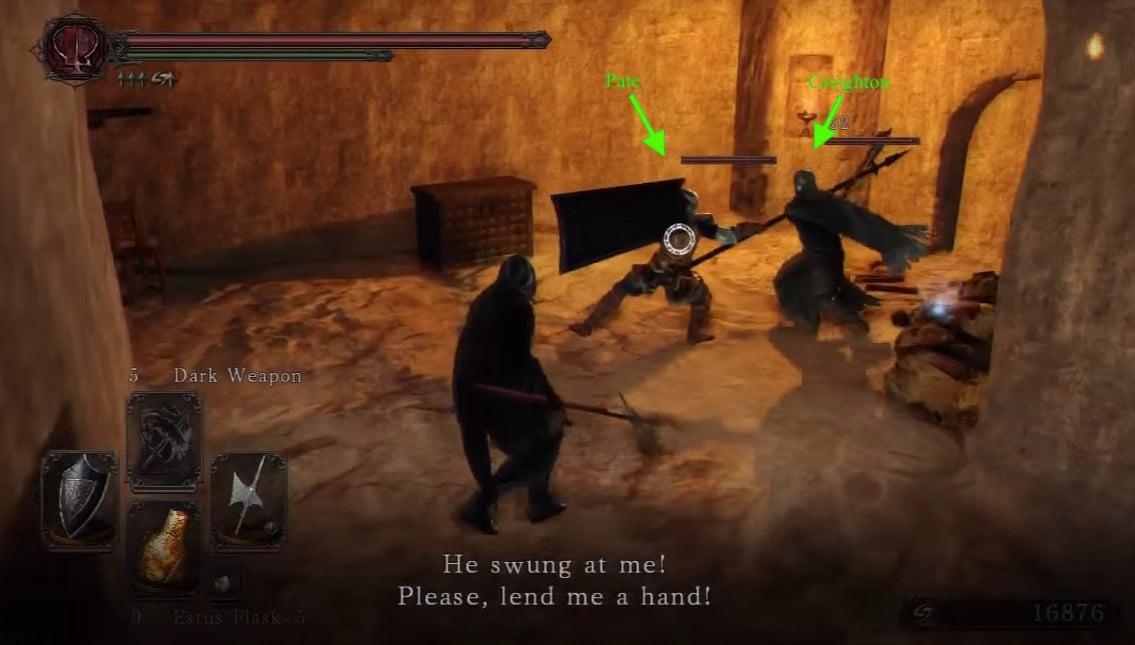
- Loot the dead NPC and talk to the living NPC after the battle, exhausting their dialogue to receive the Tseldora Den Key.
- If you sided with Creighton, you'll also receive his armor set.
- Unless you've already collected his set from Earthen Peak, killing Pate will also grant you his armor set.
- While it may feel scummy, it is generally a good idea to also kill whoever you sided with, because (as you probably already know) they are both scumbags and wish you death.
Break the jars in this room to reveal a corpse holding 3x Charcoal Pine Resin. Head into the far left corner of the room, into the hole in the wall. Go through the first door and to find a corpse holding a Torch, on the right. Past the second door is another Crystal Lizard, killing it yields 2x Titanite Chunk and a Twinkling Titanite, and to its right, a corpse holding a Titanite Chunk. On the left side of the ledge, kill the Spider Drone sitting there and cross the wooden bridge. In the room to your left are three more Spider Drones and a door which leads to a small path to the right that has a White Hollow Mage Robe (note that this is only available if the Hollow Mage you killed dropped it), and leads back up above to the wooden bridge. Smash the random objects located to the left to reveal a lever which will lower a platform above. To reach it, head back up the small stairs and make a carefully aimed jump towards it. In the chest here, is a Southern Ritual Band +1. From here the best things to do next is to simply Homeward Bone and head back across the zip-line.
An Orn Friend
Next there are two paths, which can be done now, and one of which will require Homeward Bone usage, or skip and return after second bonfire is opened. You will always start from the ledge outside the house where Mild Mannered Pate and Creighton Of Mirrah fought (zip-line brings you there), this place will be referred to as the starting point.
- Head left past the zip-line onto the wooden platform and drop down to reach a corpse holding a Large Titanite Shard. You need to drop down again, now onto the platform with the Estus Flask Shard on the corpse. Homeward Bone but now do not take the zip-line.
- Take the second zip-line head through the doorway to reach a room with 2 Hollow Mages and a Ducal Spider on the ceiling. Take them out then loot the corpse to the left for 4x Lightning Urn. Go through the small doorway ahead to reach a ladder. Climb down to reach a room with a bonfire and a door. To your left, there is another Ducal Spider, so watch out. Head out the door to reach the sand pit.
- When resting or returning to this bonfire, the Spider that's located on the ceiling in the previous room will jump down to this room.
To your right, you'll find a corpse holding a Petrified Dragon Bone, grab it and proceed into the next door. Inside you'll find an old friend if you freed her from the Shaded Woods, Weaponsmith Ornifex. In her room, you'll find jars and bookshelves to the left. Break them to find corpses holding a Flame Butterfly and a Pharros' Lockstone. Head back outside and enter the opening in a wall to your left. Behind the bookshelves ahead is a room with another Spider and a chest containing the Crescent Axe and Soul Vortex. Back in the main room, up the small hill, is a ledge that allows you to drop down to a small room with a corpse holding a Titanite Chunk on the left, and a door to the right (note that once you drop down this ledge, the only way to return to the earlier part of the level is to do an angled jump back to the ledge).
Trip to Freja
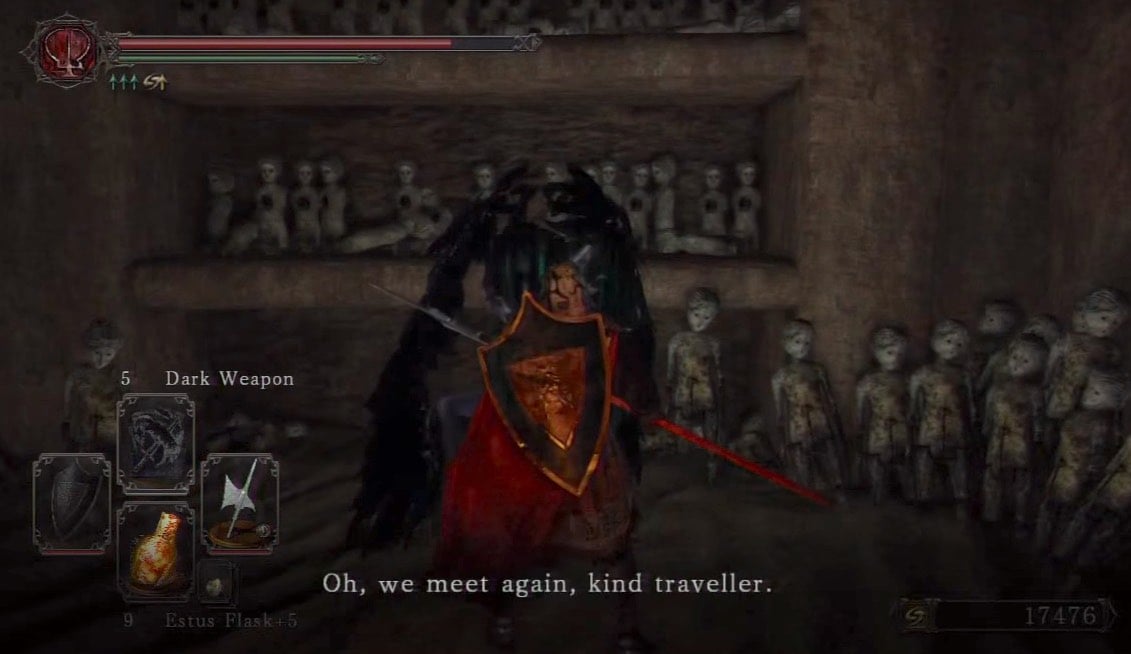
Through the door is a large courtyard. Ahead is a Basilisk and a Spider Drone. Kill them and then head through the half broken wooden door ahead. Kill the Ducal Spiders inside then head up the stairs and open the door to find a corpse with a Large Titanite Shard. A scripted Red Phantom will spawn below you, past the archway. Drop down back to courtyard. Ignore the obvious bridge for now and head towards the last closed door in this area. Trying to open it gives you the message "Too heavy to open". Smash that piece of kindling down with ranged attacks or else an un-dodgable sand burst will hit you.
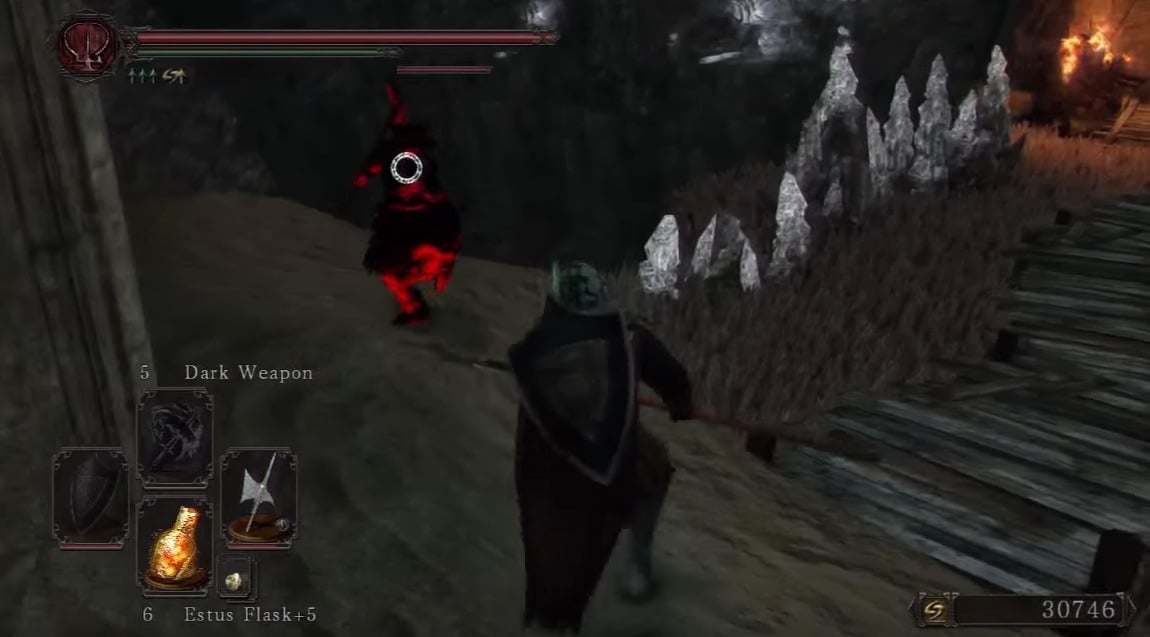
Go through the door and open the other door ahead with your Tseldora Den Key you received from either of the scumbags from earlier. Two chests are found in this room. The wooden one to the left is a Trap Chest containing 10x Rusted Coin, and the metal Chest contains the Engraved Gauntlets (upon opening the chest, you'll hear the dialogue between Pate and Creighton, revealing both are miscreants; however it does not occur if you killed both of them). Collect them and head outside. Go through the archway to the bridge.
Now head towards the building, and you'll notice two Spider Drones on the second floor of said building. Kill them before you open the door and look up to find multiple Ducal Spiders are on the ceiling, so use ranged attacks or move ahead and let them drop down. To the right is a locked iron door, you need the Brightstone Key obtained after the boss battle to open it. To the right of the door is a bench that can be broken to reveal a corpse with a Soul Of a Hero and 4x Gold Pine Resin. On the far wall are two doors, each with their own lever next to them. The door on the right holds a corpse with Homeward Bone x3. The door on the left holds a Spider Drone and a ladder heading up. Climb it to reach Freja's Lair. In this room, you'll find many spider webs which serve as bridges, which as you step on, will trigger Ducal Spiders to engage you.
Drop down from the ledge and move left, hugging the wall. Move down the first web and reach the far side. Behind the first pillar is a corpse holding a Torch. Careful, aa s Spider will drop down near here. Move forward towards the Jars on the far side. In them is a corpse holding Pharros' Lockstone . Move across the web to the left. At the end, drop to the large web to your left and follow it down. Halfway down is a corpse holding Radiant Lifegem. Go down to ground level and kill any spiders that attack. To your left is a small but wide web leading up to a platform above. On the far side, you'll notice a corpse holding a Twilight Herb. Return to the ground level and underneath the large web is a corpse holding a Simpleton's Spice. From here, head to the far right side of the room and behind the last pillar is a corpse holding 5x Corrosive Urn. As you may have noticed by now, there is a large Fog Door ahead; what you may not have noticed however, is the summon sign for Ashen Knight Boyd behind one of the pillars.

BOSS FIGHT: The Duke's Dear Freja
Death of Freja
Defeating her, means you can move towards the dragon and pick up the great soul. Head through the cave to the right to reach the Lord's Private Chamber where you will find Duke of Tseldora, back turned to the player while focusing on a table in front of him. Defeat the hollowed Duke to receive the Brightstone Key, a Fragrant Branch Of Yore and the Dark Quartz Ring +1. Down the stairs to the right is a Primal Bonfire but be careful as it is guarded by Vengarl's Body; to get his armor, kill him.
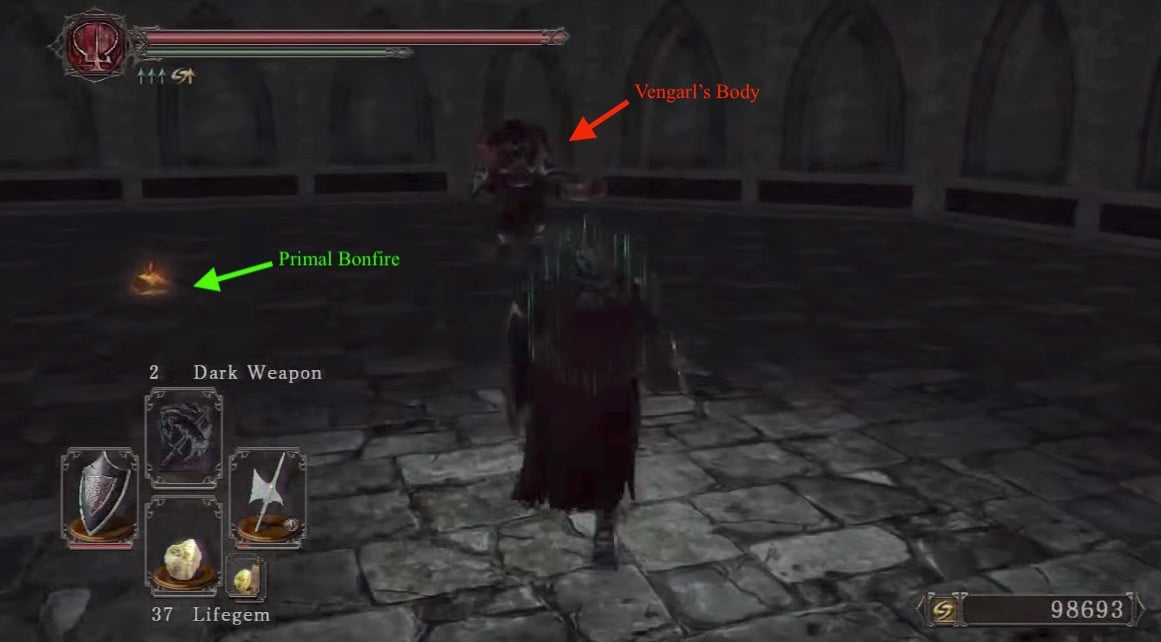
Now its time to come back to the locked iron door in the first chamber of the building and unlock it with the Brightstone Key you have just acquired. Once inside the room open another door and prepare for another Spider ambush. Kill them and loot the highly-valuable chest in the room for a Black Knight Ultra Greatsword, a Great Fireball, and a Fire Seed. There is no way to backtrack out of this area, so either Homeward Bone out or use the Primal Bonfire to get to Majula. Assuming this was your fourth Old One slain, head on to the Shrine Of Winter.
Return when you have the Ashen Mist Heart and activate the crystal within Freja's room to access the Memories of a Dragon.
 Anonymous
 Anonymous
"the only way to return to the earlier part of the level is to do an angled jump back to the ledge" Is that possible? How?

 Anonymous
 Anonymous
 Anonymous
 Anonymous
 Anonymous
 Anonymous
 Anonymous
Why are not the spiders attacking me? I'm playing SotFS offline

 Anonymous
Worth nothing that Forlorn can invade right after opening the spider door after the spike bridge (at least on SOFTS, don't know about original).

 Anonymous
 Anonymous
 Anonymous
If you light the torches, the spiders stop before they get near them. You can trigger the ambushes and run back to the lit torch. They can't come near it so you can swipe and roll back.

 Anonymous
"There is no way to backtrack out of this area, so either Homeward Bone out or use the Primal Bonfire to get to Majula"
Actually, you can backtrack. Go back to the wooden door spot you entered from (the one that holds the hole in the wall next to Ornifex's workshop) and you can just take a short sprint and jump into that hole. You will be able to access the Lower Tseldora Bonfire.
 Anonymous
 Anonymous
Or as I like to call it, "The Cove Of Nope". Because SPIDERS. Everywhere.

 Anonymous
i love ds2 but damn this area is ****ing horrendous lol. this is the lost izalith of ds2.

 Anonymous
Farming Crystal Soul Spears from this boss as a Sorcerer is an absolute nightmare on higher Bonfire Intensities . Soul Spear is much easier and costs 1 Attunement slot but with less damage .

 Anonymous
 Anonymous
how do i access the item up in the chapel window? i can't find anything on my own, any pointer would be a welcome one.

 Anonymous
literally the worst area in a souls game ever, horrible design. i’ve played this game through so many times and i dread coming here each time. i finally crossed the threshold of truly despising this area when after killing the first crystal lizard its drop fell into the quicksand, and when i killed the second one i fell off the ledge and couldn’t get back up there because this area is such a mess and it constantly cuts you off from returning to certain points. and of course when you kill a crystal lizard in this game and don’t pick up its loot, it does not respawn and its loot will disappear. brilliant

 Anonymous
I don't suggest killing spiders before opening the trapped chest before Magus. After attacking one spider the rest attacks anyway and one of them actually destroyed that chest and it looked like it did it on purpose, because it jumped on the chest and not in my direction.

 Anonymous
why is the recommened level this high? is it like at the recommended level, you are supposed to be on easy mode? 90-100 seems high, that's all

 Anonymous
I first went to sinners rise and then to Tseldora on my first playthrough. Let me tell you that now, after beating this game 4 times, Tseldora is still my least favorite of the 4 Areas you have to go to get the souls. Sinners rise was nice, The gutter and black gulch actually fun and interesting and iron Keep was hard but idk, I really liked its bosses. The extremely long way to Iron keep on the other hand was meh. But Tseldora... I just don't like the way it looks. I hate Falconers and I don't like the peasants. The Cove itself isn't that bad but still the worst of the four areas. Freya was easy tho and I like spiders but still. This area gets a Meh... / 10 from me.

 Anonymous
Benhart Jugo can actually be summoned before the Prowling Magus fight. His sign is inside one of the tents near the Royal Army Campsite bonfire

 Anonymous
What the ***** is wrong with the Falconer hollows' legs when they run? They look like they're in a Monty Python skit.

 Anonymous
Freya was whooping me on NG+; then I decided to attack the opposite head as the NPC summon. Very aggressive instead of staying at medium distance like suggested, and it turned out really well. Just a suggestion for Melee tanks like myself; move out to medium distance only when out of stamina or need to heal, otherwise just dodge slightly to the right when the pincers around her head move into an attack position, and just attack the crap out of her head.

 Anonymous
This guide is so idiotic. Why would you blow 3 Homeward Bones when you could just get the Bonfire first? The way they lay it out shouldn't even be a suggestion; the bonfire rush should be the default.

 Anonymous
Uhh it does not mention that you can summon Benhart in one of the tents at the camp.

 Anonymous
The chest in the ruined house that you get to through the well is NOT A MIMIC.

 Anonymous
Prowling magus and congregation isn't even a boss fight it's by far the easiest boss I've faced then again I was 128 with faraam set and a +10 zweihander infused with raw stone 15 hits the boss was dead (magus alone was 5)

 Anonymous
crystal lizard after pate/creighton fight doesn't yield 2x titanite chunks- it drops 2x large titanite shards. at least the twinkling titanite is correct

 Anonymous
It's all good and everything until you reach Creighton and Pate and their fight is already finished...Complete bs if you ask me

 Anonymous
This area freaks me out. All I start seeing after going here are spiders in my house

 Anonymous
Is the priestess set really there in the PS3 vanilla version? I have the DLC, but I don't think I've ever picked it up here before... Sounds like one of the many SOTFS changes that were sadly left off of the Legacy consoles.

 Anonymous
 Anonymous
Not mentioned on this walkthrough, but spiders will flee if you hold a torch, making 80% of this level an absolute cakewalk and an amazing soul farming spot (sotfs)

 Anonymous
Surprisingly decent followup to Doors of Pharos. This is another rather fun level with encounters you can properly pull, rather resilient enemies, hordes made of enemies meant to be in a horde, and it rewards being observant and methodic. Shaded Woods are pretty much the worst bit of this route.

 Anonymous
Some troll invaded me and made me kill Pate using him as human shield. That messed up my whole sidequest

 Anonymous
It's clear that you've written this based solely on SotFS, and have ignored any content in the version released prior to that. You need to leave a disclaimer that states that.

 Anonymous
Ummm....I didn't had any Pate or Creighton battle where I had to choose one or the other...and thus I do not have the key to open the doors that were behind the sand blocked doors. I am playing of course the SOTFS. Can someone tell me whether this is a bug of sort, or I didn't do something that was required to trigger it? because no other NPC's have been in this game besides that merchant with spiders.

 Anonymous
The enemy list is incorrect, it shows the Aldia's Keep enemies.

 Anonymous
 Anonymous
I've been wondering:What's up with that red crystal lizard? it doesn't flee or aggro, it just kinda sits there.

 Anonymous
 Anonymous
who ever wrote the text that leads you to the lower brightstone cove bonfire is a idiot.... just google it and you'll find a video to where you get to it much more simpler then that "correct path" :/

 Anonymous
 Anonymous
just replaying a guide for completion. As good as it is it, it takes sometimes unnessecary risk, Brightstone is no different. So follow your guide but constantly check if that what the player does is risky or not and if it is in your opinion, do it the way that is best for you. Good luck,

 Anonymous
The Mimic in SOTFS contains a Staff of Wisdom and Dark Leggings, not 5 Human Effegys.

 Anonymous
Why are the enemies listed in this area mixed up with the ones in Aldia's Keep?

 Anonymous
So i embraced the great soul but now i dont have it, the same goes for the rotten. is this a bug and what do i do?

 Anonymous
 Anonymous
The guests message wasn't nasty, it was truth. I'd really like to know who died and made you Wiki King. *side note. fixed small spelling error*

 Anonymous
After leaving the Bonfire by Ornifex's workshop, when you go past the Basilisk and into the room with the spider-possessed-hollow, two spiders on the floor, and one with the wall, the little hallway you drop into? If you walk to where the two skeletons are, the hallways rises just enough that you can jump back into the spider room if it's angled correctly. No homeward bones, no darksign, miracles, or bonfire needed. This area can be effectively farmed/cleared between Ornifex and Freyja without the use of items and without having to beat her the first time or after an Ascetic.


The falconer camp near the first bonfire was our first taste of Elden Ring
9
+10
-1