Dragon's Rest
 Dragon's Rest is a Location in Dark Souls 2, in the DLC, Crown of the Sunken King.
General Information
- Previous: Dragon's Sanctum
- Next: Cave of the Dead
- Recommended Levels: 110 to 120
- Bosses: Elana, the Squalid Queen, Sinh, the Slumbering Dragon
- Bonfires: Sanctum Nadir
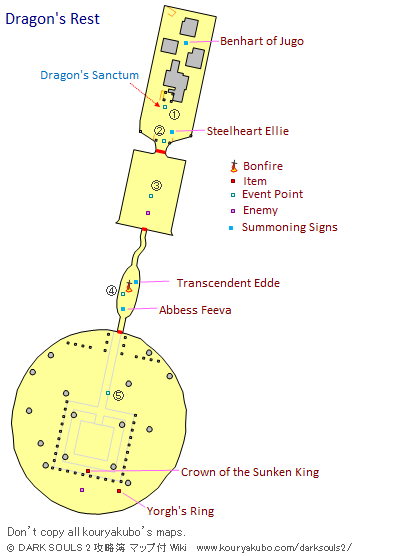
Dragon's Rest Map
Translated by Reddit@Faradn_cdv
NPCs in Dragon's Rest
NPC Summons
Items
Consumables- 10x Hexing Urn
- 3x Vine Balm
- 10x Twinkling Titanite
- Large Soul of a Brave Warrior
- 5x Small Smooth & Silky Stone
- Yorgh's Ring
- 2x Faintstone
- 2x Firedrake Stone
- 2x Old Mundane Stone
- 2x Raw Stone
- 2x Petrified Dragon Bone
- 3x Titanite Chunk
- Titanite Slab
Enemies
Boss
Notes
- ??
Full Dragon's Rest Walkthrough
Access
The elevator at the end of Dragon's Sanctum takes you up two levels, the top being the beginning of the Shulva; the middle will lead inside into a new area of the pyramide that lead us to the area with the Imperfects. Be carefull, a lot of dropping down will be required for upcoming path.
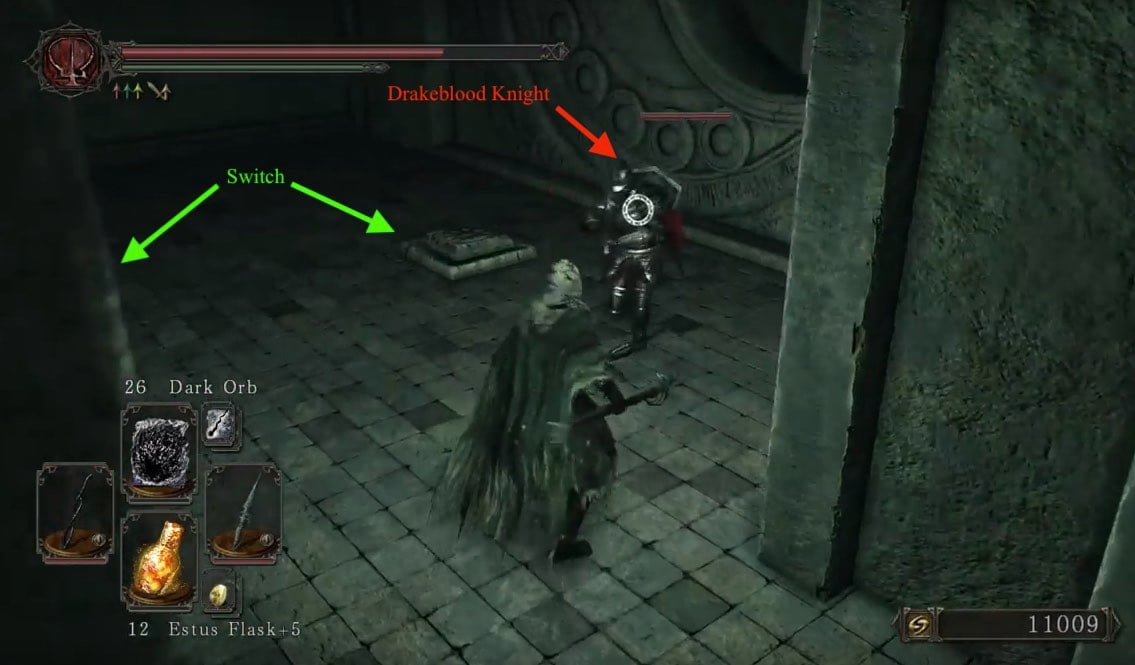
The path is blocked by rubble, so turn right instead and drop down the hole onto a broken staircase. Descend to the bottom of it and head through the door carefullyto not accidently drop down the deep hole in front of you. Instead, when you got out of the doorframe, turn right and carefully drop down onto the area below you. Move to the end of the broken bridge and drop down to the are under you. Continue forward and turn left, then, immidately turn right. You'll find yourself in a room containing two floor switches and a Drakeblood Knight. They are tough, deal lots of damage, but have low mobility. The two switches in this room rotate the two-holed circles on each side. The door on the left has Sanctum Knight in the upper area, the room behind the door is empty, so don't bother with it. The switch on the right is hiding 4 Crystal Lizards, as soon as the big opening is on the top level they will run to the other side of the room, giving you a short time to kill them and collect the loot. They drop a total of:
- 4x Twinkling Titanite
- 2x Faintstone
- 2x Firedrake Stone
- 2x Old Mundane Stone
- 3x Petrified Dragon Bone
- 2x Raw Stone
- 3x Titanite Chunk
- 1x Titanite Slab.
Too Many Lefts
Head out the door you arrived from, and then right until you reach another broken bridge. Drop onto the broken pillar then onto the next platform below. Take the stairs that lead to the next platform, and head straight until you find a body holding 10x Hexing Urn. Around the corner you'll find another Drakeblood Knight. Deal with him then jump down the broken staircase on the right, and take the next flight down again. At the bottom, continue along the path and turn left. Take another left and in the middle of the left corridor wall, press the "use" button to unlock an illusory wall, concealing a bonfire inside, the Sanctum Interior bonfire.
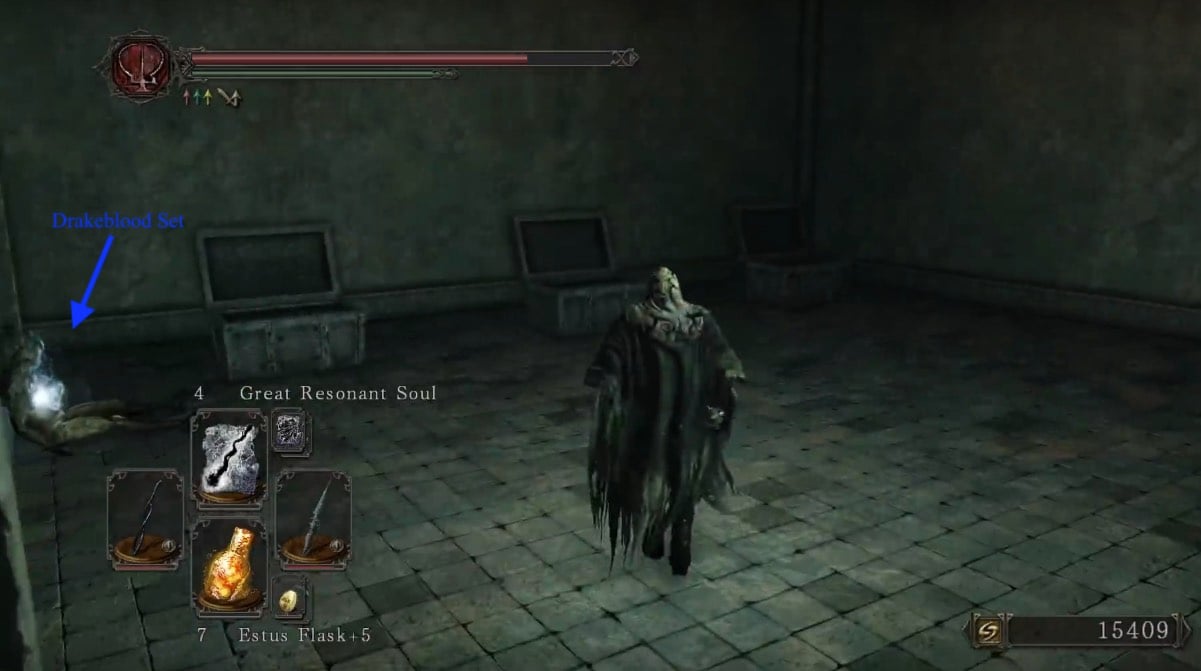
When you're ready, continue in the same direction you were heading, to find a set of downward stairs, and two more Drakeblood Knights. Turn left and again left and you'll find a room with several chest that are already open. There will be a body holding the Drakeblood Set.
Head out and turn right, go back to where you found the hidden bonfire, after the bonfire turn right and go straight until you see another broken bridge on the left. Drop down here, then down some steps, drop down again. Drop down once more to find an area you can jump to on the left, so run and jump there.
Turn right then left to find an item glowing on a body, don't rush it as there are two Drakeblood Knights nearby. Kill the first then pick it up -3x Vine Balm. Turn the corner again to find body numero two with 3x Twinkling Titanite. Further down will be another Knight standing between you, and two more bodies holding a Large Soul of a Brave Warrior and 3x Twinkling Titanite. Turn left from the last body to find another one holding 5x Small Smooth & Silky Stone. Turn left and continue forward until you come across a dead end. Here you will find an area you can jump down to, on the right side. From this platform, drop down and continue to do so until you are prompted with the "Dragon's Rest" title.
Double Trouble
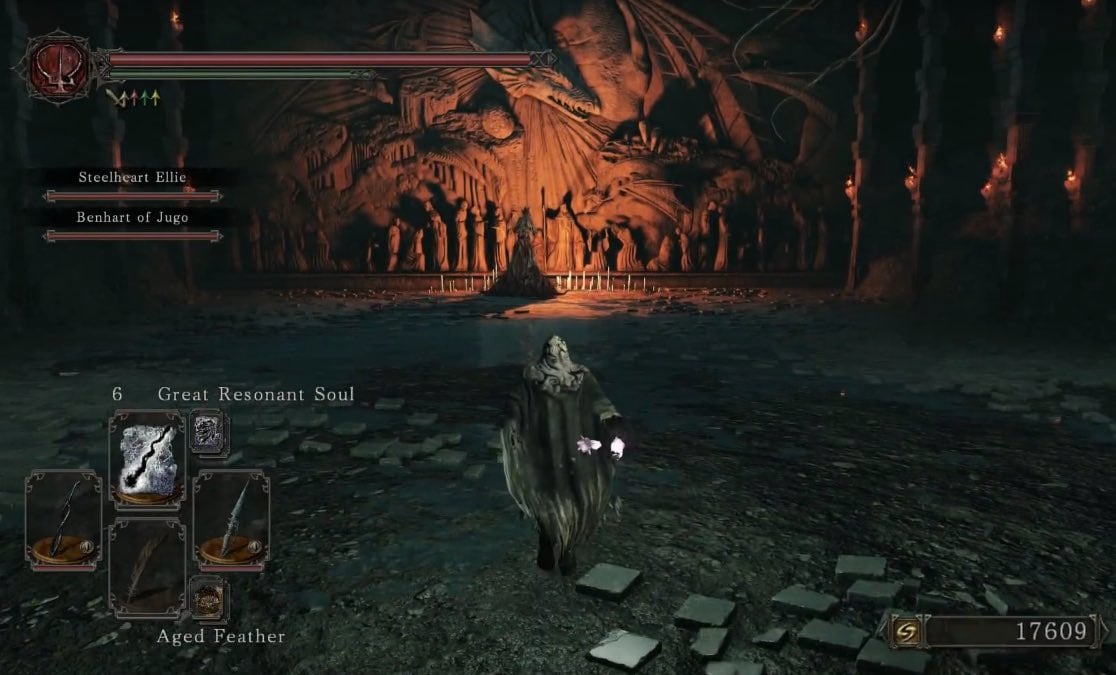
Here you will see a large fog gate that leads to the first boss fight. If you require assistance with the boss, the summon signs for Benhart of Jugo, and Steelheart Ellie, can be found in this area.
Boss Fight: Elana, the Squalid Queen
After you defeat Elana and acquire her soul (which can be exchanged for the Wrathful Axe at Weaponsmith Ornifex), the wall adorned with a giant dragon opens, revealing a passage. Continue through here to arrive at a bonfire, the Sanctum Nadir bonfire. Now you stand before a smaller fog gate. On either side of the bonfire, you'll find summon signs for Abbess Feeva, and Transcendent Edde. Through the fog gate is a large open area, where you must now fight the second boss of the Rest.
Boss Fight: Sinh, the Slumbering Dragon.
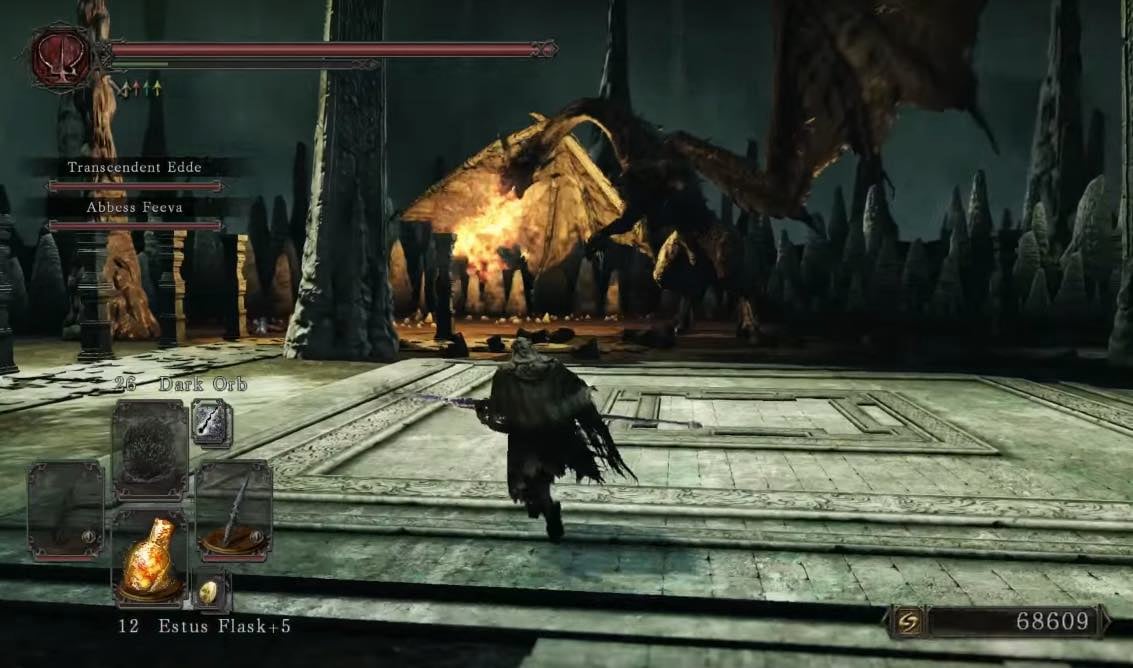
After defeating him -well done- you will obtain his soul (which can also be traded for the Yorgh's Spear at Weaponsmith Ornifex), you should also see a glimmering orb on the floor. Examining it will grant you the Crown of the Sunken King. On the left side there will be a body with an item, head there and pick up the Yorgh's Ring.
General Information
- Previous: Dragon's Sanctum
- Next: Cave of the Dead
- Recommended Levels: 110 to 120
- Bosses: Elana, the Squalid Queen, Sinh, the Slumbering Dragon
- Bonfires: Sanctum Nadir
Dragon's Rest Map

NPCs in Dragon's Rest
NPC Summons
Items
Consumables- 10x Hexing Urn
- 3x Vine Balm
- 10x Twinkling Titanite
- Large Soul of a Brave Warrior
- 5x Small Smooth & Silky Stone
- Yorgh's Ring
- 2x Faintstone
- 2x Firedrake Stone
- 2x Old Mundane Stone
- 2x Raw Stone
- 2x Petrified Dragon Bone
- 3x Titanite Chunk
- Titanite Slab
Enemies
Boss
Notes
- ??
Full Dragon's Rest Walkthrough
Access
After accessing the elevator at the end of Dragon's Sanctum that can take you up two levels, the top being the beginning of the Shulva, while the middle will lead to the Dragon's Rest after climbing the massive staircase. Once you have, you will need to reach the bottom of the area.
Head left and drop down the broken staircase, then again. Head through the door and drop down to the bridge on the right. Drop down at the end of the broken bridge. Continue forward and turn left at the corridor to take the first door you see. You'll find yourself in a room containing two floor switches and a Drakeblood Knight. They are tough, deal lots of damage, but have low mobility. The two switches in this room rotate the two-holed circles on each side. The switch on the left is hiding a Sanctum Knight. That room is empty, so don't bother with it. The switch on the right is hiding 4 Crystal Lizards, as soon as the big opening is on the top level they will run to the other side of the room, giving you a short time to kill them and collect the loot. They drop a total of:

- 4x Twinkling Titanite
- 2x Faintstone
- 2x Firedrake Stone
- 2x Old Mundane Stone
- 3x Petrified Dragon Bone
- 2x Raw Stone
- 3x Titanite Chunk
- 1x Titanite Slab.
Too Many Lefts
Head out the door you arrived from, and then right until you reach another broken bridge. Drop onto the broken pillar then onto the next platform below. Take the stairs that lead to the next platform, and head straight until you find a body holding 10x Hexing Urn. Around the corner you'll find another Drakeblood Knight. Deal with him then jump down the broken staircase on the right, and take the next flight down again. At the bottom, continue along the path and turn left. Take another left and in the middle of the left corridor wall, press the "use" button to unlock an illusory wall, concealing a bonfire inside, the Sanctum Interior bonfire.
When you're ready, continue in the same direction you were heading, to find a set of downward stairs, and two more Drakeblood Knights. Turn left and again left and you'll find a room with several chest that are already open. There will be a body holding the Drakeblood Set.

Head out and turn right, go back to where you found the hidden bonfire, after the bonfire turn right and go straight until you see another broken bridge on the left. Drop down here, then down some steps, drop down again. Drop down once more to find an area you can jump to on the left, so run and jump there.
Turn right then left to find an item glowing on a body, don't rush it as there are two Drakeblood Knights nearby. Kill the first then pick it up -3x Vine Balm. Turn the corner again to find body numero two with 3x Twinkling Titanite. Further down will be another Knight standing between you, and two more bodies holding a Large Soul of a Brave Warrior and 3x Twinkling Titanite. Turn left from the last body to find another one holding 5x Small Smooth & Silky Stone. Turn left and continue forward until you come across a dead end. Here you will find an area you can jump down to, on the right side. From this platform, drop down and continue to do so until you are prompted with the "Dragon's Rest" title.
Double Trouble
Here you will see a large fog gate that leads to the first boss fight. If you require assistance with the boss, the summon signs for Benhart of Jugo, and Steelheart Ellie, can be found in this area.
Boss Fight: Elana, the Squalid Queen

After you defeat Elana and acquire her soul (which can be exchanged for the Wrathful Axe at Weaponsmith Ornifex), the wall adorned with a giant dragon opens, revealing a passage. Continue through here to arrive at a bonfire, the Sanctum Nadir bonfire. Now you stand before a smaller fog gate. On either side of the bonfire, you'll find summon signs for Abbess Feeva, and Transcendent Edde. Through the fog gate is a large open area, where you must now fight the second boss of the Rest.
Boss Fight: Sinh, the Slumbering Dragon.

After defeating him -well done- you will obtain his soul (which can also be traded for the Yorgh's Spear at Weaponsmith Ornifex), you should also see a glimmering orb on the floor. Examining it will grant you the Crown of the Sunken King. On the left side there will be a body with an item, head there and pick up the Yorgh's Ring.
 Anonymous
Ah yes. Make sure you pick up the "-3x Vine Balm"... Negative items?

 Anonymous
 Anonymous
 Anonymous
I broke his damn tail off! :-D
I used smelter hammer, it was a 2 minute fight.
 Anonymous
Everybody chill until she summons Velstadt IN ADDITION to skeletons. Happened to me when she was around 90% health and I was running in to chip damage and running back.

 Anonymous
If RNGesus is by your side, elana will summon piggies instead (will not summon anything else as long you don't kill the piggies), and you can hit and strafe the night away

 Anonymous
I like to call the area leading down to Elana the MC esher level.

 Anonymous
Benhart's summon is in the middle of the lowest floor, before the fog wall. From fog wall where Steelheart ellie's summon is, turn 180 and head in that direction.

 Anonymous
 Anonymous
 Anonymous
 Anonymous
 Anonymous
Hi, I've started benhart quest line, but his summon doesn't appear here, and neither does the shades, I've tried dying in the room but nothing works, pls help

 Anonymous
 Anonymous
You have to have completed side quests for Benhart to appear. did it a long time ago, but this time only Ellie appears

 Anonymous
If you got problem with lizard staying up try to lift yourself in the big circle.

 Anonymous
"there will be a few npc summon signs in the area"
There is one. Only one.
This author doesnt know his ass from a hole in the ground.
 Anonymous
3rd paragraph first sentance....go out which door??? There are 3 exits and the first one got me fucking killed. Anybody reading this horrible walkthrough (the entire walkthrough) should go to a different site now. This asshole is an amateur.

 Anonymous

Good final fight but kinda anti-climatic with not even a little lore/cinematic to finish off.. Did I miss something?
4
+10
-1