Earthen Peak
Earthen Peak is a Location in Dark Souls 2. This area is connected to the Harvest Valley and the Iron Keep. There are fast rogue-like enemies, pyromancers and archers as well as traps and mimics. There are three bonfires in this area.
General Information
- Previous: Harvest Valley
- Next: Iron Keep
- Recommended Levels: 65 to 75
- Bosses: Covetous Demon, Mytha, The Baneful Queen
- Bonfires: Lower Earthen Peak, Central Earthen Peak, Upper Earthen Peak
Earthen Peak Map
NPCs
Items
Consumables- Petrified Something
- Simpleton's Spice
- Human Effigy
- Large Soul of a Proud Knight
- Divine Blessing
- Heavy Bolt x15
- Repair Powder
- Pharros' Lockstone
- Twinkling Titanite
- Skeptic's Spice x1
- Torch x1
- Titanite Shard x3
- Soul of a Nameless Soldier x1
- Soul of a Proud Knight x1
- Poison Broadsword
- Poisonbite Ring
- Mirrah Shield
- Heavy Crossbow +3
- Black Firebomb x3
- Miracle: Lightning Spear
- Great Heavy Soul Arrow
Enemies
- Hammersmith (Undead
- Poison Brumer
- Desert Sorceress
- Masked Manikin
- Undead Huntsman
- Grave Warden
- Nimble Shadow
- Entity of Avarice
Boss
Notes
- ??
Earthen Peak Walkthrough
Start and Assassin's Nook
Entering from the Harvest Valley upper walkway, venture forward and around the toxic pool. As you approach the stairs take note of the break in the wall on the left. Inside there is a Poison Brumer, which will emit a gas as you pass. Run past it and kill the other Brumer on the next platform, halfway up the flight of stairs. At the top, you'll also encounter the Desert Sorceress that has been bombarding you on your journey up, on the ledge on the left. Before proceeding, drop into the crack with the first Poison Brumer we encountered. Behind it you can find some Skeptic's Spice.
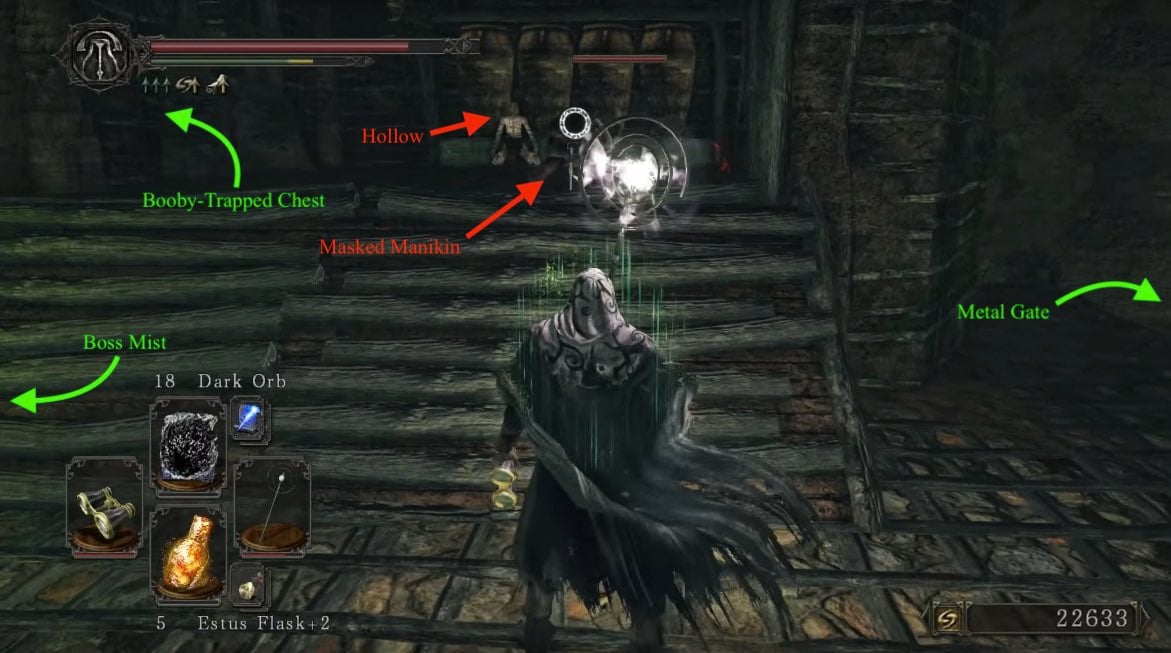
Again go up the stairs, but before heading to the fog door head into the room on the right to find an Abandoned Hollow facing the wall. Kill him quickly as a Masked Manikin will attempt to ambush you. Make quick work of him, then turn your attention to the Poison Brumer in the room on the left. DON'T RUSH IN as there is a second Poison Brumer hiding on the left of the entrance. Try to take the visible one out using ranged attacks, to make your life easier against the second. There will also be another Hollow in this room, and a booby-trapped chest. Opening this chest will (as every other booby-trapped chest so far) emit a poison mist, so get ready to roll away as soon as the cehst is opened. Inside the chest. you will find a Torch.
Pharros' Contraption and Lucatiel of Mirrah
Still delaying the inevitable boss fight, look the pool of poison (area of the stairs you entered from). You'll notice a metal grate sticking out with a Poison Brumer at the entrance. Take it out from range then line yourself up at an angle, so you don't roll off the grate, and make the leap.
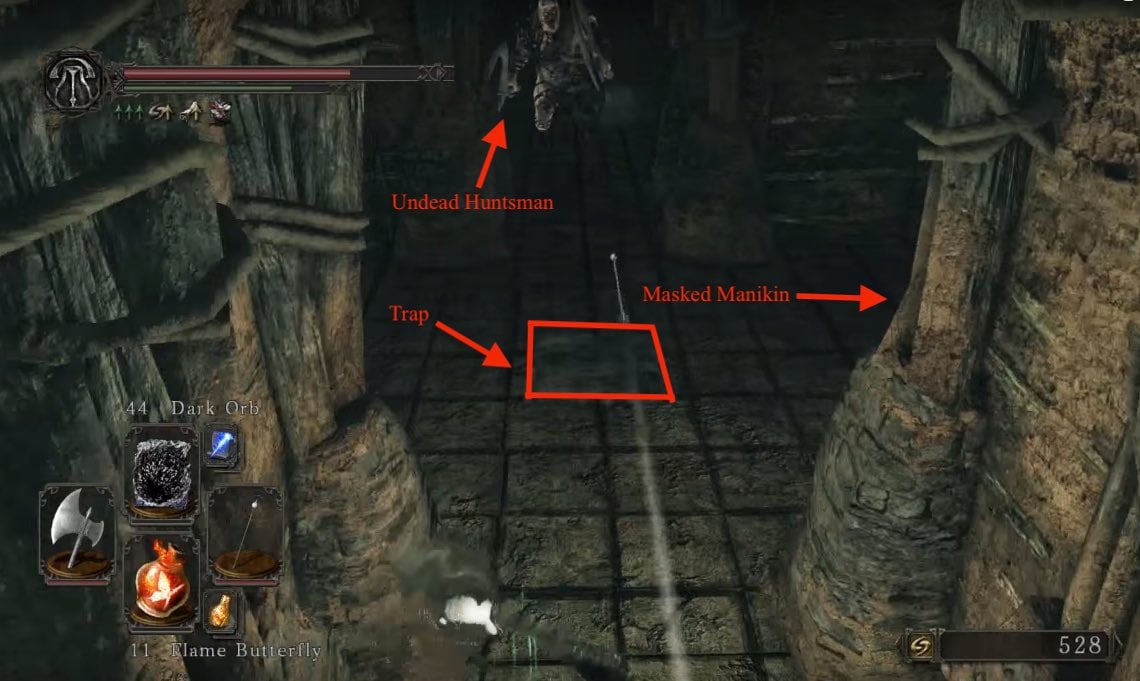
Pay attention to the floor in the next room and avoid the trap switch. It will activate a contraption to shoot arrows from behind. Just past the next door is a Manikin on the right waiting to ambush you. For a laugh, you can pull the Undead Huntsman into the first room and activate the arrow trap when the enemy walks through the door, taking care of both the trap and the enemy. Down the hall, you'll find a chest and yet another Manikin waiting on the left. Across from this enemy, a corpse holds a Soul of a Nameless Soldier and 3x Titanite Shard, while the chest holds a Heavy Crossbow +3, and 15x Heavy Bolt. Head back to the ledge overlooking the pool, jump towards the ramp on your left: if you land in the poison here, you're dead. Be wary, as soon as you land there, another Masked Manikin will ambush you here as well.
Now, you're back at the lower entry from the poison urn room in Harvest Valley. Venture down the ramp and run toward the body at the end of the toxic hallway. Halfway down take a right and enter the room , on the left you will meet Lucatiel of Mirrah. If it is the third time meeting her, she will give you a Ring of Steel Protection +1. After talking to her, investigate the Pharros' Contraption to have a mark appear on the wall behind you. Punch it to reveal a open a secret door which holds a chest containing the Poisonbite Ring and Soul Of A Proud Knight. Return to the hallway and claim an Repair Powder from the body to the right.
Slayer of the Covetous
With all that out of the way venture back to the fog gate. Head up the ramp and into the doorway on the left. If you have followed the guide so far there will be 2 Hammer Ogres in the big room full of poison jars. Either kill them or run to the ladder to the right and continue on through the door to reach the upper level once again. Return to the fog door to face the first of two bosses, of Earthen Peak.
BOSS FIGHT: Covetous Demon
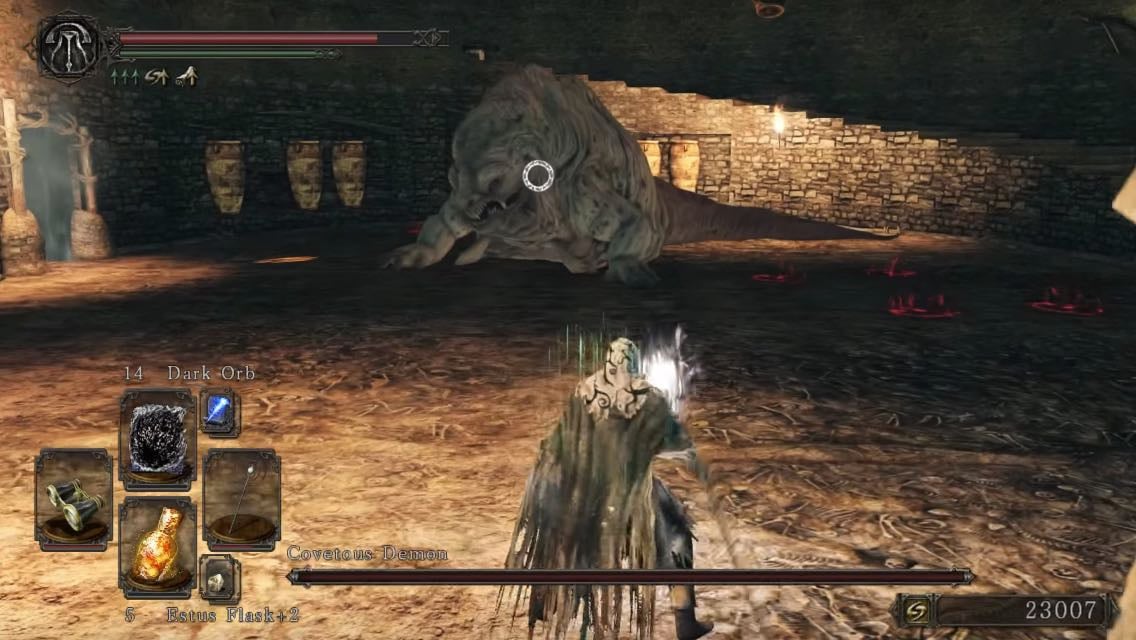
Quick Tip: In the boss room, look above for Urns hanging from the ceiling. They contain Undead, which when shot down, will cause Covetous to lunge at them. This distracts him for a good amount of time to give you free hits. (No one ever says this on their guides but breaking the pots only work with Iron Arrows/Heavy Bolts. Trying to shoot it with wooden ones will just break themselves.)
Lighting the Windmill
Shortly after the boss you'll find your first Bonfire of the area. Continue on and turn to the right. There you will see a Masked Manikin hiding behind a chest. To save yourself some trouble later, you can take care of him from here with ranged attacks, then go up the stairs to the left, but be carefull, a Manikin and a Steelworker Undead will engage you. There is a switch on the wall by the stairs that lifts/lowers the pot of poison in the room, like the second one below; be careful, as it can break. In the corner you'll find a Radiant Lifegem guarded by some poison pots. Through the door is a narrow walkway with a Spear-wielding Grave Warden at the end. Watch out to your right as there are archers that shoot poison arrows at you. Try to take them out from range before engaging/aggroing the Warden. The battle with him is tough on the walkway so lead him back to the room you came from. He keeps his shield up 90% of the time, so use guard break to stun him then lay into him; he's also susceptible to backstabs. He will also try to heal himself once he is low on life.
Move across the now clear path and through the doorway. The first door on the right leads to the walkway where the archers were standing. There is an item across the broken pathway, but don't try the jump. We will be reaching it another way much later. Instead, go back out and through the door past the hanging poison pot. To the right is a lever which raises the pot to the ceiling (significance ??). You'll also find a summon sign for Devotee Scarlett in this room.
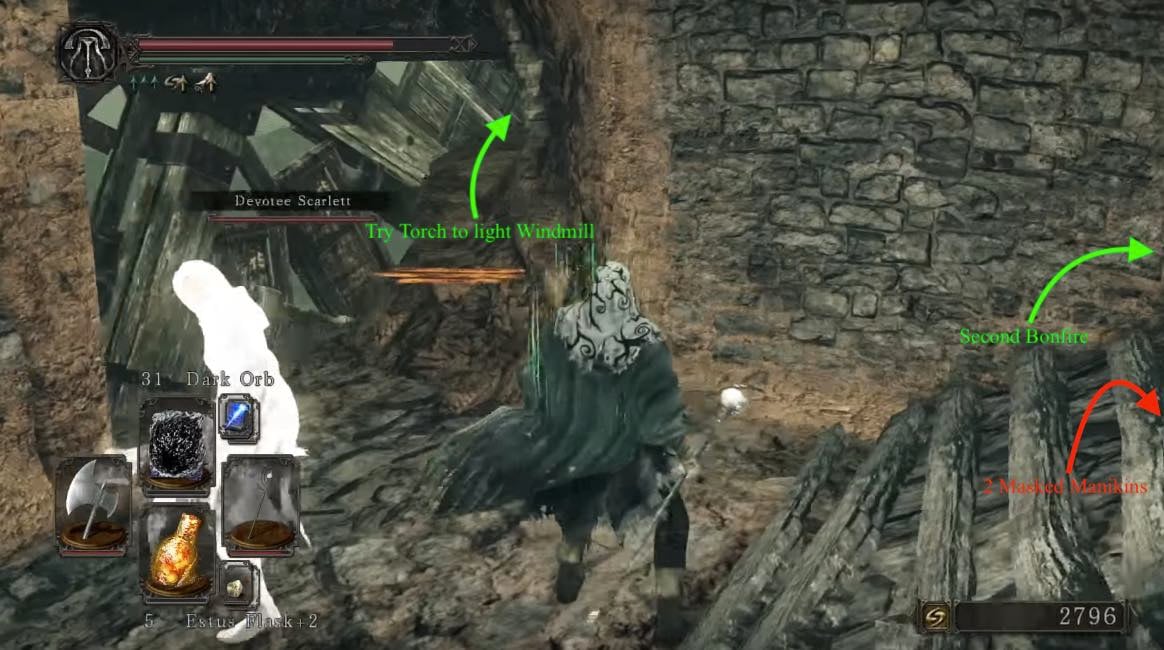
Head down the stairs to find yourself on a ledge with a chest containing a Pike, at the end on the left. As you approach it, a Masked Manikin will leap out from behind it, and attack you. This is the same chest we saw earlier when coming from the bonfire. Head back up to the room with the hanging poison contraption, and find ladder straight across the room. Similarly, approaching it will prompt not one, but two Masked Manikin to drop down from the top of it. Climb up and dead ahead, you'll find a Grave Warden standing by some stairs. There a a small ledge off the left side of wall leading up to the WINDMILL BLADES. Use your torch to light the windmill on fire as this will remove the poison water from the boss fight area!!! This is the one and only way to do this! Once that is done move up the small stairs and go through the fog door to find the second Bonfire.
The Laddersmith
Head back out and up the stairs to the left. Once again, heading upstairs will prompt another two Masked Manikins to jump out and attack you. You can also loot a corpse here for 3x Black Firebomb, and another in the corner for their Manikin Mask. If you let the last assassin run up the stairs, a small gate will block off the doorway that you initially come across. In this case, take the ladder up, to your left. Head right, into a thin corridor with an enemy on the other side of it, hitting you with ranged attacks. Be careful as two Masked Manikins will jump out of nowhere and attack you from behind. In the middle of the corridor, you'll find a Flame Butterfly. At the end of the corridor, you'll be attacked by an Desert Sorceress, try to kill her with a ranged attack. On the right you see some poison urns, if you destroy them, you can take out the two Masked Manikins with ranged attacks. There is also a chest, we will get to this one later. For now, drop down to fight another Masked Manikin. Kill him, then break one of the poison vases, blocking your exit. Drop down to the lower level and fight the two Masked Manikins, that will drop down from above of where the ignored chest is (if you haven't defeated them already). From here you have two ways you can go: either you go left through the hallway, or you drop down on the wodden plattform and go through the hallway on the right. We will take the second option for now, it leads us to the the opposite side of the gate the Masked Manikin closed earlier.
Destroy the first wooden reiling on the right to find a Simpleton's Spice, then kill the Masked Manikins further down the way. If you follow the small way on the other side of the wooden railings, you will reach the NPC Laddersmith Gilligan. Speak to him and he will offer to build you a ladder leading down for 2000 souls. After the cutscene, exhaust his dialogue to move him to Majula, and learn the "Prostration" Gesture. Go down the ladder he provided and follow the ledge to a corpse with a Pharros' Lockstone and Twinkling Titanite, head back up the ladder and follow the ledge back to the area you came from.

Meetings with the Mild Mannered
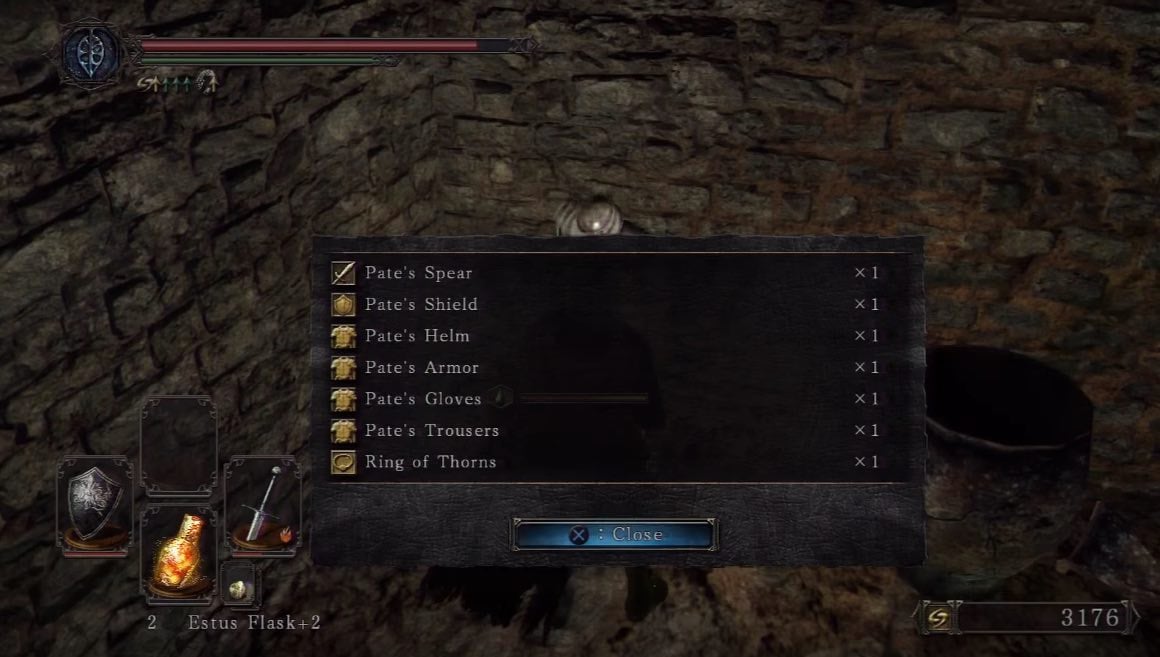
Back at the balcony go through the archway and you will notice the lever on the wall, this activates the lift ahead. However don't pull it yet. Continue on and go up the ladder, to get back to the hallway we ignored previously. Down the hallway is a Grave Warden; kill him then take the first door to the right in the hall. Down the stairs you'll encounter, for the second time if you interacted with him fully in the Forest of Fallen Giants, the NPC with the peculiarly-specific name, Mild Mannered Pate. He will give you several items: his Spear, Shield, Armor set and the Ring of Thorns.
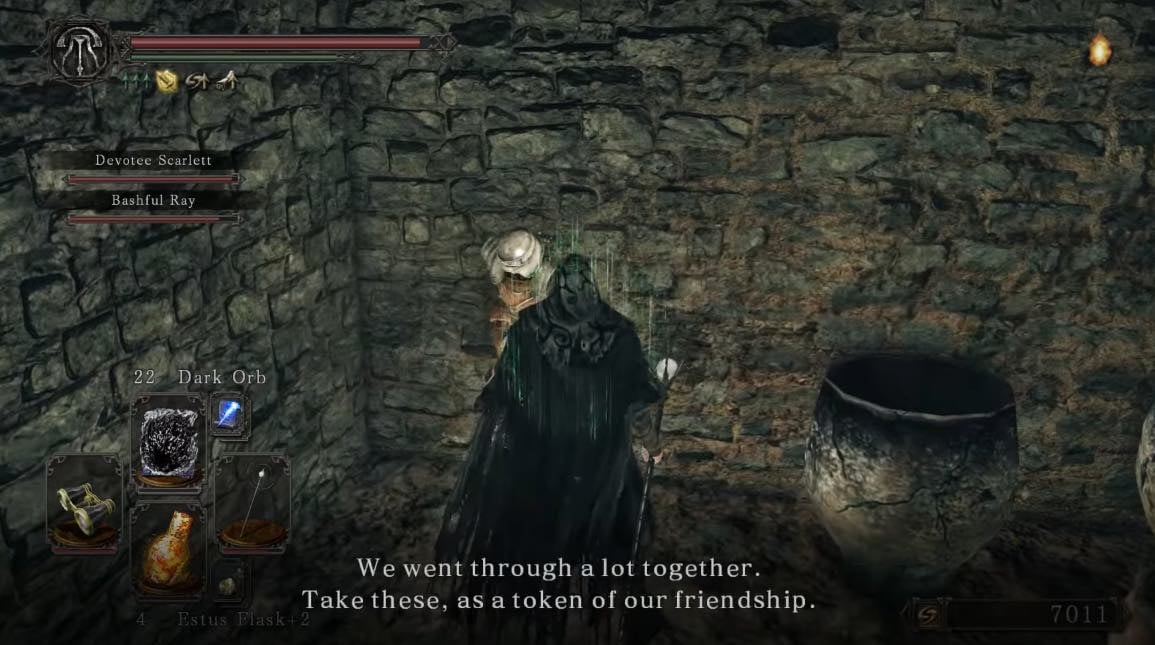
The door in this area doesn't open from this side so talk to him then head back upstairs. Continue past where the Warden was, and up the small stairs. There's a path to your right, but ignore it for now and go left up the large stairs. We will arrive on the opposite of the hole we jumped down a while ago.If you have beaten all the enemies here previously, there will only be one Desert Sorceress on the left. There is another poison-mist trapped chest behind the Desert Sorceress on the left, which contains a Pharros' Lockstone.
After taking the treasure, head back downstairs and go right into the hallway we skipped before. There's a break on the floor, and on the opposite side you can see a corpse which holds a Radiant Lifegem (NG+ divine blessing x3) and a chest containing a Soul Of A Brave Warrior and a Crimson Water, guarded by a Grave Warden. You can make the jump, but its a close one. Aim for the section of broken floor on the left. As soon as you approach the broken section, a Masked Manikin will jump down to attack you.
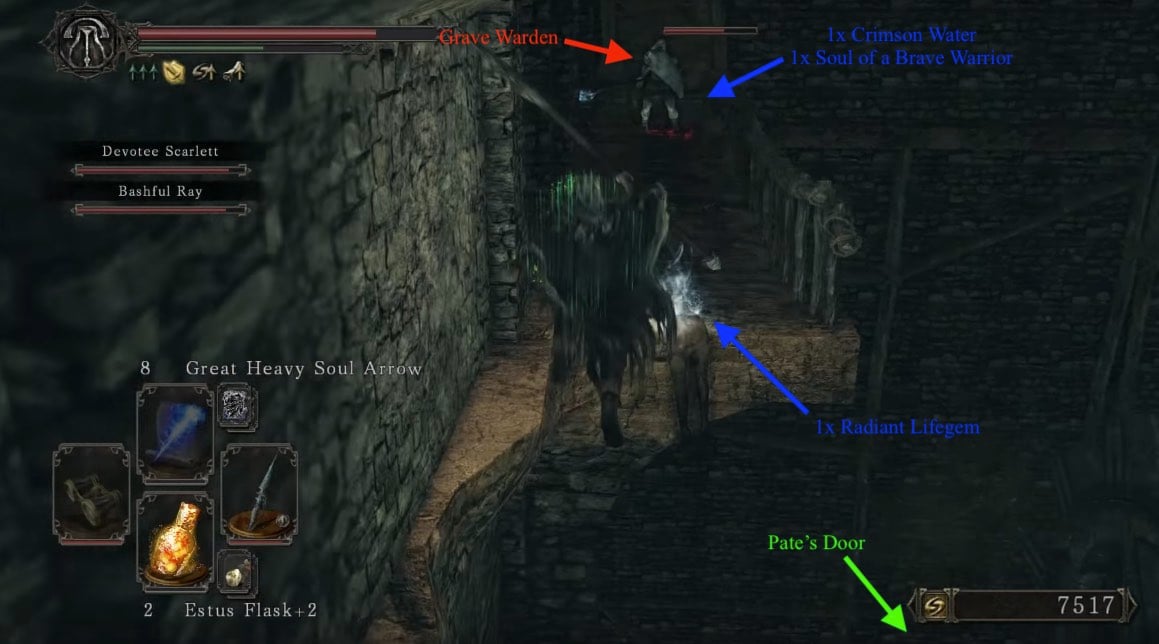
Jumping back over, break the fence on the left and drop down to the platform below. On this platform is the locked door leading to Pate's area. Open it, then turn around to see the corpse below. That is the broken archers walkway from earlier on. From here you could make the jump but first head into the small opening in the wall and turn right to find a chest ahead containing Great Heavy Soul Arrow. Jump back and head to the left, past Pate's door.
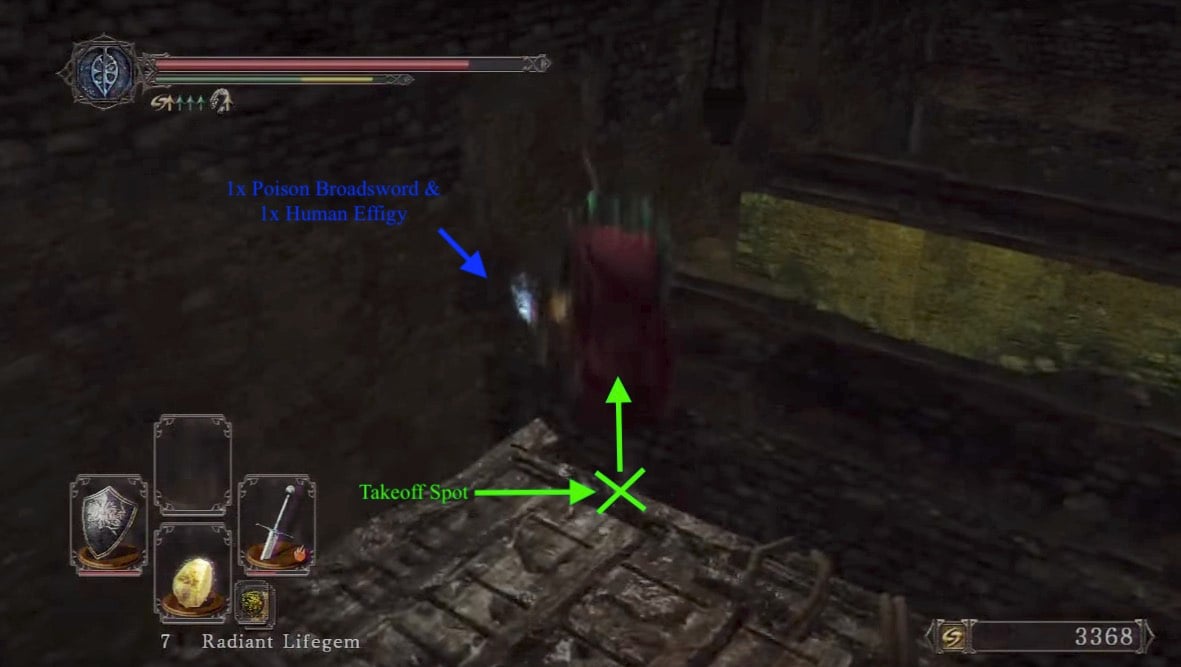
Drop to the lower platform and pick up the Lightning Spear from the chest under the structure then make the jump (surest way is to angle yourself towards the item, that way you'll likely roll into the wall and not out of the platform) down to the corpse's walkway below to collect the Poison Broadsword and a Human Effigy. Use a Homeward bone or Darksign to return to a bonfire; alternatively, you can make the jump to the nearby ledge. Its on your right facing away from the loot. After returning to the second bonfire and head up the stairs to the left once more.
Tying up Loose Ends
Remember that lever on the wall of the archway ahead? Pull it to start the lift. Run to it quickly, as it will move without you. Follow it all the way up to an area with multiple poison jars. Behind them were the various enemies you had just cleared out before. There is a chest containing the Mirrah Shield here. By now you may have noticed the lift has descended. If so, jump back down. Pull the lever once again but this time, let the lift raise without being on it. You can find underneath the lift is a corpse holding a Soul Of A Proud Knight and a Divine Blessing. Make sure you grab them and return to the ladder for safety before the lift returns! After claiming all the items in this area, head back to the top of the stairs near the second bonfire, and go to the ladder.we used when the gate was closed (be carefull of the traps and respawned aenmies if you rested or homewarded in the meantime).
Head up the ladder and you will see a doorway on both left and right. Since last time we went right, we're going left instead. There are three poison urns when you enter, break them from far away, approach the wall and press the "use" button on your controller to reveal a secret door. Remember the rain of fire balls back in Harvest Valley, when you approached Earthen's Peak?, Here you will finally dealing with the responsible Desert Sorceress. There is also a corpse containing a Spell Quartz Ring +1.
Turn around and head up the stairs, passing (or destroying from a safe distance) the multiple poison urns in this hallway. Ahead is an area that contains another Desert Sorceress and a Nimble Shadow. To your left are two more Grave Wardens guarding a set of stairs which lead to the boss fog. Ignore them for now and go up the stairs in front of you. Up the stairs, to the right is an area with six Poison Brumer amongst a bunch of Poison Jars. Using a long hit range weapon like a halberd or a spear could come in handy, in this area. In this room is a corpse holding a Small Smooth & Silky Stone in the corner. As for the chest in this room, it's not a chest: is a Mimic. So attack it, or use a Lloyd's Talisman on it to wake it. It drops Dark Gauntlets and the Work Hook.
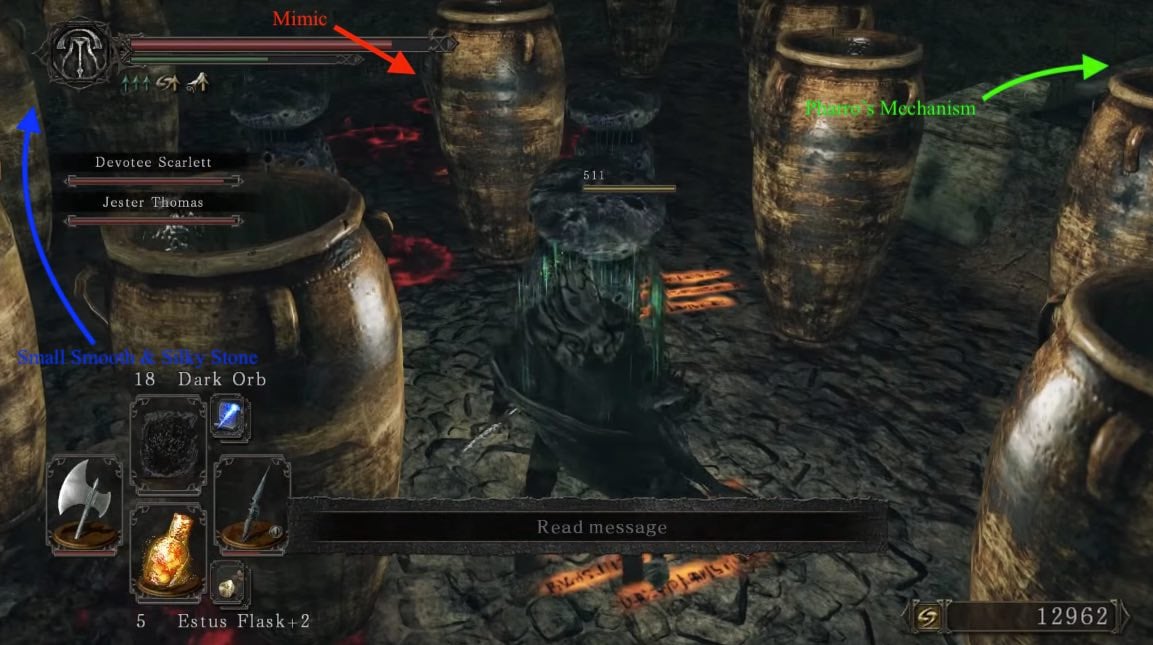
Also inside this room is a Pharro's Mechanism. Activating it causes it to spill out poison into a small pool in front of it, draining it from a hallway leading to the spinning blades. If you burned the windmill it becomes water that cures poison and gradually heals. Exit the room and go up the stairs in front of you. To reach a balcony with many poison jars.
All Hail the Queen
There are two illusory walls one to the right and one to the left of the archway. Press the "use" button to open them. The one on the right contains a Bonfire. The one on the left contains a chest holding a Petrified Something! Head all the way back downstairs and confront the final two Grave Wardens as well as two Hollow Crawler you'll have to deal with before the boss, guarding atop the set of stairs from earlier. On the left side of the steps leading up to the boss, you'll find a Poison Stone, on right, can also summon the NPC Jester Thomas for the boss fight. When you are ready approach the boss fog.
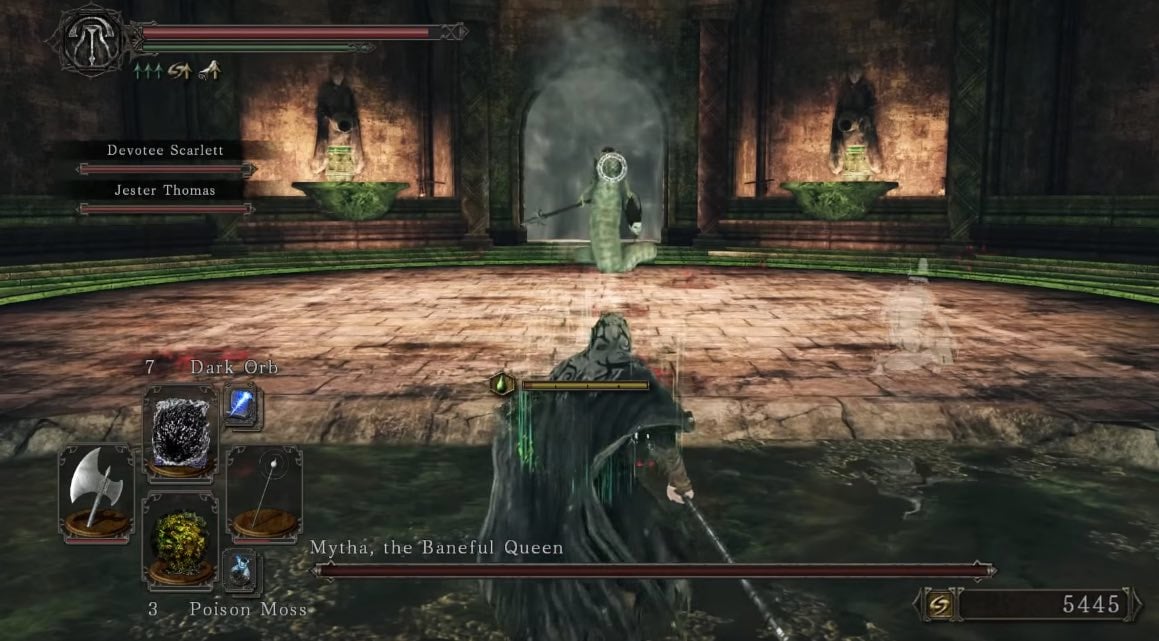
BOSS FIGHT: Mytha, The Baneful Queen
Killing her gets you a nice sum of 20,000 Souls and her Boss Soul. Head forward up the stairs and into the lift to enter Iron Keep. Note: It is recommended to follow the route starting by going down The Pit in Majula to reach the Grave of Saints before continuing in Iron Keep.
How to Slay the Queen
- MAKE SURE YOU BURN THE WINDMILL BEFORE THIS BOSS AS THIS WILL RID THE FIGHTING AREA OF POISON!
- Mytha's Attacks:
- She has a few different attacks and is very quick; reminiscent of Medusa with the whole, snake-body / woman-torso thing.
- One attack she sometimes opens with is spiting a fan of souls arrow type projectiles out of her head.
- When she is up close and personal she jabs and swipes at you with her massive lance.
- She will throw her head as well and will explode with soul-like residue wherever it lands.
- Her other attacks include tail whips and swipes.
- Mage Build: This battle is a breeze. Stay far enough away to dodge he spear jabs and smash her with your spells. At range she seems to alternate between her spear and throwing her head / Soul arrow; all are easily dodged.
- Strength Build: The fight requires a little more caution but still is pretty manageable. Using the same tactic as above, bait her spear jab and side step it. This animation leaves her wide open for a few hits. Don't get greedy though, if you stay close to her for too long she will attempt a devastating grab attack. (The grab can be easily dodge by constantly strafing left or right and leaves her very vulnerable.) Give her a few slaps then retreat to safety. If she throws her head, move away from it and rush in and attack when she goes to retrieve it.
- READ IF YOU EXPERIENCE POISON DRAINING GLITCH.
- Many people have been encountering a glitch where the poison does not drain from the boss fight area. So far there has not been a patch to fix this glitch and its making this boss fight near impossible for many. If this happens, there is still one area where you can be free of the poison. Try standing at the far end of the room in front of the fog gate. THE STONES DIRECTLY IN FRONT OF THE FOG GATE WILL KEEP YOU SAFE FROM POISON. Hope this helps anyone unfortunate enough to experience this glitch.
General Information
- Previous: Harvest Valley
- Next: Iron Keep
- Recommended Levels: 65 to 75
- Bosses: Covetous Demon, Mytha, The Baneful Queen
- Bonfires: Lower Earthen Peak, Central Earthen Peak, Upper Earthen Peak
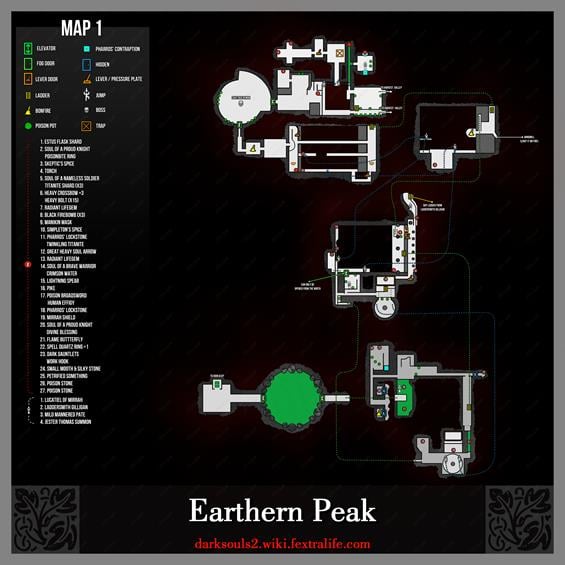
Earthen Peak Map
NPCs
Items
Consumables- Petrified Something
- Simpleton's Spice
- Human Effigy
- Large Soul of a Proud Knight
- Divine Blessing
- Heavy Bolt x15
- Estus Flask Shard (same as Harvest Valley)
- Pharros' Lockstone
- Twinkling Titanite
- Skeptic's Spice x1
- Torch x1
- Titanite Shard x3
- Soul of a Nameless Soldier x1
- Soul of a Proud Knight x1
- Poison Broadsword
- Poisonbite Ring
- Mirrah Shield
- Heavy Crossbow +3
- Black Firebomb x3
- Miracle: Lightning Spear
- Great Heavy Soul Arrow
Enemies
- Hammersmith
- Poison Brumer
- Desert Sorceress (Pyromancer)
- Masked Manikin
- Undead Huntsman
- Grave Warden
- Entity of Avarice
Boss
Notes
- ??
Earthen Peak Walkthrough
Start and Assassin's Nook
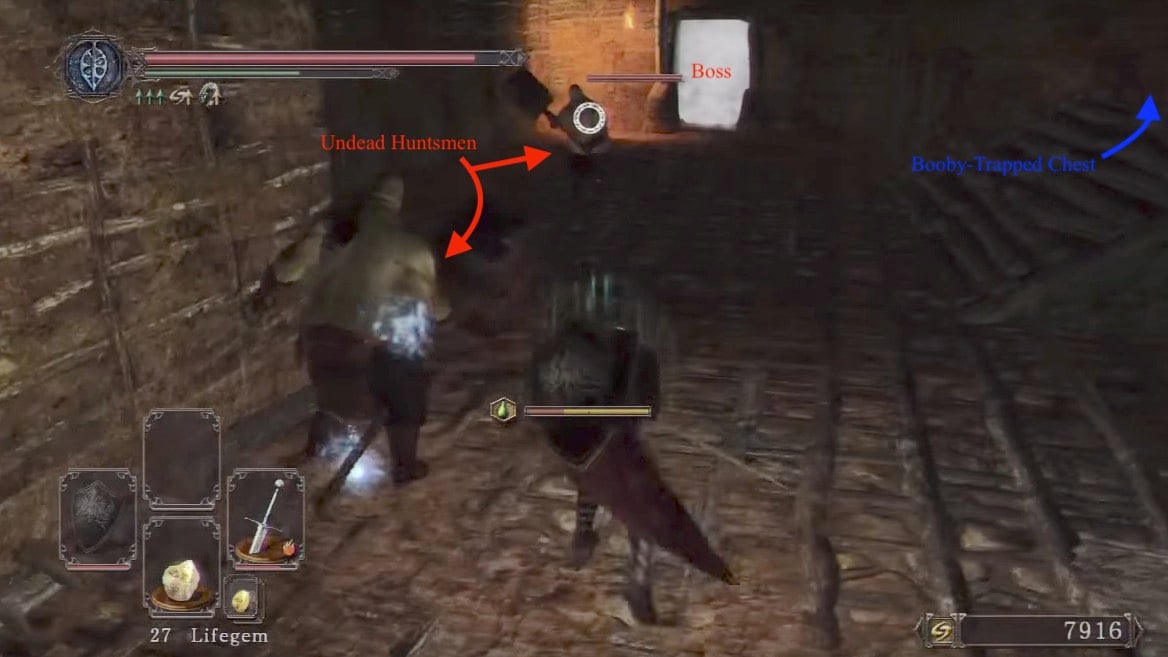
Entering from the Harvest Valley upper walkway, venture forward and around the toxic pool. As you approach the stairs take note of the break in the wall on the left. Inside there is a Poison Brumer, which will emit a gas as you pass. Run past it and kill the other Brumer on the next platform, halfway up the flight of stairs. At the top, you'll also encounter two Undead Huntsmen with hammers. Before proceeding, drop into the crack with the first Poison Brumer we encountered. Behind it you can find some Skeptic's Spice.
Again go up the stairs, but before heading to the fog door head into the room on the right to find another Huntsman. Kill him then turn your attention to the room on the left. DON'T RUSH IN as there is another three Poison Brumers and a Huntsman hiding in there. Try to take the visible ones out using ranged attacks, to make your life easier against the rest. There will also be a booby-trapped chest that will release a green poison mist. You may be disappointed with the trouble you've just gone through, to only nab a Torch from the chest, however you must bear in mind that this is a Dark Souls game.
Pharros' Contraption and Estus Flask Shard
Still delaying the inevitable boss fight, look the pool of poison (area of the stairs you entered from). You'll notice a metal grate sticking out with a Poison Brumer at the entrance. Line yourself up at an angle, so you don't roll off the grate, and make the leap, then immediately kill the Brumer.
Do not venture too far into the room, all willy-nilly. As a Masked Manikin waits just beyond the door. Pay attention to the floor in the next room and avoid the trap switch. It will activate a contraption to shoot arrows from behind. Just past the next door is another Manikin waiting to ambush you. For a laugh, you can pull the guy into the first room and activate the arrow trap when the enemy walks through the door, taking care of both the trap and the enemy. Down the hall, you'll find a chest and yet another Manikin waiting on the left. Across from this enemy, a corpse holds a Soul of a Nameless Soldier and 3x Titanite Shard, while the chest holds a Heavy Crossbow +3, and 15x Heavy Bolt. Head back to the ledge overlooking the pool, jump towards the ramp on your left: if you land in the poison here, you're dead.
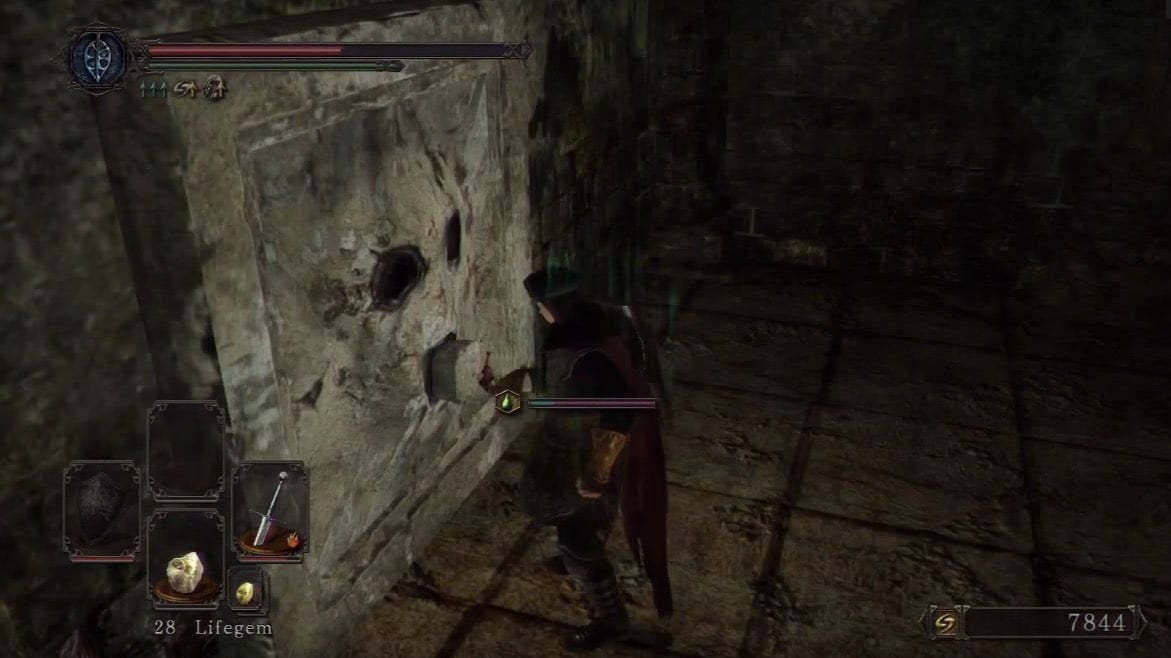
Now, you're back at the lower entry from the poison urn room in Harvest Valley. Venture down the ramp and run toward the body at the end of the toxic hallway. Halfway down take a right and enter the room holding 4 Poison Brumers. Killing them allows you to freely investigate the Pharros' Contraption to open a secret door behind you which holds a chest containing the Poisonbite Ring and Soul Of A Proud Knight. Return to the hallway and claim an Estus Flask Shard from the body to the right.
Slayer of the Covetous
With all that out of the way venture back to the fog gate. Head up the ramp and into the doorway on the left. If you have followed the guide so far there will be 2 Hammer Ogres in the big room full of poison jars. Either kill them or run to the ladder to the right and continue on through the door to reach the upper level once again. Return to the fog door to face the first of two bosses, of Earthen Peak.
BOSS FIGHT: Covetous Demon
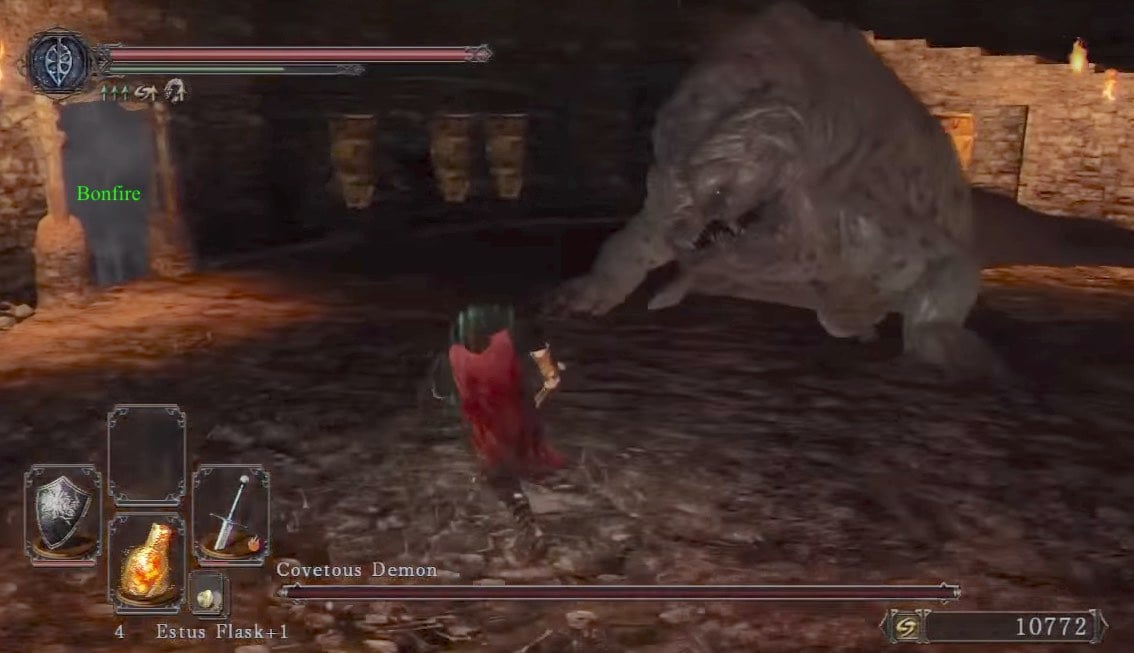
Quick Tip: In the boss room, look above for Urns hanging from the ceiling. They contain Undead, which when shot down, will cause Covetous to lunge at them. This distracts him for a good amount of time to give you free hits. (No one ever says this on their guides but breaking the pots only work with Iron Arrows/Heavy Bolts. Trying to shoot it with wooden ones will just break themselves.)
Lighting the Windmill
Shortly after the boss you'll find your first Bonfire of the area Lucatiel of Mirrah leaning against the wall. Upon speaking to her she will give you Ring of Steel Protection +1. Continue on and go up the stairs to the left. Two Manikins will engage you -there is a switch on the wall by the stairs that lifts/lowers the pot of poison in the room, like the second one below; be careful, as it can break. In the corner you'll find a Radiant Lifegem guarded by some poison pots. Through the door is a narrow walkway with a Spear-wielding Grave Warden at the end. Watch out to your right as there are archers that shoot poison arrows at you. Try to take them out from range before engaging/aggroing the Warden. The battle with him is tough on the walkway so lead him back to the room you came from. He keeps his shield up 90% of the time, so use guard break to stun him then lay into him; he's also susceptible to backstabs.
Move across the now clear path and through the doorway. The first door on the right leads to the walkway where the archers were standing. There is an item across the broken pathway, but don't try the jump. We will be reaching it another way much later. Instead, go back out and through the door past the hanging poison pot. To the right is a lever which raises the pot to the ceiling (significance ??).
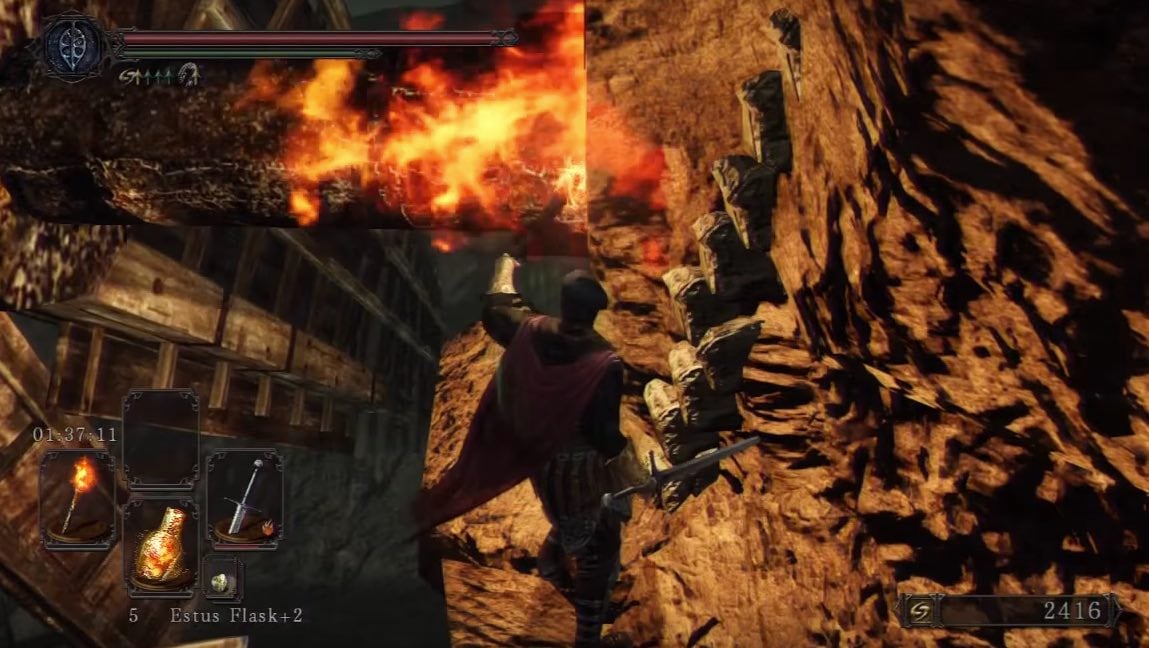
Head down the stairs to find yourself on a ledge with a chest containing a Pike, at the end on the left. Head back up to the room with the hanging poison contraption, and find ladder straight across the room. Climb up and dead ahead, you'll find another Masked Manikin standing by some stairs. There a a small ledge off the left side of wall leading up to the WINDMILL BLADES. Use your torch to light the windmill on fire as this will remove the poison water from the boss fight area!!! This is the one and only way to do this! Once that is done move up the small stairs and go through the fog door to find the second Bonfire.
The Laddersmith
Head back out and up the stairs to the left. Once again, heading upstairs will allow you to loot a corpse here for 3x Black Firebomb, a booby-trapped pressure plate, a Masked Manikin by a ladder, and a Manikin Mask in the corner. You'll also find a doorway, exit it and fight the Manikin. Destroy the wooden railing to gain access to an important ledge. On the right side, find a Simpleton's Spice, and on the left the NPC Laddersmith Gilligan.
Speak to him and he will offer to build you a ladder leading down for 2000 souls. After the cutscene, exhaust his dialogue to move him to Majula, and learn the "Prostration" Gesture. Head down the ladder provided by him and follow the ledge to a corpse holding a Pharros' Lockstone and Twinkling Titanite, then head back up the ladder and follow the ledge back to the area you came from.
Meetings with the Mild Mannered
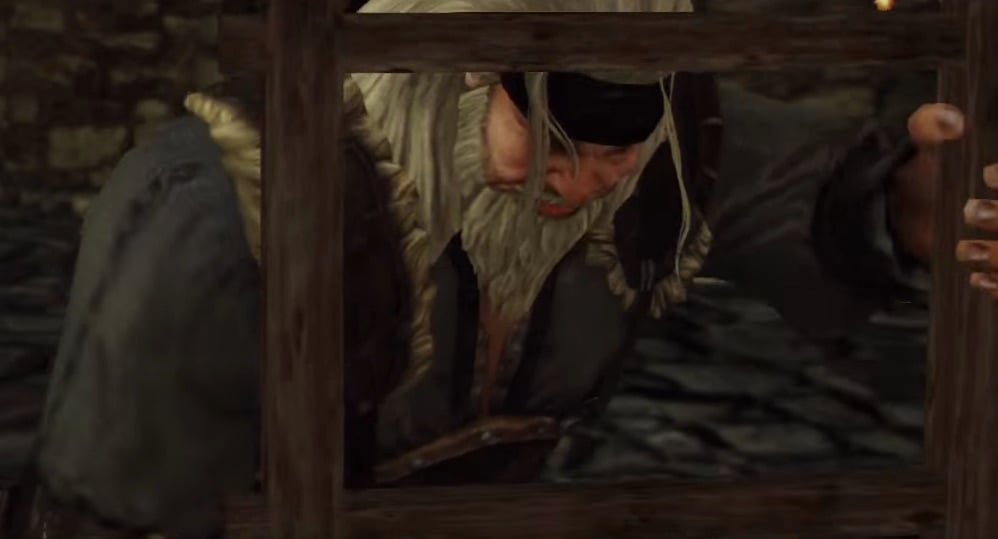
Back at the balcony go through the archway and you will notice the lever on the wall, this activates the lift ahead. However don't pull it yet. Continue on and you will reach the lift. Climb the small ladder leading to the platform to the left. there are Poison Jars on a slightly higher ledge and behind them are a few enemies. You can't reach this from here but you can get some ranged hits on the enemies if you want. Down the hallway is a Grave Warden; kill him then take the first door to the right in the hall. Down the stairs you'll encounter, for the second time if you interacted with him fully in the Forest of Fallen Giants, the NPC with the peculiarly-specific name, Mild Mannered Pate. He will give you Pate's Set, Pate's Sword, and the Ring of Thorns.
The door in this area doesn't open from this side so talk to him then head back upstairs. Continue past where the Warden was, and up the small stairs. There's a path to your right, but ignore it for now and go left up the large stairs and battle two Undead Pyromancers, one straight ahead, one behind some vases. There is a poisoned CHEST behind the poorly hidden Pyromancer on the left, which contains a Pharros' Lockstone.
An archer also awaits farther in the room. After clearing them out head back downstairs and go right into the hallway we skipped before. Take out the Pyromancer across from you with ranged attacks if you want. There's a break on the floor, and on the opposite side you can see a corpse which holds a Radiant Lifegem (NG+ divine blessing x3) and a chest containing a Soul Of A Brave Warrior and a Crimson Water, guarded by a Grave Warden. You can make the jump, but its a close one. Aim for the section of broken floor on the left. As soon as you approach the broken section, a Masked Manikin will jump down to attack you.The floor below the Pyromancer may also collapse.
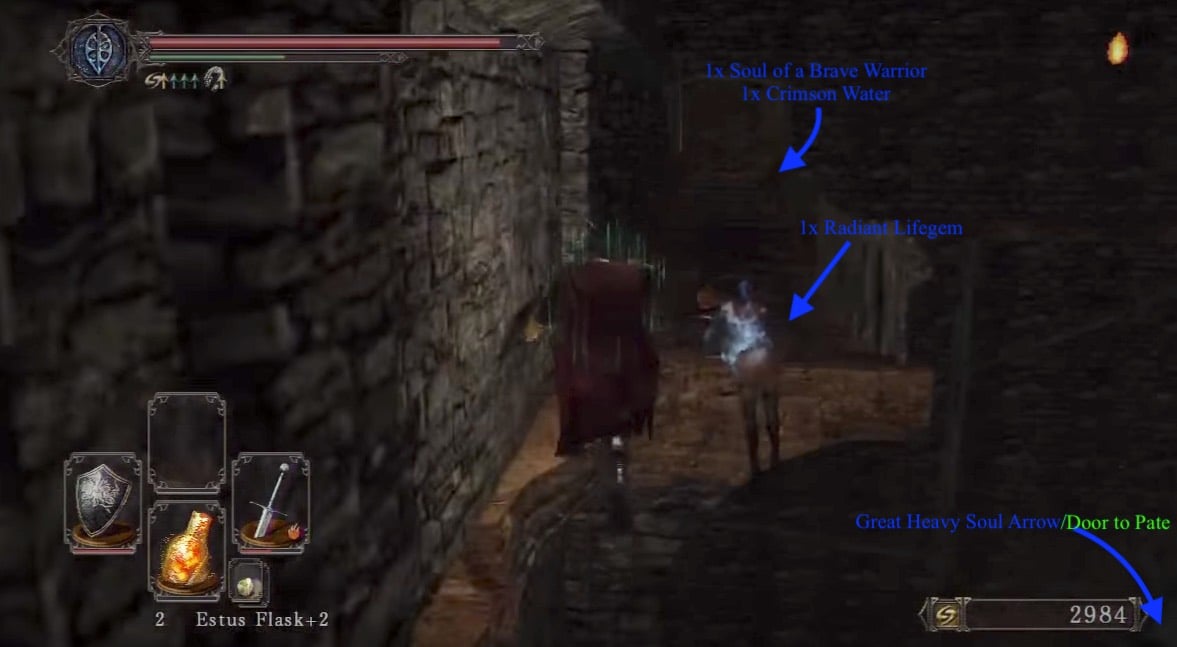
Jumping back over, break the fence on the left and drop down to the platform below. On this platform is the locked door leading to Pate's area but before opening it, turn around to see the corpse below. That is the broken archers walkway from earlier on. From here you can make the jump but first head into the small opening in the wall and turn right to find a chest ahead containing Great Heavy Soul Arrow. After looting the chest return to open Pate's door. From here (facing the door), drop down to the left and head underneath the structure to find a chest containing the Lightning Spear.
Tying up Loose Ends
Remember that lever on the wall of the archway ahead? Pull it to start the lift. Run to it quickly, as it will move without you. Follow it all the way up to an area with multiple poison jars. Behind them were the various enemies you had just cleared out before. There is a chest containing the Mirrah Shield here. By now you may have noticed the lift has descended. If so, jump back down. Pull the lever once again but this time, let the lift raise without being on it. You can find underneath the lift is a corpse holding a Soul Of A Proud Knight and a Divine Blessing. Make sure you grab them and return to the ladder for safety before the lift returns!
Climb up to the small platform once more, and make your way back to Pate. Head out the now-open door, drop to the lower platform again and make the jump (surest way is to angle yourself towards the item, that way you'll likely roll into the wall and not out of the platform) down to the corpse's walkway below to collect the Poison Broadsword and a Human Effigy. Use a Homeward bone or Darksign to return to a bonfire. Alternatively, you can make the jump to the nearby ledge. Its on your right facing away from the loot.

After returning to the second bonfire. Head up the stairs to the left once more only this time we are taking the ladder in the area. Head up the ladder and you will see a doorway on both left and right:
- Head right, into a thin corridor with an enemy on the other side of it, hitting you with ranged attacks. Be careful as two Masked Manikins will jump out of nowhere and attack you from behind. In the middle of the corridor, you'll find a Flame Butterfly. At the end of the corridor, you'll be attacked by an Undead Pyromancer, try to kill her with a ranged attack then drop down to fight another Masked Manikin. Kill him then break one of the poison vases, blocking your exit. Drop down to the lower level, and take the door here to find yourself on the opposite side of the gate the Masked Manikin closed earlier.
- Head left, to find three poison urns when you enter, break them from far away, approach the wall and press the "use" button on your controller to reveal a secret door. It will bring you to a balcony holding a corpse containing a Spell Quartz Ring +1. Turn around and head up the stairs, passing (or destroying from a safe distance) the multiple poison urns in this hallway. Ahead is an area that contains another two Pyromancers and a Grave Warden. To your left are two more Grave Wardens guarding a set of stairs which lead to the boss fog. Ignore them for now and go up the stairs in front of you. Up the stairs, to the right is an area with a few Poison Brumer amongst a bunch of Poison Jars. Using a long hit range weapon like a halberd or a spear could come in handy, in this area. In this room there is a corpse holding a Small Smooth & Silky Stone in the corner. As for the chest in this room, it's not a chest: is a Mimic. So attack it, or use a Lloyd's Talisman on it to wake it. It drops Dark Gauntlets and the Work Hook.
Also inside this room is a Pharro's Mechanism. Activating it causes it to spill out poison into a small pool in front of it, draining it from a hallway leading to the spinning blades. If you burned the windmill it instead becomes water that cures poison and gradually heals. Exit the room and go up the stairs in front of you. At the top of the stairs is the Crescent Sickle Phantom so use caution and defeat him. Past him is a balcony with many poison jars.
All Hail the Queen
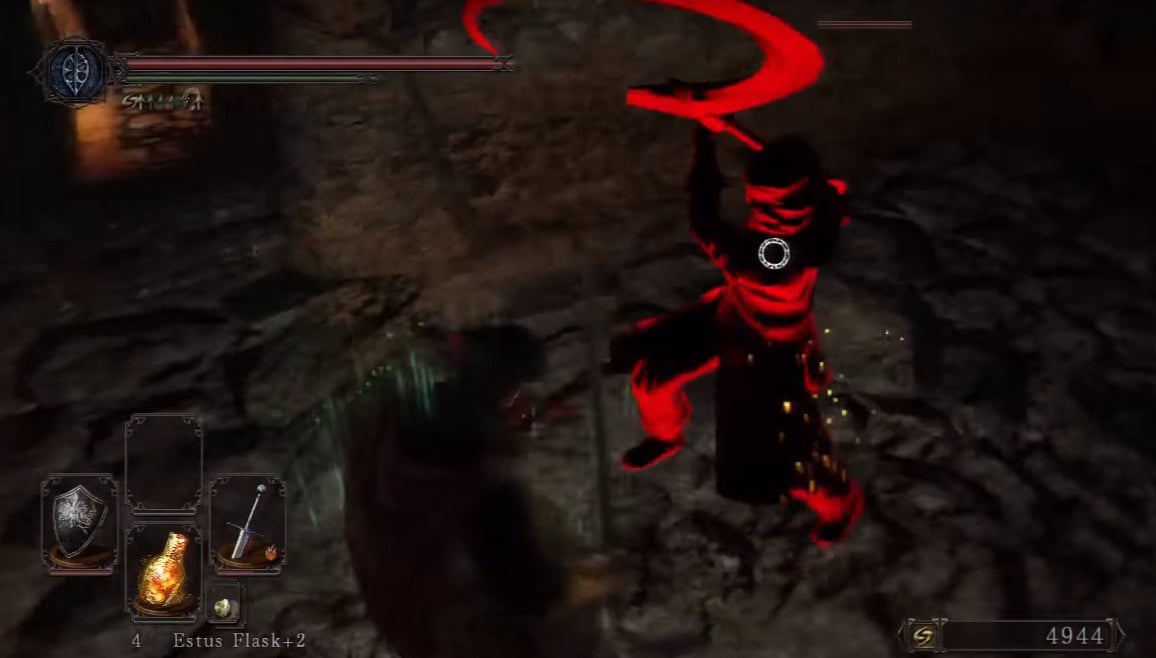
Head out and with your back to the jars, there are two illusory walls one to the right and one to the left of the archway. Press the "use" button to open them. The one on the left contains a Bonfire. The one on the right contains a chest holding a Petrified Something! Head all the way back downstairs and confront the final two Grave Wardens you'll have to deal with before the boss, guarding atop the set of stairs from earlier. On either side of the steps leading up to the boss, you'll find a Poison Stone. But on right, can also summon the NPC Jester Thomas for the boss fight. When you are ready approach the boss fog.
BOSS FIGHT: Mytha, The Baneful Queen
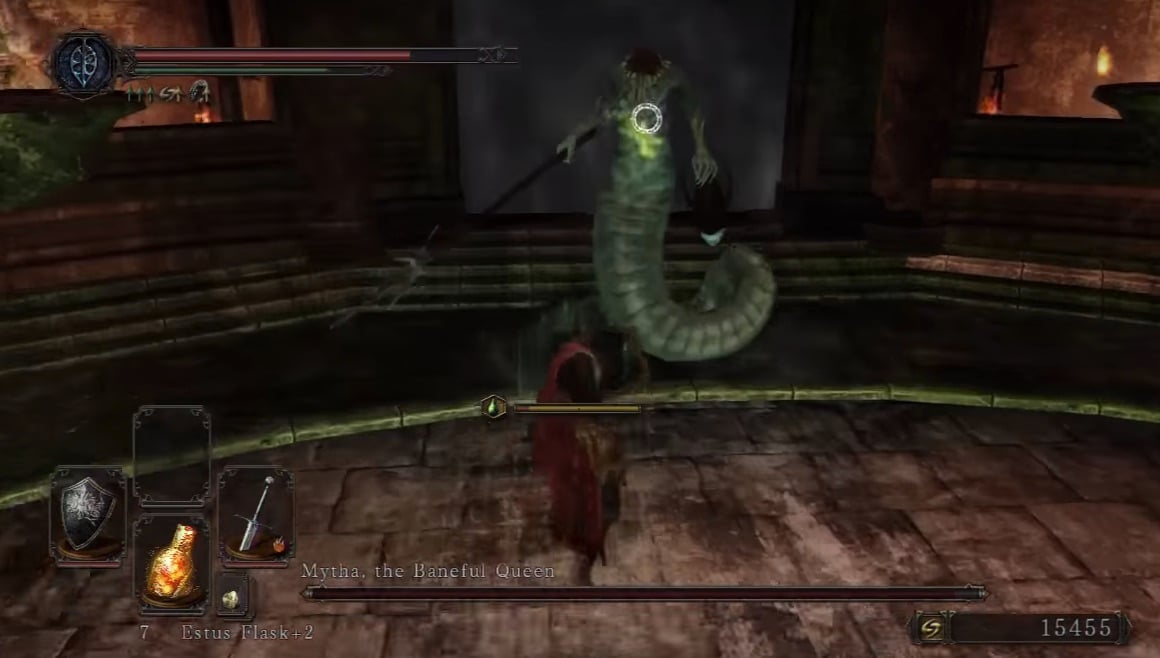
Killing her gets you a nice sum of 20,000 Souls and her Boss Soul. Head forward up the stairs and into the lift to enter Iron Keep.
How to Slay the Queen
- MAKE SURE YOU BURN THE WINDMILL BEFORE THIS BOSS AS THIS WILL RID THE FIGHTING AREA OF POISON!
- She has a few different attacks and is very quick; reminiscent of Medusa with the whole, snake-body / woman-torso thing. One attack she sometimes opens with is spiting a fan of souls arrow type projectiles out of her head. When she is up close and personal she jabs and swipes at you with her massive lance. She will throw her head as well and will explode with soul-like residue wherever it lands. Her other attacks are tail whips and swipes
- For you Mages this battle is a breeze. Stay far enough away to dodge he spear jabs and smash her with your spells. At range she seems to alternate between her spear and throwing her head / Soul arrow; all are easily dodged.
- For strength builds the fight requires a little more caution but still is pretty manageable. Using the same tactic as above, bait her spear jab and side step it. This animation leaves her wide open for a few hits. Don't get greedy though, if you stay close to her for too long she will attempt a devastating grab attack. (The grab can be easily dodge by constantly strafing left or right and leaves her very vulnerable.) Give her a few slaps then retreat to safety. If she throws her head, move away from it and rush in and attack when she goes to retrieve it.
- READ IF YOU EXPERIENCE POISON DRAINING GLITCH.
- Many people have been encountering a glitch where the poison does not drain from the boss fight area. So far there has not been a patch to fix this glitch and its making this boss fight near impossible for many. If this happens, there is still one area where you can be free of the poison. Try standing at the far end of the room in front of the fog gate. THE STONES DIRECTLY IN FRONT OF THE FOG GATE WILL KEEP YOU SAFE FROM POISON. Hope this helps anyone unfortunate enough to experience this glitch.
 Anonymous
For awhile I thought scarlet was pointing me to commit suicide off the ledge because of this level

 Anonymous
 Anonymous
Pro tip: Press attack during a jump to stick the landing. You WILL NOT roll after a plunging attack.

 Anonymous
"Return to the hallway we ignored before." Which one? This walkthrough is constantly ignoring hallways. You'd think with the terrors lurking around every corner that he'd be a bit more specific about these things. And yes, I did get blasted by fireballs, poisoned by urns and slashed to pieces by a nimble shadow all in the space of 3 seconds after going through the wrong hallway that we ignored before.

 Anonymous
 Anonymous
Confusing layout, poison everywhere, traps, annoying as hell enemies and obscure gimmick to make the boss fight not suck. What's not to love?

 Anonymous
"He will give you several items: his Spear, Shield, Armor set and the Ring of Thorns" He did not give me anything

 Anonymous
 Anonymous
 Anonymous
 Anonymous
 Anonymous
 Anonymous
How can you make a worse boobytrap area then Sen's fortress?

 Anonymous
So if i wanted the silver covetous ring I'd have to start a new game? Is it possible to access this through the ascension?

 Anonymous
This guide is very forgiving and thorough for reminding you to take a homeward bone with you to the broken archer walkway near the mild mannered pate section. Into the Mountain Dew I go :)

 Anonymous
devotee scarlett is so cool. she greets me with a gesture, then she shows me to the windmill i can burn. what a chad

 Anonymous
 Anonymous
and I in the end defeated myrtha with her poison piss, who knew that fire on windmill could pump that out

 Anonymous
Most fights up until now gave you 1 or 2 summons but this fight you actually get 3! why are the bosses so easy? I only really died to a trap leading to fall damage which gave me a good laugh, but the enemies aren't that bad.

 Anonymous
First mimic in the game and it stomped my booty.
Read that it was a mimic right after he ate my head.
 Anonymous
Wth happened with this? At the time of writing this the page is nonexistent? Is it on maintenance?

 Anonymous
I can't find that Estus Shard mentioned in the "Pharros' Contraption and Estus Flask Shard" section of this page. All I got was Repair Powder (x2). I'm playing SOTFS.

 Anonymous
Wait, you can avoid getting poisonned at this fight ? It's the most easy fight i've ever saw then ! Dunked on Queen's Head with poison on

 Anonymous
 Anonymous
 Anonymous
im so confused i thought there was a bunch of different areas you had to go through before iron keep. am i wrong?

 Anonymous
I thought an area couldn't get worse after Lost Izalith and Duke's Archives. I was wrong

 Anonymous
**** everyone who though this area was acceptable. They should be evicted from life

 Anonymous
Alternate boss strategy, summon all three npc after you cleared the area out and let them kill her for you.

 Anonymous
 Anonymous
Wow, I can't believe there is a way to get rid of the poison in the boss fight. How should you know? Since i played DS1 and DS3 before most of the boss fights until this point had been kind of easy but i needed a lot of trys for this one. Eventually i managed to get a fight down completly clean, always started to drink estus on mid health to not die from poison but it was really hard. You should have seen my face when i read this now :D

 Anonymous
 Anonymous
the Laddersmith part.....there's a Suspicious Shadow going to attack u at the end of the corridor not just a Undead pyromancer.....SotFS edition....

 Anonymous
There’s no words nor emoji that properly describe the look on my face when I got to the end of the toxic tunnel with no flasks remaining after the Cirque Du Solbull*****I endured to get to that point for the “Estus Shard” and “Repair Powder” popped up on my screen -_____-

 Anonymous
Iron Keep link has an additional + in it in General Information Next...

 Anonymous
In the arrow trapped chest near the two pyromancer and the Archer, the was a rubbish instead of a Pharros' Lockstone. Probably because I'm playing the SotFS version.

 Anonymous
ATTENTION SCHOLARS OF THE FIRST SIN PLAYERS. The estus flask shard IS NOT HERE.

 Anonymous
"lever on the wall on the archway ahead" Might as well not bother with giving any directions.

 Anonymous
Just curious, but how are you supposed to know that you can burn the windmill down (without using internet help)? I went looking for clues and exhausted all the local NPC's dialogues. I found no indications at all except Laddersmith Gilligan very vaguely talked about an old hag who'll get us all burned. I'm not even sure that was a clue. Did I miss something? Mytha is incredible hard without burning the windmill down compared to other bosses on her level.

 Anonymous
Oh my GOD this area sucked. It's a good thing you don't get too many souls on it because otherwise I would have flipped my gourd with the amount of sheer death on it. Manikins are incredibly deadly if their attacks do anything other than bounce against your shield, and the jumps (particularly the one onto the grate at the beginning) are absolute manure. Terrible level.

 Anonymous
The "Next: Iron Keep" link is defective. It links to which doesn't exist. I can't figure out how to edit this part of the wiki.

 Anonymous
In my game, there's not exist a Undead Huntsman in the room with a trap! (My game version is SOTFS for PS3)

 Anonymous
In SotFS there is no Estus Shard to be found in Earthen Peak near the lockstone room.

 Anonymous
IN SCHOLAR OF THE FIRST SIN:
LUCATIEL HAS BEEN MOVED TO THE POISONBITE RING LOCKSTONE ROOM!!!!!!!!!!!
 Anonymous
In 2nd bf when climbing the stairs (that one who leads to Mytha boss fight) instead going to left look to your right it'll be 3 poisonous jars, destroy them and there's Spell Quartz Ring +1 behind the illusory wall (you have to press the action button [X on Ps3] to reveal the wall)

 Anonymous
i never knew about burning the windmill on my first play through, so when i fought Mytha the room was still filled with poison. It eventually got done by holding out on the only spot in that arena high enough to not be covered in poison.. The stair(s) right in front of the exit side fog wall.

 Anonymous
Never ever sit at the first bonfire. The spawning placement is so ridiculously done, I lost all my souls and don't even know if I can actually get out. Seriously when you have the idea to turn a bonfire into a trap, take a chill pill.

 Anonymous
If you burn the windmill you can use the Pharos Mechanism to release healing water. You can use this to elimate enemies in the area such as those guarding the Baneful Queen boss room, and then retreating to this pool. Not only does it cure you of poison but it allows you to fully heal in under 5 seconds, and as a plus, you don't use up any Estus, Lifegems or other items, nor do you revive enemies as you would using a bonfire.


I experienced the poison draining glitch for the boss. Good thing I was stocked on healing items. Jester summon saved me. Without the summon I would have been doomed.
0
+10
-1