

Ruin Sentinel |
|
|---|---|
 |
|
| HP | 2,330 | 4,194 (NG+) |
| Weakness | Strike, Lightning, Poison, Toxic |
| Resistance | None |
| Immune | Bleed |
| Respawns | YES (Drangleic Castle) |
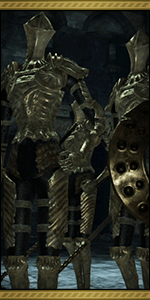
Ruin Sentinel is a Boss in Dark Souls 2 (DKS2). The Ruin Sentinel, towering and agile, wears a complete bronze armor that gives it a robotic aspect with its narrow helmet slit. Despite its considerable size, it moves swiftly, attacking the player with a range of moves, some known for their broad hitting range. Bosses are unique and challenging Enemies that drop Boss Souls capable of being transformed into powerful Weapons, Spells, and Items for the player.
Dark Souls 2 Ruin Sentinel Information
Ruin Sentinels are bosses and endgame enemies later encountered in Drangleic Castle in Dark Souls 2. Very tall and lithe, the Ruin Sentinel is armored from head to toe in what looks to be bronze. It has a narrow helmet slit, giving it a something of a robot-like appearance. These enemies are extremely fast for their size, and come at the player with a variety of attacks, many notable for their wide hit potential. There are three named Ruin Sentinels, Alessia, Ricce, and Yahim, who make up the the boss fight in the Lost Bastille: three Sentinels fought in a room: one on the platform near the entrance, and two below on the ground.
Ruin Sentinel Location in Dark Souls 2
- Area bosses of Lost Bastille. Accessed by the end of a hallway of a series of cell rooms.
- Common enemy in Drangleic Castle.
DS2 Ruin Sentinel Drops
- Ruin Sentinel Soul (boss only)
- Ruin Set armor pieces (rare, Drangleic Castle only)
Ruin Sentinel Souls Awarded in DS2
| Bonfire Intensity | Souls Awarded |
| 1 | 33,000 |
| 2 | 66,000 |
| 3 | 82,500 |
| 4 | 90,750 |
| 5 | 99,000 |
| 6 | 107,250 |
| 7 | 115,500 |
| 8 | 132,000 |
- No changes to souls awarded beyond Bonfire Intensity 8.
Ruin Sentinel Move Set
| Attack | Description | Countermeasures |
| Horizontal Swing | Grips their weapon with two hands and performs one clean horizontal swipe. This attack is telegraphed by the Sentinel bringing its weapon behind to its right (player's left) like a golf club, and has a moderate delay prior to swinging. | Can be avoided by retreating away, or dodged by rolling through towards the left, but deals heavy damage if it hits, and causes minor recoil even if successfully blocked, temporarily immobilizing the player. Has a moderate recovery time after execution. |
| Diagonal Swipes | Swings its weapon diagonally twice in a row, from left to right (player's perspective) and then in the reverse direction. Can be dodged by rolling through. | Has poor tracking beyond the first swipe, so dodging behind the Sentinel during the first swing will cause the second to miss entirely, giving the player an opportunity to inflict damage. Blocking with a greatshield will cause either swipe to deflect, staggering the Sentinel but allowing it to act almost immediately afterward, negating any recovery time. |
| Thrust & Swing | Brings the weapon back slightly, pointed forward, and then thrusts forward toward the player, followed by a step forward with a horizontal swipe left to right (player's perspective) after a short delay. | The thrust can be sidestepped to the right or rolled to avoid, and like the Double Swipe above has poor tracking so escaping the Sentinel's forward arc after the thrust and standing behind it will cause the follow-up to miss. Beware that as the Ruin Sentinel takes a step forward for the swipe, it has more range and can catch players who decide to retreat backwards to avoid the attack. |
| Overhead Slam | Telegraphed by the Sentinel gripping its weapon with both hands before it performs an overhead slam. | This attack has a narrow hitbox, however it has good tracking so rolling may be necessary, as walking or running to the side may not be fast enough to dodge the attack. Has a relatively long recovery time that can be taken advantage of. |
| Shield Toss | Performed only by the Ruin Sentinels in the Lost Bastille. When outside of attack range, the Sentinel throws its shield, causing it to fly vertically towards its target. | The shield can be dodged by rolling to the side, or deflected by rolling into it. The shield embeds itself in a wall behind its target, and the Sentinel does not retrieve it afterward, preventing it from blocking attacks anymore. |
| Spin | If the Sentinel is not within attack range of the player, they may crouch down slightly and bring their weapon out to their side, and then spin around counter-clockwise four times while traveling towards the player. | As the attack has a long travel distance, the best way to avoid this is to retreat far enough away or try to dodge to the side of its path. Blocking all of the damage instances is not recommended, as it can drain large amounts of stamina, leaving the player vulnerable to attacks by any other Sentinels. If the player is confident, the attack can also be dodged by dodging directly into the sentinel as it begins the first spin, then dodging out and past it immediately after. |
| Running Lunge | Performed only by the Ruin Sentinels in the Lost Bastille. If there is a fair amount of distance between the player and the Sentinel, they may run at the player and perform a two-handed thrust attack. | It is recommended to try to dodge to the side against this attack, as their forward momentum gives them very good reach which can catch players who try to back away. This attack deals a moderate amount of damage, but leaves the Sentinel vulnerable to follow-up. |
| Leaping Slam | Telegraphed by the Sentinel crouching down slightly and then performing a leap toward the player. | Can be dodged by running or rolling to the side, and has a long recovery time that allows players to freely inflict damage on the Sentinel. Be aware that this attack has two different timings: Instant and Delayed. If the Sentinel simply leaps up slightly, the player should dodge immediately. If the Sentinel leaves the player’s screen, then the player should count to two before dodging. Both attacks have a thin hitbox, so rolling forwards or sideways is recommended. |
Ruin Sentinel Strategies
GENERAL ADVICE
The Ruin Sentinels are extremely weak to both Blunt and Lightning damage. If you have any blunt weapon at your disposal (the Craftsman's Hammer from the chest under McDuff, for example, or the Mace from Blacksmith Leningrast), enchanting your weapon with Sunlight Weapon, infusing it with Lightning or simply using Gold Pine Resin will give you a lot of extra damage so you can dispatch them with ease.
You can parry all the Sentinel's attacks, but for the jump attacks and spin attack, they will not be stunned, and if you parry the jump attacks, there is NO SOUND, and for the spin attack, the Sentinel's next spins in the attack will not do any damage.
Despite being stated to be golems in lore, the Sentinels are easily poisonable in game.
The fight starts on a platform with one of the sentinels; the sentinel will immediately attack with an overhead attack, so rolling or running sideways (risky due to hitbox) is ideal to avoid the attack and punish the sentinel. Fighting him requires patience, and baiting his overhead smash is the safest method to dodge and punish--be wary of the camera and side way attacks. Then the second one will try to approach the platform; standing on the ledge will bait him into doing his jumping attack, and the player can back off to the wall behind to avoid it and punish it. It is highly suggested that players immediately capitalize on that and try to chip him before the other one attacks. After hitting the second sentinel twice, the player should jump off to avoid fighting them on the same ledge. The following part is the most challenging: fighting two at the same time. The key to fighting two opponents, generally, is staying in front of them and forcing them to not use dangerous long ranged attacks, and to make them attack and stay in recovery frames so that the player can punish them safely without getting hit, had the other one tried to attack the player while punishing the first opponents
Easiest Way: Just prior to the grey mist, there is a spirit to summon in one of the cells containing a skeleton, which makes this fight significantly easier, as she casts Greater Soul Arrow repeatedly. After your destroy the first one, jump down and have one person tank the second one while 2 people attack the third one. If you can use lightning spells/weapons/weapon enhancements, use them because they are weak to lightning. Or simply kite the remaining two around while the spirit chips away at them, as with enough room and warning, avoiding the sentinels attacks is straightforward.
Bellclaire does all the work: Safe Requirements: Enough STR to two-hand a 100% physical block shield (8 for Drangleic Shield), summoning Pilgrim Bellclaire. Equip the Drangleic Sheild (or a 100% physical block shield, Drangleic is just the easiest to obtain along the way), and two-hand it. Enter the boss fog, block the first Sentinels attack, and then sit in a corner while blocking (lowering your block in between attacks, to regain stamina). Bellclaire will do her thing and blast the first Sentinel until it's dead.When the next two sentinels come down, jump down as well and simply do the same thing: get their attention, sit in the corner with your shield up, block the hits, and lower guard between attacks. You should be able to guard everything they throw at you. If they stamina break you, they both probably just attacked and will take a bit to prep themselves, giving you time to regenerate all your stamina. Bellclaire will get in range and start doing her thing, taking both sentinels down.This has worked flawlessly on many characters, usually involving taking 0 damage (except for fall damage). I have tested this with a Large Leather Shield (90% phys dmg, 40 stability), and lost about 800 health in total during the fight, so it can be done with a lighter shield. Just watch your health and heal when safe (after first sentinel/falling, and after a second sentinel dies).
Notes:
- Their lunging air attack leaves them quite open, however, dodging them early the moment they jump is advisable.
- Use a fast weapon with small recovery e.g dagger, short sword, long sword, scimitar.
Greatshield Strategy
If you acquired the Tower Shield from Cathedral of Blue, a useful strategy for anyone with at least 15 STR is to 2-hand the shield and let the summonable NPC fight the Sentinels while you tank all of their hits. Since they only deal in physical attacks as long as you manage your stamina well you should be able to go the whole fight without taking damage as the shield has 100% physical block and high stability. If you lose aggro on any of the sentinels simply hit them with the shield until their focus turns to you.
Dark Hail Strategy
If you acquired Dark Hail, Dark Sunset Staff +5 and having at least 50 Intelligence and faith or above (both), it is possible to stagger within 3 blasts provided if all orbs hit the sentinel since each sentinel is counted as large enemies rather than huge bosses, Stone Ring and Abyss Seal may also help. however, it may only work at early NG to NG+2 (tested in Drangleic Castle encounter)
Craftsman's Hammer Strategy
The Craftsman's Hammer, which can be found in McDuff's area, is extremely effective against the ruin sentinels. Whether this is for all blunt weapons needs to be tested and confirmed. The use of this hammer and a 100% physical shield is dreadfully effective against the sentinels and allows for this to be a solo fight.
Drakewing Ultra Greatsword Strategy
Two handed strong attack executed from Drakewing Ultra Greatsword buffed with Dark Pine Resin can stagger Ruin Sentinels effortlessly.
Dual Malformed Skull Strategy
Powerstance strong attack executed with dual Raw Malformed Skulls can also stagger Ruin Sentinels effortlessly.
Video Strategies
Notes
- The Sentinels in Drangleic Castle have less attacks than the ones in the Lost Bastille.
- If the player is a member of the Company of Champions covenant, they cannot summon the NPC mage to aid them in the fight; the summon sign will simply not appear. Abandoning the covenant will allow the summon sign to appear. See Onlinepage for details.
- Any of the three have a chance to randomly switch targets before a long range leaping attack. New target does not have to be causing damage or aggro. Keep this in mind when healing. (Needs confirmation)
- There are 5 (4 on the first floor and 1 on the second, which is accessible from the room containing the ladder) illusory walls in the boss area, pressing X on PS3 or A on XBox 360 will reveal it: 1xTarget shield, 1x hush, 1x Rusted coin
- Another strategy is to enchant a fast weapon with poison and get in some hits until the poison sets in. Since they have low health individually, you can play the defensive until the poison does its work.
- This boss can be skipped if it's hard for newer players, but it is suggested that new players at least try to fight Ruin Sentinels before attempting this skip as they will encounter them again later. It requires defeating the Pursuer at Forest of Fallen Giants, Flexible Sentry at No Man's Wharf, and a Pharro's Lockstone. After defeating the Pursuer, take the bird's next to Lost Bastille. At Lost Bastille, take a left and follow the path until you obtain an Antiquated Key. Use the bonfire to travel to Lost Bastille's first bonfire. Head to the area where the two dogs are, passed the Heide Knight, and hit the planks on your right. Go through the locked door and follow this path until you come to an area with two chests. There will be a Pharro's Lockstone insertion on the wall right at the entrance on the right. Use it, hit the walls, and there should be an elevator (looks like a cage that you need to step inside) to reach to the top of Lost Bastille. This will send you to the area after the Ruin Sentinels fight. Make sure to get the Servant's Quarter's bonfire by heading downwards.
- Scholar of the First Sin: To encounter this boss, a Fragrant Branch of Yore is required.
 Anonymous
fully switching over to using lifgems rather then flasks for this fight helps greatly!
- Anonymous
- Anonymous
I flattened these guys on my first playthrough with a pure melee tanky shield character, so I really underestimated them on my second playthrough with a sorcerer. They handed me my hubris on a silver platter, took my lunch money, and stole my car.
- Anonymous
Hangi tasarımcının aklına tek odada birden fazla boss koymak geliyorsa onu karanlık bir odada 5 tane azgının yanına atacam
- Anonymous
these boys, shadows of yharnam and O&S are the only somewhat enjoyable gank fights From has ever made
- Anonymous
Bellclaire yı çağıramıyorum humanity im var kullandım ama summon işareti çıkmıyor neden???
- Anonymous
What a **** fight. How are you supposed to know you can summon help if you're worried about going through effigies at a fast rate?
- Anonymous
The mage was somewhat helpful, she died and there was still 2 of them while I did was blocking like it says here but in the end I had to kill them on my own.
- Anonymous
Yeah, I took both summons in with me and they both died with three sentinels remaining. Twice. The knight was garbage and the pilgrim just got ganked in a corner. Twice. I did most of the damage even though I was set up for them to take the hits. Great advice, once again.
- Anonymous
The real boss fight is the gank army you have to fight before reaching the gank squad boss
- Anonymous
Be warned, the ruin sentinels can destroy the wooden chests behind the illusory walls if they do their circle swing next to it.
- Anonymous
Upgrade your strike weapon few times and you will easily defeat them.
- Anonymous
This page is so disorganized. It says to do “A”, then when you go down the page, someone else say “A” may or may not work, so you should try “B”, but farther down someone says “B” needs tested. So what is it? Do they work for sure or not, and if it does, get rid of the parts saying it’s a theory
- Anonymous
This page says they are weak to poison, yet I hit one of them twice with poison mist and got them to stand in the cloud for the full duration both times and it did not get poisoned.
- Anonymous
While completely unnecessary it is very funny to flip the script on the Sentinels and come into the fight with 3 phantoms helping you. Yahim must be mad af when you do this.
- Anonymous
I got summoned from McDuffs warehouse, ran through the area with my host helping kill all the enemies between us and and the Sentinels, but when he crossed the fog wall to start the fight it said he entered a new area and sent me back to my world.
- Anonymous
- Anonymous
- Anonymous
I really dig one of the illusionary walls that leads you into a completely empty room after defeating Ruin Sentinels. Epic game design.
- Anonymous
Imagine tryharding them instead of just summoning twice and being a spellcaster.
- Anonymous
in the 2nd phase, one of them fell down and i did a plunge attack. I don't think i would get past this bossfight if this didn't hapapen.
- Anonymous
Literally the only enemy I know of in all of DS2 whose weapon you can’t get
eh, yo, its 2023 and this boss is still horse crap. level 60 and been at it for like an hour.
- Anonymous
- Anonymous
- Anonymous
- Anonymous
"summon in one of the cells containing a skeleton" I am playing SotFS and I found no skeleton.
- Anonymous
- Anonymous
- Anonymous
Some of their attacks are only used while in the lower level.
- Anonymous
- Anonymous
you can actually 3 vs 3 this figth, you can summon 2 fantoms; one is inside cell, the other one after left side corner (you need to kill some enemies if you are coming from shortcut ladder). one is tank the other one mage.
- Anonymous
- Anonymous
+5 Greatsword with 23 strength and if you put temp dark on it deals around 500dmg per hit.
- Anonymous
- Anonymous
Gave these guys no health, no moves, and no brain so they had to put three of them in a box so you don't accidentally blink and miss the fight
!YOU CAN DODGE THEIR SPIN!
I've added it to the page, but for the unaware, when they draw their weapon back, roll into their first spin, and immediately out behind them. The timing is a bit wonky at first, but I can consistently dodge their spin now.
- Anonymous
Ummmmm Is on one of them 'Yahim' a male and the other ruin sentinels are females cuzz I'm having some problems with the ruin sentinels genders appearing as three pairs of them
- Anonymous
- Anonymous
this boss should have been outside of drangleic castle guarding it. it wouid be alot more fun imo since you are more ready to 1v3 by that point
- Anonymous
fighting these as my third boss just so that i don't have to set foot in no man's wharf. worth it
- Anonymous
- Anonymous
Possibly the hardest boss in the game outside of Vendrick and maybe Darklurker, imo. But as a general magic user, pyromancy seems to bring him down fairly easily, in way that sorcery and hexes just don't.
Brilliant boss fight, one of my favourites but definitely a wall for newer players. They have easily accessible NPC summons very close to the boss if you wish to make it a little more even, on top of them giving you the chance to down one on the platform immediately when you enter, awesome design. Honestly reminds me of an easier Four Kings boss fight.
- Anonymous
Thos is by far my least favorite fight in the franchise. Such toxic garbage
- Anonymous
i made yahim suck my **** and made the other bow before me. i Rock.
- Anonymous
the easiest strategy by far is the redeye shield strategy. bellclaire can handle them just watch your stamina bar and its an easy w early on.
- Anonymous
- Anonymous
Endgame?! lol This is the third boss I killed. Playing blind and offline <3
- Anonymous
You know some major ficking BS. Just finished the boss battle. Couldn't find the bonfire. Walk down the hallway and get blasted by some flame thingy in the cell door. WTF all those souls. mudda bs.
- Anonymous
Who thought it would be a good idea to have nothing to break them up
- Anonymous
You know what? I don't think you're supposed to fight these guys the moment you get to lost Bastille. I'm kinda under the impression that you're meant to explore the other areas before continuing on with Bastille, I struggled a lot on my first playthrough but my second play through I came by after beating Dukes Dear Freja and it felt a lot better to fight. if you're stuck try doing some other areas first, and upgrading a weapon you like.
- Anonymous
I was lucky in my first fight. I used the Craftsman's Hammer with a Greatshield and also summoned Bellclaire. First I landed on a platform with Yahim on it. Bellclaire somehow got pushed down and have to fight that one Sentinel on the ground floor while the other one seems to be waiting on another platform. I successfully defeated Yahim and jumped down to assist Bellclaire and then the other Sentinel also jumped down. Somehow both Allesia and Ricce are aggresive only to Bellclaired and gangbanged her to death so I'm left alone. To make it worse, I realized they can shield themselves. But less than a minute after that, for some reason Allesia through the shield at me leaving itself without any extra defense equipment; this makes me it easier to defeat Allesia first, and then Ricce later on
- Anonymous
As a sorcerer, I killed the first one on the platform by using a spell after each dodge, then when the 2nd one jumps down, you nuke it until he's close enough. Then you stay on the edges of the small platform to make him fall down. I made them fall down 1 by 1 and handled them on the platform that's how i killed them. But man It was a pain in the ass I died like 20 times before I mastered that strategy lmao.
- Anonymous
- Anonymous
i thought i could farm the drangleic ones in ng+ since they respawned in ng...
- Anonymous
Tried craftsman hammer after coming here and got ‘em first try.
- Anonymous
- Anonymous
'the craftsman's hammer and a 100% physical shield is dreadfully effective'
that is one good wiki entry there
- Anonymous
I had one of the Sentinels at Drangleic Castle drop a Titanite Slab while farming the Ruin Set. (DS2, V1, PS3)
- Anonymous
- Anonymous
- Anonymous
- Anonymous
Me, Bellclaire and Felicia took these*****heads down. #bad*****esonly
- Anonymous
I saw the Weaknesses/Resistances and decided to test a couple out. (25 Faith, 25 Int) Using Lightning Spear with Priest's Chime +10 I got 395 Using Dark Orb with Sunset Staff +5 I got 375 I tried to use weapons with similar scaling in their respective categories of lightning and dark. I don't know why "Dark Mist" is a Resistance or what it is, I assume someone messed up, but it does near the same as lightning here. I'd say remove that from resistance, but idk about adding Dark to Weakness.
- Anonymous
Just killed these three *****es. "Bellclaire does all the work" it's a bit of a strong statement: you'll have to slap their metal asses by yourself in the end, since she will die sooner or later. When that happens, take your time and exploit the openings when they exhaust their attacks. My weakling mage did it, so your char will succeed too, with a little patience. Ah, and don't let them corner you! Stay "away from the ropes" and take gallantly the center of the "ring". Will be a piece of*****)cake.
- Anonymous
Back in the day this was the first fight that made me say ***** it and used a summon for help
- Anonymous
The room before the boss with a hundred royal swordsmen is just the icing on the cake
- Anonymous
I learned you could parry them and that made it a thousand times easier just remember to use buckler to make it easier
- Anonymous
- Anonymous
they are bad sentinels...they attack as 3, this is not honorable....Argh
- Anonymous
What does it mean?Scholar of the First Sin: To encounter this boss, a Fragrant Branch of Yore is required.There is no such requirement.
- Anonymous
They are not weak to magic. I was using a magic mace and it did no more damage than usual.
- Anonymous
Souls player: Dark Souls II is so much easier than Dark Souls and demons Souls. Ruin Sentinels: Allow is to introduce ourselves.
- Anonymous
This boss almost requires you to have a great shield imo. Beat him with a +4 broadsword and the twin dragon gs after some serious leveling.
- Anonymous
These things can go ***** themselves on NG+, especially when I’m using a dual great-sword build. *****ing gonna have to go back to the rapier... and Havel’s shield.
- Anonymous
Unleveled Craftsman's Hammer was a game-changer over my +5 OKGreatsword. Great tip!
- Anonymous
Just beat this boss, and boy did I hate it. First time I've been actually frustrated in a Souls game since the Lost Izalith.
- Anonymous
- Anonymous
The runup to this boss is pure bull*****Having to deal with five billion swordsmen is never fun. Grinding them down does make for a great farming route, moreso if linking it with Yummy Mummy Central on the way to Lost Sinner, but it's awful nonetheless. The fight itself is also janky as hell for the first Guardian who has a tendency to keep falling from its platform, but it's rificulously easy to facetank and punish. Second phase is tense and methodical, but it boils down to the same waiting game trying to fish for openings that led you to the room in the first place. Terrible encounter design, if not too hard.
- Anonymous
Greatshield Strategy that worked for me like a charm in vanilla seems not working anymore. 16 str 10end. Each hit takes about 1/3 oh my HP and leaves stamina intact. By some reason game thinks I don't have a shield or mechanical ***** hits me through the shield
- Anonymous
What bonfire do I go and use the ascetic to refight this boss?
- Anonymous
- Anonymous
- Anonymous
this boss looks easy its just bait the smash attack doge roll then attack rince and repeat.
- Anonymous
It's not a big deal but fyi the npc mage summon (Pilgrim Bellclaire) is a girl, not a guy. In one part of the Strategies section they refer to her as a guy. You know one thing I don't understand about her? She's only ever used sorcery all the times I've summoned her but she carries a chime in her left hand iirc. Also she's a pilgrim which does hint at her knowing miracles/being a cleric as well as a sorcerer. Yet she doesn't heal herself at all. Why give her a chime if she will never use miracles? That being said if you know some healing miracles it's worth it to try and heal her because she knows great soul arrow and even soul spear which wrecks the ruin sentinels.
- Anonymous
Absolute easy way to fight these enemies: WATCH THEIR LEGS. Anytime they attack when their legs are generally straight afterwards: BLOCK or roll away. If their legs are bent in any kind of way: HEAVY ATTACK. That is the visual cue for the attack window. If their knees ever touch the ground, you can get in TWO heavy attacks and still have a short window to recover your stamina to block whatever they throw at you next. After discovering this: these guys are not a threat whatsoever for any kind of melee character with a decent shield. Armor is irrelevant. For weapons: any blunt "strike" weapon with maybe some lightning infusion eats their health away pretty well.
They might post a challenge in the boss fight, but you can farm these guys for their armor set and souls EXTREMELY easy in Drangleic Castle...just watch their legs and manage your stamina.
- Anonymous
fighting them pretty early (3rd boss) and they certainly pose quite a challenge. still, i haven't raged yet because this boss fight is just so much fun for some reason lol. wish they had a more distinct design though
- Anonymous
I agree, this boss is (these bosses are) a major difficulty spike in the game. As most people are used to just one boss, but then they throw 3 at you, 3 bosses incredibly resistant to slash weapons. And yes, the first Sentinel DOES attack you almost instantly after the patch. Also the website needs to specify that certain aspects from the SotFS are NOT on the legacy consoles. (Xbox 360 and PS3). LIKE: Requiring the Fragment Branch of Yore, or the Aurus set in the gutter, as the Heide Knight does not spawn
- Anonymous
these bosses are absolutely broken, even with the latest update the one on the first floor hits me within 0.01 seconds of landing without the possibility of fighting back, when i do, however manage to dodge 1/10 tries, its hitbox is so broken that it oneshots me. i beat this piece of***** of a game on the 360, and buying the scholar edition was one of my biggest waste of money ever. no summon signs from anyone in this "community" and the ones that do answer my plea are 500 million too far away for me to summon and everyone tells me to "git gud", if that ain't bullshit, i don't know what is
Here is a good way to win if you r a human and summon both bellclaire and Felecia then it will make the boss a hell of a lot easier since to is basically a 3v3
I know this a weird question and I do not know If this works let's say you have the craftsman hammer and infused it with a boltstone then put some magic ooz on it will it have both lighting damage and magic damage to
- Anonymous
They are *****ing me over, I can't seem to beat their asses. Is it normal that they are my fourth boss fight?
- Anonymous
- Anonymous
You can block most, if not all of their attacks but it is best to roll in the last attacks of the sequences or in the leaps. Easier: kill the first on the platform before jumping, others do not go into combat until you get off or the first one dies.


Fight was fairly easy once i understood fighting the first one without jumping down makes the fight 1v1 then 1v2 as opposed to panic jumping down and making it 1v3
0
+10
-1