Aldia's Keep
 Aldia's Keep is a Location in Dark Souls 2. It is a castle ruin with ample grounds. Here you will find several interesting enemies and lore hints, as well as an important imprisoned NPC who grants a quest.
General Information
- Previous: Undead Crypt through Shaded Woods
- Next: Dragon Aerie
- Recommended Levels: 100 to 110
- Boss: Guardian Dragon
- Bonfires: Foregarden, Ritual Site
Aldia's Keep Map
NPCs in Aldia's Keep
Items
Consumables- Soul of a Nameless Soldier
- Petrified Dragon Bone x3
- Poison Throwing Knife x15
- Alluring Skull x3
- Fire Seed
- Radiant Lifegem x2
- Twilight Herb
- Fading Soul
- Crimson Water
- Bonfire Ascetic x3
- Great Magic Barrier
- Pharros' Lockstone
- Large Soul of a Nameless Soldier
- Corrosive Urn
- Aldia Key
- Soul Geyser
- Soul of a Proud Knight
- Large Soul of a Brave Warrior
- Malformed Shell
- Malformed Skull
- Wilted Dusk Herb x2
- Elizabeth Mushroom x2
Enemies
- Prowler Hound (Petrification)
- Ogre
- Basilisk
- Great Basilisk
- Dragon Acolyte
- Poison Brumer
- Mirror Spirits
Boss
NPC Summons
- Aslatiel of Mirrah (Brother of Lucatiel, Dark Spirit the one she recounts as "lost" to this land, not her herself.)
- Painting Guardian (NG+ only)
- Forlorn
Notes
- Dragon Acolytes can be farmed for Petrified Dragon Bones. NG and NG+ both have good drop rate.
Aldia's Keep Walkthrough
From the Gates
As you enter through the Shaded Woods doors, by wearing the King's Ring you acquired in the Undead Crypt, on left, near a tree, is a corpse with Soul of a Nameless Soldier and Petrified Dragon Bone. In a corner to the right of the stairs that lead further into the are, there is a corpse with Fire Seed. There is a roaming pack of Prowler Hounds in the tall grass that inflict bleed and petrification. Another corpse, closer to the middle of the tall grass has 10x Poison Throwing Knife, with a corpse visible a few feet away holding 3x Alluring Skull . If you follow the bridge to the left you come across a Mimic that contains a Malformed Skull and Dark Mask.
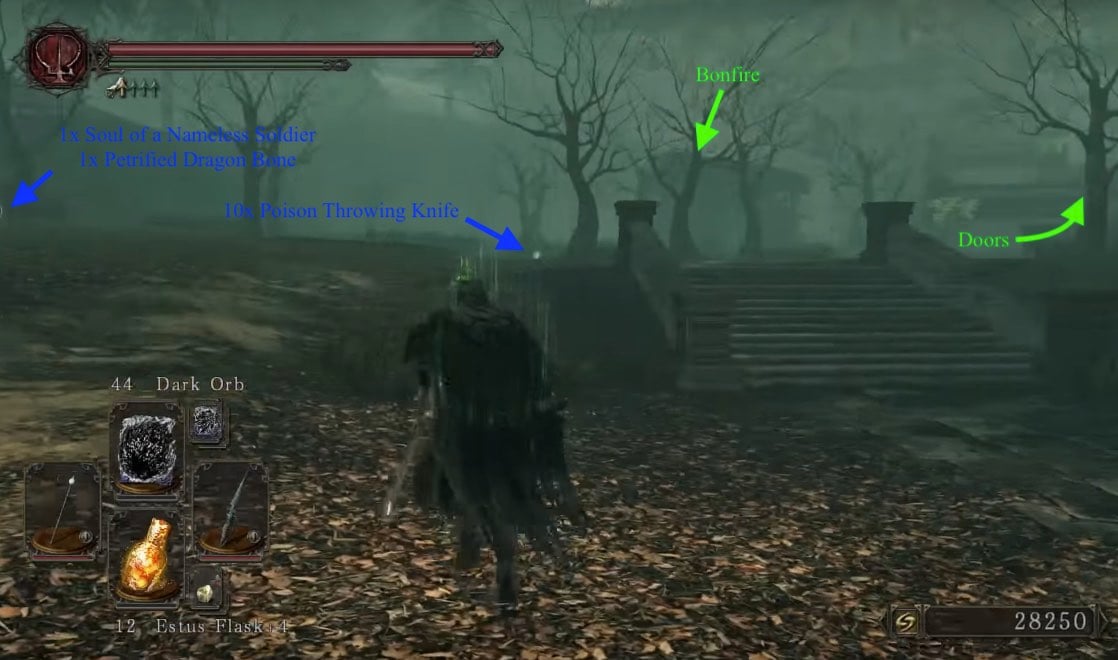
In a little wooden hut nearby, is the Foregarden bonfire. You may meet Lucatiel of Mirrah here, if you kept her alive during three earlier boss fights, she will reward you with her sword and armor: Mirrah Greatsword, Lucatiel's Set.
Brother from another Mirrah
Go up the stairs and drop into the fountain to loot a corpse with a Radiant Lifegem. Continue up the stairs and go the left corner of the building’s doorway. Loot the corpse with Twilight Herb x1. Walk through the building triggers the invasion of the black phantom, Aslatiel of Mirrah.
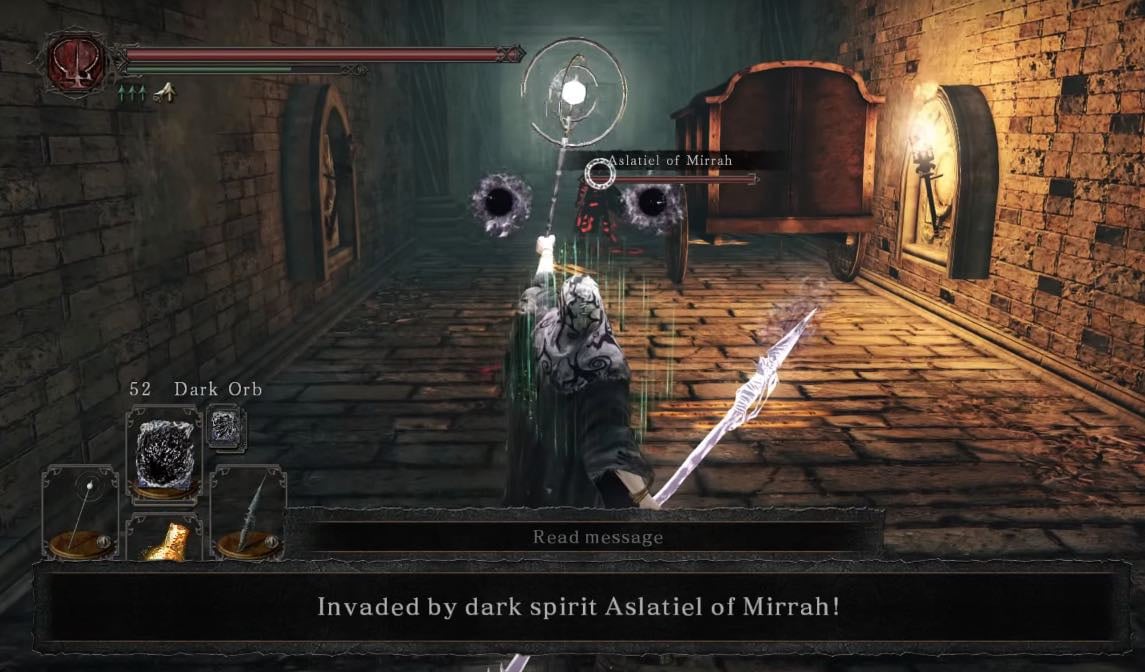
After defeating him, the moving carriage next to you holds a Basilisk. You can lure an Ogre (found in the next room) over to break it, and it does not reset until NG+, or until you have burnt a Bonfire Ascetic. Although, this is not recommended, as invaders can use this to annoy the host -or if that works in your favour, go for it.
Dead Undead Dragon Hall
Upon entering you are greeted by an impressive and imposing dragon’s skeleton, that doesn't not attack the player unless all four sconces in the area are lit; lighting each sconce summons the Forlorn invader (Note: these does NOT count as an invasion and do not count towards unlocking the Forlorn Set or Weapons for Straid. They are compareable to the Insolent Spirits). We will come across the necessary sconces while exploring the area, so for now, loot the corpse right in front of the dragon skeleton for a Fading Soul. After the player lights all four sconces, and returns to the Skeleton Dragon, it will lunge forward. Run out of the room as soon as you see him move, and after his head lunge, he will die and drop Aldia's Key.
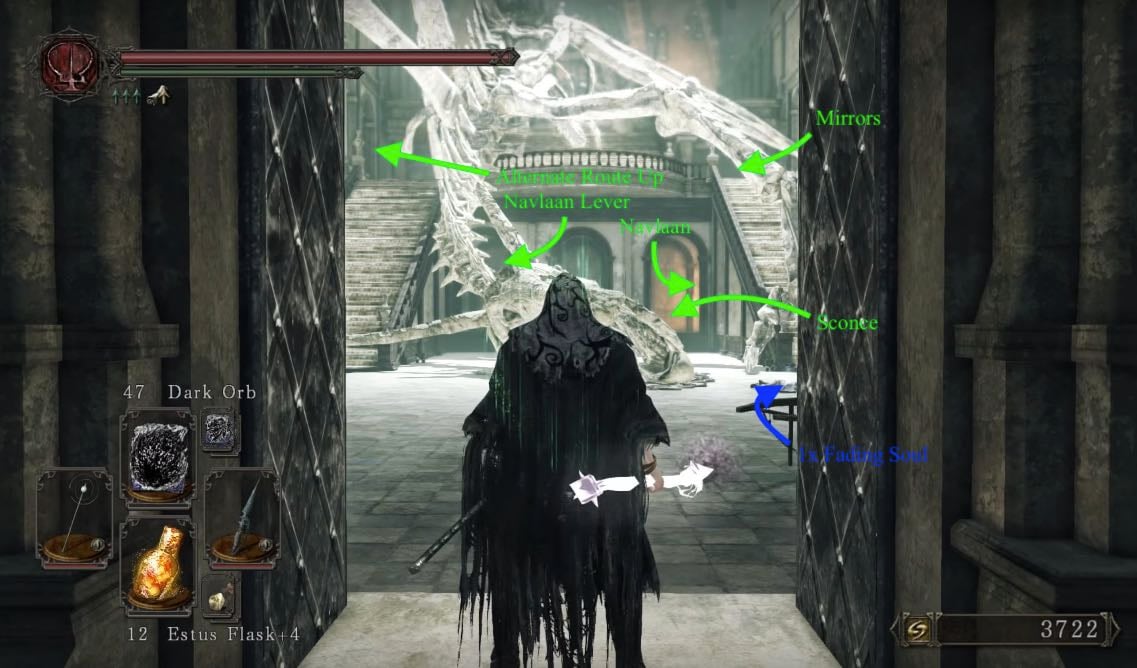
Walk straight ahead past the skeleton's skull will lead us to the first sconce and further down to a branching path. Following the way to the right, we will end up at a magical barrier, behind which you will find Royal Sorcerer Navlaan. If you talk to him while being human, he will seem to be frightened by something and tell you to leave him alone, as nothing good will come from spending time with him. If you are hollow instead, he will show his other personality, that of being an assassin (and the reason why he locked himself in here). If you want to do his side quest, do NOT free him, more details about his questiline can be found on his wiki page. If you still want to free him, you will find the lever on the left of the 3 archways, the way being filled with messages to back of and to not pull the lever. Beware though, that freeing him will cause his assassin-self to invade you in different places. He also acts as an merchant, either by releasing him (only a merchant while in human form) or by completing his questline (only a merchant while hollowed).
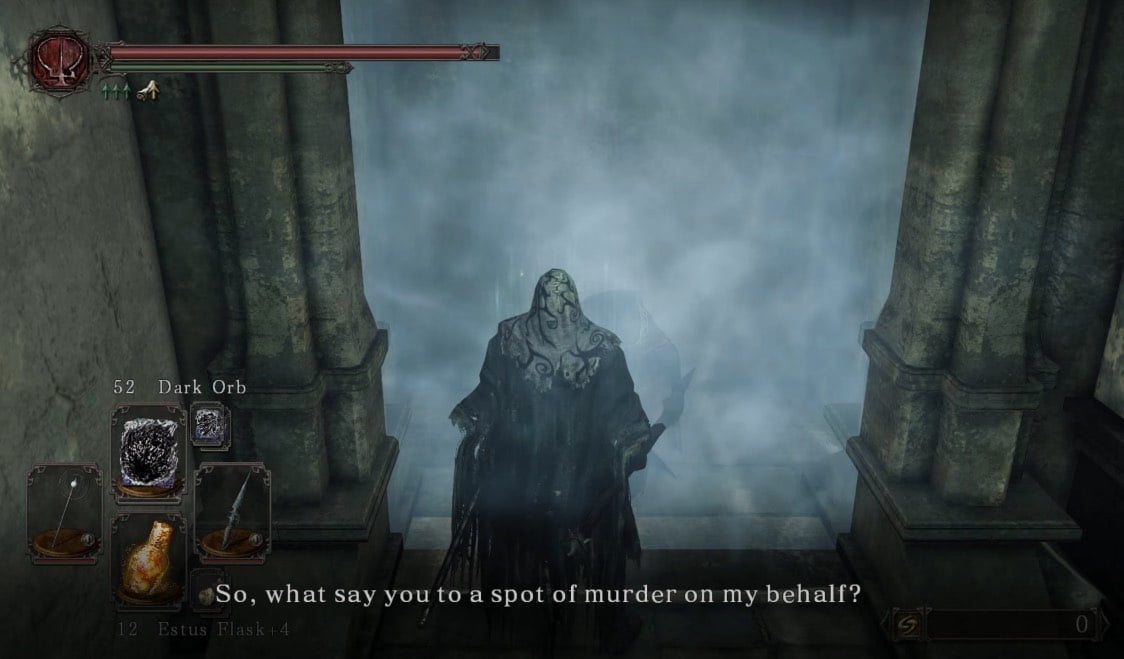
Mirror, Mirror...Mirror
After talking with our friend with the split personality, go up the stairs then head right, ignoring the stairs to your left momentarily. Once you enter this area with the mirrors ahead, do a U-turn to your right and you will first encounter a Red Crystal Lizard, and a chest containing the Great Magic Barrier, at the end. Go back down the hallway and you walk into a room of mirrors. Three of which will break and release a Looking Glass Varlet each, out of the mirrors. One of the mirrors in the middle contain a body holding a Large Soul of a Brave Warrior. A corpse in this room holds a Northern Ritual Ring +2 and a Petrified Dragon Bone. The chest in this area contains a Brightbug. On the left of the room, near to the dragon skeleton, there will also be the summon sign for Sellsword Luet.
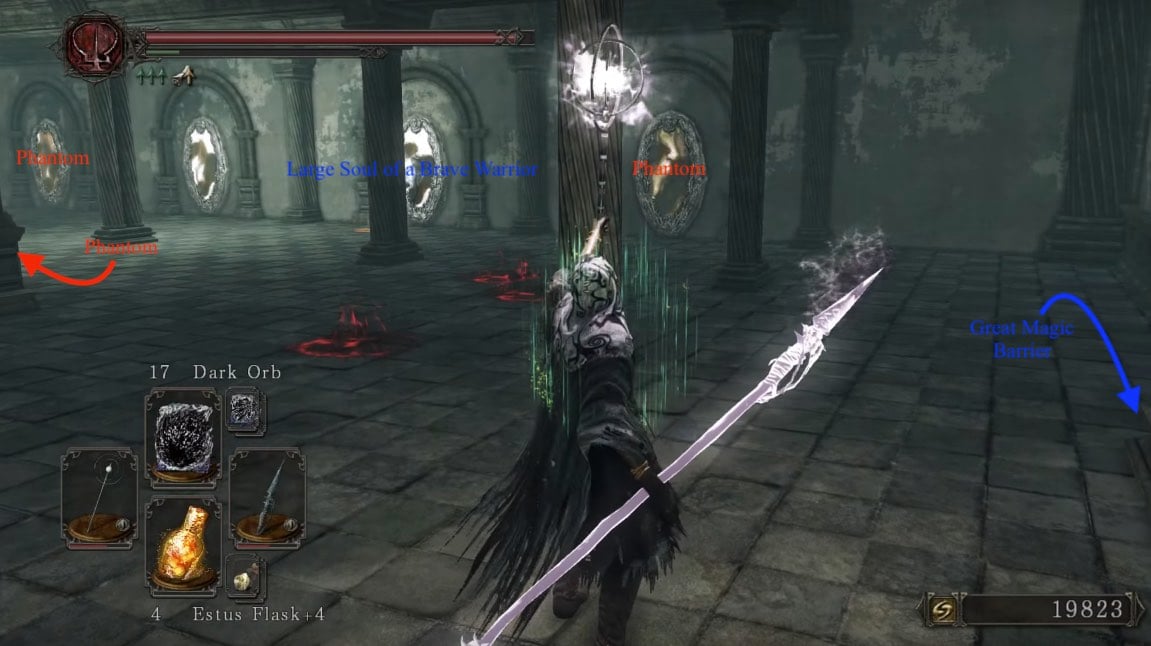
Free the Beasts
Return to the stairs we ignored earlier and head up them to find a petrified Ogre, who you can revive it with a Fragrant Branch of Yore. You can lure him to the carriages to break them, releasing the Basilisks inside. After you have finished taking your Ogre for a walk, you can kill him to make him drop a Dragon Acolyte Mask. Beware though, that this Ogre does not respawn. Take the next flight of stairs up to find yourself in the next section with the caged (and respawning) Giant Basilisk.
Alternatively, you can safe yourself the Fragrant Branch of Yore and take the staircase to the left instead. You will end up at the same section with the caged Great Basilisk, surrounded by petrified people. Attacking it makes it aggro and possibly destroy the cage. To alleviate the risk, take care of it with range from a distance. A corpse in front of where it’s cage was holds a Crimson Water. Head to the right side of cage to find a hallway that leads to an iron chest with 2x Bonfire Ascetic as well as another sconce on the way to the chest. Return to where the cage of the Basilisk, and walk through into the next room.
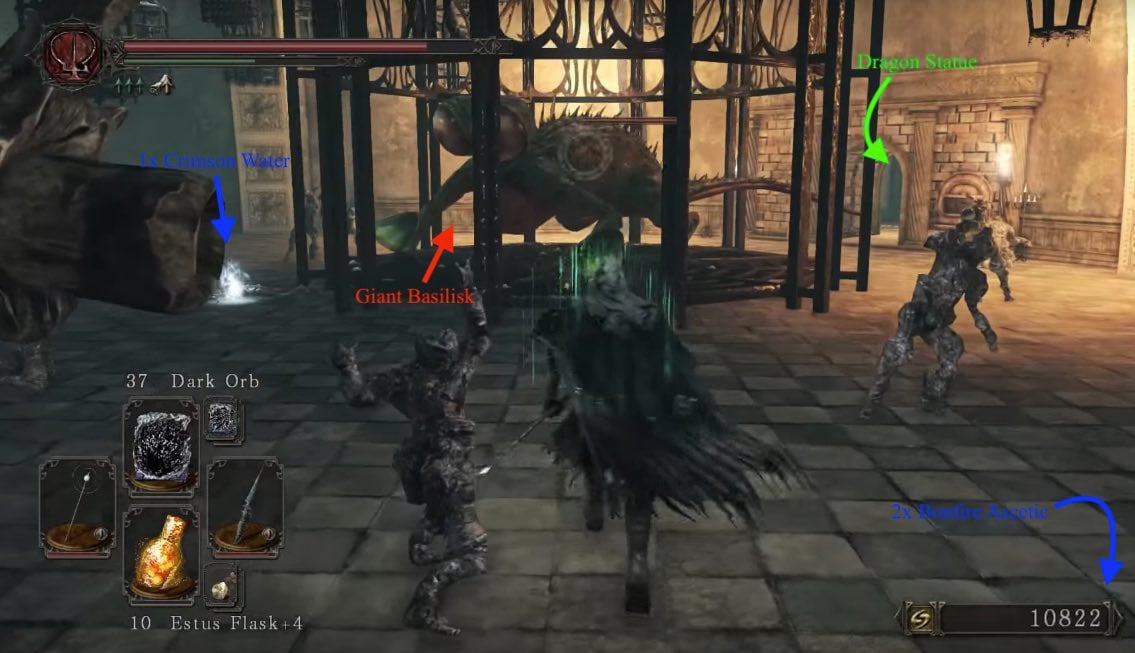
First a Skeleton, Now a Statue
A statue of a dragon greets you in the center of the room and behind it a shut door. Pull the lever dangling from its mouth to open the door into the next room. This also shuts the door you came in through so if you need to return back through, pull the lever again. In the next room there is a Pharros contraption wall and a corpse under a table, with a Radiant Lifegem. Using the Pharros Lockstone here greatly illuminates the area, giving you better visibility for the ambush ahead. Having the hallway illuminated also lets you take a better looked on the different enemies trapped in the cages above you.
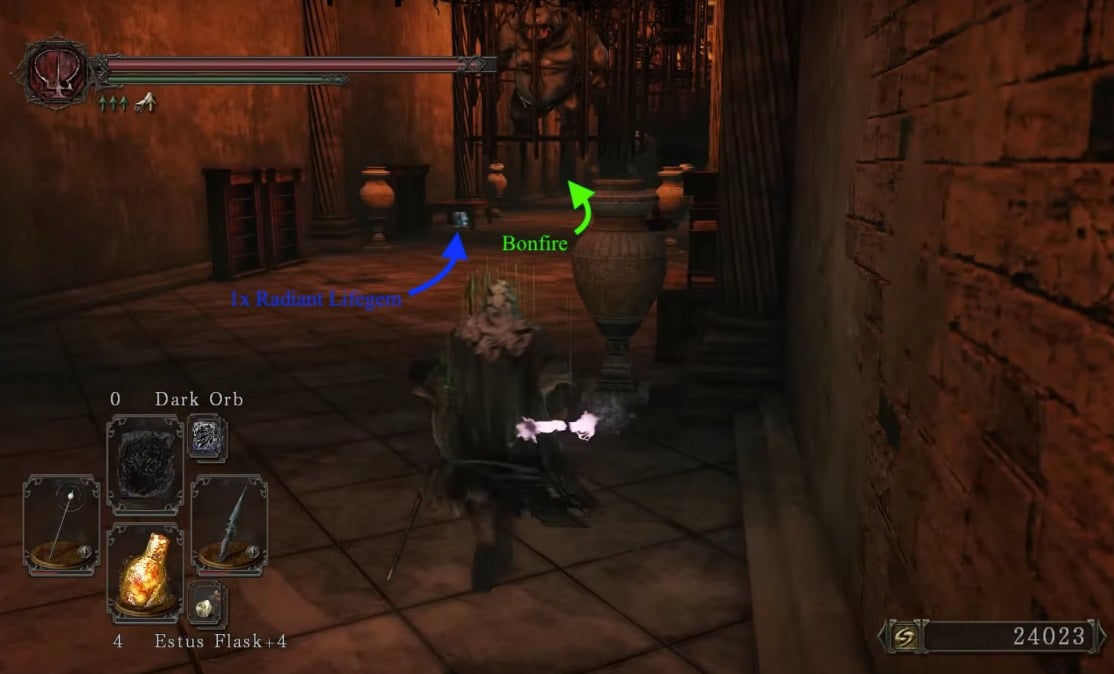
Shrek 3
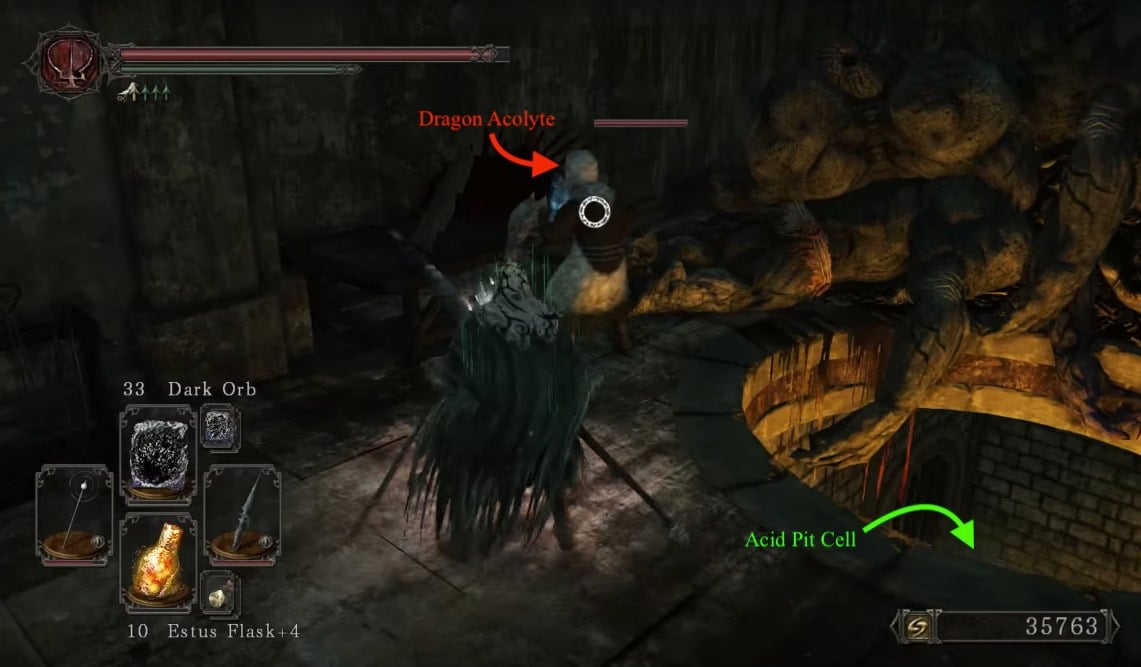
At the end of this hallway, an Ogre trapped in a suspended cage can be seen. You can walk past most caged enemies in this area. There are two Dragon Acolyte lurking behind the paintings, the paintings can be shot down with arrows, making the Acolytes come out of their hiding spots. Near the second Acolyte, there is a corpse under a table, which you can pick up to receive a Radiant Lifegem. The door on the left close by will lead to laboratory.
Destroying the bookcases on the right after entering the room will reveal a Pharros' Lockstone. At the middle of going down the stairs, there is an illusory wall to the left, revealing the Ritual Site Bonfire. Going all the way down lets us reach the third brazier and an acid pool with 2 Swollen Mongrel. After taking care of them, don't forget to unequip all items, then dive in to have a little acid bath (as a refresher, acid does not hurt you, but does great damage to any equipment you wear). Inside the pool ,you will find (from left to right): a Large Soul of a Nameless Soldier and 4xCorrosive Urn; 2x Divine Blessing; and Soul Geyser and a Petrified Dragon Bone. After taking all the items, remember to reequip everything and head back to the hallway.
Continuing to the left, we will come across a locked door on the right side. This locked door can be opened later with the key we get from the Dragon Skeleton once all 4 braziers are lit. Further down the hallway there is a caged Ogre blocking the way, it is recommended to take care of him now, since another Ogre will breach through the big iron door behind him and has the potential to free his Ogre friend. On the left there are 3 petrified corpses, the final brazier, as well as a pair of big, locked iron doors. These can be smashed open by one of the Ogres, so lure one here and let him open the door for you Obelix' style (any comparison with Obelix and an Ogre not intended). Behind the now opened gates lies a chest containing a Malformed Shell. Further down the hall, the door on the left opens to a little butcher room with another Acolyte. The hole in this room leads back into the acid pool form before.
Journey to the Dragon Boss
Going through the doors the Ogre breached from leads to a room with another closed door on the right (leading to the same room as the door before) and an iron door in the front. Going through these iron doors, we are entering a less illuminated room with an item to the right and another door in front of us. Trying to get closer to the door or item will make another Ogre breach through said doors. After taking care of him, take the Simpleton's Spice and Twilight Herb from the corpse. Through the hole the Ogre made, we can already reach the Fog Gate to the boss, but lets take a little detour first.
Since we lit up all the sconces now, head back to Dragon Skeleton. Be wary though, it will try to attack you, after the one attack though, it will crumble and leave the Aldia's Key behind. With this key, we can now open the two locked doors in the hallway.
This room has four Dragon Acolytes, a caged Gargoyle, three chests (which are all Mimics) and an Aldia Warlock, and a lever that allows you to drop all the hanging cages from the hall before. After taking care of the Acolytes and the Warlock, take the Soul of a Proud Knight from the table right across the door you entered this room, and a Large Soul of a Brave Warrior at the right corner at the very end of this room. The 3 Mimics here contain (in order from the first locked door to the second door): 2x Cracked Red Eye Orb; 1x Bonfire Ascetic; and 3x Wilted Dusk Herb.
If you use the lever to drop the cages, a Mimic holding a Fragrant Branch of Yore, another monster will drop 3x Twinkling Titanite. The Giant Poison Brumer will drop a Corrosive Urn, a further mimic will drop the Black Witch's Staff. Royal Sorcerer Navlaan dark spirit will also invade here if you freed him earlier.
Once you have done everything you want in this area, head through fog gate to fight the Guardian Dragon.
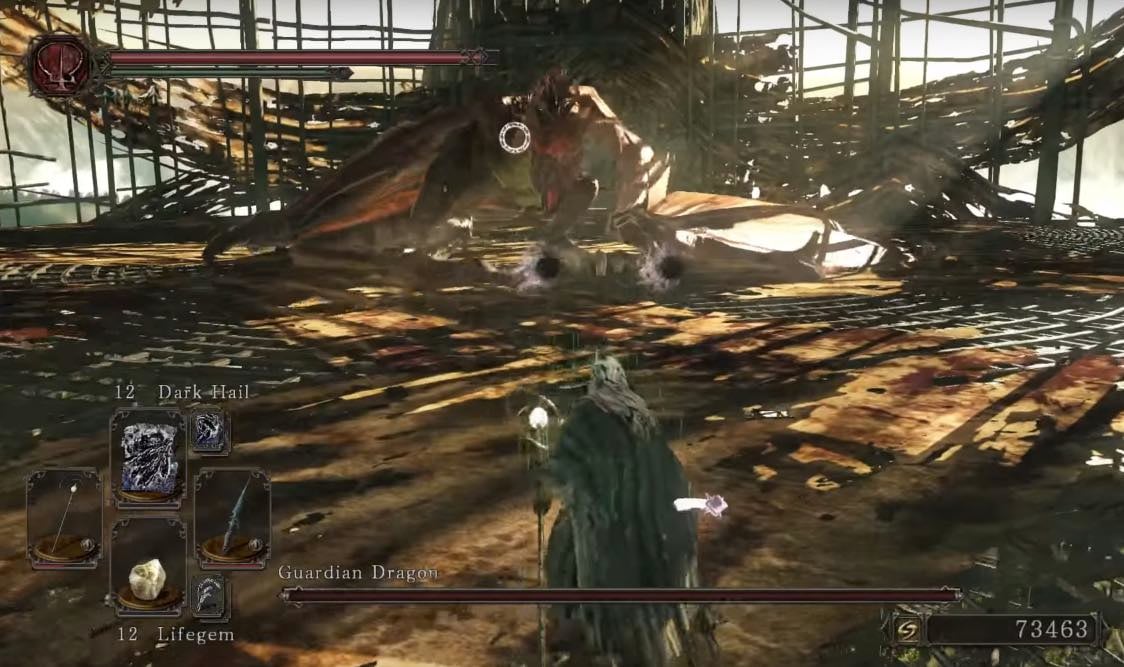
BOSS FIGHT: Guardian Dragon
After defeating the boss, exit the arena to pick up Dragon Scale from a corpse and take the elevator to Dragon Aerie.
General Information
- Previous: Undead Crypt through Shaded Woods
- Next: Dragon Aerie
- Recommended Levels: 100 to 110
- Boss: Guardian Dragon
- Bonfires: Foregarden, Ritual Site
Aldia's Keep Map
NPCs in Aldia's Keep
Items
Consumables
- Soul of a Nameless Soldier
- Petrified Dragon Bone x3
- Poison Throwing Knife x15
- Alluring Skull x3
- Malformed Skull
- Fire Seed
- Radiant Lifegem x2
- Twilight Herb
- Fading Soul
- Crimson Water
- Bonfire Ascetic x2
- Great Magic Barrier
- Northern Ritual Band +2
- Pharros' Lockstone
- Large Soul of a Nameless Soldier
- Corrosive Urn
- Aldia Key (Dropped by the dragon skeleton at the entrance)
- Soul Geyser
- Soul of a Proud Knight
- Large Soul of a Brave Warrior
- Malformed Shell
- Fragrant Branch of Yore
Equipment
Enemies
- Prowler Hound (Petrification)
- Basilisk
- Great Basilisk
- Dragon Acolyte
- Poison Brumer
- Mirror Spirits
- Mimics
- Ogre
NPC Summons
- Aslatiel of Mirrah (Brother of Lucatiel, Dark Spirit the one she recounts as "lost" to this land, not her herself.)
- Painting Guardian (NG+ only)
Boss
Notes
- Dragon Acolytes can be farmed for Petrified Dragon Bones. NG and NG+ both have good drop rate.
Aldia's Keep Walkthrough
From the Gates
As you enter through the Shaded Woods doors, by wearing the King's Ring you acquired in the Undead Crypt, on left is a corpse with Soul of a Nameless Soldier and Petrified Dragon Bone. To the right behind stairs in corner, is a corpse with Fire Seed. There is a roaming pack of Prowler Hounds in the tall grass that inflict bleed and petrification. Another corpse, closer to the middle of the tall grass has 10x Poison Throwing Knife, with a corpse visible a few feet away holding 3x Alluring Skull . If you follow the ridge to the left you come across a Mimic that contains a Malformed Skull and Dark Mask.

In a little wooden hut to the left of the stairs up to the big structure ahead, is the Foregarden bonfire. You may meet Lucatiel of Mirrah here, if you kept her alive during three earlier boss fights, she will reward you with her sword and armor: Mirrah Greatsword, Lucatiel's Set.
Brother from another Mirrah
Go up the stairs and drop into the fountain to loot a corpse with a Radiant Lifegem. Continue up the stairs and go the left corner of the building’s doorway. Loot the corpse for a Twilight Herb. Walk into the building to trigger the invasion of the black phantom, Aslatiel of Mirrah.

After defeating him, the moving carriage next to you holds a Basilisk. You can lure an Ogre over to break it, and it does not reset until NG+, or until you have burnt a Bonfire Ascetic. Although, this is not recommended, as invaders can use this to annoy the host -or if that works in your favour, go for it.
Dead Undead Dragon Hall
Upon entering you are greeted by an impressive and imposing dragon’s skeleton, that lunges forward if you get too close. Run out of the room as soon as you see him move, and after his head lunge, he will die and drop Aldia's Key. Loot the corpse on the ground in front of the dragon for a Fading Soul.

Walk straight ahead and into the 3 archways. If you make a left you will encounter several messages on the ground imploring you to pull back. At the end of a hallway is a lever; pulling this lever will free Navlaan, canceling out a side quest and loot. This also allows him to invade you dark spirit in multiple areas from now on. If you do pull the lever, go back and down the opposite hallway where you meet the now free Royal Sorcerer Navlaan. He talks to you briefly and becomes available as a merchant. If instead of doing this you visit him as hollow, without pulling the lever, you will activate his side quest. For more information, click here.

Mirror, Mirror...Mirror
Go up the stairs then head right, ignoring the stairs to your left momentarily. Once you enter this area with the mirrors ahead, do a U-turn to your right and you will encounter a chest containing the Great Magic Barrier, at the end. Go back down the hallway and you walk into a room of mirrors. Three of which will break and release a hostile phantom each, out of the mirrors. A corpse in this room holds a Northern Ritual Ring +2 and a Petrified Dragon Bone.

Free the Beasts
Return to the stairs we ignored earlier and head up them to find a petrified Ogre. Revive it with a Fragrant Branch of Yore for the complete experience. Take the next flight of stairs up to find yourself in the next section with the Giant Basilisk.
Alternatively, take the staircase to the left of the cyclops to go one level up to where you see a Giant Basilisk in a cage, surrounded by petrified people. Attacking it makes it aggro and possibly destroy the cage. To alleviate the risk, take care of it with range from a distance. Killing it may yield a Magic Stone or Dragon Sage Hood. A corpse in front of where it’s cage was holds a Crimson Water. Head to the right side of cage to find a hallway that leads to an iron chest with 2x Bonfire Ascetic. Return to where the cage of the Basilisk, and walk through into the next room.

First a Skeleton, Now a Statue
A statue of a dragon greets you in the center of the room and behind it a shut door. Pull the lever dangling from its mouth to open the door into the next room. This also shuts the door you came in through so if you need to return back through, pull the lever again. In the next room there is a Pharros contraption wall and a corpse under a table, with a Radiant Lifegem. Using a Pharros Lockstone here greatly illuminates the area, giving you better visibility for the ambush ahead.

Shrek 3
At the end of this hallway, an Ogre trapped in a suspended cage can be seen. You can walk past most caged enemies in this area. There are two Dragon Acolyte lurking behind the paintings. They can also be be provoked by attacking the paintings. There is also a locked door that will be breached by an Ogre here; he can smash through the chained door on the left side of the hall which is locked (revealing a chest with a Malformed Shell) and can break walls for you if you time it right. The Ogre can also free the caged monsters.

To the left is a disposal pit leading to the acid cell below, this room has an acolyte in it. The disposal pit can be reached by taking the door opposite the second painting -in which an acolyte burst out of. Before heading down, you want to do two things:
- A Pharros' Lockstone is in the lab behind the shelves on the right of the entrance. Just destroy them all.
- On the way down the stairs to the pit there is an illusory wall to the left that reveals the Ritual Site bonfire.
Once down the stairs, you will reach the acid pit. It is recommended you kill these enemies using ranged attacks if possible, then remove all of your armor and rings to avoid corrosive damage in order to retrieve the Large Soul of a Nameless Soldier, 4x Corrosive Urn, 2x Divine Blessing, Soul Geyser, and Petrified Dragon Bone.
Journey to the Dragon Boss
To access the locked doors that are on the right side of the hall, you are required to light all 4 sconces in the area that trigger the event that re-animates the dragon skeleton in the first room. After opening these locked doors you can use this pathway to sneak behind one of the Ogres that break through a doorway. This room has four Dragon Acolytes, and a Gargoyle, three Mimics and an Aldia Warlock.
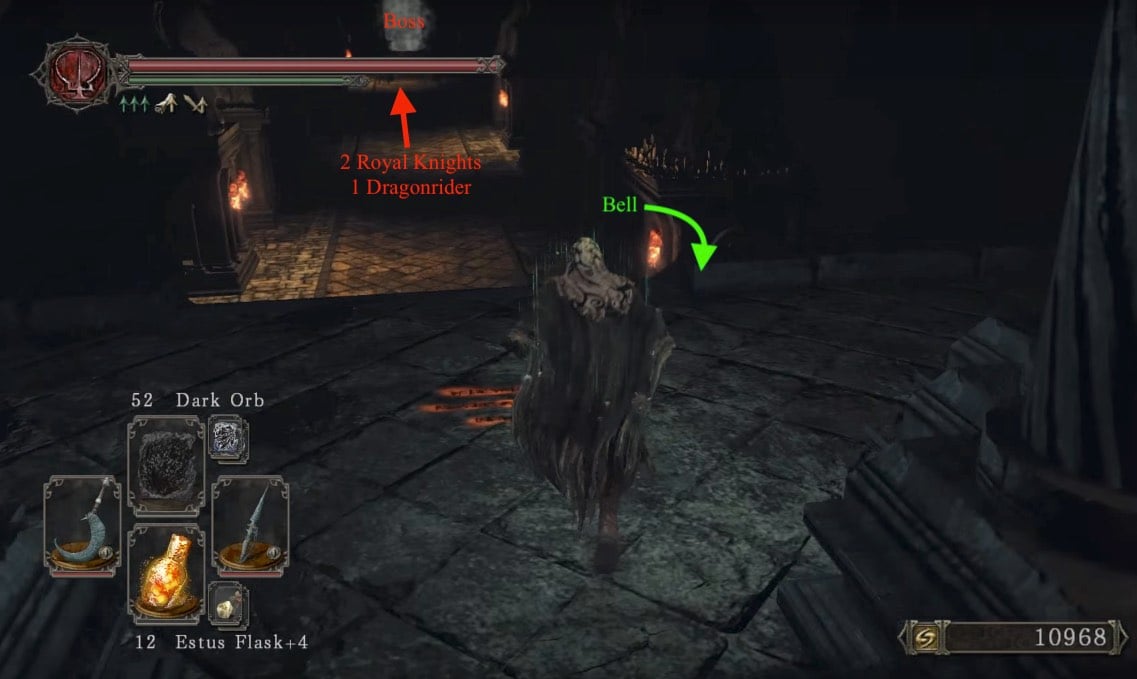
This room also contains a lever that allows you to drop all the hanging cages. If you attempt to run through this room, the Acolytes will follow you and alert the Ogre. The next close door will have an Ogre behind it and will also burst through the wall as before.
If you use the lever to drop the cages, a Mimic holding a Fragrant Branch of Yore, another monster will drop 3x Twinkling Titanite. The Giant Poison Brumer will drop a Corrosive Urn, a further mimic will drop the Black Witch's Staff. Royal Sorcerer Navlaan dark spirit will also invade here if you freed him earlier. Once you get past him it is a straight run to the fog gate and on to the Guardian Dragon.

BOSS FIGHT: Guardian Dragon
After defeating the boss, exit the arena to pick up Dragon Scale from a corpse and take the elevator to Dragon Aerie.
I was just invaded here by Forlorn (Scythe). It was after the Dragon Tooth pickup, across a bridge. It's the small island where 3 Yellow Cored Undead Citizens ambush you, between two bridges :D

 Anonymous
Does any bug for "aldia skip" work in vanilla?
Is it necessary to delete updates?
 Anonymous
 Anonymous
 Anonymous
 Anonymous
The ogre that breaks through the wall with no signs of warnings whatsoever is peak game design, very fair. Thanks Yui Tanimura for epic game!!!

 Anonymous
The Red Crystal Lizard link leads to regular crystal lizard.

 Anonymous
 Anonymous
 Anonymous
What if I don't have a Fragrant Branch of Yore do unpetrify the ogre?

 Anonymous
I just emptied out all the enemies, all the ogres, acolytes, went into the locked laboratory and ended the warlock and his minions, the gargoyle (i have never seen that lightning attack before). Got the 3 mimics dealt with. I then dropped the lever, took out the mimics that dropped from the cages with a bow from each door. There was also a giant brumer i didnt know about either.
The reason I came to this page is that there was one more enemy that dropped, and I have not seen it anywhere in game yet. It was really fat and slow and crawled towards me, I got scared it might be overpowered and take my 50k souls and so I shot it to death before seeing how it attacked.
Does anyone know what kind of monster that was? It was almost like a baby covetous demon (still bigger than my character though)
 Anonymous
This area is cool aesthetically, and the Dragon Skeleton coming to life and lunging at you is really cool and all, but holy crap are the later parts of this area tiresome, mainly due to the multiple Ogres, and god help you if they manage to break their friends out too, the boss is lame too, A pushover for casters, and an annoyance for melee builds

- > Get one-shooted by an hidden ogre behind a wall;
- > Go back to the area, defeat the ogre, then get killed by a second hidden ogre in the exact same way....
This is the kind of "gotcha" moment that makes this game very frustrating to play.
 Anonymous
Also next to the elevator on the right theres an invisible hollow

 Anonymous
I just got Sellsword Luet as a summon here? Next to the mirrors at the start. I don’t see it listed as a possible NPC summon on this page, though?

 Anonymous
Is it just me or does this page not show the walkthrough at all?

 Anonymous
The petrified ogre can be lured to the shaking wagon at the entrance. It took a while to lure it off the steps. Seems you have to make it attack its way past halfway down the steps, otherwise it repeatedly retreats.
For extra fun, lure it to the wagon by Aslatiel. Watch it disappear as it attacks the wagon, then reappear as you reapproach. I kept trying to make it break the wagon and the game crashed (PS4 SotFS).
 Anonymous
 Anonymous
Indicating that the dragon will lunge towards the player at some point is a needless spoil. Sure, people who come here to read the guide should expect spoilers, but this just ruins the whole fun of the area for no valid reason at all, the worst part being that there's nearly a whole hour worth of gameplay between the moment this is mentioned and the moment it actually happens in the game. Naming that paragraph "Dead Undead Dragon" was also a terrible idea in that regard...

 Anonymous
This area isn't listed in the 'Locations' box for some reason

 Anonymous
"If you talk to him while beeing human, he will seem to be frightend by something and tell you to leave him alone, as nothing good will come from spending time with him. If you are hollow instead, he will show his other personality, that of beeing an assassin"
One of the greatest passages in all of English literature.
 Anonymous
Anyone else having a hard time finding the sconces? I only managed to find 2 out of 4...

 Anonymous
An easy way to deal with the Forlorn phantom is to lure them out to the fountain and just go around it, down the fountain then up the stair again over and over, while attacking them with a ranged weapon. I dunno if anyone would have problem with them at this point, but this is a fairly nice way to cheese them without being hit by that big sword.

 Anonymous
Why are the mimics in this game so easy to identify? You can see their teeth from across the room ffs

 Anonymous
Should may be specified that the Phantoms that spawn from the sconces MUST be defeated for the dragon bones to re-animate. I was confused after I had already lit all 4 but nothing happened, and that was the only way I could get it to work.

 Anonymous
 Anonymous
 Anonymous
 Anonymous
 Anonymous
As long as you killed all 4 Forlorn and lit the torches the skeleton dragon will awaken and if you run out of the room fast enough it dies. If anyone needed any help. (DS2 SOTFS.)

 Anonymous
Totally didnt mention the CHEST next to the Northern Ritual Ring +2 and a Petrified Dragon Bone in the mirrors/phantoms area upstairs. It's a real chest (not mimic) and there's a brightbug inside (sotfs)

 Anonymous
I like the clever headings in this wiki. It helps me remember what there is to find in each area :D

 Anonymous
There’s a “ghost” propped up against the railing to the right of the elevator after you defeat the Guardian Dragon.. if you swing in that corner, you’ll kill him and receive a so-smooth so-silky

 Anonymous
mmmmm i didn't find that ritual bonfire in the room leading down to the pit. i rolled and hit every wall and nothing.....

 Anonymous
why the hell you put picture way to velstadt boss fog gate there, wtf

 Anonymous
What the hell do you mean the skeleton dragon won't attack you unless all 4 sconces are lit?? As soon as I entered the room it animated and 1-shotted me while I stood there like a chump beliving the wiki entry. :p I am playing the original version on PC mind you (I refuse to buy the same game twice for the same system) so if this is a change for the Scholar of the First Sin edition, it should be noted as such.

 Anonymous
Just a heads up; the PS3 version of this guide is written for SotFS; not the original version. Aldia's Key is in the acid pit with the decrepit dogs; there's no sconces to light; and a bunch of stuff written here doesn't exist in the original version. It's just the long shot down the hallway with the hidden bonfire specified, and the right side doors of the hallway are simply unlocked using Aldia's Key. No NPC summons for this area unfortunately.

 Anonymous
 Anonymous
the writing in this guide is lazy as hell. who let this fool write a guide for dark souls of all games?

 Anonymous
I haben't had any fun with this game since I killed the Looking Glass Knight.

 Anonymous
Link to undead keep is 404'ing. "you acquired in the Undead Keep" At the very start, thanks for the wiki, it's been a huge help in my play through of the dark souls series....can't thank you thankless people enough.

 Anonymous
Note that you can avoid fighting Navlaan if you get into the mist before he hits you.

 Anonymous
 Anonymous
btw, this area sucks big time. it's like they no longer cared at this point in development, just a bunch of old enemies thrown together in a generic castle.

 Anonymous
In SotFS, every time you light a sconce, a red spirit will appear (similar to Forlorn). If you don't kill all of them, the game won't trigger the dragon skeleton attack.

 Anonymous
 Anonymous
Nothing here seems to mention the stupidly overpowered invaders that appear on SotFS when you light the sconces. Actually, there's hardly any mention of them anywhere...

 Anonymous
Surprise surprise, another part of the walkthrough thats incredibly wrong.

 Anonymous
I wonder if Aldia Keep is where all the creatures come from, it looks like some sort of monster making operations here!! Are those guys working in the lab the makers of the mimics?

 Anonymous
The final Guardian Dragon bosses didn't spawn for me, and no amount of reloading and re-entering the area can fix it. Broke my campaign and now I'll never finish it.

 Anonymous
What kind of*****ty devs put the same traps one after the other? Talking about rhinos breaking doors. Seriously it isn't even about out-smarting/manoeuvring the ennemies it's about how many times the devs decided you should die before being allowed to proceed and ***** you and your SM if you had a lot souls. Bc everyone knows the best thing to do, is to make the game so that it punish you for being new. Like how dare you go into that hallway for the first time ? You should know everything ! For all its good side DS2 seem like it was made by a woman during that time of the month, while being told she looks fat.

 Anonymous
Aldia can be skipped if you want to because after ng6 it's hard but that depends on if you have fire and dark immunity

 Anonymous
Aldia can be skipped if you don't talk to him in the crypt What you do is completely pass the bonfire doing this stops the game coding making it as if he doesn't exist there for making nashandra the final and easy boss

 Anonymous
Given the Phantoms are actively seen trying to break out of the mirrors, I wonder if it's possible that the Looking Glass Knight took that as it's shield instead of being unique.

 Anonymous
 Anonymous
The skeleton dragon is not an insta-kill. I took approximately 1400 HP damage with medium armor, but (barely) survived.

 Anonymous
The Brightbug is clearly not available for the standard edition. I am playing on PS3 without DLC. No chest with a Brightbug.

 Anonymous
The guide for DX9 version states there's a chest with a brightbug but there isn't and other guides don't corroborate.


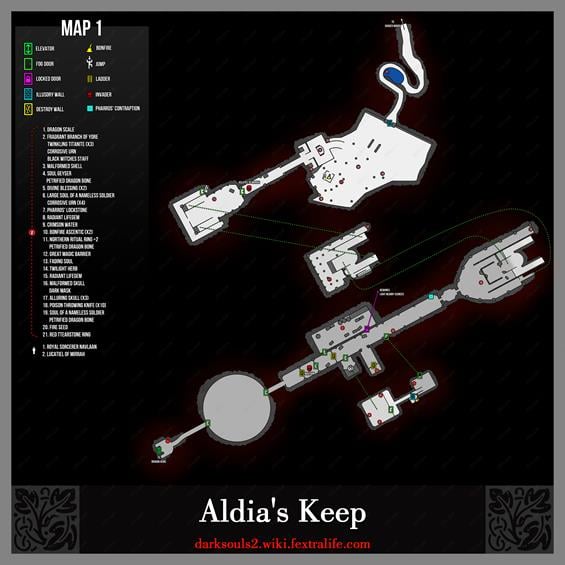
thanks for only mentioning where 2 of the sconces are, very exhaustive wiki page
0
+10
-1