

Cave of the Dead
 Dragon's Rest is a Location in Dark Souls 2, in the DLC Crown of the Sunken King.
General Information
- Previous: Dragon's Rest
- Next: Memory of the King
- Recommended Levels: 110 to 120
- Bosses: Graverobber, Varg, and Cerah
- Bonfires: 2
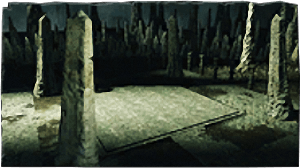
Cave of the Dead Map

Translated by Reddit@Faradn_cdv
NPCs
NPC Summons
Items
Consumables- 3x Petrified Something
- 2x Brightbug
- 5x Bonfire Ascetic
- 3x Twinkling Titanite
- 3x Petrified Dragon Bone
- 1x Titanite Slab
- 3x Blackweed Balm
Enemies
Boss
Notes
- It appears that if you kill the Petrifying Statue Clusters to their spawn limit, the last one will drop a Promised Walk of Peace hex.
Full Cave of the Dead Walkthrough
The Cave in the Cave of the Dead
From the Priestess' Chamber bonfire in Shulva, enter the cave and at the end of the corridor to find a fog gate. Cross it to enter the Cave of the Dead. Drop down the ledge, and if you are in human form, find two NPC summon signs for Rapacious Andrei , and Ruined Alfis. Drop down the next ledge and you will find a room with 3 Sanctum Soldiers, many Petrifying (red-eyed) Statues, and a few holes in the ground. Kill the enemies before dropping down the second hole on the right.
You will be in a room FULL of Petrifying Statues, and a few Poison Statue Clusters and Sanctum Soldiers. Navigation is hard, but there is only one exit in the room, the aforementioned hole the player has to drop is the closest one to the exit. In the room there is a metal chest that contains 3x Petrified Something , a corpse with 2x Brightbug, and another holding 3x Bonfire Ascetic .
When you find the exit, drop off the ledge. This new room contains 3 Petrifying Statue Clusters, several Petrifying Statues, a Cragslipper, and three 3 Sanctum Soldiers beyond it.

After killing all these enemies, enter the fog gate for the boss fight(s):
Boss Fight: Graverobber, Varg, and Cerah .

Calm after the Storm
Killing these bosses will give you a total of:
Go to the opposite side of the entrance of the room and you will find a chest containing a Flower Skirt , and a corpse holding 3x Blackweed Balm . To exit, you can simply use a Homeward Bone or Aged Feather or fall down the hole in the end to drop into the area where you found the Dark Greatsword hex.

From here go back to the body that had the Torches and jump to the platform below. From the platform roll down to the entrance of the building, take the elevator and you'll arrive back at the bonfire.
General Information
- Previous: Dragon's Rest
- Next: Memory of the King
- Recommended Levels: 110 to 120
- Bosses: Graverobber, Varg, and Cerah
- Bonfires: 2
Cave of the Dead Map

Translated by Reddit@Faradn_cdv
NPCs
NPC Summons
Items
Consumables- 8x Dried Root
- 5x Torch
- 1x Petrified Something
- 2x Brightbug
- 5x Bonfire Ascetic
- 3x Twinkling Titanite
- 3x Petrified Dragon Bone
- Titanite Slab
- 3x Blackweed Balm
Enemies
NPC Invasions
Boss
Notes
- It appears that if you kill the Petrifying Statue Clusters to their spawn limit, the last one will drop a Promised Walk of Peace hex.
Full Cave of the Dead Walkthrough
Access
In the room with the various statues that needed to be destroyed in order to defeat the Ghost Sanctum Knights in Dragon's Sanctum , you'll find the Eternal Sanctum Key . Then return to the door in the beginning of the Sanctum that was locked, and unlock it with your newly acquired key. Kill the two Sanctum Priestesses inside and open the chests to obtain a total of: 8x Dried Root , a Lightning Clutch Ring , and 2x Bonfire Ascetic.

Go up the carved ladder on the left wall in the end of the room, up the stairs then up the next ladder. As you emerge from the ladder, 3 Corrosive Egg Crawlers will drop from the ceiling, kill them and head up the ladder straight ahead to find a chest containing a Sanctum Shield . There is also a balcony here where you can set light to two sconces, but not much else.
Baldyr & the Chamber of Priestess
Head back down and across the bridge. At the end of the bridge you will be invaded by Rockshield Baldyr . Defeat him to access the Priestess' Chamber bonfire, shortly after. Hit the obelisk at the entrance of the cave to activate the elevator nearby. Take the elevator down then roll/jump off it when you see a ledge. On the right is a body that has 5x Torch, while the other side holds a path leading down and around the building. You will arrive at a doorway which leads to a chest containing the Hex, Dark Greatsword. Alternately, you can access this area after killing the boss of this area.

The Cave in the Cave of the Dead
Homeward Bone back to the bonfire and enter the cave and at the end of the corridor to find a fog gate. Cross it to enter the Cave of the Dead. Drop down the ledge, and if you are in human form, find two NPC summon signs for Rapacious Andrei , and Ruined Alfis. Drop down the next ledge and you will find a room with 3 Sanctum Soldiers, many Petrifying (red-eyed) Statues, and a few holes in the ground. Kill the enemies before dropping down the second hole on the right.
You will be in a room FULL of Petrifying Statues, and a few Poison Statue Clusters and Sanctum Soldiers. Navigation is hard, but there is only one exit in the room, the aforementioned hole the player has to drop is the closest one to the exit. In the room there is a metal chest that contains 3x Petrified Something , a corpse with 2x Brightbug, and another holding 3x Bonfire Ascetic .
When you find the exit, drop off the ledge. This new room contains 3 Petrifying Statue Clusters, several Petrifying Statues, a Cragslipper, and three 3 Sanctum Soldiers beyond it.
After killing all these enemies, enter the fog gate for the boss fight(s):
Boss Fight: Graverobber, Varg, and Cerah .
Calm after the Storm
Killing these bosses will give you a total of:
Go to the opposite side of the entrance of the room and you will find a chest containing a Flower Skirt , and a corpse holding 3x Blackweed Balm . To exit, you can simply use a Homeward Bone or Aged Feather or fall down the hole in the end to drop into the area where you found the Dark Greatsword hex.
From here go back to the body that had the Torches and jump to the platform below. From the platform roll down to the entrance of the building, take the elevator and you'll arrive back at the bonfire.
 Anonymous
- Anonymous
- Anonymous
Hey, you know Black Gulch, that area that everyone absolutely hates because of the stupid poison-spitting statues scattered all over the damn place?
Well, since we don't have any better ideas for an optional area for this DLC, let's just take that area and make it even ****in' WORSE, with petrify statues instead of poison ones, and a cluster **** of mobs in this cramped small cave, and let's just make the boss a dumb Gank Trio that forces them to sprint around like madmen and call it a day!
- Anonymous
As a pure sorcerer, I had to summon those 2 NPCs because I was getting my freaking ass kicked with no end in sight.
- Anonymous
"Enemies in the cave drop some of the DLC exclusive items if you are a co-op phantom."
Some enemies might drop items only with coop summons, the in-game provided ones might do, but it's not really confirmed, like Promised walk of Peace drop...
- Anonymous
2022.. going back through the DLC, and after finally beating these 3 shitbags was a great moment.
Tried 5 times with my summon dudes, and last run was epic.
Fake Havel and ninja guy took out summons while I killed Robin Hood, ninja guy was out of steam, and dropped like a cheap hooker.
Left me and fat boy , who took 20 dark orbs to put to rest. Good times.
- Anonymous
Don't know what it's called "Cave of the Dead". Seems pretty alive to me. Overly congested cluster**** with random crap everywhere.
- Anonymous
I used broken Santier's spear +5 to attack both melees, timing my attacks and rolls, and using walls to block arrows. Ran laps to heal, and finished off the archer last.
- Anonymous
Nothing more pointlessly annoying than filling levels with spitting statues.
- Anonymous
- Anonymous
how are these guys difficult? maybe if you solo, but if you have the allies you can literally just backstab constantly, strafing between to avoid arrows.
- Anonymous
- Anonymous
- Anonymous
I put on the stone ring and smashed the Havel clone in the face with the kings ultra gs, and he just calmly ignored me and pancaked me.
Ok, im really starting to love hexes. i beat the gank squad on first try thanks to black knight sword + Dark Weapon, and spammed dark orbs on the havel fake lol
- Anonymous
The ”rush archer” strategy didn't work out for me at all, I died at least five times trying it.
But I discovered that, as long as you have the two phantoms with you, the bosses will focus on them, and you just have to backstab them with your strongest weapon. Finally done with this BS
- Anonymous
- Anonymous
The doing laps in and out of the water strategy going for archer, little guy, then the tank worked well. I'm glad I did it this way, because once it got down to just me and the tank it was a long tense fight. That guy is no joke. I'll never even try to fight him any other way than 1 on 1 in the future...
- Anonymous
See the pool of water closest to your right when you enter the boss room? Welcome to the merry go round of death. They all take ages to jump down and chase you while you can tear the archer a new one if you make a run for it. And if you need buff just make enough space and stand right next to the edge of the pool, consoom whatever and drop down and repeat the whole Tom&Jerry skit again.
Note: DO NOT jump into the left pool, there are statues and that statue bug in there that will the bane of yours.
- Anonymous
Had a hard time with the bosses, until i decided to parry the havel guy at last. First summon the two white phantoms, wait for them to heal up at the fog wall and then go for the archer while your friends are meleeing. After defeating the archer, kill the two swords guy, don't mess with big dragon tooth guy until the very end. Finally, equip a parry shield and have an easy time parrying havel. That's it.
- Anonymous
Is it just me, or does Rockshield Baldyr seem incapable of stepping on the elevator near the bonfire? I've noticed that if I get past him, hit the switch, and wait that I can use the elevator as a 'safe' zone that Baldyr has to run all the way around to get to me.
- Anonymous
I see people complaining that they're hard that's only the case if you fight them straight.These we're my approach: 1.Int/Strength-Old knight hammer,staf of Wisdom and alonne great bow.Third dragon ring and soldier ring for weigh and wearing the lion mage set any low weight head gear.Run in circles and each lap stamp the great bow user,repeat till it dies next the guy with the katanas keep going in circles and looks for openings between attacks and stamp him then roll away quickly,my hammer broke and watching the timing i started to use the great bow till it died nxt the Havel turtle this one can be done straight joust dodge and shower it with soul lance. 2. Strength/Dex(50). go below 30% weight capacity again I used the dragon ring and soldier ring,my weapons were Heide Lance and Black bow and a stamina Regen shield.Joust keep rolling in circles shooting the nearest one and stabbing the great bow guy each time it got in the way then proceed to roll after the only one remaining was the Havel bait the jumping attack and back stabb it or cheese it with poison arrows.
- Anonymous
- Anonymous
- Anonymous
- Anonymous
What is with that giant statue thing right by the boss gate that spews poison? Can it be destroyed?
- Anonymous
After trying every other strategy online and having them fail me I eventually found one that worked for me. Bonfire, human, summon both NPCs, run through level until falling off of last ledge which leads to the fog gate and wait to recuperate and allow the NPCs to catch up. Then fight the 3 humanoid enemies and the sandworm. Go to fog door, heal if necessary and enter. Allow things to happen and evade until heavy armor asshole is preoccupied and then use a fast weapon to do backstabs or attack, always leave enough stamina to roll or run away and take a breath, also not allowing him to switch focus. If he does then run past your allies and then away after he refocuses and then keep going. Kill him first. Then hopefully you have at least one ally left at this point and kill the dual wielding knight. Take it slow. Run away to heal if you get to half of hp. Then use magic or arrows on the the third guy.
- Anonymous
Use bonfire ascetics to farm bonfire ascetics? garrythegoatbah@yahoo.com

At least this place isn’t even remotely as bad as Iron Passage or horse**** valley
0
+10
-1