Forest of Fallen Giants
 Forest of Fallen Giants is a Location in Dark Souls 2. This area is the recommended area to visit first, after Majula, introducing the player to weaker enemies and an important merchant.
General Information
- Previous: Majula
- Next: Heide's Tower of Flame
- Recommended Levels: 5+
- Bosses: Pursuer, The Last Giant
- Bonfires: The Crestfallen's Retreat, Cardinal Tower, Soldier's Rest, The Place Unbeknownst
Forest of Fallen Giants Map
NPC's in the Forest of Fallen Giants
Bosses
Items
Consumables
- Amber Herb x5
- Aromatic Ooze x3
- Buckler
- Divine Blessing x1
- Estus Flask Shard
- Fire Arrows x10
- Firedrake Stone x1
- Great Soul Arrow
- Green Blossom x3
- Halberd
- Homeward Bone x3
- Human Effigy x11
- Large Soul of a Lost Undead x2
- Large Titanite Shard x1
- Lifegem x12
- Old Radiant Lifegem x1
- Radiant Lifegem x3
- Repair Powder x2
- Seed of a Tree of Giants
- Small White Sign Soapstone
- Sorcerer's Staff
- Soul of a Lost Undead x5
- Soul of a Nameless Soldier x6
- Soul of a Proud Knight x1
- Titanite Shard x2
- Titanite Slab
- Titanite Chunk x3
- Throwing Knife x10
- Torch x8
- Twinkling Titanite x2
- Wilted Herb x3
- White Sign Soapstone
- Witching Urn x5
- Wood Bolt x20
- Black Firebomb x3
- Cracked Red Eye Orb x5
- Large Soul of a Proud Knight x2
- Heavy Iron Key
Equipment
- Foot Soldier Shield
- Grand Lance
- Life Ring
- Light Crossbow
- Mail Breaker
- Ring of Restoration (need Soldier Key)
- Fire Longsword
- Bastard Sword
- Blue Wooden Shield
- Broken Straight Sword x2
- Whip
- Rebel's Greatshield (in Flame Lizard caverns - Winner of Dark Souls Shield Competition design)
- Infantry Helm
- Large Leather Shield
- Chloranthy Ring
- Hand Axe
- Shortsword
- Small Leather Shield
- Drangleic Set
- Hunter Set
- Hawk Ring
- Flame Quartz Ring +1
Enemies
- Hollow Royal Soldier
- Hollow Infantry
- Ironclad Soldier
- Ogre
- Flame Lizard
- Royal Swordsman
- Syan Soldier (Stands guard outside Kings Door)
- Armourer Dennis
NG+ Enemies
- NG+ 2x Red Phantoms (In court yard of the Kings door)
- NG+ 2x Red Hollows (Ballistae Room)
- NG+ 1x Red Ironclad Soldier (Near Exploding Barrel Courtyard)
- NG+ 1x Red Hollow (just before Pursuer Boss Fight)
- 1x Red Ironclad Soldier (near Soldiers Rest Bonfire)
Full Forest of Fallen Giants Walkthrough
Accessing From Majula
Starting at the Majula bonfire, facing the coast, you should notice a crumbled wall separating the hill and a big doorway, on the right; if not, look for the torch sconce marking the entrance. This leads down to an underground stone ramp-way. Continue into the darkness, making a U-turn on the first right of the main path in, you'll find an iron chest (chest is a Mimic in NG+) with a Rusted Coin. Turn around and proceed down the hallway, to find a dead end to the right and to the left a large gated door. Pulling the lever to the right of the gate, opens it.
The path opens up to a cave with a wooden bridge that spans a stream. Past the bridge, going to the right leads to the Forest of Fallen Giants, while to the left you'll find two long planks to a large stone with a chest that contains a Human Effigy. Beyond in the stream is a corpse with a Homeward Bone and Soul of a Lost Undead, if you are confident in your jumping abilities, you can make the jump from the platform holding the chest. If not, simply head back up the wooden planks and drop down from the rocks above. To get to the Forest from here, simply continue forward, and follow the stream left.
Welcome to the Forest
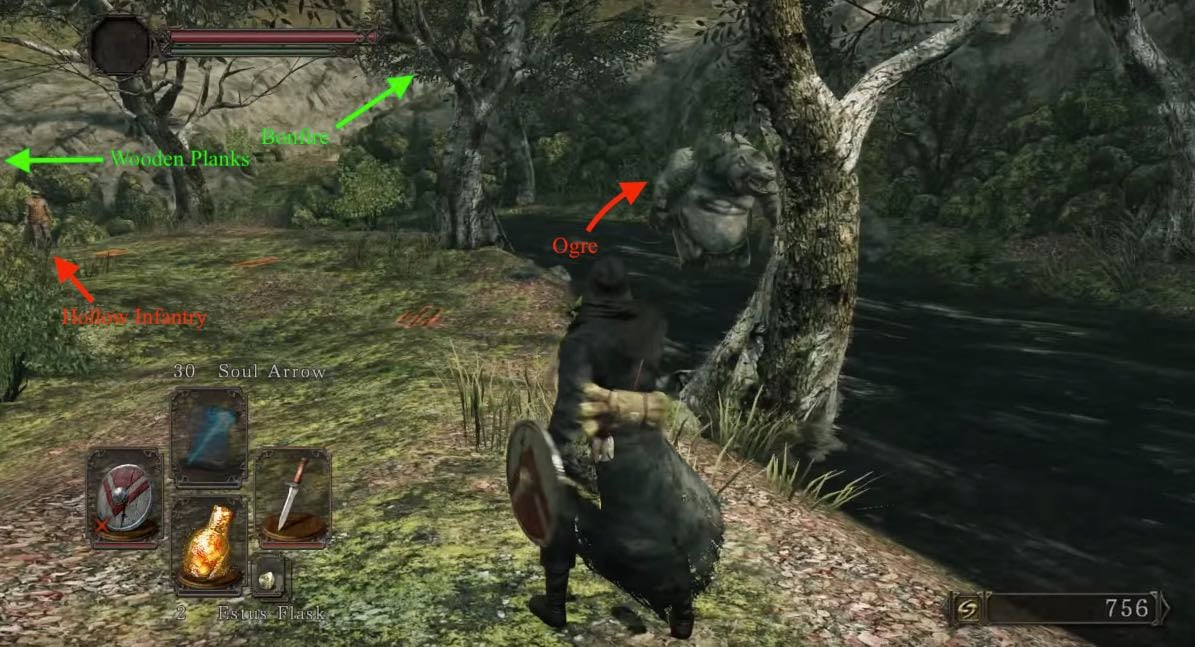
Upon your arrival, two Hollow Infantries wander immediately ahead with an additional two beyond, around the bend of the creek. In the creek, you'll find an Ogre roaming around, which won't aggro until you come within reach. Just ahead of the tree, up a short path on the right is a clearing in which you'll find The Crestfallen's Retreat bonfire, where you will be attacked by another Hollow. Moving ahead across a plank bridge there is an Archer and three more Hollows. Dropping down to the stream below the plank bridge brings you to a corpse with Soul of a Lost Undead. Across the planks and up the hill brings you to a ladder.
Mossy Rotunda
Going up the ladder leads into an open area with a whopping twelve Hollow Infantry playing dead, and a Hollow Royal Soldier throwing firebombs from the walkway above. There are several corpses on the ground holding various items including: a Human Effigy, Green Blossom, 2x Broken Straight Sword, and a Lifegem.
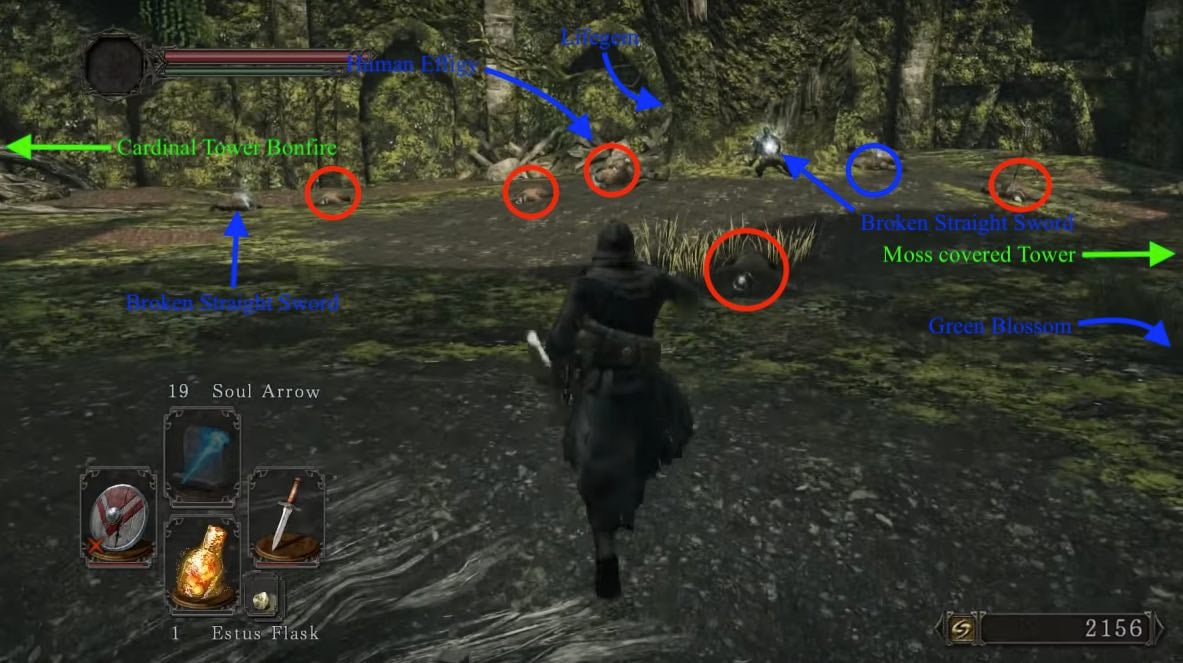
To the right is an opening to a cliff, and to the left a ladder up a moss covered tower. When you get on the ladder a Hollow Infantry will start coming down the ladder ahead of you. Avoid damage by getting on the ladder and immediately getting off. Cross the planks at the top of the tower and go up to the right to a corpse with a Soul of a Nameless Soldier. Dropping down to the ledge below leads to the Hollow Royal Soldier who was throwing Firebombs. Jumping across the gap to the ledge brings you to a corpse with Shortsword and a Soul of a Lost Undead. Back at the base of the ladder that lead up, to the right you can spot a platform with items on it. Jumping over to it nets you Throwing Knives and a Soul of a Nameless Soldier.
Hallways to Cardinal Tower Bonfire
To the left of the clearing is a mist, which leads through a wooded tunnel and into ruins. Before going straight into the broken wall, turn left and kill the ambushing Hollow Infantry around the corner then return to the hole and drop into a room with 3 Hollows (one of them faking death). In the corner behind the shelves -you'll have to break it- find 20x Wood Bolt. Leave the room through the door and head right to enter a room with two Hollow Royal Soldiers; one will ambush you from the right after you pass the boxes, and the other will join after. Continuing down the hallway, you will find a Lifegem x1 on the left, and stairs beyond with a hollow archer at the top who fires down at you. As you ascend another Hollow Royal Soldier from a ledge throws Firebombs at you. A third Hollow Royal Soldier moves to ambush you as you reach the top of the stairs. By the back of the courtyard near the rubble you will find the Buckler.
Along the wall to the left of the staircase is a ladder. At the top, straight ahead is a corpse with 5x Witching Urn and a Hollow Royal Soldier (around the corner to the right). The large pair of closed doors lead to the Cardinal Tower bonfire. Next to it, you meet the Merchant Hag Melentia. After exhausting her dialog, she will move to Majula. Before she leaves, be sure to snag a firebomb or two. You'll also want Lenigrast's Key in the nearish future, but most of the rest of her inventory can wait.
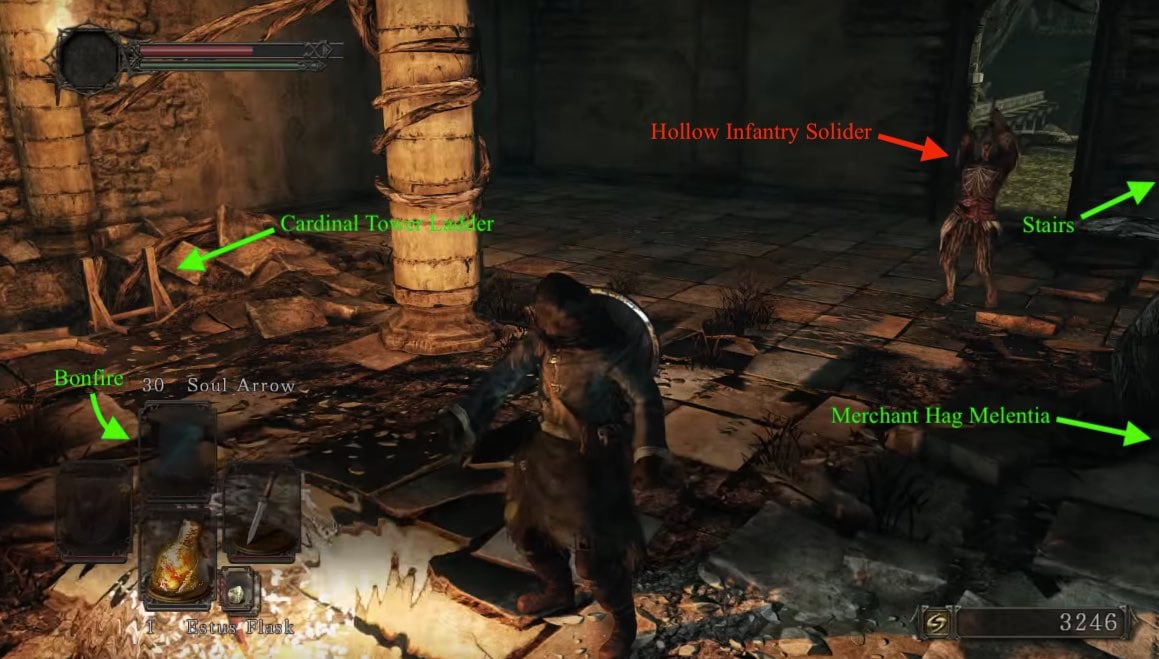
Going up the stairs in the room leads to a locked door. Once you obtain the Soldier Key (or break the door down), it opens to a room where you will find the following: a Crystal Lizard, a chest containing a Small Leather Shield and Repair Powder, a Hand Axe and Radiant Lifegem, a Hollow Soldier Helm, and a door that leads to another room with an iron chest holding Radiant Lifegem x2 and a Small White Sign Soapstone. A Hollow Royal Soldier will stand up behind you once you go through the door. You can drop down here and onto the branch to obtain a Divine Blessing, then to the bottom to return to the bonfire.
Scaffolding and Flame Lizard Cave
Outside of the bonfire room you can drop down to wooden planks where there will be two Hollow Infantry Soldiers. Proceeding down the plank, there is a hole in the wall on the left which leads you back to the staircase and bonfire from the previous section. Jumping to the plank ledge brings you to a corpse with a Human Effigy. Drop down to the wooden platform and kill the Hollow. Go down the ramp and walk carefully down the tree trunk, where you come across a corpse with a Soul of a Lost Undead and Torch.
On the ground, expect several Hollows and two Ironclad Soldiers. To the left, a cave opens to a tunnel lined with petrified people. Flames tinge the air while explosions can be heard. A corpse on the floor carries a Soul of a Proud Knight. Deeper into the tunnel, a grated door is on the left where there is a chest with a Fire Longsword. Quickly make a dash for the door and get it open to secure yourself a safe sport from the explosive molten balls that will begin pelting you.
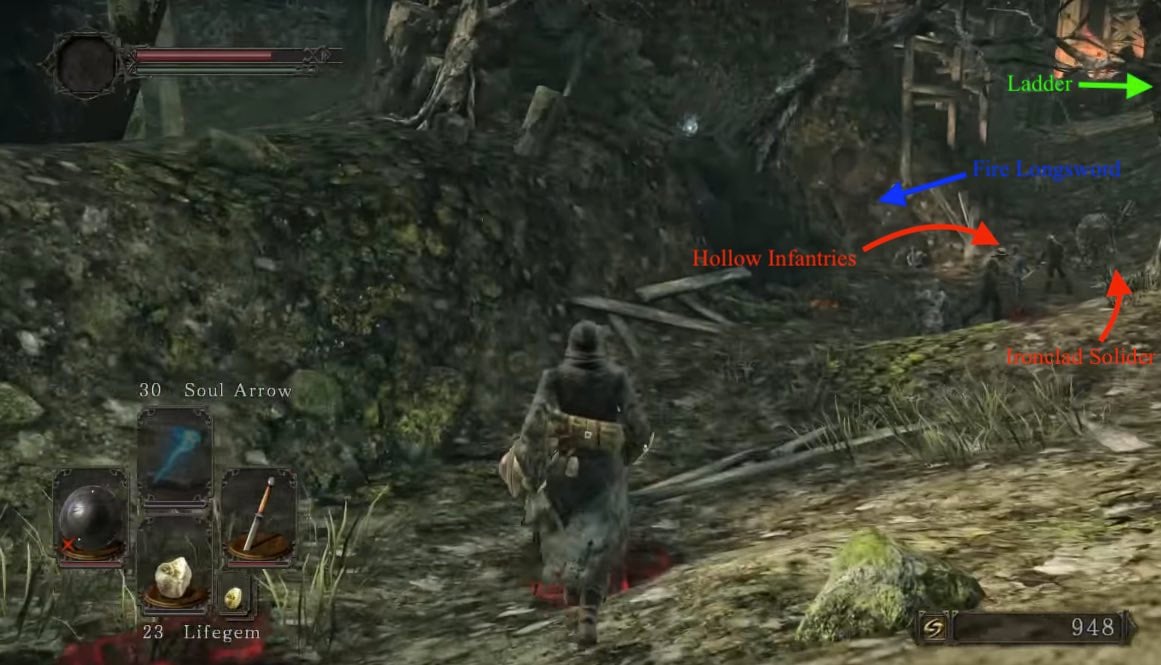
Progressing down the tunnel means confronting the fire-breathing Flame Lizard responsible for the fires. You can kill it if you really want, but it's neither easy (this early in the game) nor especially rewarding. Behind the lizard are three more, a locked door, many corpses to loot, and a chest. (There is another way to reach the treasures, detailed in Flame Lizard Pit).
To the left of the cave with the fire there is another cave with a Foot Soldier Shield, guarded by an Ironclad Soldier. Going back out the tunnel and into the clearing, kill another Ironclad Soldier and there is a ladder near the corpse that had the human effigy. To the left of the ladder is a corpse with a 3x Lifegem. Taking the ladder up brings you back to the plank near the hole in the wall mentioned earlier in this section.
Cardinal Tower Bonfire Ladder
In the bonfire room is a ladder down into a large room with columns. There are two Hollow Royal Soldiers here waiting to attack, one sits feigning death on the left, and one comes from the bridge. Down at the bottom of the room, giant Flame Lizards (See 'Flame Lizard Pit' below) are visible. Facing the bottom of the ladder, to your right is a closed door that does not open from this side (later on, this will become a shortcut).
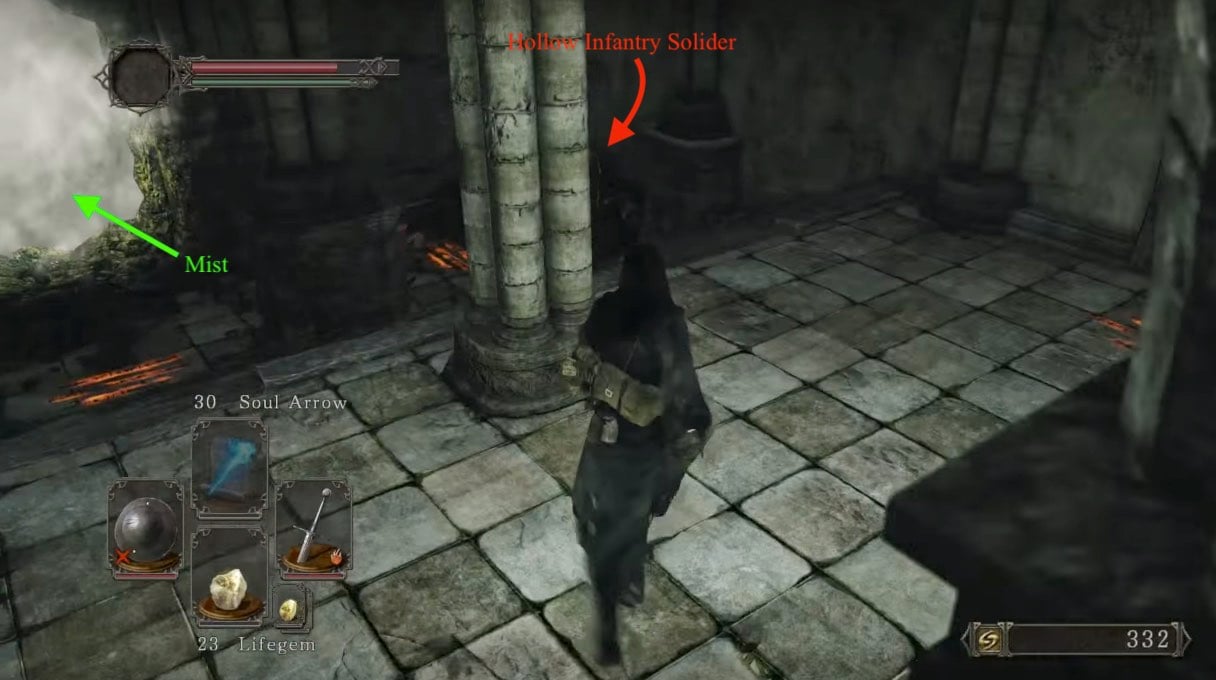
Going across the bridge leads to a feigning Hollow Royal Soldier, and a locked door on the right. A body at the corner holds a Soul of a Lost Undead. Back across the bridge, jog right through an open archway which leads to a room with a locked door on the right (leads to Soldier's Rest area) and mist straight ahead. Another Hollow Royal Soldier is laying on the ground behind the large pillar on the right.
Rooftops, Cale, and First Shortcut
Going through the mist leads to an area with rooftops, scaffolding, and a large tree branch directly ahead which leads up. As soon as you enter the area, two Hollow Infantry will converge on you from the right, and an archer on a wall far to the right will start shooting -- he will continue to pick at you through this entire section. Running up the tree-root brings you to the top of a wall where an Ironclad Soldier stand near wooden breastworks. Get him out of the way.
Back near the top of the tree-root, you can drop down to a peaked rooftop (the drop will take some health). When you drop down, you'll want to keep moving, but note that just behind you here is another drop to a round room with a Hollow Infantry and a corpse with a Torch, return for it later. There are two Hollow Infantry on the rooftops, plus another Archer to your left. Keep moving, work quickly, and take care not to fall. Once you've killed all the Infantry, head back to where you dropped down from the root. Dash and jump across a small gap to deal with the pesky archer. Then, drop down to another landing with a ladder in front of you, and a cave to your left.
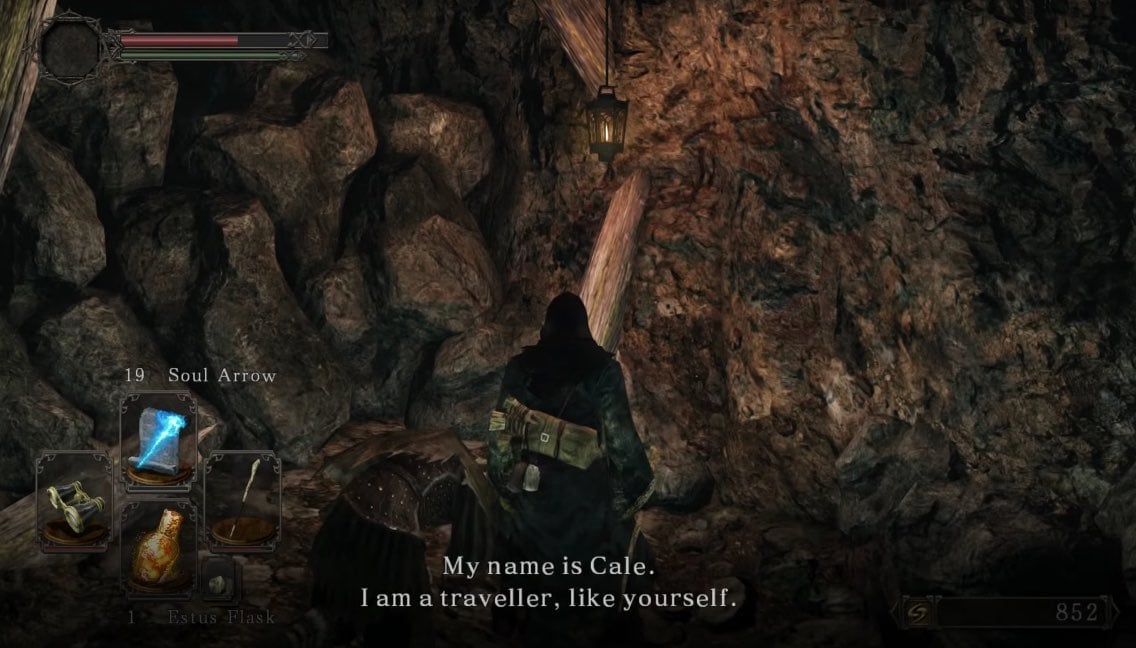
Enter the cave slowly and carefully; as you move forward you'll eventually trigger a boulder trap. After the boulder passes, there's a corpse straight ahead with a Human Effigy on it. Do not go right down around the corner; you'll fall into a hole. Continue up the ramp where the boulder came down, dispatch another Hollow Archer to the Left, and find a corpse with an Amber Herb, you'll also find Cale the Cartographer crawling around back in the cave. Exhaust his dialog, and he will give you the key to the mansion in Majula.
Retrace your steps back to the ladder on the same level as the entrance to the boulder-trapped cave. Climb the ladder and run down the battlements to your right, finally dealing with the annoying Archer. Continue down the battlements and drop to your right onto the rooftop, then head back right again up the ramp and towards the "first" rooftop. Drop down to the middle tier of the house, and follow a ramp down the ground; another Archer to your right may start sniping you. Head straight along the water to a corpse next to a gate with a Titanite Shard.
To get back to the main tree-root from the ground at the gate:
- From the gate, head straight back along the water and right to the plank ramp you (probably) came down
- About four strides up, turn a hard left onto a short set of planks which drop you back to the ground below the big tree root
- Go under the tree root, following the water around to your left to a ladder. There may be a Hollow Infantry hiding here.
- Climb the ladder to the roof and turn right to a plank bridge which takes you back to the tree root.
Go back up to the top of the tree root where you killed the Ironclad Soldier. Nearby, a ladder on the right brings you up to a rooftop platform and triggers an appearance of an eagle who drops the Pursuer mini-boss. Probably a good idea to run away here, level-up and face him later. If you really want to take the fight, at least open the nearby shortcut first, lest you die. Defeating him here will skip his later boss fight, but if you drop off the platform or die, he will disappear from this current location for good.
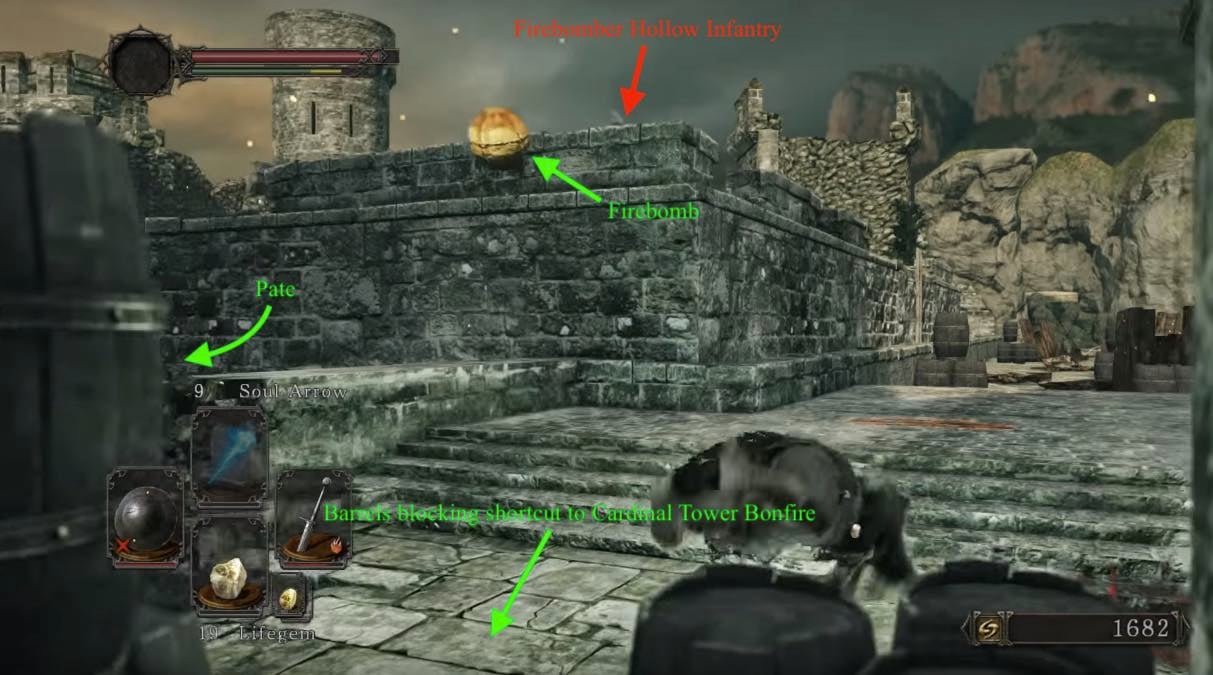
In the far corner of the platform where the eagle drops the Pursuer is a fire-bombing Hollow Royal Soldier and there is a Hollow Royal Soldier in each corner. There are some bodies in that place, they hold a Human Effigy, Lifegem x2, a Torch, an Estus Flask Shard and a Repair Powder. Back down the short ladder, at the end of the way, past all of the breastworks are a bunch of explosive barrels stacked by the wall. Throw a firebomb (from a distance; purchasable from Merchant Hag Melentia)/bait the firebomb-throwing Hollow Royal Soldier to set off a huge explosion which opens a shortcut back to the Cardinal Tower bonfire.
Ballista Room, Pharros' Lock, and Pate
Coming out of the new shortcut bomb-hole, two Hollow Royal Soldiers await to your left, and straight past is a ladder which leads down to a short stone staircase. In the corner on the left by the stairs is a corpse with Green Blossom. Moving forward, to the right is a destroyed wall which opens to a room with ballistae that fire arrows when triggered by proximity to the room. Inside the room you are swarmed by 4 Hollow Royal Soldiers so it is best to trigger the trap and walk out, letting the arrows kill one of the enemies. If this doesn't work, run in and go to the left before they fire and take them out before they swarm you.
The ballistae can be operated by the player which should lead to some fun PvP moments. There are two corpses on the ground with Great Soul Arrow, a Large Soul of a Lost Undead, and Blue Wooden Shield. Inside this room in the back, there's a ladder. Opening the chest in the lower room triggers a trap (either poison or arrows it is best to roll to the left or right and slightly behind the chest as this will avoid arrows and most of the poison), inside the chest is a Titanite Shard. If you have a Pharros' Lockstone and insert it into the mouth in the wall (if not you can buy it from merchant hag Melentia). A nearby wall will shine, indicating you should attack it. Upon attack, it will reveal a hidden room with two chests containing the Chloranthy Ring and a Titanite Slab. Attacking the closed door down here will cause three enemies inside to open the door, inside you can find a chest containing the Life Ring and a Large Titanite Shard.
Beyond the ballista room along the same wall, you encounter the NPC Pate who warns you about a trap. Walking through the adjacent archway leads to four Hollow Infantry who swarm you. The gate in the archway is lowered behind you, preventing you from returning back through. Several Hollow Infantry and soldiers attack here. Walking straight on through the open doorway brings you into a hallway, in the corner of which is a corpse with Aromatic Ooze x3. On the Wall past this item there is a hidden wall that contains a Sorcerer's Staff and Amber Herbs x1 . Continue down the hallway and left to the bottom of a staircase.
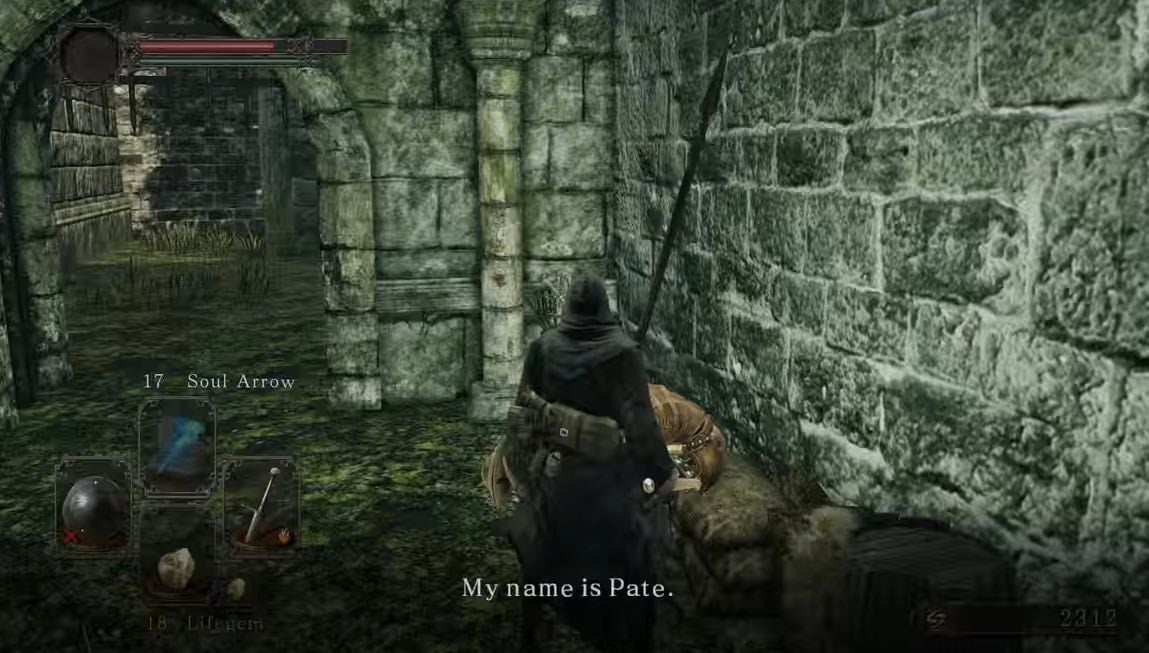
Once up the stairs, go past the cart which blocks the path, going left takes you to the top of the wall above Pate and the gate that dropped behind you after crossing into the courtyard. You can drop down either side from here. Returning to Pate continues his dialogue tree and earns you White Sign Soapstone.
Hollow Royal Soldiers and Firebombs
Going directly opposite of the ballista room brings you to a courtyard full of exploding barrels, with a doorway ahead and an open archway to the right. There are hollows above with firebombs, so be especially wary of the barrels when passing through here. Going through the right archway brings you to another courtyard with a Hollow Royal Soldier slumped along the wall to the left; he reanimates and attacks. Continuing through another archway into yet another courtyard, you'll find a large tree is on the right and two Hollow Royal Soldiers attacking the tree. Behind that tree is a corpse with a Large Soul of a Lost Undead.
Returning back through the doorway, there is a ladder up the wall to your left. Going up the ladder brings you to the top of the wall above Pate and near trigger-gate. Going to the right leads to a corpse with a Light Crossbow. Through the doorway past the corpse and into the fort leads inside another section of the fort. Inside drop down to the room and defeat the three Hollow Royal Soldiers. Open the iron chest to obtain a Mail Breaker and Infantry Helm. If you go back to the ledge above the three hollows, you can jump across to loot a corpse with a Torch and a Soul of a Nameless Soldier.
Seaside Sword Room and Second Shortcut
You can drop down from here to return to the portion of the courtyard where the two Hollow Royal Soldiers are located. If you haven't already, kill the Hollow Royal Soldiers and go through the doorway into a large room. To the right and up the stairs is a corpse with a Lifegem and Homeward Bone . Back down the stairs and to the right is a locked door (opened with the Soldiers Key). To the left, as you enter, and straight down the room are two Hollow Royal Soldiers. Just past the ruins of the giant sword a Ironclad Soldier waits to ambush you from behind a cart. In the corner nearby is a corpse with 2x Amber Herb. Going up the blade of the stone sword jutting out of the building will trigger a trap: four Hollow Infantry drop down behind you onto the sword. At the end of the sword you will find a Halberd and Soul of a Nameless Soldier.
Once back down the sword, head through the mist and into a large open room with a sconce. to the right is a broken wall which leads into a room with a seated Hollow Royal Soldier. The staircase in the room leads down to a boarded up door. A corpse at the base has a Large Leather Shield and Lifegem. Returning back into the first room you first entered, head straight across and turn right. On the right is a corpse with 10x Fire Arrow. Just beyond and to the right is the elevator to the The Last Giant boss. But, first, open the door just ahead which creates a shortcut to the ladder from the Cardinal Tower bonfire.
When you're ready to try The Last Giant, step on the pressure plate elevator and descend. (If you step on the pressure plate but immediately hop off of the elevator, the other side will bring up a Ironclad Soldier. Descending either elevator goes to the same location.) Go down the hallway where a Hollow Royal Soldier waits in the doorway on the left. The door is locked for the time being. To open it, you need the Iron Key from the Iron Keep. This door leads to the Flame Lizard Pit mentioned earlier. Straight into the tunnel and enter the mist to confront The Last Giant. If you are not hollow, there will be 1-2 NPC summon signs outside the boss fog.
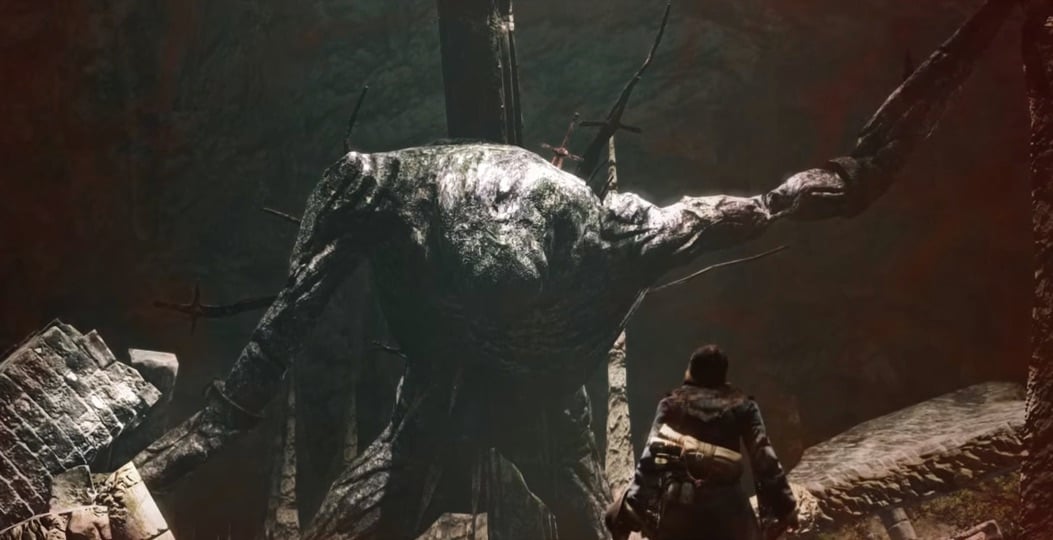
BOSS FIGHT: The Last Giant
After obtaining the Soldier Key, the next stop on the recommended route is Heide's Tower of Flame. Alternatively, you can also open some areas here in Forest of Fallen Giants with the key, including a way to the Pursuer boss and to an early visit to Steady Hand McDuff after the Pursuer boss fight. McDuff will infuse your weapons, unlike Lenigrast.
Ironclad Enclave - Soldier's Rest
After obtaining the Soldier Key, return to the room before the rooftops section, just past the bottom of the Cardinal Tower bonfire ladder, and to the left of the bridge above the Flame Lizard Pit. When entering this room, instead of going straight, where the fog was, turn to the right towards a door, which can now be opened with the Soldier Key. Descending the staircase beyond leads to a fairly dark, long rectangular room. A shade summon sign for Ruined Alfis will be just next to the doorway. Sconces are scattered about the room and, when lit, illuminate the entire area nicely. 6 Skeletons will appear as you move forward. A corpse in the corner near the first Skeleton has a Black Firebomb x3 and a Homeward Bone, the corpse near the end of the dark room has a Torch. A door exits to an outside area where the remnants of several buildings are found. Ironclad Soldiers are the main enemy here, but a hollow archer will immediately become a nuisance. Hollows are present in a small building directly across from where you come into this section. Ladders outside and inside this building lead to the roof where the player will be greeted by the large hammers of three Ironclad Soldiers. On this rooftop is a corpse holding a Soul of a Nameless Soldier, a Whip, a Bastard Sword, a Human Effigy and 3x Cracked Red Eye Orb .
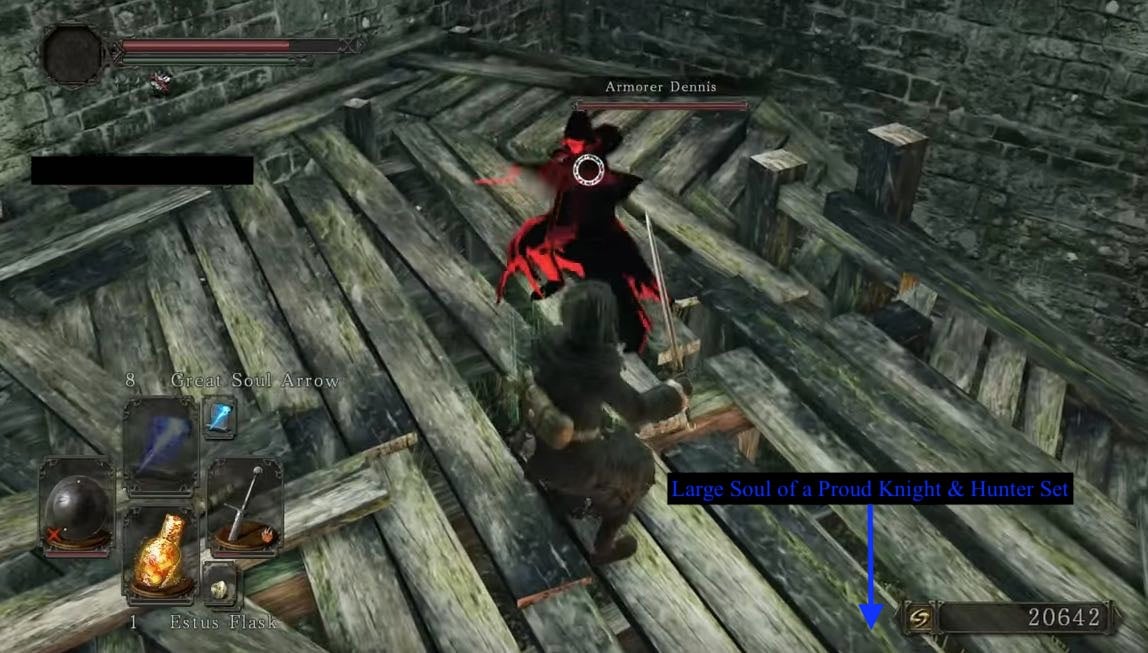
Heading back down you'll find a small clearing and a corpse by a gate (the other side is the area in which the ambush Pate warns about is found). The corpse holds an Amber Herb and Green Blossom. A broken down building creates a path over a chasm leading to the rest of the area. To the right are some steps leading up to a wooden chest containing the Hunters set and a Large Soul of a Proud Knight. Once in this area the NPC invader Armorer Dennis will appear. At the bottom of the stairs to the right will be two openings in the building. The first on will lead to the Soldier's Rest bonfire and the second opening will lead to a room containing a Giant Tree which may be holding a Seed of a Tree of Giants.
To the Pursuer
A second door can be open from down the Cardinal Tower bonfire ladder. Go through the bridge and get rid of the three hollow on the way. To the right of the bridge is a door you can now open. Walking in front of you, you will find a chest with 3x Torch and a Ring of Restoration. Back on, you can go to a courtyard through the right, and pick up a Grand Lance. Be careful of the Syan Soldier, as he can be tough at this stage of the game, though he also will not attack if you stay away from his door (you can't open it anyways). There is also a chest containing some Amber Herbs here. Now go back to the room, where you walked up a giant stone sword. On the right end of the room, there is a staircase and a door which previously couldn't be opened, it is now possible with the Soldier Key. Beat the two Royal Swordsmen up the stairs. At the top, you will be in an area with a mist wall and a third Royal Swordsman together with a bow-wielding Hollow Royal Soldier. Be careful, as this Swordsman might jump-attack you while you go up the stairs. Before getting through the mist wall, climb the stairs on the right to find a body and a Soul of a Nameless Soldier, and 3x Lifegem. Now, get ready to fight the area's boss and traverse the mist! NOTE: when you are not hollow, you can go back to the dark room with the skeletons to summon Ruined Alfis to help you in the fight.
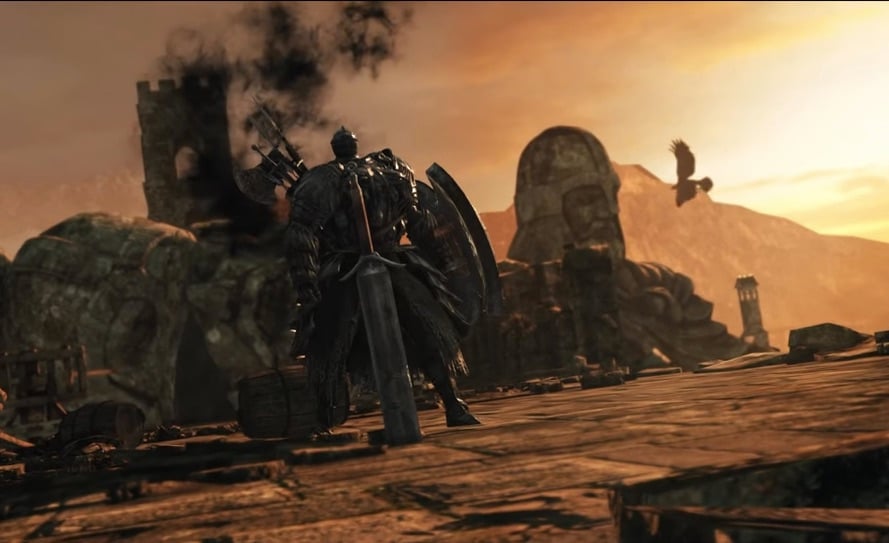
BOSS FIGHT: The Pursuer
After defeating the Pursuer, continue forward through the gap in the stone head. Through the hole in the floor immediately ahead, if you drop down, you will find the Drangleic Set, Drangleic Shield, and Drangleic Sword. Continue one more drop and you will be near the beginning of your ascent towards the Pursuer. If you head all the way back up to the room past the boss, past the gap in the floor you see two Hollow Royal Soldiers attacking another Giant Tree. When you go up the stairs to the right you will see a nest which you can "examine." Doing so will prompt an eagle to take you to The Tower Apart bonfire in the Lost Bastille.
Flame Lizard Pit
Note: this area is relatively high-level compared to the rest of Forest of Fallen Giants; probably one to come back to later.
If you decide to jump in the Flame Lizard Pit, use the Silver Cat Ring and try to drop down onto the junk at the end of the left side. The Flame Lizards are quite durable and cause a lot of damage with attacks (4 poison arrows to start the process, will eat about 3/4 of their hp). A high fire defense is recommended, however they have a lunge attack which is unblockable and will knock you down. This is in addition to breathing fire.
There are a total of four Flame Lizards below, one of which is readily visible and can be taken out with a bow and patience. If you switch the elevator to the Last Giant fight so the side closer to the pit is up, it can be used as a sniper spot for a second Flame Lizard who can only be seen from certain angles (that's one of them). An archer Hollow Royal Soldier will raise with this side of the elevator so watch out. After the second Flame Lizard is killed, a small tunnel leads down that he was blocking. Another one is to the right in a large chamber and the last is to the left in a smaller (but still big) side chamber. A locked door (opened using Iron Key) leads to the Last Giant fight (tunnel right before it).
The two Flame Lizards in the pit can be taken out with a bow by drawing them up partially and taking a few shots. They will retreat at some point and this will need to be repeated. Avoid the flames near the Flame Lizards, as they can burn your character, but only if you get very close(The flames will disappear, when you kill the 4 lizards, leaving holes, which are instant death if you jump into them. The flames will be there again, after reloading the level.). In the first section you can find a corpse with a Firedrake Stone, a skull holding a Soul of a Proud Knight, a skeleton with the Hawk Ring and a chest carrying a Flame Quartz Ring +1. In the lower area, a corpse holds Cracked Red Eye Orb x2. In the area with the last Flame Lizard (who tend to drop Cracked Red Eye Orbs as well) there is a skeleton carrying the Rebel's Greatshield and the Heavy Iron Key.
General Information
- Previous: Majula
- Next: Heide's Tower of Flame
- Recommended Levels: 5+
- Bosses: Pursuer, The Last Giant
- Bonfires: The Crestfallen's Retreat, Cardinal Tower, Soldier's Rest, The Place Unbeknownst
Forest of Fallen Giants Map
NPCs in the Forest of Fallen Giants
Merchant Hag Melentia
- Sells Key to the Blacksmith house in Majula (1,000 souls).
- Sells a Pharros' Lockstone, one of two that can be used to get the Chloranthy Ring at this point in the game. (4,000 souls)
Cale the Cartographer
Mild Mannered Pate
- Warns you of trap in short area full of Hollow Royal Soldiers, gives White Sign Soapstone upon your escape.
- Summon for The Last Giant boss fight.
Items
Consumables- Amber Herb x5
- Aromatic Ooze x3
- Buckler
- Chloranthy Ring
- Divine Blessing x1
- Estus Flask Shard (Upstairs in the Cardinal Tower)
- Fire Arrows x10
- Firedrake Stone x1
- Great Soul Arrow
- Green Blossom x2
- Halberd
- Homeward Bone x2
- Human Effigy x4
- Large Soul of a Lost Undead x2
- Large Titanite Shard x1
- Lifegem x7
- Radiant Lifegem x1
- Repair Powder x1
- Seed of a Tree of Giants (examine Giant Tree in the courtyard across from the Ballista room)
- Small White Sign Soapstone
- Soul of a Lost Undead x5
- Soul of a Nameless Soldier x5
- Soul of a Proud Knight x1
- Titanite Shard x2
- Titanite Slab (in Pharros Contraption room)
- Torch x7
- Twinkling Titanite x2
- White Sign Soapstone
- Witching Urn x5
- Wood Bolt x20
- Black Firebomb x3
- Cracked Red Eye Orb x3
- Large Soul of a Proud Knight
Equipment
- Hawk Ring
- Drangleic Set
- Infantry Helm
- Life Ring
- Sorcerer's Staff (hidden wall in Pate's area right before upward stairs; press X (PS3) or A (360) to open it)
- Ring of Restoration (need Soldier Key)
- Mail Breaker
- Light Crossbow
- Bastard Sword
- Blue Wooden Shield
- Broken Straight Sword
- Flame Quartz Ring +1
- Hunter Set
- Rebel's Greatshield (in Flame Lizard caverns - Winner of Dark Souls Shield Competition design)
- Hand Axe
- Fire Longsword
- Large Leather Shield
- Shortsword
- Small Leather Shield
Enemies
- The Pursuer - on the platform just outside the explosive secret door near the bonfire (an eagle drops him off); can be killed at this point to get Soul of the Pursuer and the Ring of Blades. This counts as The Pursuer boss fight; he won't appear in his boss arena later if you kill him here. do note that killing him there as a phantom gives full souls! therefore if you are trying to get souls fast kill that boss as a phantom.
- Hollow Royal Soldier
- Hollow Infantry
- Ironclad Soldier
- Flame Lizard
Notes
Full Forest of Fallen Giants Walkthrough
Accessing From Majula
Starting at the Majula bonfire, facing the coast, you should notice a crumbled wall separating the hill and a big doorway, on the right; if not, look for the torch sconce marking the entrance. This leads down to an underground stone ramp-way. Continue into the darkness, making a U-turn on the first right of the main path in, you'll find an iron chest (chest is a Mimic in NG+) with a Rusted Coin. Turn around and proceed down the hallway, to find a dead end to the right and to the left a large gated door. Pulling the lever to the right of the gate, opens it.
The path opens up to a cave with a wooden bridge that spans a stream. Past the bridge, going to the right leads to the Forest of Fallen Giants, while to the left you'll find two long planks to a large stone with a chest that contains a Human Effigy. Beyond in the stream is a corpse with a Homeward Bone and Soul of a Lost Undead, if you are confident in your jumping abilities, you can make the jump from the platform holding the chest. If not, simply head back up the wooden planks and drop down from the rocks above. To get to the Forest from here, simply continue forward, and follow the stream left.
One with Nature
Upon your arrival, two Hollow Infantries wander immediately ahead with an additional two beyond, around the bend of the creek. To the right, across the stream at the base of a tree is a with a Lifegem. Following the stream, and hugging the right wall, you'll come up a short path into a clearing in which you'll find The Crestfallen's Retreat bonfire. Move ahead across a plank bridge there is an Archer and 2 more Hollows. Dropping down to the stream below the plank bridge brings you to a corpse with Soul of a Lost Undead. Across the planks and up the hill brings you to a ladder.
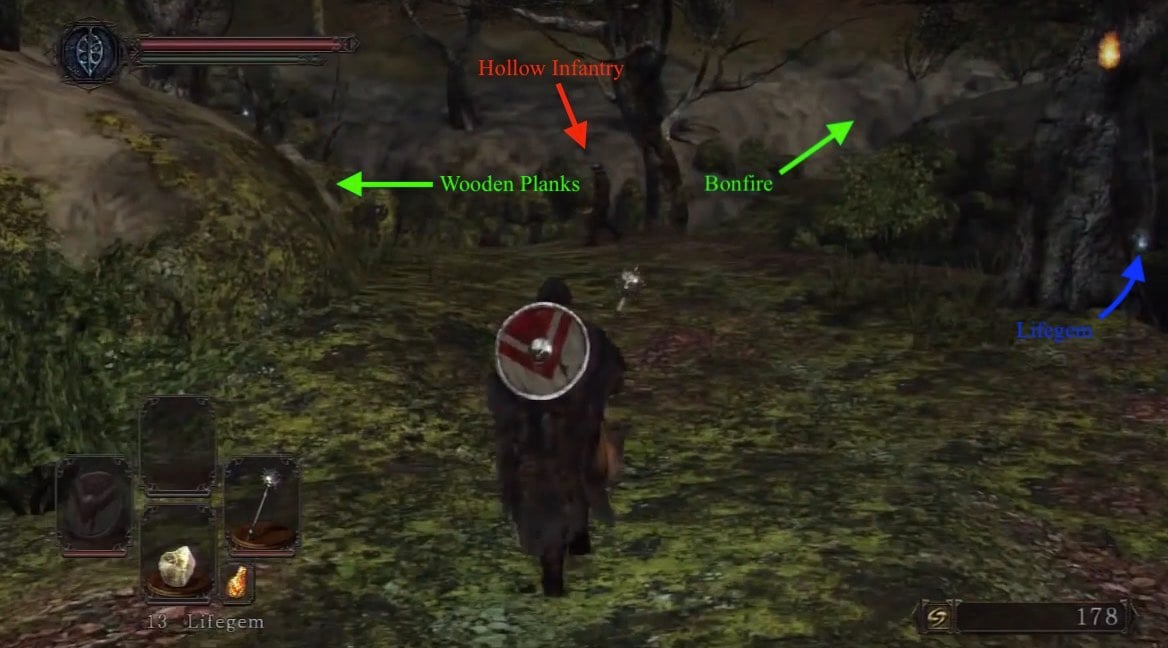
Mossy Rotunda
Going up the ladder leads into an open area with several Hollows and an Archer above. If you can't handle all Hollows at once, try luring them to the top of the ladder, then re-descending it quickly. The Hollows will follow you down the ladder and you can dispatch them one by one.
At the base of a tree in the Mossy Rotunda, you'll find a resting Heide Knight, who will not attack unless provoked. While that sounds well and good, killing him drops the Heide Knight Sword. There are two corpses on the ground where there is a Human Effigy and a Lifegem. Next to the Heide Knight, a corpse holds a Broken Straight Sword.
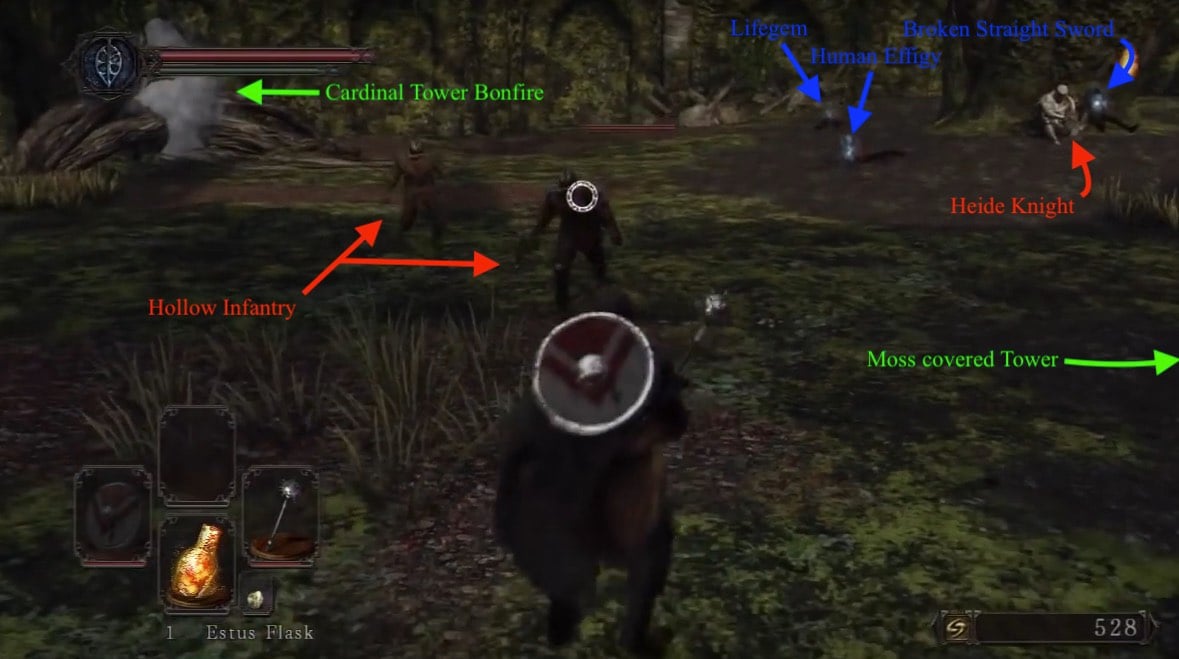
To the right is an opening to a cliff, and to the left a ladder up a moss covered tower. There are two Hollows on the stairs up. Cross the the planks at the top of the tower and go up to the right to a corpse with a Soul of a Nameless Soldier. Dropping down to the ledge below leads to the Archer and a Hollow. Jumping across the gap to the ledge brings you to a corpse with Shortsword and Soul of a Lost Undead. Back at the base of the ladder that lead up, to the right you can spot a platform with items on it. Jumping over to it nets you Throwing Knives.
Hallways to Cardinal Tower Bonfire
To the left of the clearing is a mist, which leads through a wooded tunnel and into ruins. Before going straight into the broken wall, turn left and kill the ambushing Hollow Infantry around the corner then return to the hole and drop into a room with 3 Hollows (one of them faking death). In the corner behind the shelves -you'll have to break it- find 20x Wood Bolt. Leave the room through the door and head right to enter a room with two Hollow Royal Soldiers; one will ambush you from the right after you pass the boxes, and the other will join after. Continuing down the hallway, you will find a Lifegem x1 on the left, and stairs beyond with a hollow archer at the top who fires down at you. As you ascend another Hollow Royal Soldier from a ledge throws Firebombs at you. A third Hollow Royal Soldier moves to ambush you as you reach the top of the stairs. By the back of the courtyard near the rubble you will find the Buckler.
Along the wall to the left of the staircase is a ladder. At the top, straight ahead is a corpse with 5x Witching Urn and a Hollow Royal Soldier (around the corner to the right). Back behind you is a set of doors which open to a room with the Cardinal Tower bonfire. Next to it, you meet the Merchant Hag Melentia. After speaking with her and getting some back-story, she will move to Majula. Grab a Firebomb or 2 for later.

Going up the stairs in the room leads to a locked door. Once you obtain the Soldier Key (or break the door down), it opens to a room where you will find the following: a Crystal Lizard, a chest containing a Small Leather Shield and Repair Powder, a Hand Axe and Radiant Lifegem, a Hollow Soldier Helm, and a door that leads to another room with an iron chest holding Radiant Lifegem x2 and a Small White Sign Soapstone. A Hollow Royal Soldier will stand up behind you once you go through the door. You can drop down here and onto the branch to obtain a Divine Blessing, then to the bottom to return to the bonfire.
Scaffolding and Flame Lizard Cave
Outside of the bonfire room you can drop down to wooden planks where there will be two Hollow Infantry Soldiers. Proceeding down the plank, there is a hole in the wall on the left which leads you back to the staircase and bonfire from the previous section. Jumping to the plank ledge brings you to a corpse with a Human Effigy. Drop down to the wooden platform and kill the Hollow. Go down the ramp and walk carefully down the tree trunk, where you come across a corpse with a Soul of a Lost Undead and Torch.
On the ground, expect several Hollows and two Ironclad Soldiers. To the left, a cave opens to a tunnel lined with petrified people. Flames tinge the air while explosions can be heard. A corpse on the floor carries a Soul of a Proud Knight. Deeper into the tunnel, a grated door is on the left where there is a chest with a Fire Longsword. Quickly make a dash for the door and get it open to secure yourself a safe sport from the explosive molten balls that will begin pelting you.

Progressing down the tunnel means confronting the fire-breathing Flame Lizard responsible for the fires. You can also kill it which takes time and maybe isn't worth it. However, by killing it you can leap inside the hole (It could be a bug/glitch, because it will take some tries to be able to jump into it, which can happen by trying to jump from the left side of the hole). Inside the hole there are three more Flame Lizards, a closed door, many corpses to loot, and a chest. (There is another way to reach the treasures, detailed in Flame Lizard Pit).
To the left of the cave with the fire there is another cave with an Foot Soldier Shield, guarded by an Ironclad Soldier. Going back out the tunnel and into the clearing, kill another Ironclad Soldier and there is a ladder near the corpse that had the human effigy. To the left of the ladder is a corpse with a 3x Lifegem. Taking the ladder up brings you back to the plank near the hole in the wall mentioned earlier in this section.
Cardinal Tower Bonfire Ladder
In the bonfire room is a ladder down into a large room with columns. There are two Hollow Royal Soldiers here waiting to attack, one sits feigning death on the left, and one comes from the bridge. Down at the bottom of the room, giant Flame Lizards (See 'Flame Lizard Pit' below) are visible. Facing the bottom of the ladder, to your right is a closed door that does not open from that side (later on, this will be opened from the other side creating a shortcut).
Going across the bridge leads to a feigning Hollow Royal Soldier, and another locked door on the right. A body at the corner holds a Soul of a Lost Undead. Back across the bridge, jog right through an open archway which leads to a room with a locked door on the right (leads to Soldier's Rest area) and mist straight ahead. Another Hollow Royal Soldier is laying on the ground behind the large pillar on the right.

Rooftops, Cale, and First Shortcut
Going through the mist leads to an area with rooftops, scaffolding, and a large tree branch directly ahead which leads up. As soon as you enter the area, two Hollow Infantry will converge on you from the right, and an archer on a wall far to the right will start shooting -- he will continue to pick at you through this entire section. Running up the tree-root brings you to the top of a wall where an Ironclad Soldier stand near wooden breastworks. Get him out of the way.
Back near the top of the tree-root, you can drop down to a peaked rooftop (the drop will take some health). When you drop down, you'll want to keep moving, but note that just behind you here is another drop to a round room with a Hollow Infantry and a corpse with a Torch, return for it later. There are two Hollow Infantry on the rooftops, plus another Archer to your left. Keep moving, work quickly, and take care not to fall. Once you've killed all the Infantry, head back to where you dropped down from the root. Dash and jump across a small gap to deal with the pesky archer. Then, drop down to another landing with a ladder in front of you, and a cave to your left.
Enter the cave slowly and carefully; as you move forward you'll eventually trigger a boulder trap. After the boulder passes, there's a corpse straight ahead with a Human Effigy on it. Do not go right down around the corner and fall in the hole and die. Continue up the ramp where the boulder came down, dispatch another Hollow Archer to the Left, and find a corpse with an Amber Herb, you'll also find Cale the Cartographer crawling around back in the cave. Exhaust his dialog, and he will give you the key to the mansion in Majula.

Retrace your steps back to the ladder on the same level as the entrance to the boulder-trapped cave. Climb the ladder and run down the battlements to your right, finally dealing with the annoying Archer. Continue down the battlements and drop to your right onto the rooftop, then head back right again up the ramp and towards the "first" rooftop. Drop down to the middle tier of the house, and follow a ramp down the ground; another Archer to your right may start sniping you. Head straight along the water to a corpse next to a gate with a Titanite Shard.
To get back to the main tree-root from the ground at the gate:
- From the gate, head straight back along the water and right to the plank ramp you (probably) came down
- About four strides up, turn a hard left onto a short set of planks which drop you back to the ground below the big tree root
- Go under the tree root, following the water around to your left to a ladder. There may be a Hollow Infantry hiding here.
- Climb the ladder to the roof and turn right to a plank bridge which takes you back to the tree root.
Go back up to the top of the tree root where you killed the Ironclad Soldier. Nearby, a ladder on the right brings you up to a rooftop platform and triggers an in-appearance of an eagle who drops the Pursuer mini-boss. Probably a good idea to run away here, level-up and face him later. If you defeat him here, he will not appear for the later boss fight, but if you drop off the platform or die, he will disappear from this current location for good.
In the far corner of the platform where the eagle drops the Pursuer is a fire-bombing Hollow Royal Soldier and there is a Hollow Royal Soldier in each corner. There are some bodies in that place, they hold a Human Effigy, Lifegem x2, a Torch, an Estus Flask Shard and a Repair Powder. Back down the short ladder, at the end of the way, past all of the breastworks are a bunch of explosive barrels stacked by the wall. Throw a firebomb (from a distance; purchasable from Merchant Hag Malentia)/bait the firebomb-throwing Hollow Royal Soldier to set off a huge explosion which opens a shortcut back to the Cardinal Tower bonfire.

Ballista Room, Pharros' Lock, and Pate
Coming out of the new shortcut bomb-hole, two Hollow Royal Soldiers await to your left, and straight past is a ladder which leads down to a short stone staircase. In the corner on the left by the stairs is a corpse with Green Blossom. Moving forward, to the right is a knocked in wall which opens to a room with ballistas that fire arrows when triggered by proximity to the room. Inside the room you are swarmed by several Hollow Royal Soldiers so it is best to trigger the trap and walk out, letting the arrows kill one of the enemies. If this doesn't work, run in and go to the left before they fire and take them out before they swarm you.
The ballistas can be operated by the player which should lead to some fun PvP moments. There are two corpses on the ground with Great Soul Arrow, a Large Soul of a Lost Undead, and Blue Wooden Shield. Inside this room in the back, there's a ladder. Opening the chest in the lower room triggers a trap (either poison or arrows it is best to roll to the left or right and slightly behind the chest as this will avoid arrows and most of the poison), inside the chest is a Titanite Shard. If you have a Pharros' Lockstone and insert it into the mouth in the wall (if not you can buy it from merchant hag Melentia). A nearby wall will shine, indicating you should attack it. Upon attack, it will reveal a hidden room with two chests containing the Chloranthy Ring and a Titanite Slab. Attacking the Closed door down here will cause three enemies inside to open the door, inside you can find a chest containing the Life Ring and a Large Titanite Shard.
Beyond that room along the same wall, you encounter the NPC Pate who warns you about a trap. Walking through the adjacent archway leads to four Hollow Infantry who swarm you. The gate in the archway is lowered behind you, preventing you from returning back through. Several Hollow Infantry and soldiers attack here. Walking straight on through the open doorway brings you into a hallway, in the corner of which is a corpse with Aromatic Ooze x3. On the Wall past this item there is a hidden wall that contains a Sorcerer's Staff and Amber Herbs x1 . Continue down the hallway and left to the bottom of a staircase.

Once up the stairs, go past the cart which blocks the path, going left takes you to the top of the wall above Pate and the gate that dropped behind you after crossing into the courtyard. You can drop down either side from here. Returning to Pate continues his dialogue tree and earns you White Sign Soapstone.
Hollow Royal Soldiers and Firebombs
Going directly opposite of the ballista room brings you to a courtyard (and exploding barrels) with doorway ahead and an open archway to the right. Going through the right one brings you to another courtyard with a Hollow Royal Soldier slumped along the wall to the left; he reanimates and attacks. Continuing through another archway into yet another courtyard, you'll find a large tree is on the right and two Hollow Royal Soldiers attacking the tree. Behind that tree is a corpse with a Large Soul of a Lost Undead.
Returning back through the doorway, there is a ladder up the wall to your left. Going up the ladder brings you to the top of the wall above Pate and near trigger-gate. Going to the right leads to a corpse with a Light Crossbow. Through the doorway past the corpse and into the fort leads inside another section of the fort. Inside drop down to the room and defeat the three Hollow Royal Soldiers. Open the iron chest to obtain a Mail Breaker and Infantry Helm. If you go back to the ledge above the three hollows, you can jump across to loot a corpse with a Torch and a Soul of a Nameless Soldier.
Seaside Sword Room and Second Shortcut
You can drop down from here to return to the portion of the courtyard where the two Hollow Royal Soldiers are located. If you haven't already, kill the Hollow Royal Soldiers and go through the doorway into a large room. To the right and up the stairs is a corpse with a Lifegem and Homeward Bone . Back down the stairs and to the right is a locked door (opened with the Soldiers Key). To the left, as you enter, and straight down the room are two Hollow Royal Soldiers. Just past the ruins of the giant sword a Ironclad Soldier waits to ambush you from behind a cart. In the corner nearby is a corpse with 2x Amber Herb. Going up the blade of the stone sword, trigger a trap where four Hollow Infantry drop down behind you onto the sword. At the end of the sword you will find a Halberd and Soul of a Nameless Soldier.
Once back down the sword, head through the mist and into a large open room with a sconce. to the right is a broken wall which leads into a room with a seated Hollow Royal Soldier. The staircase in the room leads down to a boarded up door. A corpse at the base has a Large Leather Shield and Lifegem. Returning back into the first room you first entered, head straight across and turn right. On the right is a corpse with 10x Fire Arrow. Just beyond and to the right is the elevator to the The Last Giant boss. But, first, open the door just ahead which creates a shortcut to the ladder from the Second Bonfire.
When you're ready to try The Last Giant, step on the pressure plate elevator and descend. (If you step on the pressure plate but immediately hop off of the elevator, the other side will bring up a Ironclad Soldier. Descending either elevator goes to the same location) Go down the hallway where a Hollow Royal Soldier waits in the doorway on the left. The door is locked for the time being. To open it, you need the Iron Key from the Iron Keep. This door leads to the Flame Lizard Pit mentioned earlier. Straight into the tunnel and enter the mist to confront The Last Giant. It is recommended summon the NPC Pate here.

BOSS FIGHT: The Last Giant
Ironclad Enclave - Soldier's Rest
After obtaining the Soldier Key, return to the room before the rooftops section, just past the bottom of the bonfire ladder, and to the left of the bridge above the Flame Lizard Pit. The Soldier Key unlocks the door in this room and opens to the top of a staircase. Descending leads to a fairly dark, long rectangular room. A shade summon sign for Ruined Alfis will be just next to the doorway. Sconces are scattered about the room and, when lit, illuminate the entire area nicely. Several skeletons will appear as you move forward. A corpse in the corner by the sleeping hollow has a Black Firebomb x3 and a Homeward Bone. A door exits to an outside area where the remnants of several buildings are found. Ironclad Soldier are the main enemy here, but a hollow archer will immediately become a nuisance. Hollows are present in a small building directly across from where you come into this section. Ladders outside and inside this building lead to the roof where the player will be greeted by large hammers from three Ironclad Soldiers. On this rooftop is a corpse holding a Soul of a Nameless Soldier, a Whip and 3x Cracked Red Eye Orb .

Heading back down you'll find a small clearing and a corpse by a gate (the other side is the area in which the ambush Pate warns about is found). The corpse holds an Amber Herb and Green Blossom. A broken down building creates a path over a chasm leading to the rest of the area. To the right are some steps leading up to a wooden chest containing the Hunters set and a Large Soul of a Proud Knight. Once in this area the NPC invader Armorer Dennis will appear. At the bottom of the stairs to the right will be two openings in the building. The first on will lead to the Soldier's Rest bonfire and the second opening will lead to a room containing a Giant Tree which may be holding a Seed of a Tree of Giants.
To the Pursuer
A second door can be open from down the ladder. Go through the bridge and get rid of the three hollow on the way. To the right of the bridge is a door you can now open. Walking in front of you, you will find a chest with 3x Torch and a Ring of Restoration. Back on, you can go to a courtyard through the right, and pick up a Grand Lance, be careful of the Syan Soldier, as he can be tough with you being this low leveled. There is also a chest containing some Amber Herbs here. Now go back to the Seaside Sword room. The door left of the stairs can now be opened. Beat the two hollows up the stairs and be careful with the one above, he may jump attack from the stairs. Go up and you will face a mist wall. Before getting through, climb the stairs on the right to find a body and a Soul of a Nameless Soldier, and 3x Lifegem. Now, get ready to fight the area's boss and traverse the mist!

BOSS FIGHT: The Pursuer
After defeating the Pursuer, continue forward through the gap in the stone head. Through the hole in the floor immediately ahead, if you down down, you will find the Drangleic Set, Drangleic Shield, and Drangleic Sword. Continue one more drop and you will be near the beginning of your ascent towards the Pursuer. If you head all the way back up to the room past the boss, past the gap in the floor then go up the stairs to the right you will see a nest which you can use. An eagle will take you to The Tower Apart bonfire in the Lost Bastille.
Flame Lizard Pit
Note: this area is relatively high-level compared to the rest of Forest of Fallen Giants; probably one to come back to later.
If you decide to jump in the Flame Lizard Pit, use the Silver Cat Ring and try to drop down onto the junk at the end of the left side. The Flame Lizards are quite durable and cause a lot of damage with attacks (4 poison arrows to start the process, will eat about 3/4 of their hp). A high fire defense is recommended, however they have a lunge attack which is unblockable and will knock you down. This is in addition to breathing fire.
There are a total of four Flame Lizards below, one of which is readily visible and can be taken out with a bow and patience. If you switch the elevator to the Last Giant fight so the side closer to the pit is up, it can be used as a sniper spot for a second Flame Lizard who can only be seen from certain angles (that's one of them). An archer Hollow Royal Soldier will raise with this side of the elevator so watch out. After the second Flame Lizard is killed, a small tunnel leads down that he was blocking. Another one is to the right in a large chamber and the last is to the left in a smaller (but still big) side chamber. A locked door (opened using Iron Key) leads to the Last Giant fight (tunnel right before it).
The two Flame Lizards in the pit can be taken out with a bow by drawing them up partially and taking a few shots. They will retreat at some point and this will need to be repeated. Avoid the flames near the Flame Lizards, as they can burn your character, but only if you get very close(The flames will disappear, when you kill the 4 lizards, leaving holes, which are instant death if you jump into them. The flames will be there again, after reloading the level.). In the first section you can find a corpse with a Firedrake Stone, a skull holding a Soul of a Proud Knight, a skeleton with the Hawk Ring (which seems to be mostly useless) and a chest carrying a Flame Quartz Ring +1. In the lower area, a corpse holds Cracked Red Eye Orb x2. In the area with the last Flame Lizard (who tend to drop Cracked Red Eye Orbs as well) there is a skeleton carrying the Rebel's Greatshield and the Heavy Iron Key.
 Anonymous
i wonder how these people ever enjoy darksouls, a game which is intentionally distant, harsh and does not bother to spoonfeed you information or placate you. then when you go to the wiki written by volunteers, you act entitled and expect to be pampered like little children over the smallest things. why don't you fix the wiki yourself?

 Anonymous
Almost from the start this wiki is infuriating. The bit where you say to go up onto the platform where tonnes of enemies are plus a Pursuer BEFORE opening the shortcut to the cardinal tower bonfire is absolute genius. Do you even read what you've written. So much of it is assbackwards. And here's the kicker - the other walkthroughs I've looked at were WORSE. I thought nerds were into details.

 Anonymous
Fun fact: The bird that you can hear calling near the Cardinal Tower bonfire is a northern goshawk (Accipiter gentilis), a wide-ranging forest raptor found at northerly latitudes across Europe and Asia, including in Japan. As of 2023 the goshawk found in North America is considered a separate species, Accipiter atricapillus.

 Anonymous
What key do I need to open the door to the lizard pit and where do I get it?

 Anonymous
 Anonymous
 Anonymous
To fellow players new to DS2 and are having trouble finding the hidden wall with the sorcerers catalyst behind it. Some hidden walls in DS2 are not destructible. They ones that aren’t destructible, can be opened by interacting with it (though a prompt will not appear you can still interact).

 Anonymous
 Anonymous
 Anonymous
 Anonymous
 Anonymous
 Anonymous
 Anonymous
Anyone have a list of all places where there are breakable walls?

 Anonymous
who wrote this garbage? not even a screen shot for locations of important items. sloppy work.

 Anonymous
The "fire lizard pit" stuff needs to be reworked by someone who actually knows how to format a wiki correctly. All the fextra wikis ive used over the years have been excellent quality. Yet the entire DS2 wiki is unfathomably broken

 Anonymous
The other Soulsborne wiki were great but why is the dark souls 2 wiki ass cheeks here?

 Anonymous
What happened to the text formatting in the "Seaside Sword Room and Second Shortcut" sub-sectiion? It's completely broken.

 Anonymous
 Anonymous
Why is there a Halberd and Sorcerer's staff in the consumables list and not in the equipment list?

 Anonymous
There's something charming about this area that sets the scene for the rest of the game, but I don't know how to explain it. It alone keeps me hooked and playing for the rest of the game. Maybe it's the bosses, or the connectivity but it just keeps me coming back to this excellent game time and time again.

 Anonymous
Why couldn't they add atleast a hole texture where the chains come out of the ceiling at the elevator. It looks so bad.

 Anonymous
i bought this because of a recent sale and my god this area is not a good start.
ds1 and ds3s first few areas are great and make me want to play more... this just feels like a slog
 Anonymous
I never seen so many ungrateful chumps in my entire life. This site is full of people talking trash about the authors of the walkthroughs, who do this stuff voluntarily. Feel free to take the time to write one yourselves. Oh wait... you won't, since you're lazy and all you do is complain when you get spoon fed information. Y'all are childish.

 Anonymous
A sunbro by the name of XiRiLiPiPiCu helped me out with this area giving me a really good start in the game. God I just wish i could thank them.

 Anonymous
This was so plastered with annoying enemies and ambushes it made me quit ds2 for half a year

 Anonymous
If anyone's confused by what does "Now go back to the Seaside Sword room" means, remember that long rectangular room with the statue with its sword making a ramp up to a Halberd and an ambush? Entering this room from the entrance guarded by the, highly likely the first ever ninja turtle hammer guy you'll see, to the right is a short staircase. Beside that staircase is the entrance to the Pursuer, opened with the Soldier Key

 Anonymous
For some reason I had a shadow of an enemy or npc that dropped a smooth and silky stone in the area above the two firebombers.

 Anonymous
Here i was running away from 3 Iron turtles, Dennis and a handful of skeletons... the bastard sword was worth it though.

 Anonymous
Even after beating ds1, this areas kicking my ass. Guess I gotta git gud.

 Anonymous
 Anonymous
Started SOTFS today after completing DS1 a few days ago and dear me this area is boring, I don't know what it is there's nothing particularly wrong but it's just so...dull.

 Anonymous
 Anonymous
Is there a Scholar of the First Sin guide? This is my first souls game and it is thoroughly destroying me.

 Anonymous
I am farming the beginning of the forest and after awhile some enemies that are Respawnable don't respawn

 Anonymous
"Heading back down you'll find a small clearing and a corpse by a gate (the other side is the area in which the ambush Pate warns about is found)." NO IT ABSOLUTELY IS NOT >:( I'd fix this but someone destroyed the formatting of this page

Is there a hidden area near the beginning? If you're up on the walls of the Mossy Rotunda, and look down through binoculars to the area of the Ironclad Enclave (the soldiers won't render from that distance but you'll see the boxes and barrels on the main structure), on the cliffs above that is a pathway, and there's a platform to the right that almost looks like it's supposed to be jumped to from one of the branches to the mossy rotunda. Following that you go into a tunnel. Or vice versa, jumped from onto that main structure for the ironclad enclave. Also, at the start of the rooftop pathway (next to that platform the Pursuer might appear only once via eagle), from that section of barrels you can detonate to open a hole to the cardinal tower bonfire, if you go to the opposite end of that pathway there's a set of boulders blocking what looks to be a valid tunnel entrance. Arrow shots do go through the one gap you can see at the top of the boulders. Is there a pathway there? And how do you get to it?

 Anonymous
There’s another giant that you can do something with what do I need for it? If the guide said something about then I just missed it. :(

 Anonymous
Something is wrong with this guide. Where is the heide knight that supposed to sitting close to the tree in the rotunda?

For Xbox one the ironclad knight on the lift to the last giant cannot step off the wood platform to get you. So step back and shoot your bow at him.

 Anonymous
The hawk ring is not useless as most bows have terrible range in the beginning, and here is a tip for new people: duck under the giants legs when he swings and do not get stepped on.

 Anonymous
 Anonymous
It's possible to get down to the Fire Lizard Pit without a silver-cat ring using a plunging attack to cancel the fall damage. From the bottom of the ladder near the bonfire, face the pit and stand on near the pillar to the right of the ladder. Aim yourself towards the lizard and take a few steps back. Run and then jump off the ledge and you'll get enough distance to be able to perform a plunging attack on the lizard which will cancel all fall damage. Because the lizard is so large it's relatively easy to hit, just watch out because I've once had the plunging attack connect but not perform an animation, leading to me sliding off the lizard and taking fall damage as normal.

 Anonymous
Sorry there is no knight at the tree once you start a new game or starting out as a first time visitor

 Anonymous
It is not an eagle (even if it looks like) - In the official game guide it is stated that what carries the Pursuer around is a crow (since Pursuer is a tool of Velka).

 Anonymous
A good way to grind souls is after the second bonfire, go down the ladder and defeat the enemies in the area. If you look at the floor below, you can see the fire lizard. If you have a projectile attack, you can probably kill him and get a bunch of souls. If you go back to the bonfire and go back to there, he should return and you can kill him again.

 Anonymous
I can't summon anyone because I don't have Xbox live! The pursuer is impossible for me! I mean, I beat the last giant to get there, but he was hard too. Can anyone give me any tips on how to kill the pursuer? (I Got killed on the mini-boss fight)

 Anonymous
So, Late game, went back to this area to do some weapon testing and the moment I go outside these golden flecks start floating down, I've never seen this environmental effect before anywhere. It looks like fireflies or embers falling from the sky. I've gotten as far in the game as to beat every boss but the true final boss and the boss before him (I cannot spell names for the life of me) I have no idea if this effect is natural or occures after a certian point in the game or what, it's just an interesting effect and want to know what caused it.

 Anonymous

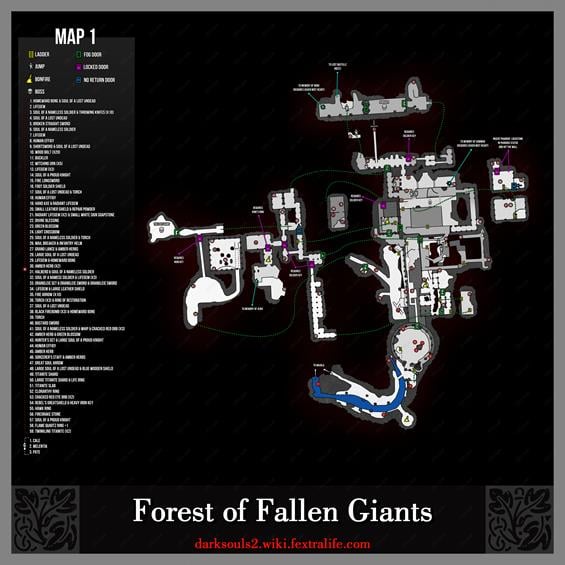
Not be ungrateful but the map misses quite a lot
0
+10
-1