Harvest Valley
 This area contains many powerful casters and poison pools which are dangerous to explore in without the appropriate gear, it is best to take one's time and proceed slowly to avoid a surprise attack which leads to death by poison. The Heirs of the Sun covenant can also be found in this area.
General Information
- Previous: Undead Purgatory
- Next: Earthen Peak
- Recommended Levels: 60 to 70
- Bosses: N/A
- Bonfires: Poison Pool, The Mines
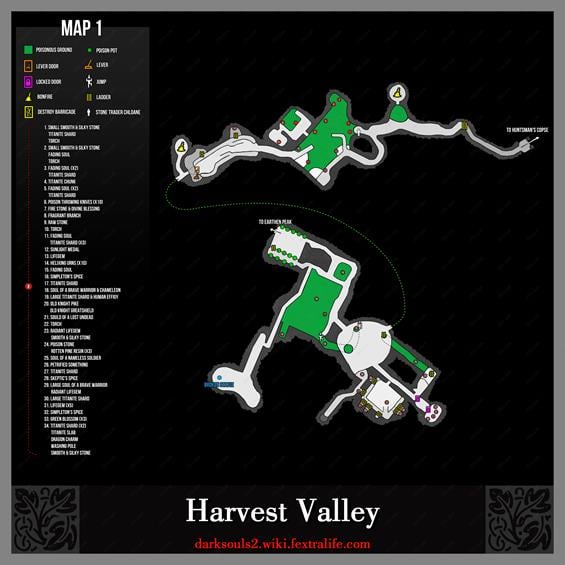
Harvest Valley Map
NPCs in the Harvest Gulch
Items
Consumables- Fragrant Branch Of Yore
- Raw Stone x1
- Hexing Urn x10
- Lifegem x7
- Fading Soul x6
- Titanite Shard x9
- Torch x6
- Small Smooth & Silky Stone x2
- Titanite Chunk x2
- Fire Seed x1
- Divine Blessing x1
- Soul of a lost Undead x1
- Radiant Lifegem x2
- Smooth & Silky Stone x2
- Large Titanite Shard x2
- Simpleton's Spice x2
- Skeptic's Spice x1
- Poison Stone x1
- Rotton Pine Resin x3
- Soul of a Nameless Soldier x1
- Green Blossom x3
- Large Soul of a Brave Warrior x1
- Human Effigy x1
- Titanite Slab x1
- Old Knight Pike
- Old Knight Greatshield
- Chameleon Scroll
- Poison Throwing Knife x10
- Dragon Charm
- Washing Pole
Enemies
- Banedigger (Dark Magic Giant)
- Hollow Crawler
- Skeleton
- Captive Undead (Hollow)
- Artificial Undead (Sickle Wielder)
- Steelworker Undead
- Desert Sorceress
Notes
- Use a torch while exploring the caves with poison, so it will be easier to see where you are going.
- Harvest Valley is filled with poisonous areas and obstacles, so come prepared.
Harvest Valley Walkthrough
Stone Trader
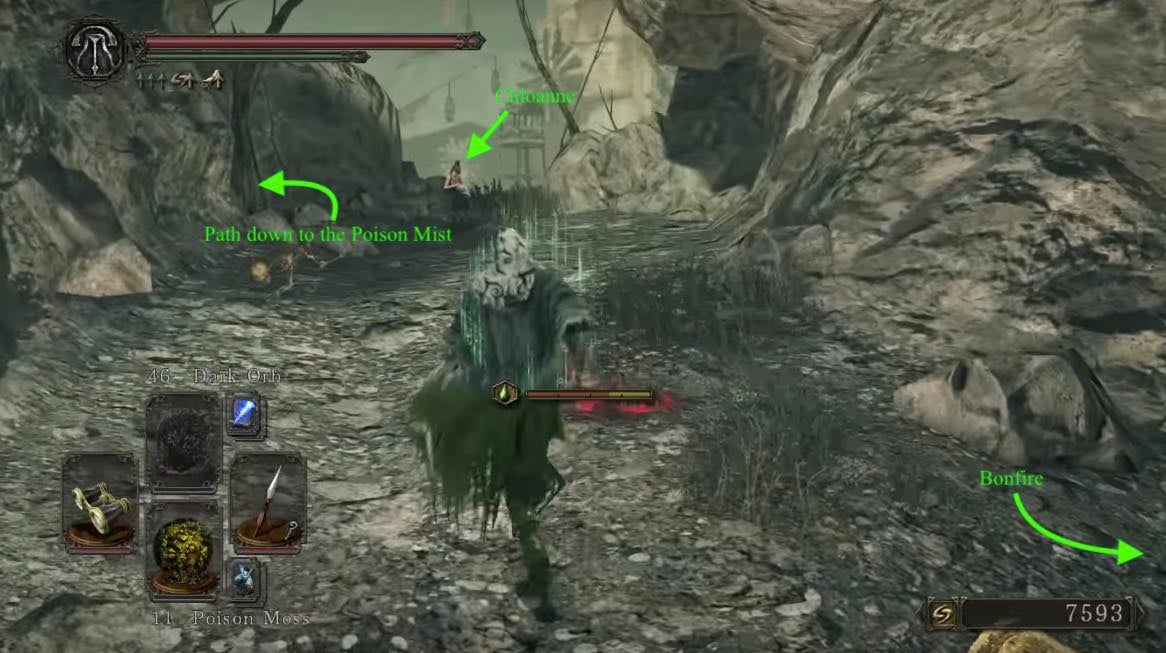
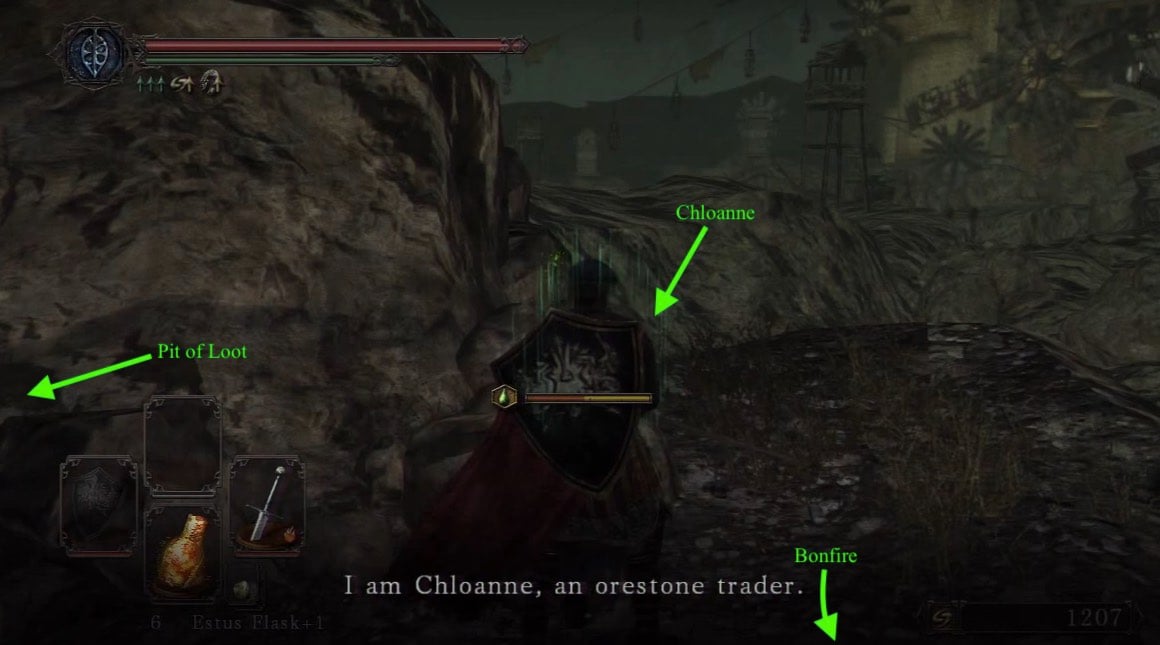
From the Skeleton Lords boss area in Huntsman's Copse, head through the doorway in that room and continue on a path leading to a raised bridge. Pull the lever on the right to lower the bridge and cross over into Harvest Valley. As you move along the rocky pathways you will soon encounter a pool of poison to your right blocking a cave which harbors the first Bonfire. Defeating the boss in Earthen Peak will drain the pool is drained. However, as that comes later, cross quickly but don't roll as that covers your entire body in poison rather than only your legs. Once you've used the bonfire, head back across the poison pool, and up the right side the hill to encounter the NPC Stone Trader Chloanne . Exhaust her dialogue to move her to Majula.
Misty Treasures
Peering over the edge, you can spot a rather large enemy standing in the middle of a poison lake, a Banedigger; this guy uses Dark Orbs. Use this vantage point to defeat him with ranged attacks, as battling in the poison mist is too unnecessarily risky. After dispatching him, head down the path to your left and continue to walk along the ledge to find a spawning Skeleton and a corpse holding a Lifegem. In the poison mist you can see a plethora of items scattered all over the area. There are also 3 Hollow Crawler and a few more Skeletons that spawn when traversing this area. Tank up on anti-poison items of your choice and plunder:
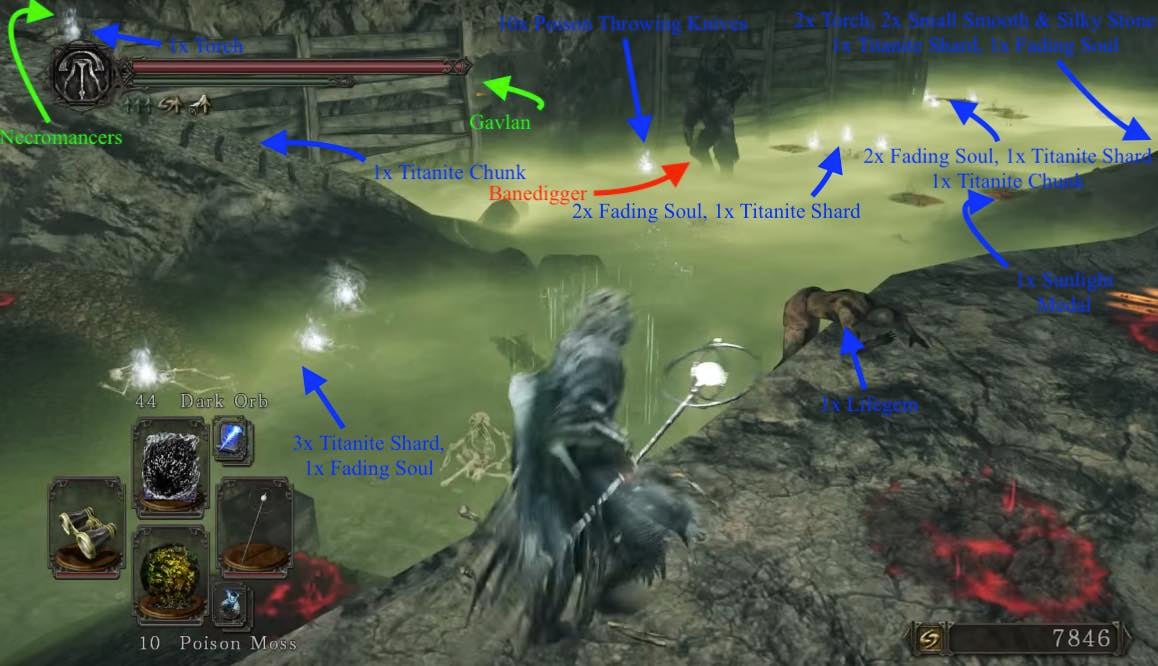
- 7x Fading Soul
- 7x Titanite Shard
- 10x Poison Throwing Knife
- 2x Small Smooth & Silky Stone
- 2x Titanite Chunk
- 2x Torches
- 1x Bleed Stone
- 1x Lifegem
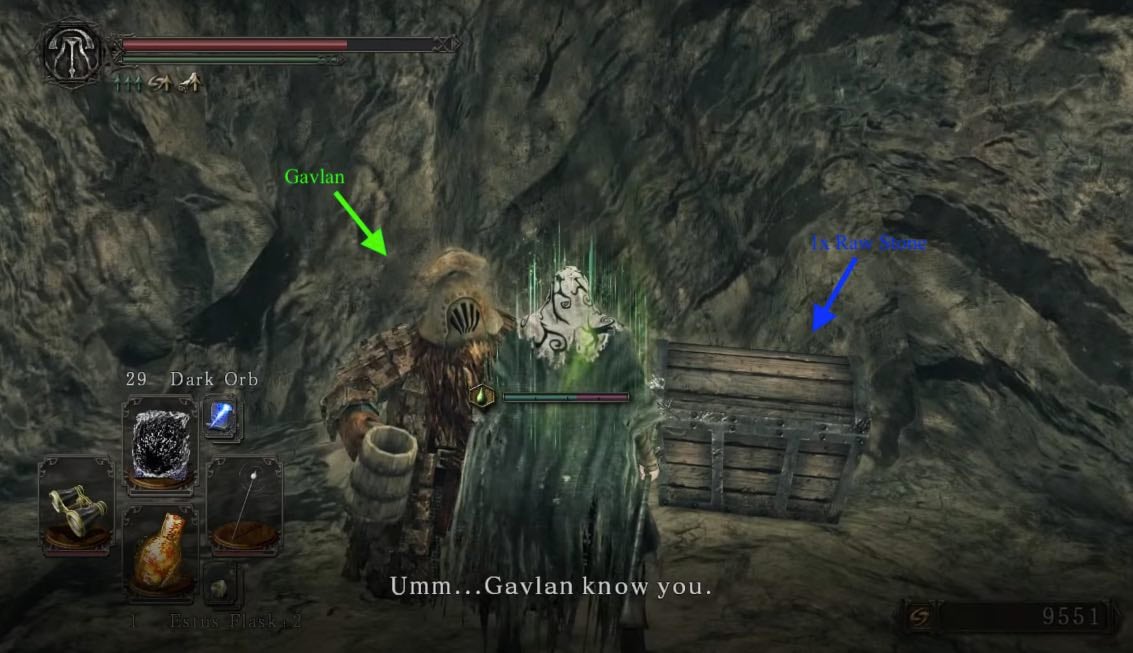
Head through the small archway in the middle of the lakes wall and kill the skeleton to your right. Circle around the left of the poison pit to loot a corpse holding a Fragrant Branch Of Yore and a Torch. Continue along the ledge and enter the hole in the wall to find the NPC Gavlan (If you talked to him previously in No-man's Wharf). Behind him is a chest containing Raw Stone. Exiting this room, in this same cave, down in the mist, there should be a small alcove to the left of the slope leading down. In here you'll find a chest containing a Fire Seed and a Divine Blessing.
Leave this cave, back out to the open and head up the slope to where you found the single Torch. Continue along and you'll arrive to the greetings of two Desert Sorceress; one on a ledge on the left, and another on a higher platform at the back. They're easily dispatched at range by rolling the occasional fire hail. Melee is also viable, but be wary, as they also cast Lingering Flame, which will explode instantly if you're in melee range. Climb the ladder that you first come across on the right for a better vantage point and 10x Hexing Urns. You will also find multiple Undead around the area. Climb the second ladder on the right to arrive at where the second Desert Sorceress is/was. You'll find a lever you can pull to raise the wooden gate blocking the exit. Head through and turn right to reach the second Bonfire. Be careful with the urns in this area, as they are all filled with poison.
From the Second Bonfire
Past this bonfire, you'll come upon a small quarry with several holes filled with poisonous gas. Here you'll find three Crystal Lizards. This is quite convenient, as if you miss any of them, you can easily go back to the bonfire, rest, and try again, without traveling a long distance or having to face any enemies in the process. Along the left wall is a path leading up to a boarded off area, and an opening on the right, ignore the opening for now.
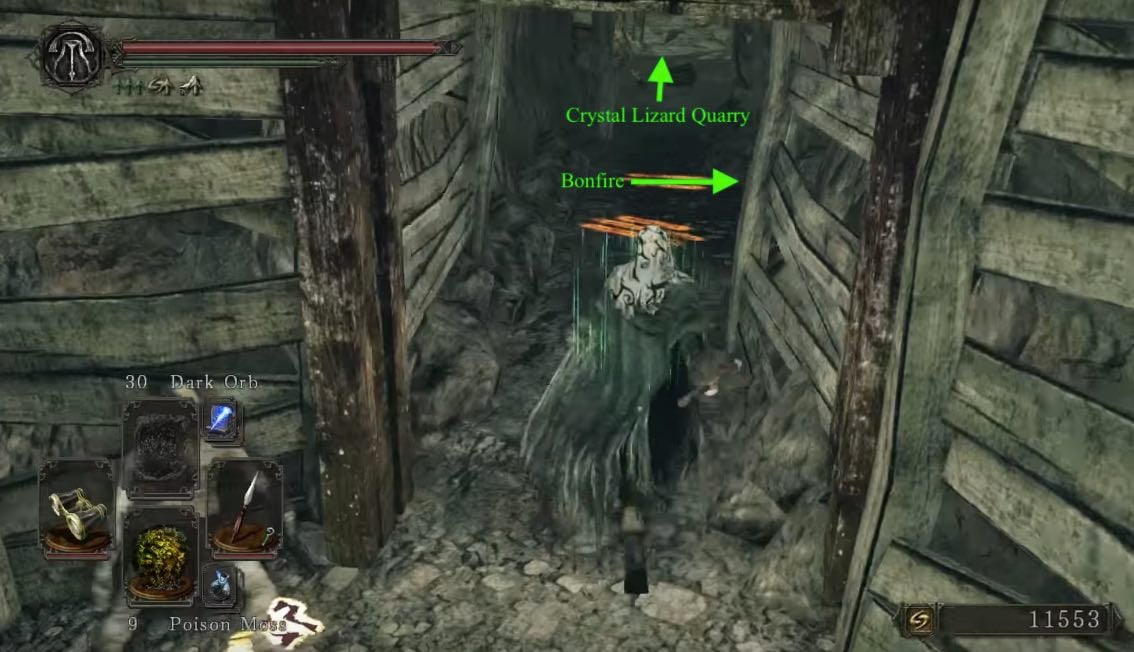
As you approach the wall a Banedigger will burst through. Instead of killing him, get around him and bait him into destroying another wall (NG+ there is a Sickle Wielding Giant Phantom hiding behind it). With the wall gone and the giant dead claim the treasure:
- 1x Old Knight Pike
- 1x Old Knight Greatshield
- 1x Soul of a Lost Undead
- 1x Torch
- 1x Radiant Lifegem
- x1 Smooth & Silky Stone
Near where the Giant was is a small ledge you can drop off, onto a chest containing a Poison Stone and 3x Rotten Pine Resin. The only way out is down into a gas filled tunnel with a Soul of a Nameless Soldier and a Skeleton. At the end of the tunnel is a ladder leading back to the small quarry. From here, return to the path with the Banedigger and enter the opening we ignored earlier.
Boxed In
Once you're through there, 4 Undead Huntsmen will converge from the sides, and a small wall raises behind you, blocking a potential escape the same way you entered. You can kite them and use the raised pathways as a bottle neck. You can also escape the area by going up the ramp, to the right, then breaking through the third set of boards. This is actually the easiest way, because than you can pick them one by one with a halberd, by sniping, and/or spells. Once all the enemies are cleared out, break the rest of the boards and claim the remaining loot of the area which includes:
- 1x Simpleton's Spice
- 1x Skeptic's Spice
- 1x Radiant Lifegem
- 5x Lifegem
- 1x Large Titanite Shard
- 1x Titanite Shard
- 1x Large Soul of a Brave Warrior
- 3x Green Blossom
One of the boards hides 2 Hollows. Another board hides a tunnel that has two exits: one lead you to a Petrified Something on a ledge overlooking a small quarry, and the other brings you to a Crystal Lizard then a pit which jumping into will lead to death. So take the lizard then head the other way.
Misty Path to the Sun
It is time to enter one of the aforementioned, poison holes. Look for the one with a lootable body at the bottom and hop in. Grab the Fading Soul from it and run down the tunnel. Near the exit is another Simpleton's Spice. The tunnel leads to another gas filled pit with two more Banediggers. Run up the nearby ramp for a breather, and dispatch of them with ranged attacks, if you desire. Be careful though, as a Forlorn can invade here, and there will also be a Desert Sorceress high above periodically raining down fireballs. Scattered across the floor of the pit, are several lootable bodies. Be careful when looting down there though, as there are Hollow Crawler and Skeletons waiting down there as well.
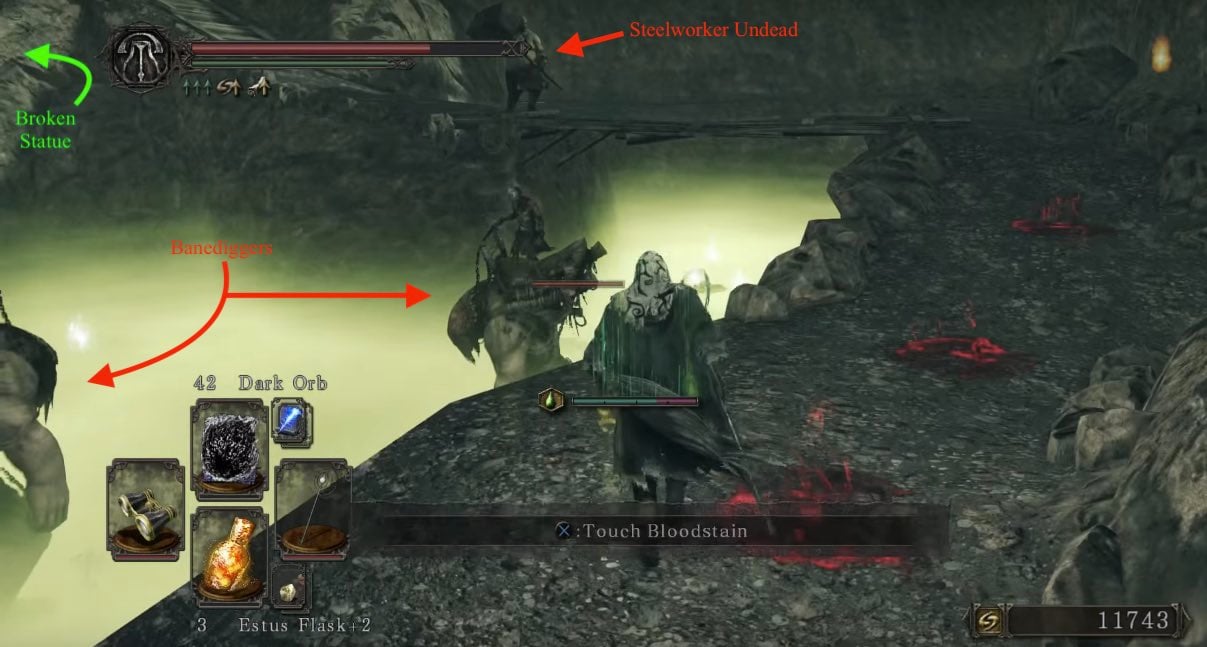
- 1x Large Titanite Shard
- 3x Titanite Shard
- x1 Titanite Slab
- x1 Soul of a Brave Warrior
- x1 Human Effigy
- x1 Smooth & Silky Stone
- Chameleon Sorcery
- Dragon Charm
- Washing Pole
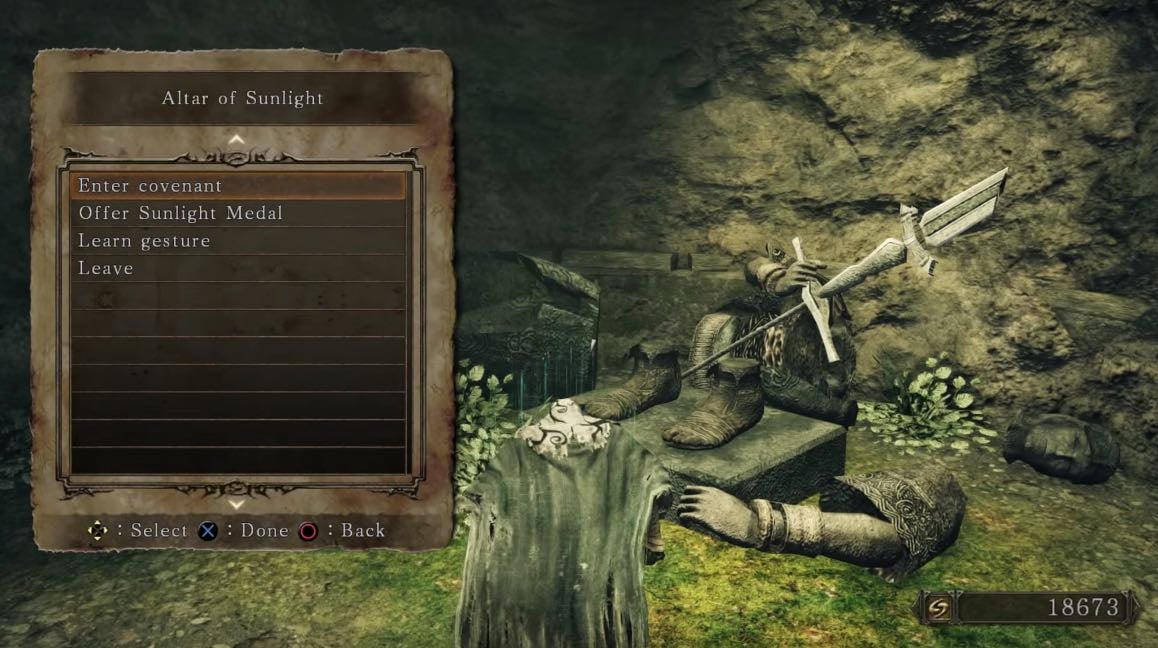
Once back up the ramp, you can either go right to go back to the quarry near the second bonfire, or continue up the path and confront the hammer wielding Steelworker Undead near the plank bridge. After he's dealt with, cross the small wooded bridge, head up the stairs and down a path to the left under a windmill blade. Continuing on into a tunnel, you'll come upon a broken statue drenched in sunlight. It is similar (exactly the same?) to the one in Dark Souls 1 and allows players to join the Heirs of the Sun covenant and learn the 'Praise the Sun' gesture.
To the Earthen Peak
Returning from the Heirs of the Sun shrine, you can either go left, or right, down the ramp, then left (instead of crossing the bridge), and at the end left again. If you take the second way, be careful of an Masked Manikin on an high ledge to the right. Both ways bring you towards the entrance to Earthen Peak. In both cases, you will be entering an area filled with poison urns, as well as an Undead Steelworker, alerted when you enter. They will crush through the poison urns and coat themselves with it, so just let them come towards you and die from the poison, or take them out of their misery quickly. You will also notice that both entrances will be connected to a ladder, right before the doorways to Earthen Peak. If you take the upper route, be careful of another Undead Steelworker greeting you.
Soul Farming Tips
If you have lightning or ranged attacks, it's very easy to farm the giants that spawn near the Mines bonfire (2nd one) for 750 each. If you go the extra step of killing the two just past the quarry after the bonfire as well, you can get 3k souls or more very quickly with little time/effort and just a few lightning spears/dark orbs/any form of ranged attacks that deal roughly 200 damage minimum.
General Information
- Previous: Undead Purgatory
- Next: Earthen Peak
- Recommended Levels: 60 to 70
- Bosses: N/A
- Bonfires: Poison Pool, The Mines
Harvest Valley Map
NPCs in the Harvest Gulch
- Stone Trader Chloanne
- Gavlan
- Heirs of the Sun Covenant Altar
Items
*Before The Mines Bonfire*Consumables
- Fragrant Branch Of Yore
- Raw Stone x1
- Hexing Urn x10
- Lifegem x1
- Fading Soul x5
- Titanite Shard x2
- Poison Throwing Knife x10
- Torch x2
- Small Smooth and Silky Stone x2
- Titanite Chunk x1
- Fire Seed x1
- Divine Blessing x1
*From The Mines bonfire
Consumables**
- Soul of a lost Undead x1
- Torch x1
- Radiant Lifegem x2
- Smooth & Silky Stone x1
- Chameleon Scroll
- Large Titanite Shard x2
- Simpleton's Spice x2
- Skeptic's Spice x1
- Fragrant Branch of Yore
- Poison Stone x1
- Rotton Pine Resin x3
- Soul of a Nameless Soldier x1
- Green Blossom x3
- Large Soul of a Brave Warrior x2
- Titanite Shard x2
- Fading Soul x1
- Human Effigy x1
- Old Knight Pike (make enemy break wall)
- Old Knight Greatshield (make enemy break wall)
Enemies
- Banedigger (Dark Magic Giant)
- Skeleton
- Captive Undead (Hollow)
- Artificial Undead (Sickle Wielder)
- Undead Steelworker
Notes
- Use a torch while exploring the caves with poison, so it will be easier to see where you are going.
- Harvest Valley is filled with poisonous areas and obstacles, so come prepared.
Harvest Valley Walkthrough
The First Bonfire & Chloanne
From the Skeleton Lords boss area in Huntsman's Copse, head through the doorway in that room and continue on a path leading to a raised bridge. Pull the lever on the right to lower the bridge and cross over into Harvest Valley. As you move along the rocky pathways you will soon encounter a pool of poison to your right blocking a cave which harbors the first Bonfire. Defeating the boss in Earthen Peak will drain the pool is drained. However, as that comes later, cross quickly but don't roll as that covers your entire body in poison rather than only your legs. Once you've used the bonfire, head back across the poison pool, and up the right side the hill to encounter the NPC Stone Trader Chloanne. Exhaust her dialogue to move her to Majula.
Loot Pit
Peering over the edge, you can spot a rather large enemy standing in the middle of a poison lake, a Banedigger; this guy uses Dark Orbs. Use this vantage point to defeat him with ranged attacks, as battling in the poison mist is too unnecessarily risky. After dispatching him, head down the path to your left and continue to walk along the ledge to find a spawning Skeleton and a corpse holding a Lifegem. In the poison mist you can see a plethora of items scattered all over the area. There are also a few more Skeletons that spawn when traversing this area. Tank up on anti-poison items of your choice and plunder:
- 5x Fading Soul
- 2x Titanite Shard
- 10x Poison Throwing Knife
- 2x Small Smooth & Silky Stone
- 1x Titanite Chunk
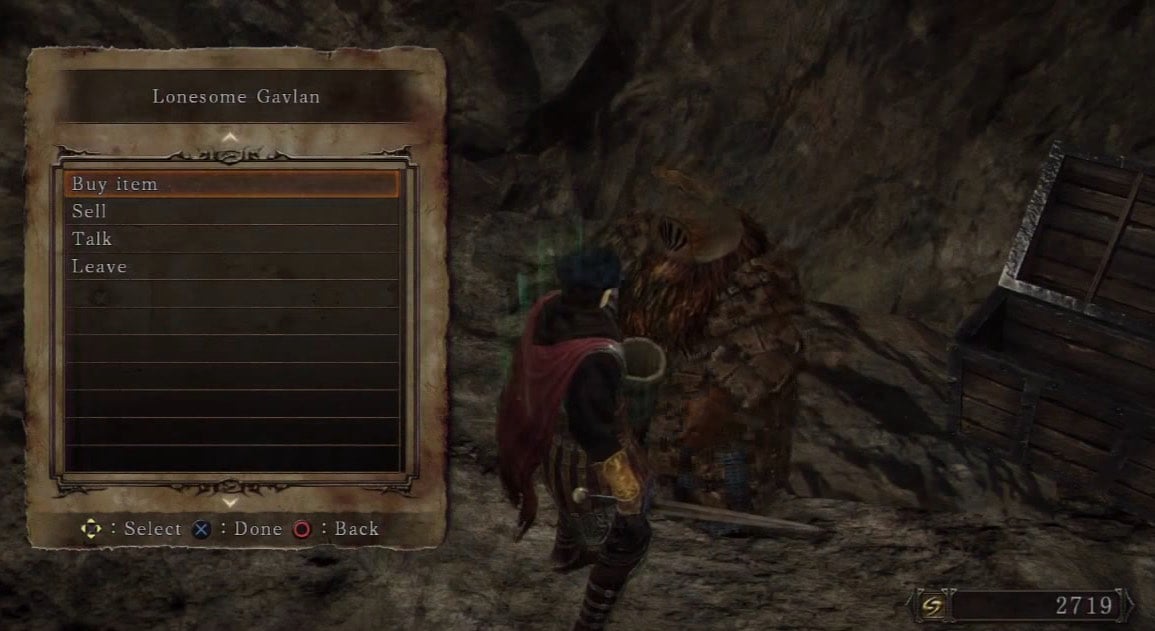
Head through the small archway in the middle of the lakes wall and kill the skeleton to your right. Circle around the left of the poison pit to loot a corpse holding a Fragrant Branch Of Yore and a Torch. Continue along the ledge and enter the hole in the wall to find the NPC Gavlan (If you talked to him previously in No-man's Wharf). Behind him is a chest containing Raw Stone. Exiting this room, in this same cave, down in the mist, there should be a small alcove to the left of the slope leading down. In here you'll find a chest containing a Fire Seed and a Divine Blessing.
To the Second Bonfire
Leave this cave, back out to the open and head up the slope to where you found the single Torch. Continue along and you'll arrive to the greetings of two more Banediggers in the small valley. Climb the ladder that you first come across on the right for a better vantage point and 10x Hexing Urns. You will also find multiple Undead around the area. Climb the second ladder on the right to arrive at a lever. Pull it to raise the wooden gate blocking the exit. Head through and turn right to reach the second Bonfire.
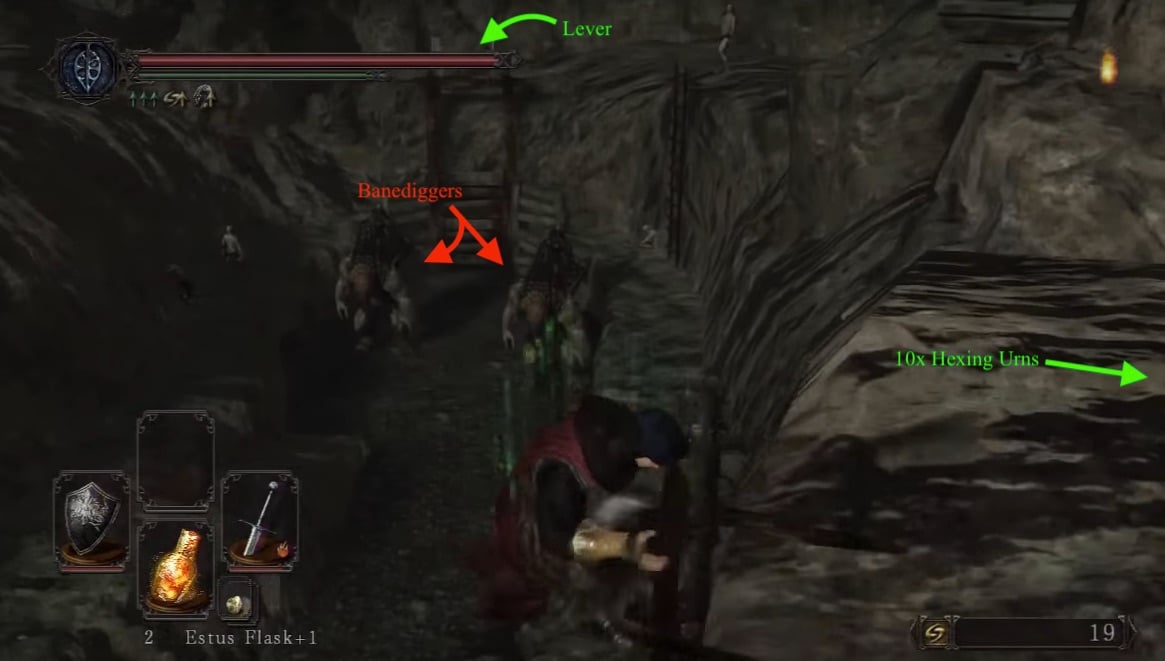
Quarry of Options
Past this bonfire, you'll come upon a small quarry with several holes filled with poisonous gas. Along the left wall is a path leading up to a boarded off area, and an opening on the right, ignore the opening for now.
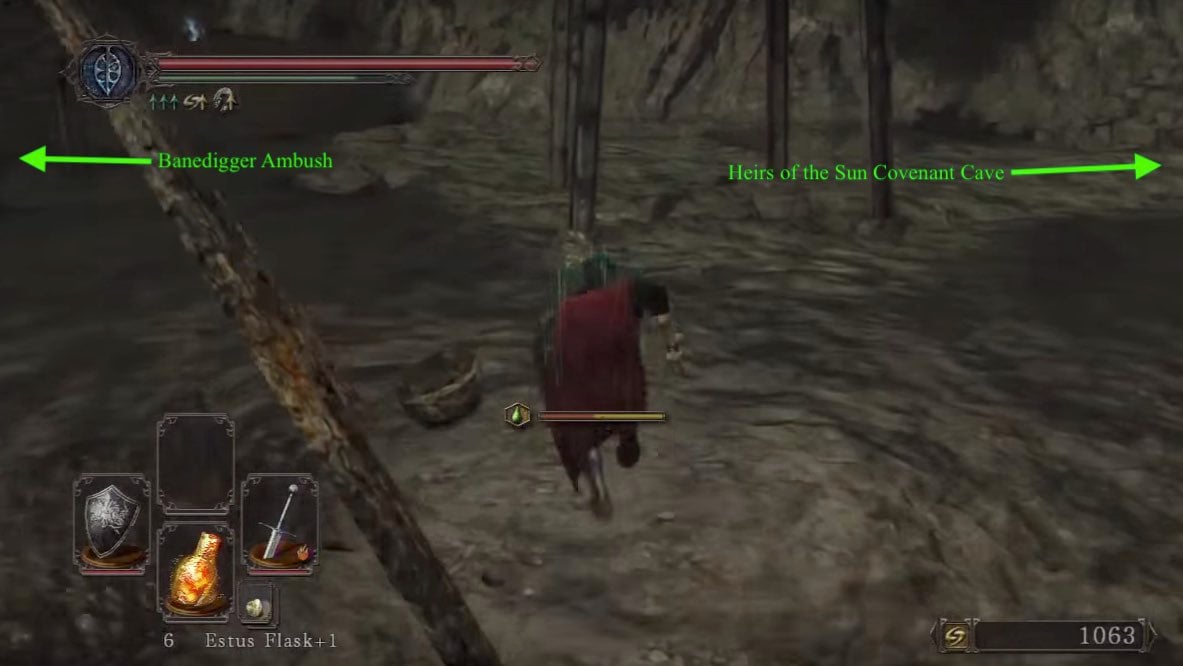
As you approach the wall a Banedigger will burst through. Instead of killing him, get around him and bait him into destroying another wall (NG+ there is a Sickle Wielding Giant Phantom hiding behind it). With the wall gone and the giant dead claim the treasure:
- 1x Old Knight Pike
- 1x Old Knight Greatshield
- 1x Soul of a Lost Undead
- 1x Torch
- 1x Radiant Lifegem
- x1 Smooth & Silky Stone
Near where the Giant was is a small ledge you can drop off, onto a chest containing a Poison Stone and 3x Rotten Pine Resin. The only way out is down into a gas filled tunnel with a Soul of a Nameless Soldier. At the end of the tunnel is a ladder leading back to the small quarry. From here, return to the path with the Banedigger and enter the opening we ignored earlier.
Huntsmen Ambush
Once you're through there, 4 Undead Huntsmen will converge from the sides, and a small wall raises behind you, blocking a potential escape the same way you entered. You can kite them and use the raised pathways as a bottle neck. You can also escape the area by going up the ramp, to the right, then breaking through the third set of boards. This is actually the easiest way, because than you can pick them one by one with a halberd, by sniping, and/or spells. Once all the enemies are cleared out, break the rest of the boards and claim the remaining loot of the area which includes:
- 1x Simpleton's Spice
- 1x Skeptic's Spice
- x1 Radiant Lifegem
- 5x Lifegem
- 1x Large Titanite Shard
- 1x Titanite Shard
- 1x Large Soul of a Brave Warrior
- 3x Green Blossom
One of the boards hides 2 hollows. With loot in hand, head for the exit tunnel. At the next intersection go left to find a Crystal Lizard. Run in and dispatch it quickly, but do not follow if it falls into the hole. Dropping down will instantly kill you. Going the other way you will find yourself on a ledge overlooking the small quarry. Loot a Fragrant Branch of Yore from the body near the edge.
Heirs of the Sun Covenant Cave
It is time to enter one of the aforementioned, poison holes. Look for the one with a lootable body at the bottom and hop in. Grab the Fading Soul from it and run down the tunnel. Near the exit is another Simpleton's Spice. The tunnel leads to another gas filled pit with two more Banediggers. Run up the nearby ramp for a breather, and dispatch of them with ranged attacks, if you desire. Scattered across the floor of the pit, are several lootable bodies holding:
- 1x Large Titanite Shard
- 1x Titanite Shard
- 1x Soul of a Brave Warrior
- 1x Human Effigy
- Chameleon Sorcery
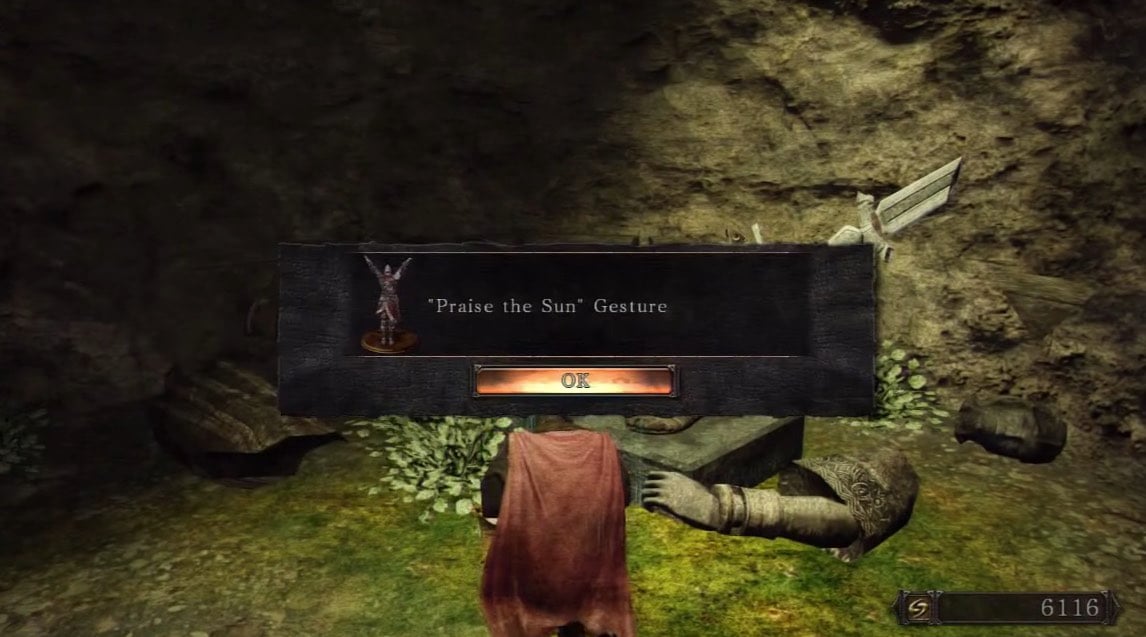
Once back up the ramp continue up the path and confront the hammer wielding Undead Steelworker near the plank bridge. After he's dealt with, cross the small wooded bridge, head up the stairs and down a path to the left under a windmill blade. Continuing on into a tunnel, you'll face an executioner before you'll come upon a broken statue drenched in sunlight. It is similar (exactly the same?) to the one in Dark Souls 1 and allows players to join the Heirs of the Sun covenant and learn the 'Praise the Sun' gesture.
To the Earthen Peak
Returning to the bottom of the stairs near the bridge from earlier, you can take the path to the right which curves left and to a room full of poison urns. Take it slow: a Undead Steelworker will aggro as you approach, breaking a few urns which spew poison in the process. Just let him come to you. There's another Undead Steelworker waiting for you inside the doorway on the left. Once in the room, you'll see a ladder which accesses a higher walkway in the same room with yet another Undead Steelworker on that level; to pull him, go back out to the bridge and straight up to the top of the stairs -- this is another entry to the same upper walkway. He'll aggro as you approach him.
Once all the mobs are dealt with, head back into the room. From here, there are two entrances to Earthen Peak: the ladder, and the other straight out the doorway. Take the lower route If you're eager to get the nearby Estus Flask Shard in Earthen Peak for details.
Soul Farming Tips
If you have lightning or ranged attacks, it's very easy to farm the giants that spawn near the Mines bonfire (2nd one) for 750 each. If you go the extra step of killing the two just past the quarry after the bonfire as well, you can get 3k souls or more very quickly with little time/effort and just a few lightning spears/dark orbs/any form of ranged attacks that deal roughly 200 damage minimum.
 Anonymous
It says the two bonfires are Black Gulch Mouth and Hidden Chamber. I assume that's pre SotFS. I'm looking for these "artificial undead" in harvest valley but can't find them.

 Anonymous
PRO TIP: jk i'm not a pro i just started playing but use lifegems if you get poisoned ... moss is so much more expensive, it's not like it's super rare or anything, but lifegems are literally 1/5, maybe 2/5 of the price for essentially doing the same exact thing

 Anonymous
 Anonymous
 Anonymous
 Anonymous
 Anonymous
You say it's "dangerous to explore in without the appropriate gear" and "come prepared" but you never say what the appropriate gear is or how to prepare. Great guide.

The bonfires are incorrectly listed as the ones for Black Gulch. I'd edit it myself, but the editor UI is bugging out.

 Anonymous
On PS4 I got invaded by a Forlorn in the boxed-in area with the 4 sickle guys.

 Anonymous
No mention of the two suspicious shadows in the room with the steelworker all the poison vases?

 Anonymous
We're not going to mention the "Poison Pool" bonfire right beside where Chloanne is first met?

 Anonymous
I have no idea why is this named Harvest Valley. There's too much poison here to be able to grow something. They could've named this area Poison Valley instead.

 Anonymous
I know it's hard to believe, but we're actually standing in Ano--

On the lower route to earthen peak there is a pharaoh lockstone spot on your right going for the eastus flask shard beware there one 4 of those poison spewing bugs as soon as you enter in the chest there is a poisonbite ring and a soul of a proud Knight which for some reason he left out when he made this walkthrough

I am playing Scholar of the First Sin and was looking for the Crystal Lizard that should have spawned in the tunnel on the left that leads to a poison pit after the 4 Undead Huntsmen. I was not able to find it there so I thought I was too late and went back to the bonfire to try again. The second time it also wasn't there. The third time, right before smashing the wooden door to the aforementioned tunnel, I was invaded by NPC Forlorn which rewarded me with 1x Human Effigy. It is not listed here but it is on the Phantoms page. And by the way, I guess the Scholar edition does not have that Crystal Lizard in the tunnel, but the 3 ones after the bonfire at its place.

 Anonymous
***** YOU! Undead Purgatory does NOT lead here. It’s a dead end. Don’t listen to the guide, it was written by a halfwit using his***** as a map.

 Anonymous
How the f*ck i can reach this place i,m fu*king stuck in undead purgatory

 Anonymous
 Anonymous
In this line: "Loot a Fragrant Branch of Yore from the body near the edge", the item is incorrect. In my game, it was a Petrified Something.

 Anonymous
Just wanted to add for the SoTF version, there are now 3 Crystal Lizards just after the second bonfire. You can kite the one in the middle from afar, then slowly move out of the tunnel and range the other two before they both notice you and run away.

 Anonymous
 Anonymous
Right at the point when you turn left to the sun covenant, drop down to the mist to get a SLAB.

 Anonymous
There are some NG related items I would like to update and the page overall could use a redesign due to the text being rather hard to read.
Thanks :)

I don't find the crystal lizard which was said to be on the other side of the "Petrified Something". I tried reloading many many times and the lizard is just not there.
1
+10
-1