Huntsman's Copse
This area becomes accessible after unlocking a secret path in between Majula and Heide's Tower of Flame. The region features two bosses and optional directions to follow after defeating them, and several NPCs and bonfires as well as unique enemies.
<< Previous: Sinners' Rise Next: Undead Purgatory >>
General Information
- Previous: Sinners' Rise
- Next: Undead Purgatory, Harvest Valley
- Recommended Levels: 55 to 65
- Bosses: Skeleton Lords
- Bonfires: Undead Refuge, Bridge Approach, Undead Lockaway
- Clearing this area opens Earthen Peak
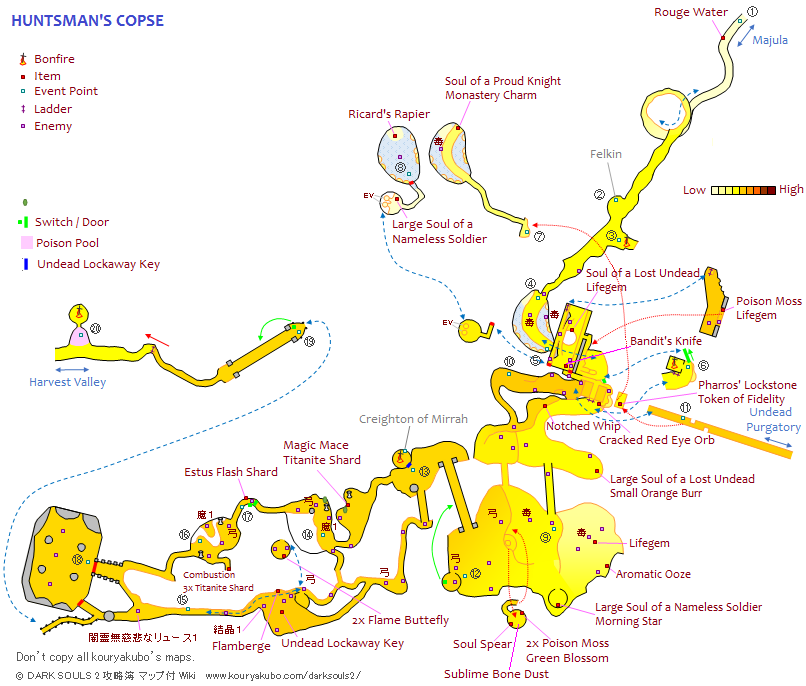
Huntsman's Copse Map
NPCs
- Creighton of Mirrah (NPC Summon)
- Felkin the Outcast
Items
Consumables- Flame Butterfly
- Poison Moss x3
- Bandit's Knife
- Pharros Lockstone
- Token of Fidelity
- Undead Lockaway Key
- Rouge Water x1 (Area between Majula and Huntsman's Copse)
- Large Soul of a Nameless Soldier x2
- Soul of a Nameless Soldier x1
- Lifegem x3
- Aromatic Ooze x1
- Morning Star
- Poison Throwing Knife x10
- Large Titanite Shard x3
- Titanite Shard x4
- Flamberge
- Combustion
- Green Blossom x1
- Monastery Charm x1
- Soul of a Proud Knight
- Rogue Set
- Prisoners Set
- Black Hollow Mage Set
- Ricard's Rapier
- Notched Whip
- Bandit's Knife
- Magic Mace
Enemies
- Captive Undead (Hollows)
- Moon Butterfly (Poison Moth)
- Artificial Undead (Sickle Wielding Giants)
- Rogue (Hollow Thieves)
- Skeleton
- Hollow Mage (Black) (Necromancer)
- Torch-wielding Hollows
- Purgatory Guardians
- Red Phantom Purgatory Guardians (NG+ only)
- Red Phantom Tower Knight (No respawn, NG+ he does respawn)
- Merciless Roenna (Aldia Warlock NPC Invader)
Boss
Notes:
- Example lore note
Huntsman's Copse Walkthrough
Majula Access
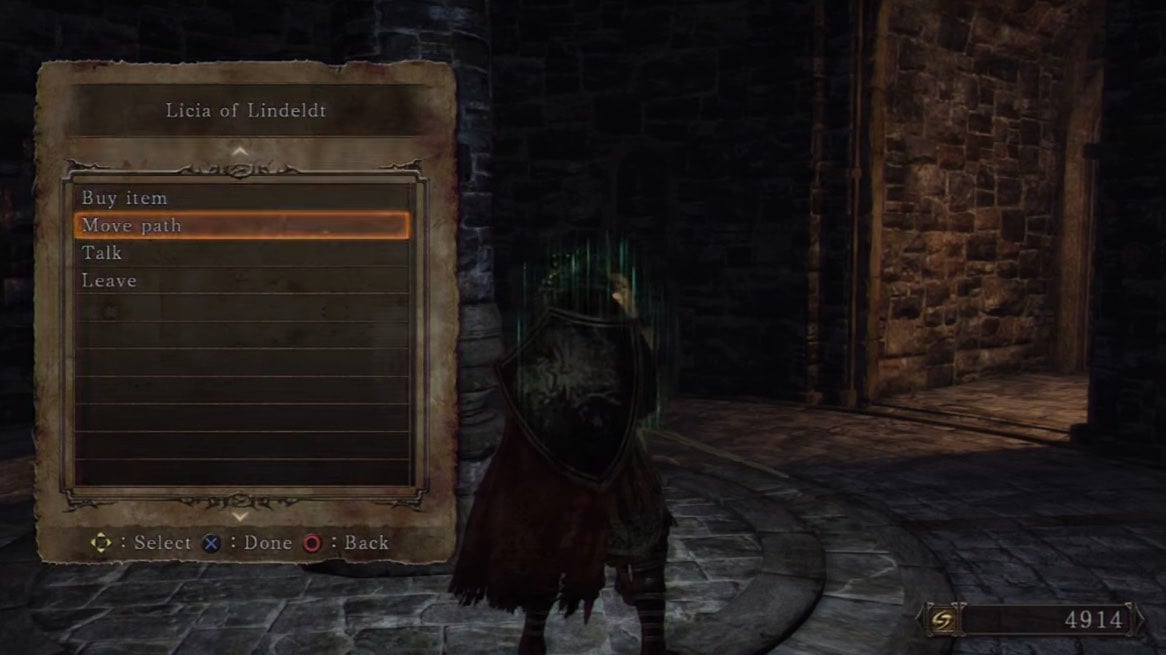
After meeting Licia of Lindelt in Heide's Tower of Flame and expending all of her dialogue, she will move to the contraption in the tunnel leading to Heide's Tower, in Majula. You will know if she's there because the light above the door will be shining brightly. For 2000 souls she will shift the path and will grant you access to the Huntsman's Copse -however if you have no regard for her life, or her miracles, you can simply kill her and reload the game to access these areas for free.
Felkin and the Bonfire
Upon first entering the tunnel, you'll immediately notice a corpse with a Rouge Water, followed by a long cave up. Continue until you come across an NPC named Felkin, sitting in a chair facing the wall. A Hex trainer that claims you lack the skill to learn his trade, unless you've attained a level 8 in Intelligence and Faith in which case, you'll have access to him as a merchant. When you exhaust his speech, you will be given the Sunset staff which requires 20 faith and 20 intelligence and the Hexer's Set.
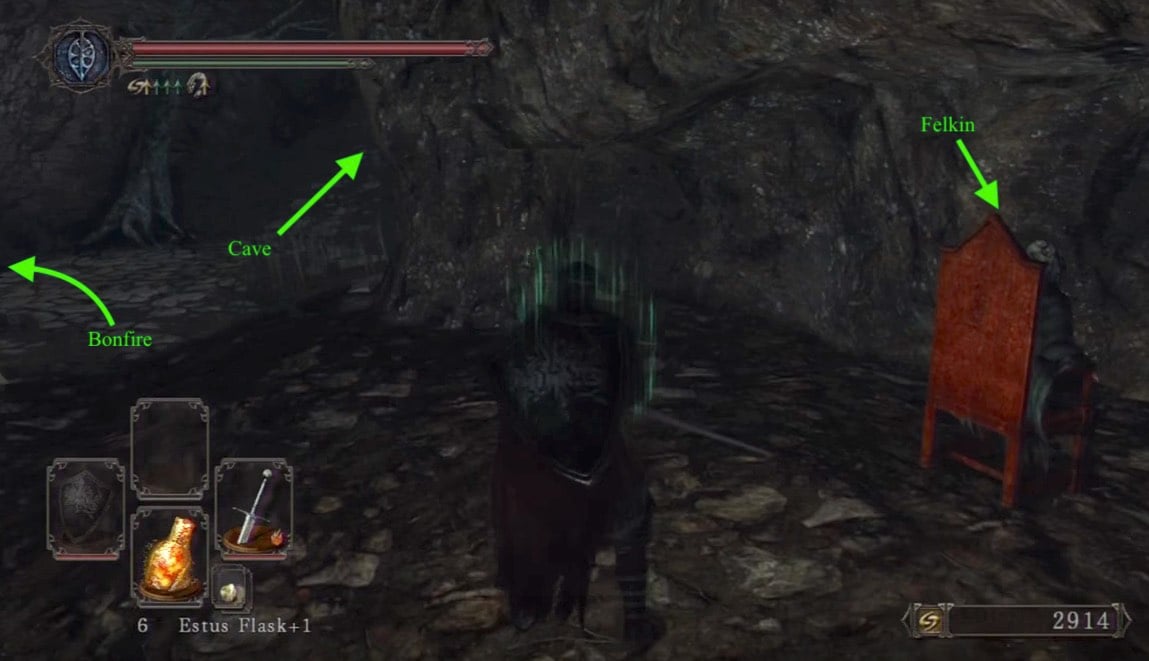
Shortly after exiting the cave, you'll find the first bonfire to the left. On the edge looking out towards the horizon, you might see various messages saying "try rolling" as is typical in the Souls games--don't. Also, before leaving, the proceeding areas become a bit easier if you've got a torch lit, so take advantage of the never-ending flame of the bonfire to light it.
Second Bonfire
After leaving the bonfire and heading up the path on the right, you'll find a kneeling Hollow at the entrance to another cave, in which another Hollow will attack you as soon as you enter it. After dealing with them, move through the cave quickly, dealing with the Poison Moths above that will try to spray you with poison mist--rather feebile, can be taken down with 1x Throwing Knife--and the Hollows on the ground ahead of you. Below the path you may notice a corpse with an item, ignore it for now.
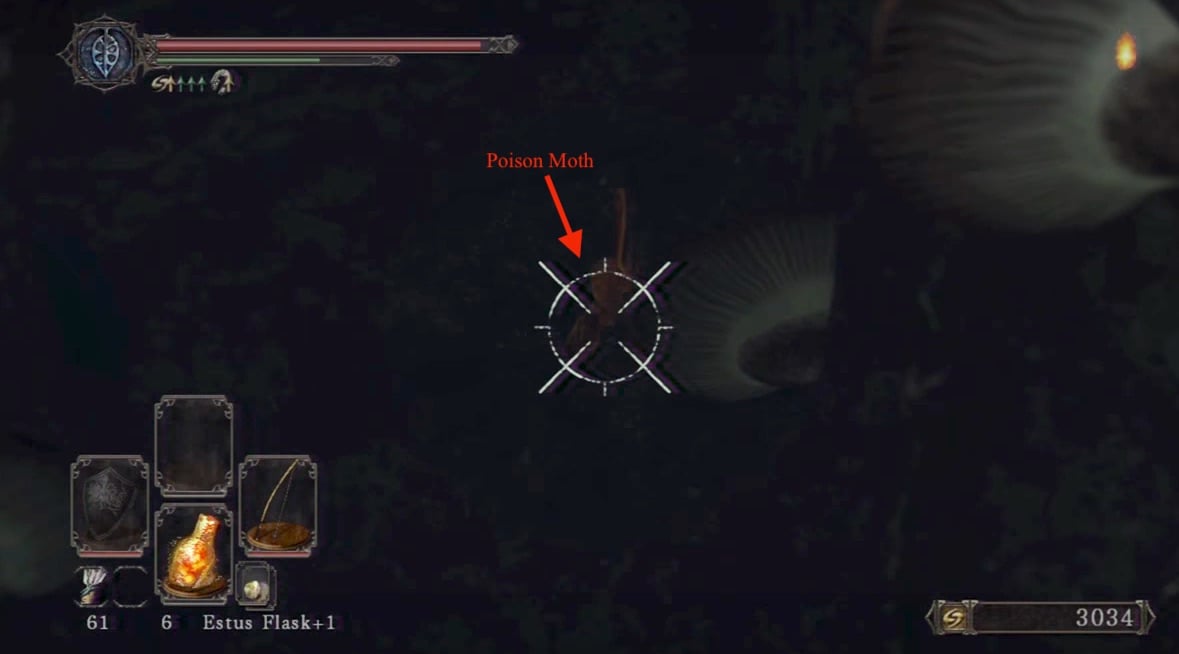
After exiting the cave the path will split, one path has a gap with a tree that can be knocked down on the opposite side, and the other leads up to a dark building; we're heading into the latter first. Upon first entering, a Hollow Rogue with two daggers will rush you, and another will shoot poison arrows from the other side. Lure the melee threat out then return to deal with the rest. At the end of the walkway there is a door you should run over to and open, then quickly cancel the action and roll away to dodge any incoming arrows as well as another Rogue that breaks the door. Deal with him then you can smash the boarded up windows to let some light in, and go through the doorway. This leads back outside on the ledge above the staircase, with an Abandoned Hollow on the far edge, and a corpse hanging of the side with a Cracked Red Eye Orb. Then go down the ladder and to find a room containing the second bonfire, to your left.
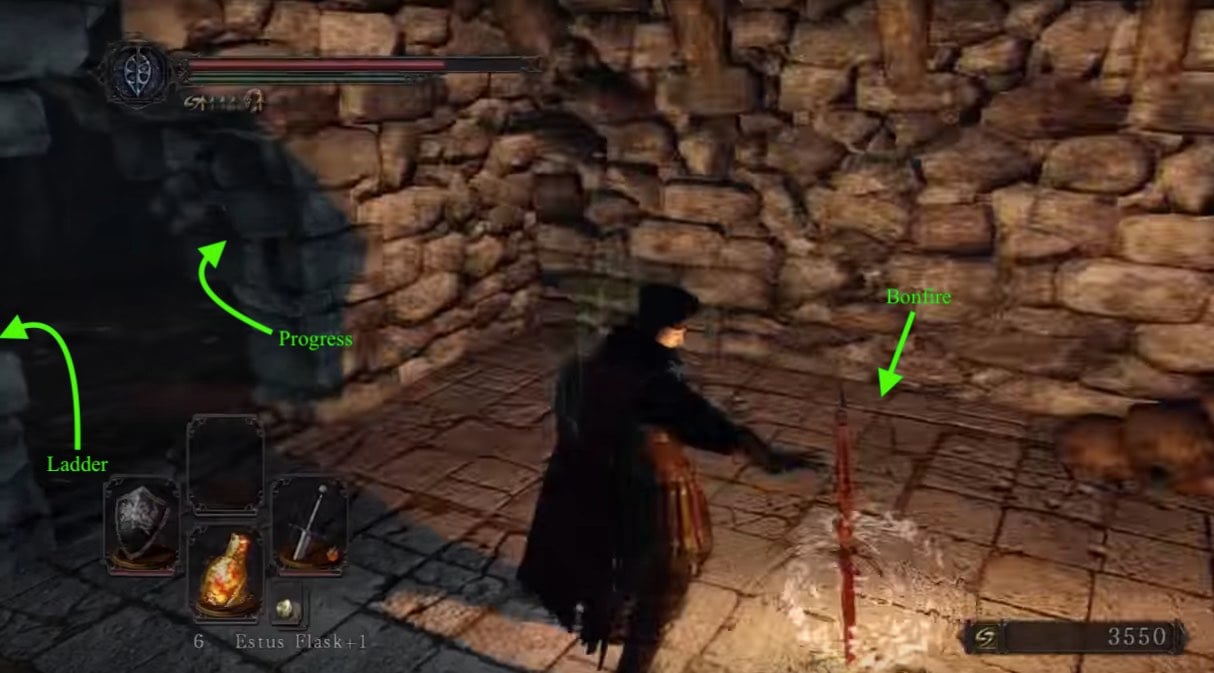
Venture Below
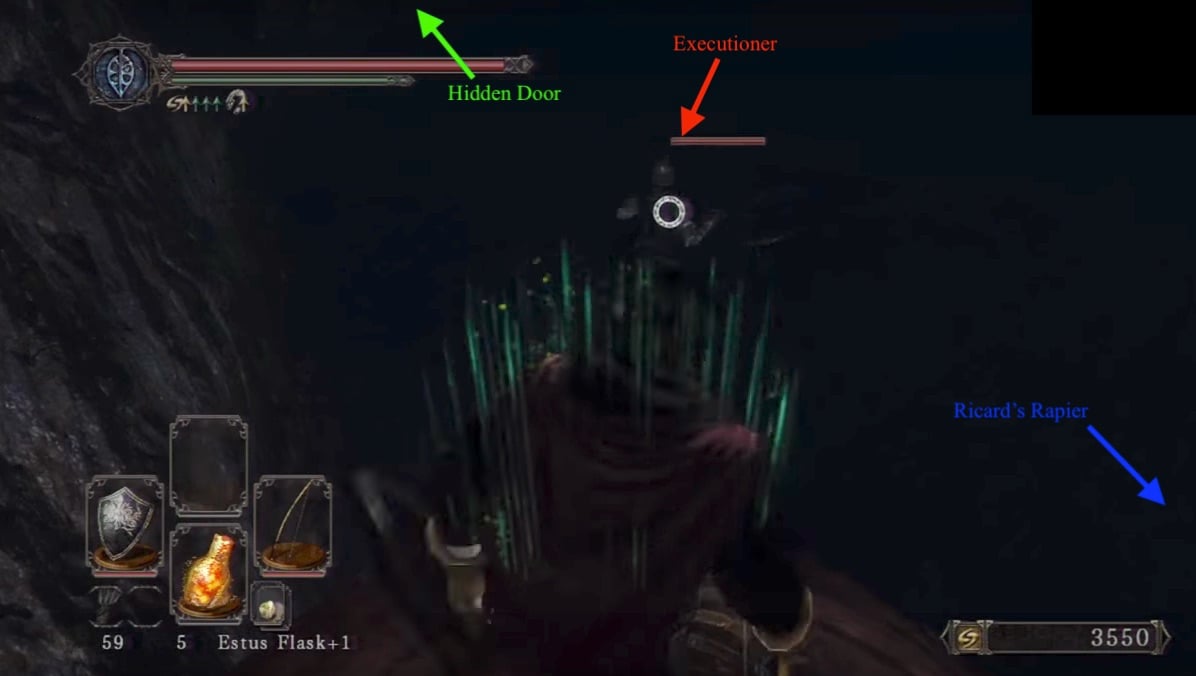
Across from the bonfire there is a stone pillar with a corpse on it that you can jump to, it has a Pharros' Lockstone and a Token of Fidelity; climbing back up the ladder will make the jump easier. Looking back toward the bonfire there is a ledge down below, drop down and you'll find yourself in a lower section of the butterfly cave. Beware, there are more butterflies and an Executioner below. At the end of the walkway is a corpse with a Monastery Charm and a Soul of A Proud Knight. Use Throwing Knives to kill the butterflies, 1 is on a mushroom next to the corpse the other is on the left side of the walkway when you come in and then drop down using the mushrooms. The chest at the bottom contains Ricard's Rapier, and directly opposite it on the other side of the cave, there is a rock wall that you can open by pushing the "use" button on your controller, that leads to a room with a corpse with a Large Soul of A Nameless Soldier and an Iron Maiden lift that takes you up.
The lift leads back to the dark room we passed through, but on the other side instead. Deal with the two thieves, then go down the stairs to collect some loot. Be weary of the large pit in the center of the room. On the floor hanging on the edge of the pit is a corpse with a Lifegem and a Soul of A Lost Undead. In the corner of the room, there is also a corpse with a Bandit's Knife. Head up the staircase, and go up the ladder, opposite of the door you came through. At the top, a club-wielding Rogue will be waiting. A Rogue will jump up from the ledge, deal with him and drop down. On the ledge you'll find a corpse with a Poison Moss and a Lifegem. Drop down once again, and roll towards the door and return to the bonfire.
Journey to the Third Bonfire
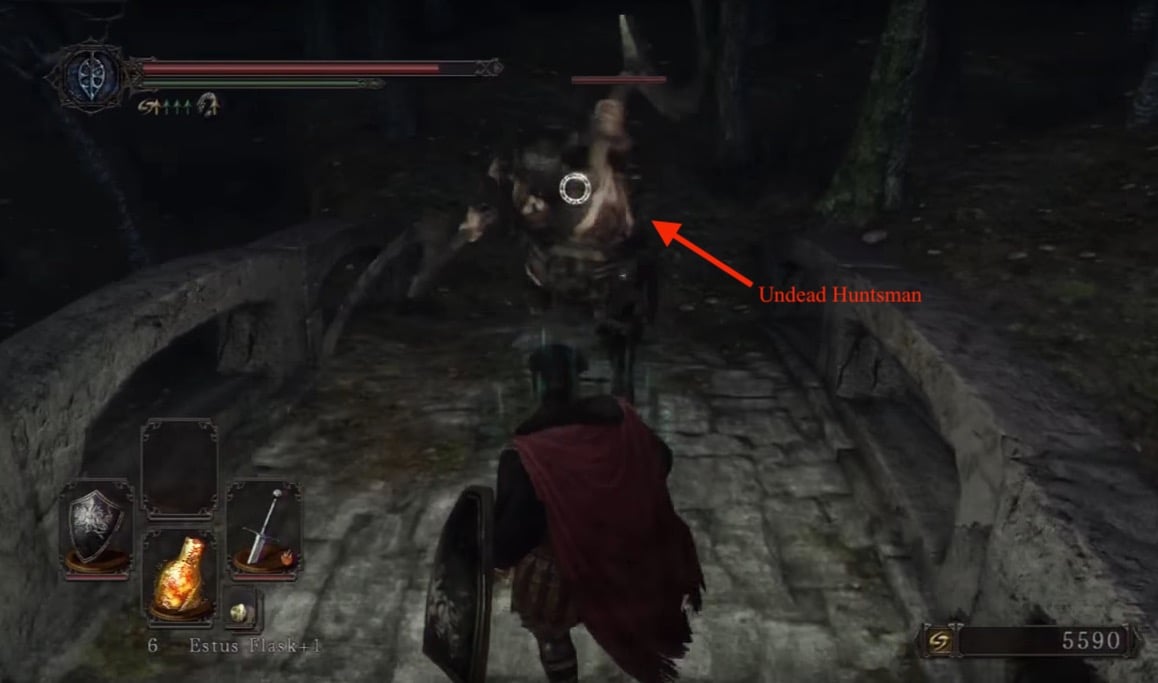
Heading out the bonfire door, and right will bring you deeper into the Copse. Continue down the path to find a Hollow Laborer patrolling the bridge along with another Hollow. To your left, before the bridge, hides a Hollow behind a tree, and a corpse with a Large Soul of A Lost Undead and a Small Orange Burr. Back on track and across the bridge, you'll meet your first Undead Huntsman. Despite the intimidating appearance, he's not that hard to kill; kite him across the bridge while baiting his attacks to get two or three swings in, then just rinse and repeat. Kill the Moths before continuing onward. There are two more Huntsman to deal with ahead, then head into the cell to net a Morning Star and a Large Soul of A Nameless Soldier, from the corpse. The third Huntsman guards a corpse with a Aromatic Ooze. Near the second butterfly you should have killed, is a corpse with a Lifegem.
Now there are two paths you can take, one leads to the Undead Purgatory, the other leads to the third bonfire:
Undead Purgatory
To the right of the first bridge is a second, where there are two Hollows and an Executioner, deal with them quickly and on the ledge is a corpse with a Notched Whip, then follow the path where another four Executioners (replaced with Red Phantom Purgatory Guardians in NG+ onward) on tall pillars, two with whips, two with staffs. Deal with them one by one and head across the bridge where a red phantom with a Greatsword and shield is waiting (he only respawns in NG+ onward, drops Greatsword +3).
- STRATEGY: This guy makes Havel look easy. To deal with this rather difficult phantom, first and most important is not letting him hit you, if he staggers you it's game over. The best strategy is parrying and backstabbing, his swing patterns are really odd and it's difficult to time it right but it shouldn't be too bad once you get it down. It should take about 4-5 before he is defeated and now you can head inside the Purgatory which holds the Executioner's Chariot boss as well as some loot.
- STRATEGY 2: Run backwards across the bridge. He won't follow you all the way. Find the sweet spot and you can shoot him in the back as he constantly turns around to leave/reengage you. The fight is now trivial.
- STRATEGY 3: A beautiful cheap way to kill this guy is just to the right of his entrance, at the bridge, is a ledge with an item (Fire Seed). Jump over to this ledge and you can use your bow to shoot through the iron gate and pepper him in the face. He cannot retaliate. (courtesy of TheBunnyMage).
To progress further here, please click here.
Continuing to the Bonfire
To get there, go up the hill past the first bridge where more Hollow Rogues are waiting. Deal with them, and look over the side where the hut is and drop down into it, there are two corpses one containing 2x Poison Moss and a Green Blossom, the other has the Soul Spear spell. An Executioner lurks below as well. Follow the tunnel out, and go back up the hill on your right, into the far hut. Another Rogue will drop down, kill him, and pull the lever to lower the bridge and now you can get across. As soon as you exit the hut you're in, you may be attacked by a Stray Dog and a couple of Rogues. The cell across the bridge holds a bonfire and an NPC, but its locked. To get the key, cross the stone bridge next to the pile of burning bodies, more Rogues await.
In this dark canyon with narrow ledges, its important that you take your time. Continue down and the path will split.The upper path leads to three more Hollow Rogues and a corpse with 10x Poison Throwing Knife There is also a Crystal Lizard up here. Looking off the cliff edge there will be a small ledge. On the ledge is a corpse holding 3x Poison Moss. This is also a convenient spot to snipe the Rogue below.
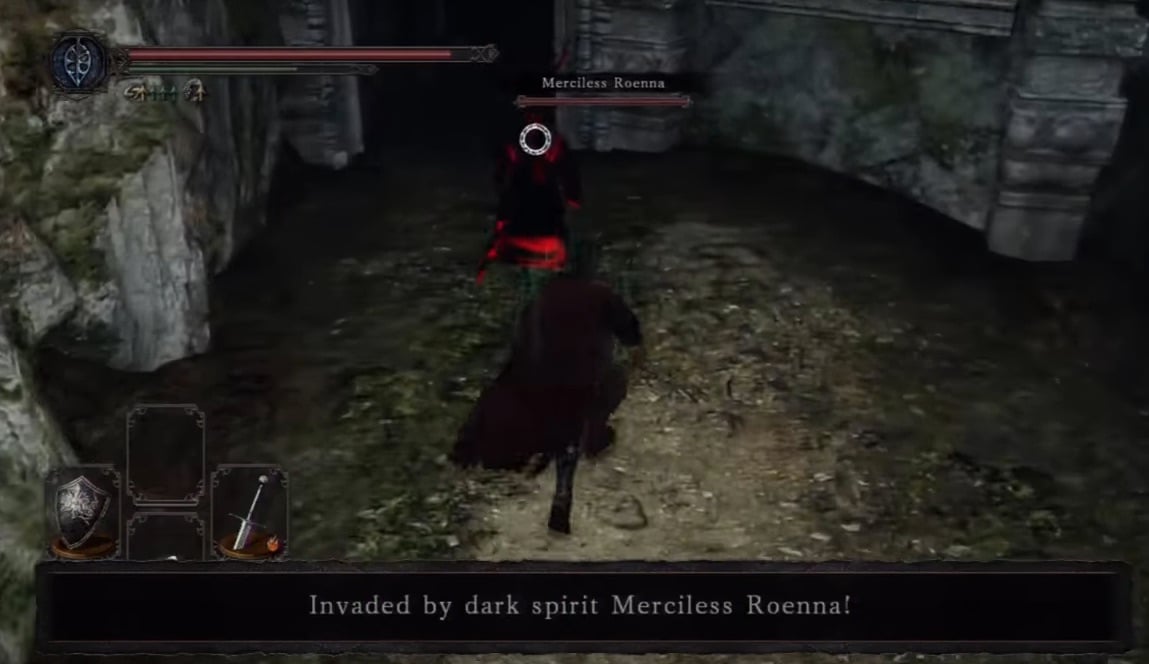
Head back down to the lower path and off to the side is a wooden bridge, this leads you to Skeletons and Necromancers; don't go there yet, instead continue down the path and there will be three more Rogues to deal with, one archer is in front of the cell and two more melee ones inside, as well as a corpse holding the Undead Lockaway Key (NG+ only: Two sickle giants will appear at a certain point before being invaded and after the key pickup). Continue down the path and you'll encounter a scripted NPC invasion, Merciless Roenna.
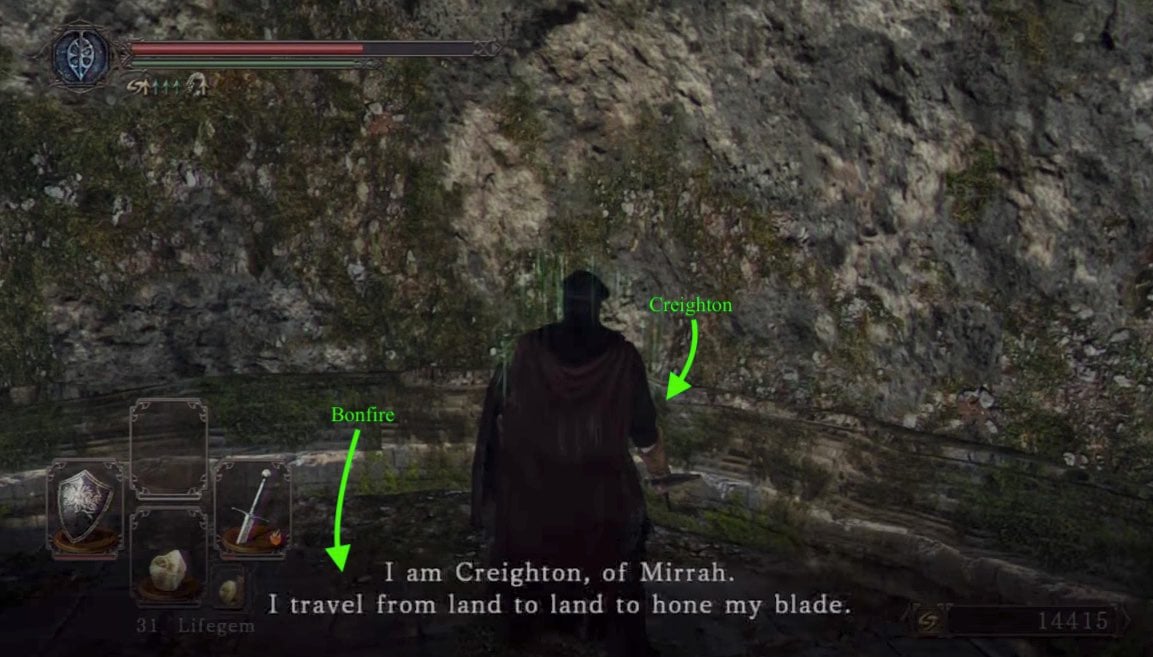
Return to the locked bonfire for now and use the key to unlock it to access it and be able to interact with the NPC Creighton of Mirrah inside. He teaches the 'Fist Pump' gesture and tells you how he got locked up inside. Killing him results in him dropping his mask and Melentia will sell the rest of his set.
Cave Shortcut (Optional)
Next to the bonfire will be a cave, this leads to skeletons as well as jars that emit a cursing fog, Upon entering you will see a sconce to your right as well as a corpse with a Magic Mace and a Titanite Shard. One of the skeletons is buried below the ground next to the jar, inactive until you get close to it. Another one is further in the tunnel, carrying dual scimitars, if you attempt to kill them, they'll soon be resurrected by a dark necromantic magic. Watch out as there is a skeleton behind the jars. Destroy all jars from here on with a good ranged attack to avoid curse build up from the laughing jars. In the next area a pathway immediately to your left holds a hiding skeleton.
Further on the right hand side of the room is a skeleton archer and the Black Hollow Mage (also the necromancer who keeps reanimating the skeletons here, they have a rare chance to drop Black Hollow Mage Set and the second best sorcery dedicated staff in game: Lizard Staff). Kill her to stop the Skeletons from respawning and carry on. Another option is to use Yearn and Force to knock the skeletons into the bottomless pit. You will come to a closed gate which you can't pass as the lever is on the opposite side. Back track to the small pathway which the skeleton was hiding in and you will arrive outside again. Cross over the wooden bridge and continue right down the path and it will lead you to the boss fog gate where you fight the Skeleton Lords.
Before entering the fog, move along the right hand path near the waterfall to come to the opposite side of the cave from earlier. You will come to a room with a necromancer and skeletons on the left side. Careful, as the floor here is missing in some places. Use ranged attacks to dispatch the Necromancer. Move forward and take the path to the right first. This leads to a broken bridge with a corpse holding Combustion pyromancy spell and 3x Titanite Shard. Double back and turn right, taking the path leading towards the sconce. At the end of this path is the lever to the closed gate as well as a corpse holding 1x Estus Flask Shard, a Crystal Lizard and there is a summon sign for Creighton of Mirrah. Turn around and head back out of the cave and approach the boss fog door.
BOSS FIGHT: The Skeleton Lords
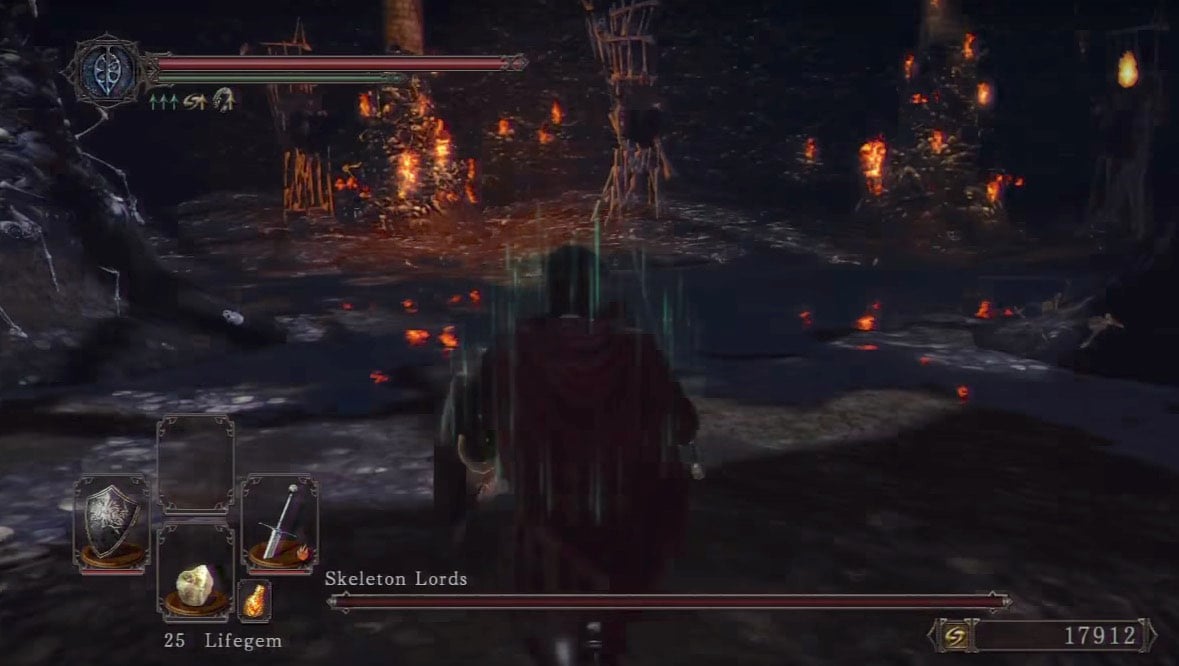
Once defeated, the player is rewarded with the Skeleton Lord's Soul.
General Information
- Previous: Sinners' Rise
- Next: Undead Purgatory, Harvest Valley
- Recommended Levels: 55 to 65
- Bosses: Skeleton Lords
- Bonfires: Undead Refuge, Bridge Approach, Undead Lockaway
- Clearing this area opens Earthen Peak
Huntsman's Copse Map

NPCs
- Creighton of Mirrah (NPC Summon)
Met in the Undead Lockaway bonfire, teaches 'Fist Pump' gesture. He tells you that he came to Drangleic with Mild-Mannered Pate, honing his blade in the dangerous land. He claims that Pate trapped him in there and since you freed him, he can hunt him down. "Pate, the man with the strange ring. Watch out for the slimy rat. And don't you believe a word he says. I'll find the common footpad, and put an end to his roguery." - Bashful Ray (NPC Summon)
- Felkin the Outcast
Met in the cave before first bonfire, hex trainer
Items
Consumables- Flame Butterfly
- Poison Moss x3
- Bandit's Knife
- Pharros Lockstone
- Token of Fidelity
- Undead Lockaway Key
- Rouge Water x1 (Area between Majula and Huntsman's Copse)
- Large Soul of a Nameless Soldier x2
- Soul of a Nameless Soldier x1
- Lifegem x3
- Aromatic Ooze x1
- Morning Star
- Poison Throwing Knife x10
- Large Titanite Shard x3
- Titanite Shard x4
- Flamberge
- Combustion
- Green Blossom x1
- Monastery Charm x1
- Soul of a Proud Knight
Enemies
- Hollow Prisoner (Hollows)
- Great Moth (Poison Moth)
- Undead Huntsman (Sickle Wielding Giants)
- Hollow Rogue (Hollow Thieves)
- Syan Soldier
- Skeleton
- Hollow Mage (Black) (Necromancer)
- Purgatory Guardians
- Red Phantom Purgatory Guardians (NG+ only)
- Red Phantom Tower Knight (No respawn, NG+ he does respawn)
- Merciless Roenna (Aldia Warlock NPC Invader)
- The Forlorn (NPC Invader)
Boss
Notes:
- Example lore note
Huntsman's Copse Walkthrough
Majula Access
After meeting Licia of Lindelt in Heide's Tower of Flame and expending all of her dialogue, she will move to the contraption in the tunnel leading to Heide's Tower, in Majula. You will know if she's there because the light above the door will be shining brightly. For 2000 souls she will shift the path and will grant you access to the Huntsman's Copse--however if you have no regard for her life, or her miracles, you can simply kill her and reload the game to access these areas for free.
Felkin and the Bonfire
Upon first entering the tunnel, you'll immediately notice a corpse with a Rouge Water, followed by a long cave up. Continue until you come across an NPC named Felkin, sitting in a chair facing the wall. A Hex trainer that claims you lack the skill to learn his trade, unless you've attained a level 8 in Intelligence and Faith in which case, you'll have access to him as a merchant. When you exhaust his speech, you will be given the Sunset staff which requires 20 faith and 20 intelligence and the Hexer's Set.
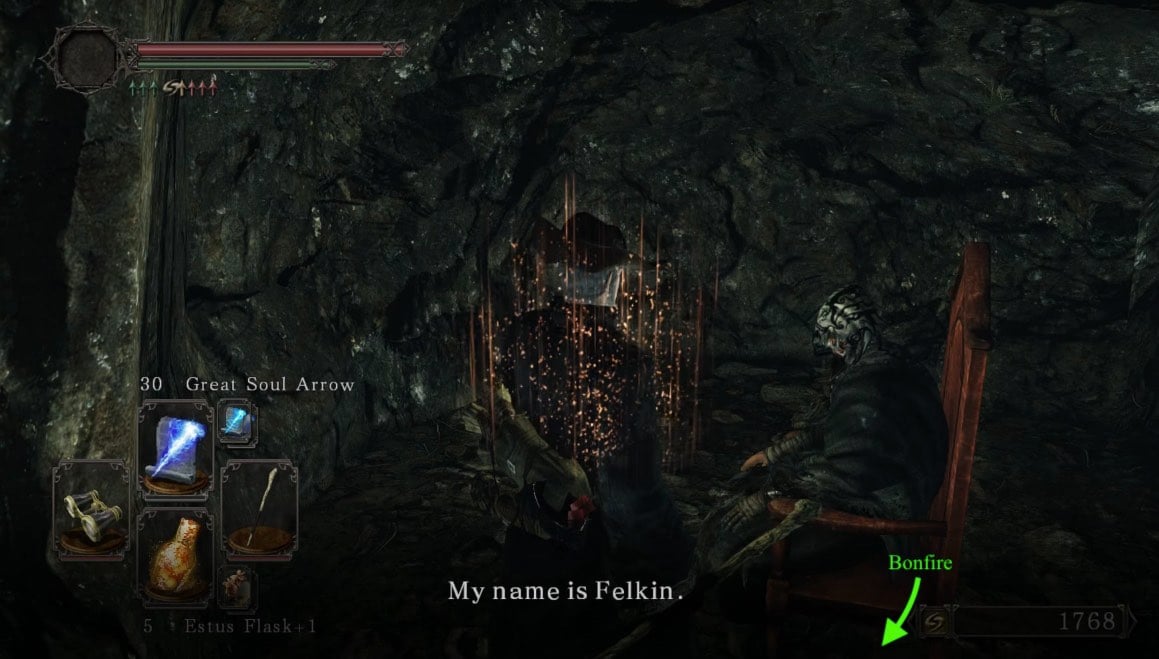
Shortly after exiting the cave, you'll find the first bonfire to the left. On the edge looking out towards the horizon, you might see various messages saying "try rolling" as is typical in the Souls games--don't. Also, before leaving, the proceeding areas become a bit easier if you've got a torch lit, so take advantage of the never-ending flame of the bonfire to light it.
Second Bonfire
After leaving the bonfire and heading up the path on the right, you'll find 2 kneeling Hollow Prisoners at the entrance to another cave, in which another 2 Hollow Prisoner will attack you as soon as you enter it. After dealing with them, move through the cave quickly, dealing with the Great Moths above that will try to spray you with poison mist--rather feebile, can be taken down with 1x Throwing Knife--,the torch wielding Hollow Prisoner, and the Hollow Prisoner on the ground ahead of you. Below the path you may notice a corpse with an item, ignore it for now.
After exiting the cave the path will split, one path has a gap with a tree that can be knocked down on the opposite side, and the other leads up to a dark building; we're heading into the latter first. On the way up, a Hollow Rogue will drop down and attack you. Upon entering, another Hollow Rogue with two daggers will shoot poison arrows from the other side. After entering, there are two ways, on to the right, which quickly leads to an dead end, and a way to the left. As you move to the left, you can smash open the woode barricades at the windows, which will let in some light. Further down the walkway are 2 Hollow Prisoner and at the end there is a door. Be carefull when opening it, as 2 more Rogues will wait on the other side. Deal with them then go through the doorway. This leads back outside on the ledge above the staircase, with an Hollow Prisoner hanging on the edge. Ignore the first way to the right and instead go all the way to the end and around the corner, on the far edge, a corpse hanging of the side with a Cracked Red Eye Orb. Be careful when you approach it though ,as a club wielding Hollow Rogue will ambush you from around the corner. Go back to the previously ignored way and down the ladder. If you go around the corner to your left, you will see the previously mentioned tree, which you can kick down to open a short-cut. In the opening to the left of the tree you will find the second bonfire of this area. Be carefull when you respawn the enemies in this area, as the club-wielding Hollow Rogue from before will drop down on you once you try to progress further.
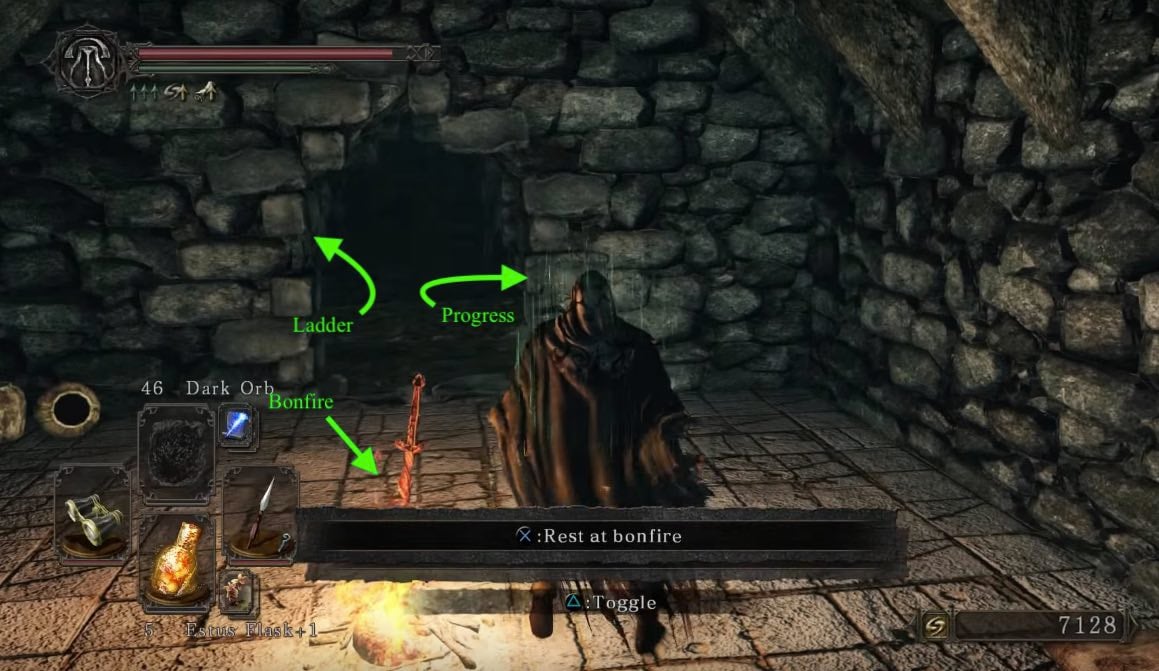
Venture Below
Across from the bonfire there is a stone pillar with a corpse on it that you can jump to from the ledge near where the Cracked Red Eye Orb was, it has a Pharros' Lockstone and a Token of Fidelity. Looking back toward the bonfire there is a ledge down below, drop down and you'll find yourself in a lower section of the moth cave. Beware, there are more Great Moths and a Great Basilisk below. At the end of the walkway is a corpse with a Monastery Charm and a Soul of A Proud Knight. Use Throwing Knives or a Bow to kill the Great Moths, 1 is on a mushroom next to the corpse the other is on the left side of the walkway when you come in and then drop down using the mushrooms. Kill the Basilisk for a nice 3x Large Titanite Shard. The chest at the bottom contains Ricard's Rapier, and directly opposite it on the other side of the cave, there is a rock wall that you can open by pushing the "use" button on your controller, that leads to a room with a corpse with a Large Soul of A Nameless Soldier and an Iron Maiden lift that takes you up.
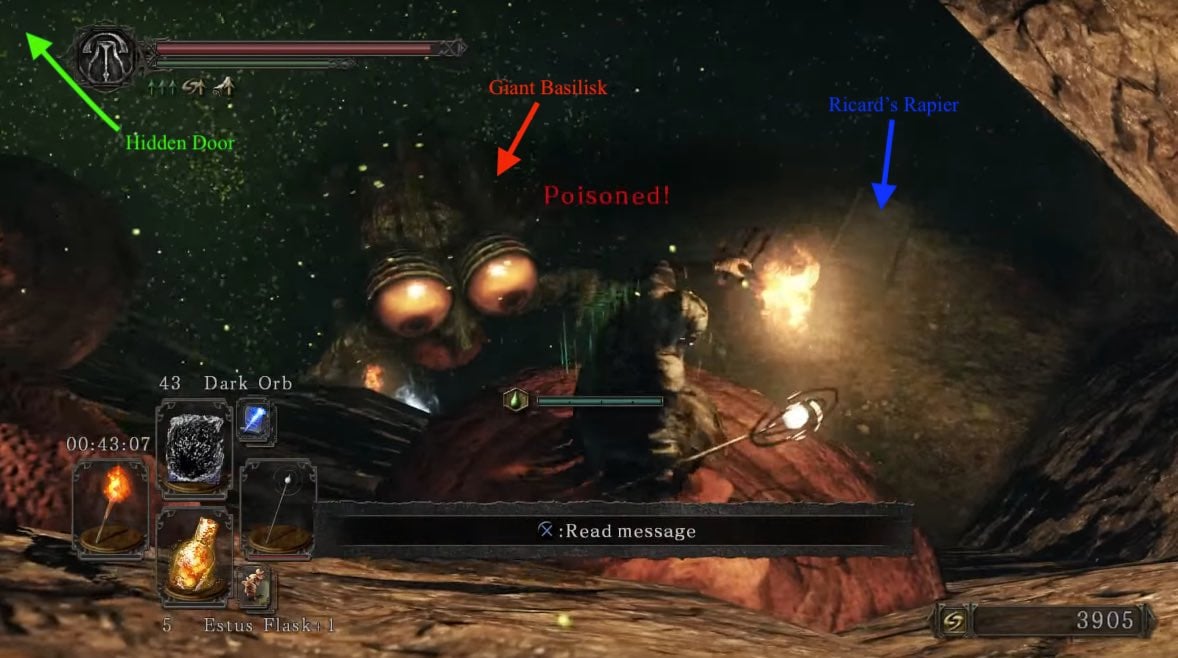
The lift leads back to the dark room we passed through, but on the other side instead. Deal with the two thieves, then go down the stairs to collect some loot. Be weary of the large pit in the center of the room. On the floor hanging on the edge of the pit is a corpse with a Lifegem and a Soul of A Lost Undead. In the corner of the room, there is also a corpse with a Bandit's Knife. Head up the staircase, and go up the ladder, opposite of the door you came through. At the top, a club-wielding Rogue will be waiting. A Rogue will jump up from the ledge, deal with him and drop down. On the ledge you'll find another Hollow Rogue and a corpse with a Poison Moss and a Lifegem. Drop down once again, and roll towards the door and return to the bonfire.
Felkin Journey to the Third Bonfire
Heading out the bonfire door, and right will bring you deeper into the Copse. Continue down the path to find a torch-wielding Hollow Prisoner on the bridge in front of you, and another Hollow Prisoner hiding behind a tree. Be carefull while fighting those, as the Executioner and the Hollow Prisoner on the ledge on the right of you might drop down to you to join the fight. Before going over the first bridge, head left to find a hiding Hollow Rogue and a corpse with a Large Soul of A Lost Undead and a Small Orange Burr. Back on track and across the bridge, you'll meet your first Undead Huntsman. Despite the intimidating appearance, he's not that hard to kill; kite him across the bridge while baiting his attacks to get two or three swings in, then just rinse and repeat. Kill the Moths before continuing onward. There is a torch wielding Hollow Prisoner to deal with ahead, then head into the cell, where 2 more Hollow Prisoner are kneeling. After dealing with them, go to the corpse to net a Morning Star and a Large Soul of A Nameless Soldier. A summon sign for Bashful Ray is next to the bodies. Going outside and right, a Huntsman guards a corpse with a Aromatic Ooze. Near the second moth you should have killed, is a corpse with a Lifegem. The moment you pick it up, Forlorn will invade.
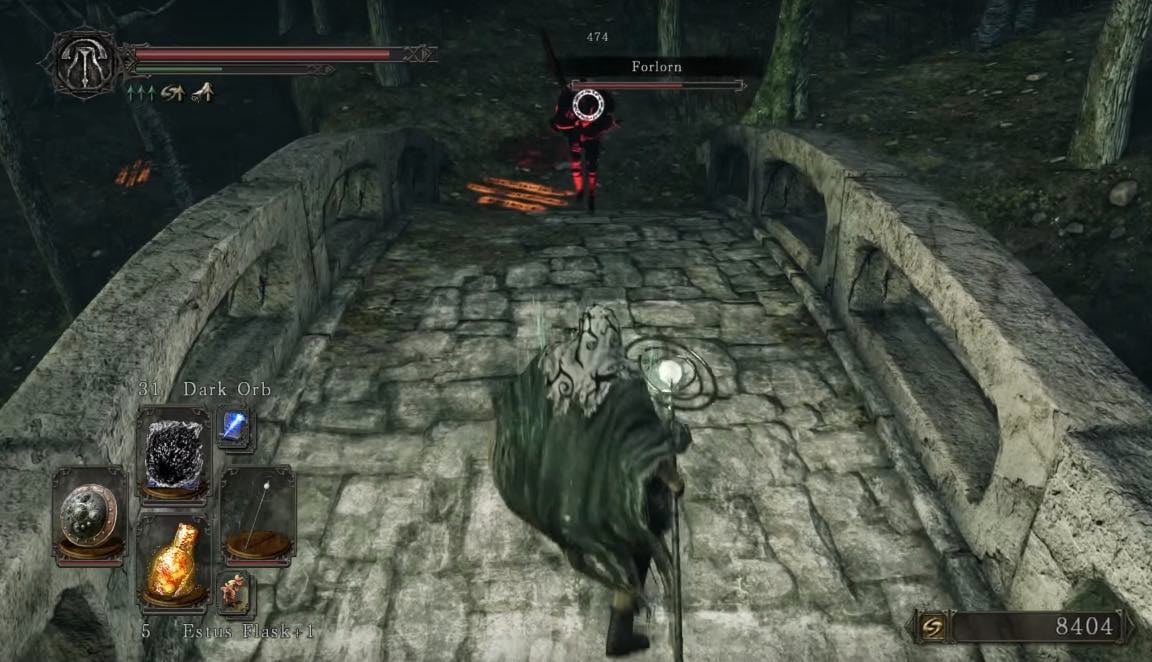
Now there are two paths you can take, one leads to the Undead Purgatory, the other leads to the third bonfire:
Undead Purgatory
To the right of the first bridge is a second, where there are two Hollows and an Executioner. After you have dealt with them, folllow the path ahead and ignore the path on the left for now. A second Executioner is coming from the path ahead of you. On the ledge further down the path, there is a corpse with a Notched Whip, but be carefull when approaching it, as a Skeleton is going to rise behind you. After optaining the whip, go back to the path we previously ignored, heading this way will bring us to a more open path, with another 5 Executioners (replaced with Red Phantom Purgatory Guardians in NG+ onward) waiting on tall pillars and on the wall on the left, 3 with whips, two with staves. Deal with them one by one and head across the bridge where 2 Hollow Prisoner are going to climb up and abush you once you cross past them. Before the fog gate at the end of the bridge, a red phantom with a Greatsword and shield is waiting (he only respawns in NG+ onward, drops Greatsword +3). After dealing with him, jump to the corpse to the right, containing a Fire Seed.
- STRATEGY: This guy makes Havel look easy. To deal with this rather difficult phantom, first and most important is not letting him hit you, if he staggers you it's game over. The best strategy is parrying and backstabbing, his swing patterns are really odd and it's difficult to time it right but it shouldn't be too bad once you get it down. It should take about 4-5 before he is defeated and now you can head inside the Purgatory which hold the Executioner's Chariot boss as well as some loot.
- STRATEGY 2: Run backwards across the bridge. He won't follow you all the way. Find the sweet spot and you can shoot him in the back as he constantly turns around to leave/reengage you. The fight is now trivial.
- STRATEGY 3: A beautiful cheap way to kill this guy is just to the right of his entrance, at the bridge, is a ledge with an item (Fire Seed). Jump over to this ledge and you can use your bow to shoot through the iron gate and pepper him in the face. He cannot retaliate. (courtesy of TheBunnyMage).
To progress further here, please click here.
Continuing to the Bonfire
To get there, go up the hill past the first bridge where more Hollow Rogues are waiting. Deal with them, and look over the side where the hut is, deal with the Hollow Rogue on top of it. There is a hole in the roof to enter the hut, but be carefull, a Syan Soldier is waiting down there. After dealing with him, loot the two corpses one containing 2x Poison Moss and a Green Blossom, the other has the Soul Spear spell, the chest contains 1x Sublime Bone Dust. Follow the tunnel out, and go back up the hill on your right, into the far hut. Another Rogue will drop down, kill him, and pull the lever to lower the bridge and now you can get across.
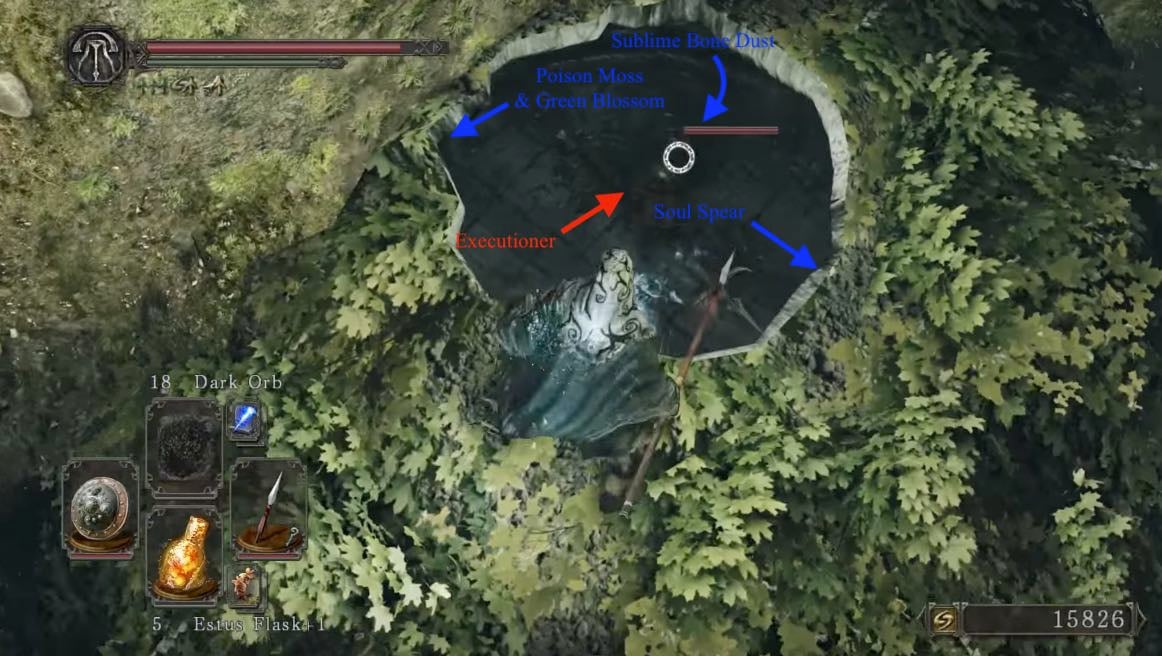
As soon as you exit the hut you're in, you may be attacked by a Stray Dog and a couple of Rogues. The third bonfire is in a cell across the bridge, but its locked. To get the key, cross the stone bridge next to the pile of burning bodies, more Rogues await.
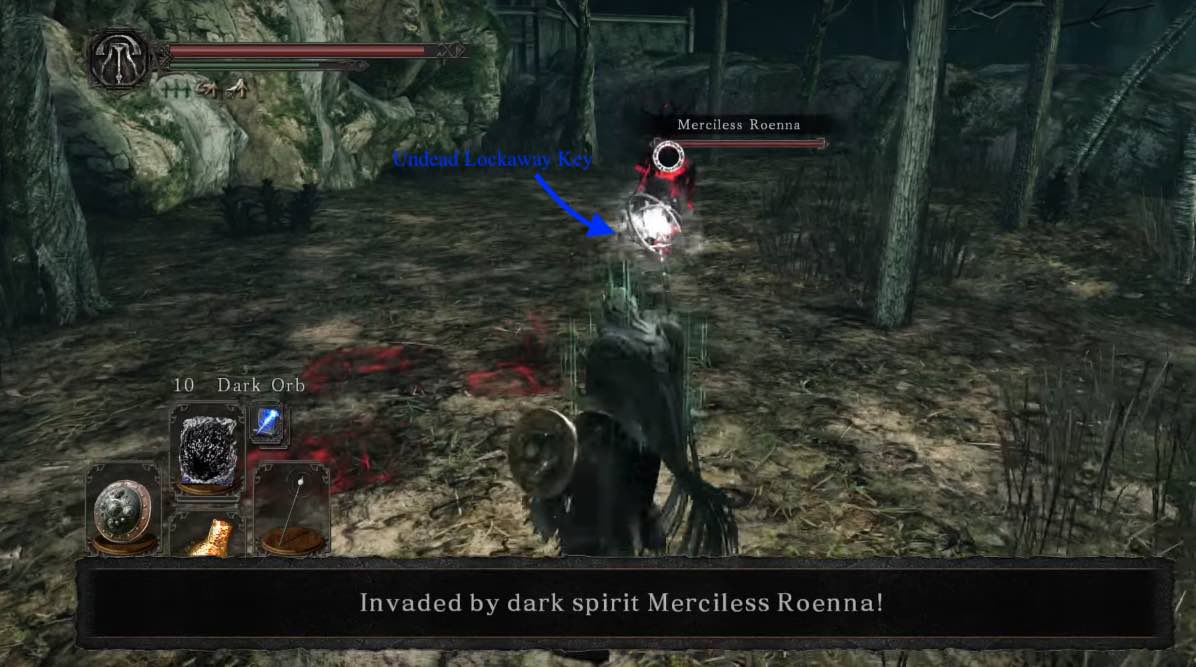
In this dark canyon with narrow ledges, its important that you take your time. Continue down and the path will split. The upper path leads to a scripted NPC invasion, Merciless Roenna, a Great Moth up in the tree and a corpse with the Undead Lockaway Key (NG+ only: Two sickle giants will appear at a certain point before being invaded and after the key pickup). Once you've dealt with her, look off the cliff edge to find a small ledge. On the ledge, a corpse holds Flamberge. This is also a convenient spot to snipe the Rogue below.
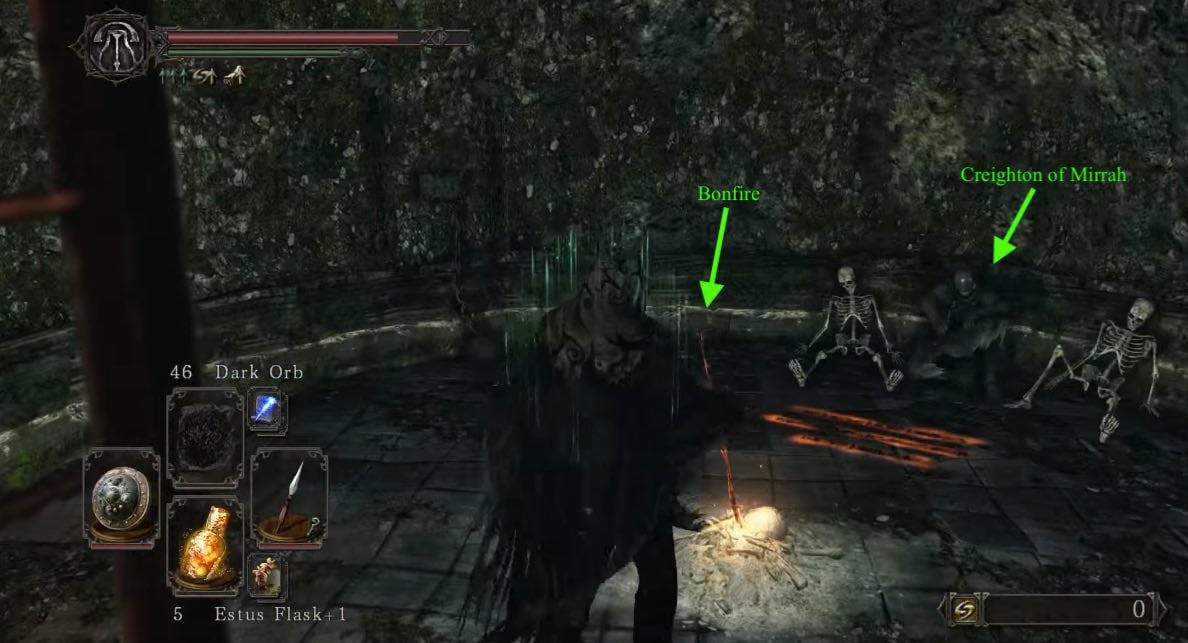
Return to the locked bonfire for now and use the key to unlock it to access it and be able to interact with the NPC Creighton of Mirrah inside. He teaches the 'Fist Pump' gesture and tells you how he got locked up inside. Killing him results in him dropping his mask and Melentia will sell the rest of his set. After unlocking this bonfire, head back to the intersection after the bridge. Go back up where Merciless Roenna was and take care of the Great Moth. Looking down, you will also notice an item near the entrance to a cave, as well as a Necromancer. Snipe her from here to reduce your trouble for later, then head back and take the lower path. On the right side, you will notice a wooden bridge, which leads you into a cave with Skeletons and Necromancers; don't go there yet, instead continue down the path and there will be three more Rogues to deal with, one archer is in front of the cell and a melee one and another archer inside, as well as 2x Undead Prisoner and a corpse with 2x Flame Butterfly. Continuinging the path, you will find yourself in front of a building.
The path straight ahead is blocked by bolders, so turn to the right and follow the path behind the waterfall. After a bit you will se a few stairs to your left leading to a fog gate, this is the fog gate to the boss, which we will ignore for now. Instead, move along the right hand path near the waterfall into a cave, inhabitated by a Necromancer (which we already sniped from the area where Merciless Roenna spawned) and 3 Skeletons. Careful when dealing with the Skeletons, as the floor here is missing in some places. Move forward and take the path to the right first. This leads to a broken bridge with a corpse holding Combustion pyromancy spell and 3x Titanite Shard. Going back, you will notice a corpse with items in front of you, jump over the gap to claim the Human Effigy, 40x Lacerating Arrow and 3x Prism Stone waiting there. Jump back and go through the little path on your left. At the end of this path is the lever to a closed gate, guarded by another Skeleton as well as a corpse holding 1x Estus Flask Shard, a Crystal Lizard and a summon sign for Creighton of Mirrah.
Pull the lever and go through the gate to deal with another Necromancer and 3 Skeleton. Carefull though that you dont get too close to the jar with a face on it, which not only emits a strange laughter, but also a cursing fog. Destroy this jar with a strong ranged attack (a magic attack seems to be enough, bow and arrow not). Further down the path, there is a split, with another Skeleton waiting in the path to the front. This way leads outside to the wooden bridge we ignored before. The other path leads to a seemingless empty room, with another laughing curse jar on the left, as well as a corpse with a Magic infused Mace, and a Titanite Shard. Be carefull when approaching it though, as another Skeleton will rise near where the cursed jar was. Following the path on the other side of the room brings us back to the bonfire, offering an alternative root to the fog gate. You will also notice a Hollow Prisoner running in cycle between the bonfire and the wooden bridge, this one drops a Repair Powder.
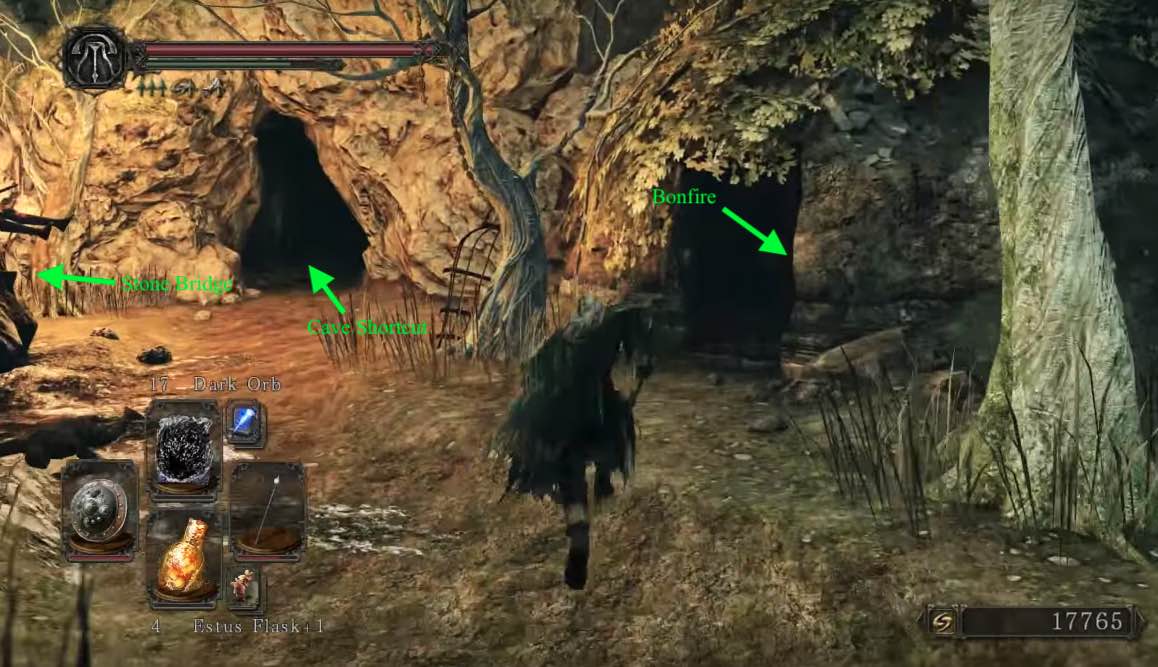
After finishing your preparations, head back to the og gate to face the boss of this area, The Skeleton Lords.
BOSS FIGHT: The Skeleton Lords
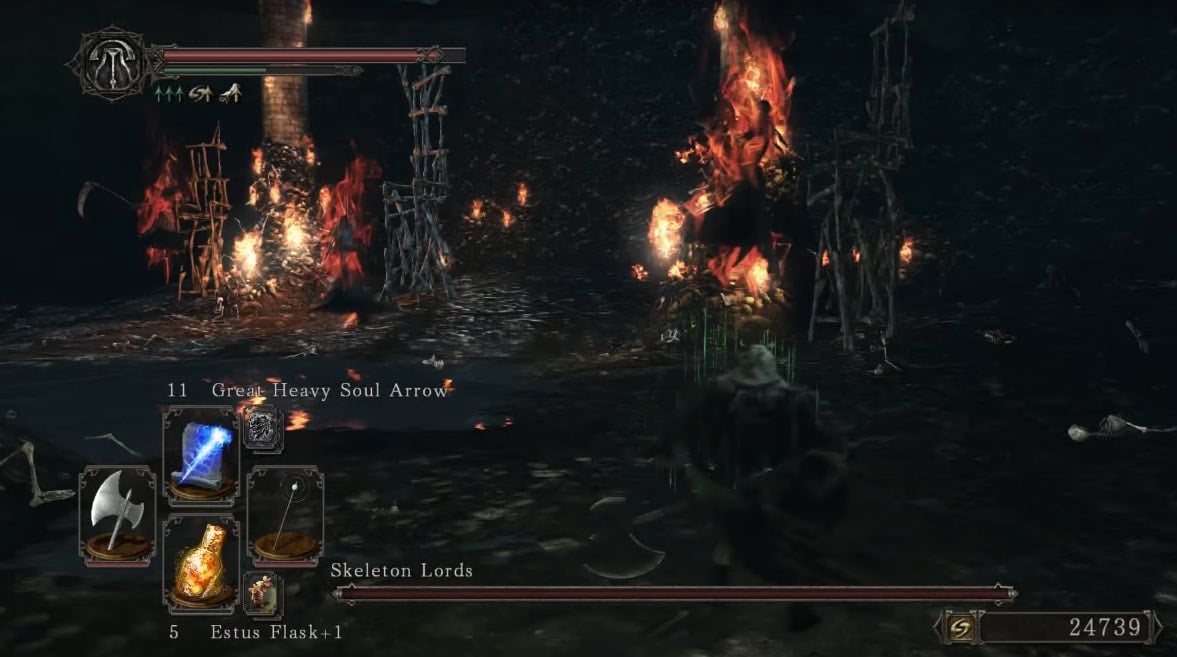
Once defeated, the player is rewarded with the Skeleton Lord's Soul. Continue through the big doorway and corridor until you reach a bridge you can lower by pulling a lever on the right. Continue onwards, down the ladder, until the title prompts to notify you of your arrival at the Harvest Valley.
<< Previous: Sinner's Rise Next: Undead Purgatory >>
