Iron Passage
 Iron Passage is a Location in Dark Souls 2. It is part of the Crown of the Old Iron King DLC.
General Information
- Previous: Brume Tower
- Next: Memory of the Old Iron King
- Recommended Levels: 110 to 120
- Bosses: Smelter Demon
- Bonfires: Iron Hallway Entrance
Iron Passage Map

NPCs in the Iron Passage
- N/A
Items
Consumables- 7x Large Titanite Shard
- Dried Root
- 2x Crimson Water
- Simpleton's Spice
- 5x Torch
- 2x Wilted Dusk Herb
- 3x Cracked Eye Orb
- 3x Old Growth Balm
- 1x Titanite Chunk
Enemies
Boss
Notes
- ??
Iron Passage Walkthrough
Access
Obtain the Tower Key from Brume Tower to gain access to the Iron Passage.
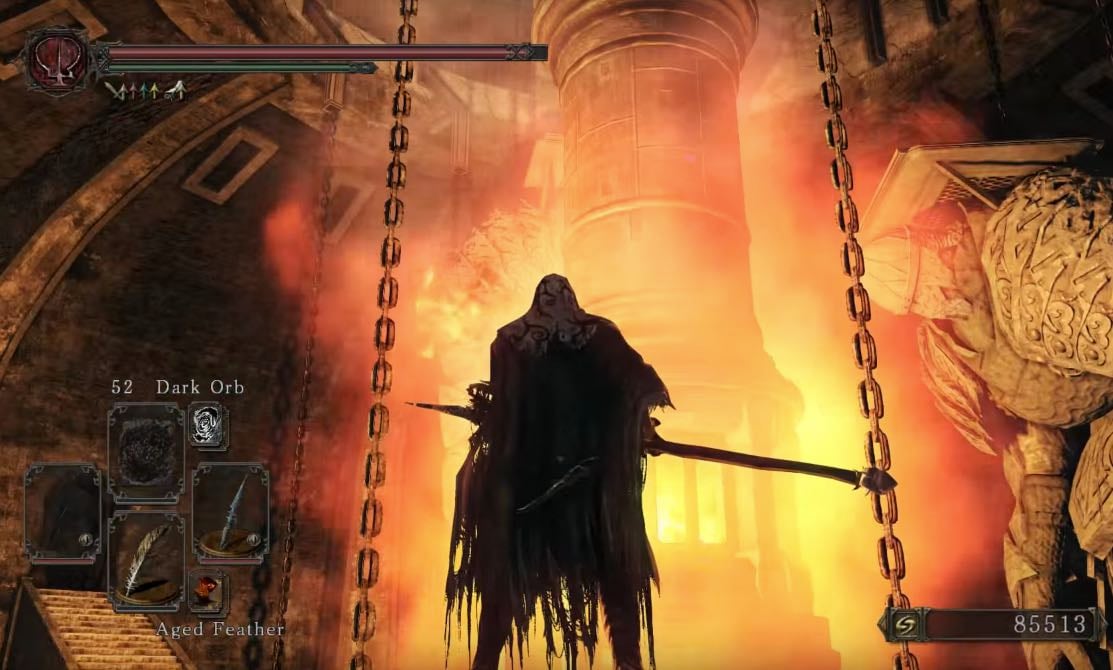
From the Foyer bonfire, take the elevator that goes down then use the Tower Key on the small metal door. Head down the two staircases then pick up the 2x Twilight Herb on the right, before you take the elevator down. Once down, enter the doorway to prompt the "Iron Passage" title, letting you know you've arrived.
Blue Big Bad
Light the Iron Hallway Entrance bonfire, then drop down to the next floor. This is one of the areas where summon signs are available for players that don't have this DLC can be summoned, as well as the NPC summon signs for Steel-willed Lorrie and Drifter Swordsman Aidel.
Continue to find a lever, a path ahead, and a path to the left. Pulling the lever opens the cell doors in the path ahead, and will release 4 Ashen Warriors will be released, after killing them the last cell to the right will contain a corpse holding 7x Large Titanite Shard. This lever has another use that is not essential to complete the area, and will be described under "Optional Content".
Take the path to the left and drop down the hole. Around the corner is a room with two more Ashen Warriors, and a Fume Sorcerer providing lightning cover fire for them, when you engage. You will see an item in a body out of reach, ignore it for now. After killing the enemies, head through the doorway and drop down again. You'll find another drop with an Ashen Warrior waiting below, drop and kill it. Continue to the next room with the Sorcerer, a Possessed Armor, and two Ashen Warriors (one of which hides in an attempt to ambush you). After dealing with them, continue to yet another drop. This final room contains a Possessed Armor, a Sorcerer, and an Iron Warrior. After killing them all, pick up a Dried Root from the body and enter the mist to fight the boss.
Boss Fight: Blue Smelter Demon
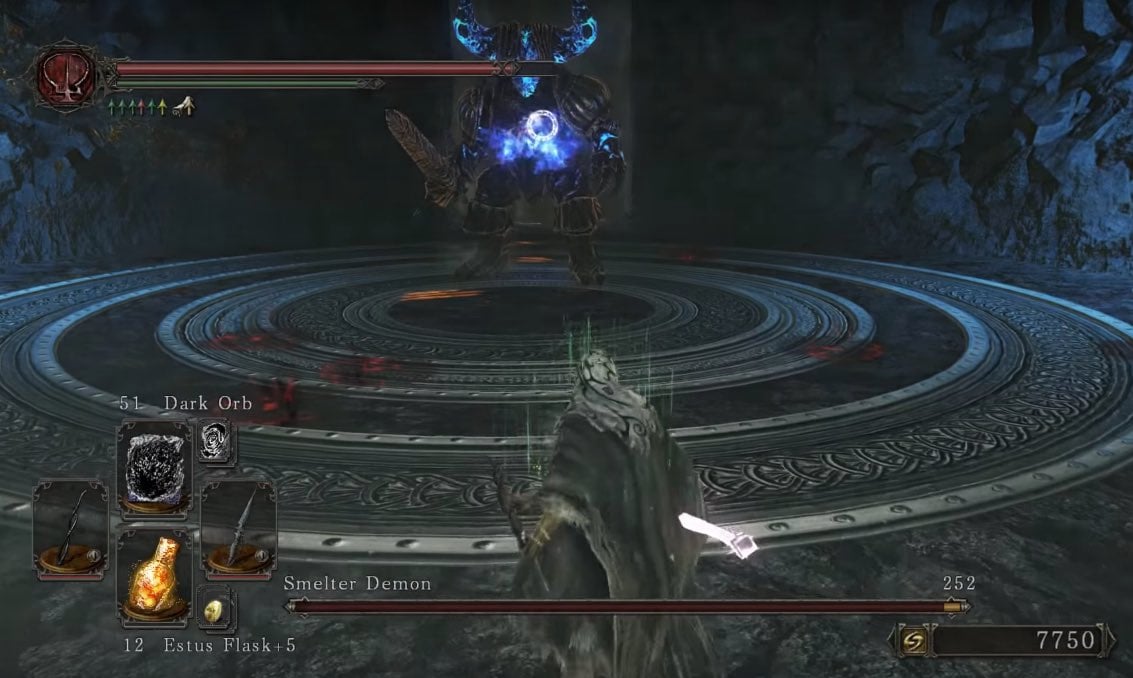
After defeating the boss, continue to the next division and pick up the Pharros Mask from the corpse. Take the elevator here, and drop down to the walkway to find yourself back at the entrance of Iron Passage.
Clearing the Run
It's worth clearing one room at a time, then feathering back, since you can earn a lot of souls as well as collect the Jester Gloves and Covetous Serpent Ring; it's also a very short distance from room to room, and dying deep feels bad when you've collected 40k souls. It also means you only use one effigy, if you're bringing the summons along. Consider using the NPCs, combined with Aged Feather & Black Separation Crystal. It's considerably safer. They'll always take the low path. And if you take the high path, they'll just rush to the last room.
Lever Room
Clear the Skeletons. It's worth just doing this 12 times if you want to clear the run easily. Once they're stop respawning pull the lever, and run down the corridor, ensuring to hug the right wall. Roll through the first two fireballs, and simply run past the remainder. You'll drop into a pit with the Priestess and Sorcerer through a doorway.You can then take on the Warriors, and feather back, or stay on this path.
Low Path
Room 1:
- Bait out the Warriors, and take them away from line of sight of the Sorcerer. While doing this, the Priestess will likely run down to you. Generally, the Priestesses will drop down if you've aggroed them but are unable to see you. Stand at the end of the ridge that the Sorcerer is on and take him out with wooden arrows. His spells will crash into the ground.
Room 2:
- Dive attack the Warrior. Then roll forward to bait the next Warrior behind the wall. Pull him back out of line of sight of the archer, then wait for the archer to shoot, to run to aggro the next Warrior and Priestess. Once again, remove yourself from the Archer's line of sight before you kill them both. Deal with the Archer at range, if you like. Watch for the final Warrior hiding out of sight at the end of the room.
Room 3:
- Aggro the Priestess then break her line of sight, and kill her when she approaches. Let the NPCs do the hard work on the Giant (5-6 poison arrows will also take 2/3 of his health). Snipe the Archer.
High Path
Room 1:
- After killing the Priestess, kill the Sorcerer. Ignore the Warrior, and head back into the fireball room. Go through the archway, and you're into the second room.
Room 2:
- Find another lever here, and a few more Warriors. Also watch for the Sorcerer who spawns near the lever. You can stunlock it pretty easily , once you know where it's spawning. Pull the lever, then clear the warriors. As before, consider doing this 12 times before moving on.
- Running through this gate is the only way to access the Possessed Armor's platform in the final room.
Room 3:
- If you didn't take the gate on the previous room, you'll come out by the Priestess. Bait the Archer to shoot while hiding in cover. Once they've fired their shot, take care of the Priestess, and just suck up the arrows (two handing a katana takes ~6 light hits). Once again take cover to heal up or simply catch your breath, then use poison arrows to take care of the Giant (or let the NPCs do it). Snipe the archer.
- If you did go through the gate, you'll arrive out by the Archer. Kill him then drop down to kill the Priestess. Snipe the Giant with poison arrows (5-6 arrows), take him on hand-to-hand, or let the NPCs do the work.
Optional Content
It is not possible to get all items in this area in one run. You will need to use Aged Feather or Homeward Bone, and rest at a bonfire a few times to reset the area and come back for missing items.
The lever in the first room that open the cells, also opens the grate at the end for the stone lizard to shoot fireballs. If you pull the lever and run (and manage to dodge the fireballs) you can go past the grate before it closes and have access to the upper areas with items you could see, but not reach. Even these upper area have many enemies, which makes it more challenging than the lower areas.
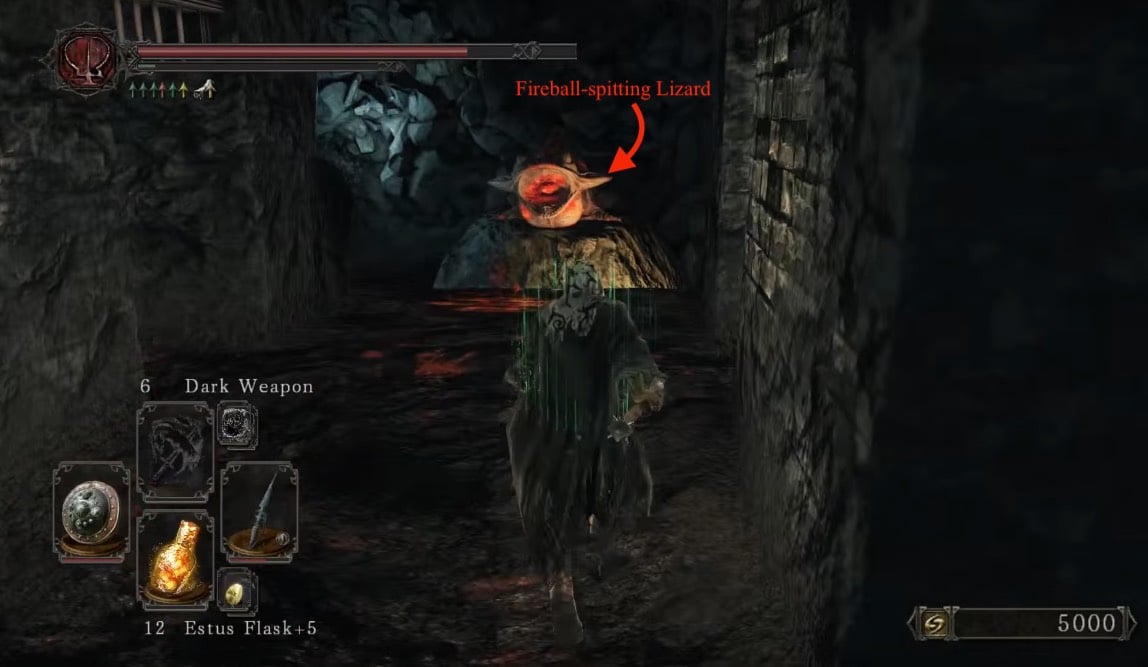
When you manage to run past the closing grate, an Astrologist will be waiting for you. Deal with it, and go left to face the Fume Sorcerer and pick up 2x Crimson Water from the body at the end.
Head back to where you dropped but this time, head forward. You will see another lever, and a Fume Sorcerer will emerge. Kill the sorcerer and look ahead of the lever. Its another block of cells with a grate and a salamander at the end. The two bodies holding items in the cells, but to pick those up you can't progress more in this area, you will need to return to the bonfire to reset the area and come here again.
If you open the cells, you'll find three Ashen Warriors, a Simpleton's Spice, and 5x Torch. If you decide to run past the grate, you will find yourself in a room with 2 exits.
- The exit on the left - An Astrologist awaits. Here you can see an item below, and a Possessed Armor close to it, but if you drop to pick it up you have to repeat the process all over again. If you drop down, kill the Possessed Armor and pick up 2x Wilted Dusk Herb.
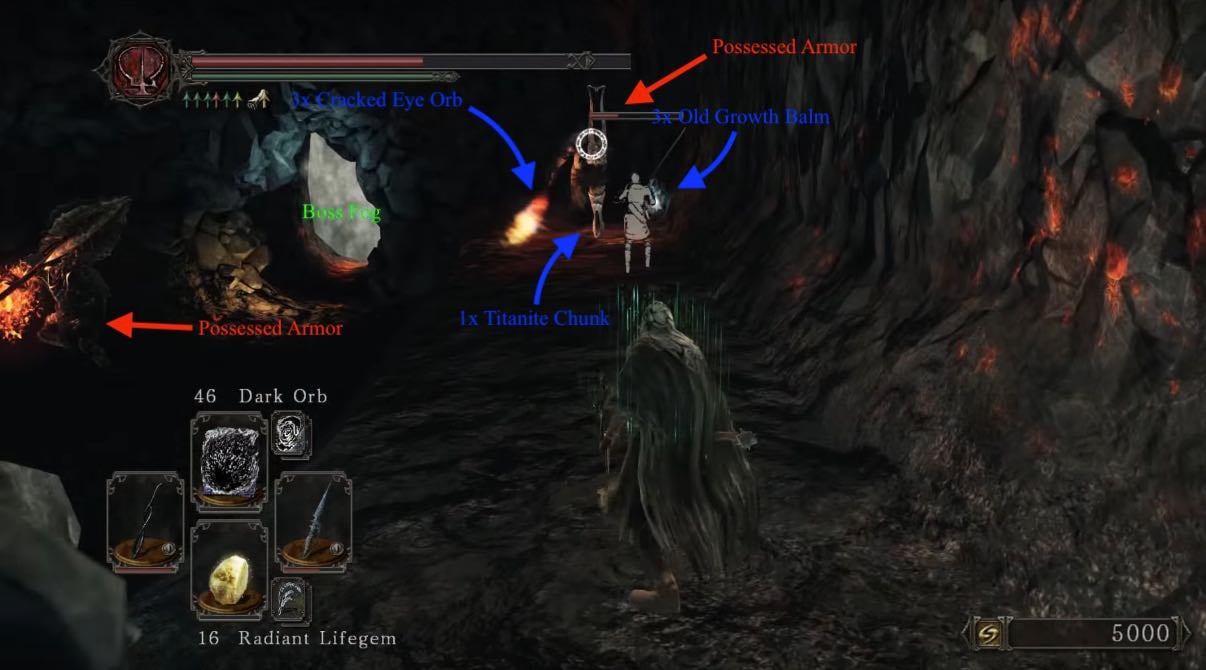
- The exit on the right - Leads to the last area, near the boss gate. A Possessed Armor will also be guarding two bodies holding 1x Titanite Chunk, 3x Cracked Eye Orb, and 3x Old Growth Balm.
Co-Op Strategy
If you are summoning help, or being summoned, Iron Passage becomes a lot more manageable. Rather than choosing one path, it is best to split up, with two players passing through the first gate, while the other two, preferably the host and either another player or an NPC summon, stay behind and go through the "main" route using the passage to the left.
The two players going through the gate can simply wait next to the gate while the host pulls the lever. The two players taking the high route can split up a second time at the second gate, with one going through while the other pulls the lever again. Doing this allows all of the enemies on each level to be engaged directly, and doesn't require anyone to attempt to dash through the gauntlet.
If you have less than four players, it is generally better for players to go through gates when possible, since the players on the higher levels can easily support the player on the lower level with archery or spells once they have defeated the enemies on their part.
Also note that, if you are the host, it is preferable if you don't engage the Iron Warrior outside the boss gate until the players on the higher levels have dealt with their enemies, and are able to come down and assist. Remember, if a phantom dies, you're down one phantom, but if the host dies, it's all over!
General Information
- Previous: Brume Tower
- Next: Memory of the Old Iron King
- Recommended Levels: 110 to 120
- Bosses: Smelter Demon
- Bonfires: Iron Hallway Entrance
Iron Passage Map

NPCs in the Iron Passage
- N/A
Items
Consumables- 7x Large Titanite Shard
- Dried Root
- 2x Crimson Water
- Simpleton's Spice
- 5x Torch
- 2x Wilted Dusk Herb
- 3x Cracked Eye Orb
- 3x Old Growth Balm
- 1x Titanite Chunk
Enemies
Boss
Notes
- ??
Iron Passage Walkthrough
Access
Obtain the Tower Key from Brume Tower to gain access to the Iron Passage.

From the Foyer bonfire, take the elevator that goes down then use the Tower Key on the small metal door. Head down the two staircases then pick up the 2x Twilight Herb on the right, before you take the elevator down. Once down, enter the doorway to prompt the "Iron Passage" title, letting you know you've arrived.
Blue Big Bad
Light the Iron Hallway Entrance bonfire, then drop down to the next floor. This is one of the areas where summon signs are available for players that don't have this DLC can be summoned, as well as the NPC summon signs for Steel-willed Lorrie and Drifter Swordsman Aidel.
Continue to find a lever, a path ahead, and a path to the left. Pulling the lever opens the cell doors in the path ahead, and will release 4 Ashen Warriors will be released, after killing them the last cell to the right will contain a corpse holding 7x Large Titanite Shard. This lever has another use that is not essential to complete the area, and will be described under "Optional Content".
Take the path to the left and drop down the hole. Around the corner is a room with two more Ashen Warriors, and a Fume Sorcerer providing lightning cover fire for them, when you engage. You will see an item in a body out of reach, ignore it for now. After killing the enemies, head through the doorway and drop down again. You'll find another drop with an Ashen Warrior waiting below, drop and kill it. Continue to the next room with the Sorcerer, a Possessed Armor, and two Ashen Warriors (one of which hides in an attempt to ambush you). After dealing with them, continue to yet another drop. This final room contains a Possessed Armor, a Sorcerer, and an Iron Warrior. After killing them all, pick up a Dried Root from the body and enter the mist to fight the boss.
Boss Fight: Blue Smelter Demon

After defeating the boss, continue to the next division and pick up the Pharros Mask from the corpse. Take the elevator here, and drop down to the walkway to find yourself back at the entrance of Iron Passage.
Clearing the Run
It's worth clearing one room at a time, then feathering back, since you can earn a lot of souls as well as collect the Jester Gloves and Covetous Serpent Ring; it's also a very short distance from room to room, and dying deep feels bad when you've collected 40k souls. It also means you only use one effigy, if you're bringing the summons along. Consider using the NPCs, combined with Aged Feather & Black Separation Crystal. It's considerably safer. They'll always take the low path. And if you take the high path, they'll just rush to the last room.
Lever Room
Clear the Skeletons. It's worth just doing this 12 times if you want to clear the run easily. Once they're stop respawning pull the lever, and run down the corridor, ensuring to hug the right wall. Roll through the first two fireballs, and simply run past the remainder. You'll drop into a pit with the Priestess and Sorcerer through a doorway.You can then take on the Warriors, and feather back, or stay on this path.
Low Path
Room 1:
- Bait out the Warriors, and take them away from line of sight of the Sorcerer. While doing this, the Priestess will likely run down to you. Generally, the Priestesses will drop down if you've aggroed them but are unable to see you. Stand at the end of the ridge that the Sorcerer is on and take him out with wooden arrows. His spells will crash into the ground.
Room 2:
- Dive attack the Warrior. Then roll forward to bait the next Warrior behind the wall. Pull him back out of line of sight of the archer, then wait for the archer to shoot, to run to aggro the next Warrior and Priestess. Once again, remove yourself from the Archer's line of sight before you kill them both. Deal with the Archer at range, if you like. Watch for the final Warrior hiding out of sight at the end of the room.
Room 3:
- Aggro the Priestess then break her line of sight, and kill her when she approaches. Let the NPCs do the hard work on the Giant (5-6 poison arrows will also take 2/3 of his health). Snipe the Archer.
High Path
Room 1:
- After killing the Priestess, kill the Sorcerer. Ignore the Warrior, and head back into the fireball room. Go through the archway, and you're into the second room.
Room 2:
- Find another lever here, and a few more Warriors. Also watch for the Sorcerer who spawns near the lever. You can stunlock it pretty easily , once you know where it's spawning. Pull the lever, then clear the warriors. As before, consider doing this 12 times before moving on.
- Running through this gate is the only way to access the Possessed Armor's platform in the final room.
Room 3:
- If you didn't take the gate on the previous room, you'll come out by the Priestess. Bait the Archer to shoot while hiding in cover. Once they've fired their shot, take care of the Priestess, and just suck up the arrows (two handing a katana takes ~6 light hits). Once again take cover to heal up or simply catch your breath, then use poison arrows to take care of the Giant (or let the NPCs do it). Snipe the archer.
- If you did go through the gate, you'll arrive out by the Archer. Kill him then drop down to kill the Priestess. Snipe the Giant with poison arrows (5-6 arrows), take him on hand-to-hand, or let the NPCs do the work.
Optional Content
It is not possible to get all items in this area in one run. You will need to use Aged Feather or Homeward Bone, and rest at a bonfire a few times to reset the area and come back for missing items.
The lever in the first room that open the cells, also opens the grate at the end for the stone lizard to shoot fireballs. If you pull the lever and run (and manage to dodge the fireballs) you can go past the grate before it closes and have access to the upper areas with items you could see, but not reach. Even these upper area have many enemies, which makes it more challenging than the lower areas.

When you manage to run past the closing grate, an Astrologist will be waiting for you. Deal with it, and go left to face the Fume Sorcerer and pick up 2x Crimson Water from the body at the end.
Head back to where you dropped but this time, head forward. You will see another lever, and a Fume Sorcerer will emerge. Kill the sorcerer and look ahead of the lever. Its another block of cells with a grate and a salamander at the end. The two bodies holding items in the cells, but to pick those up you can't progress more in this area, you will need to return to the bonfire to reset the area and come here again.
If you open the cells, you'll find three Ashen Warriors, a Simpleton's Spice, and 5x Torch. If you decide to run past the grate, you will find yourself in a room with 2 exits.
- The exit on the left - An Astrologist awaits. Here you can see an item below, and a Possessed Armor close to it, but if you drop to pick it up you have to repeat the process all over again. If you drop down, kill the Possessed Armor and pick up 2x Wilted Dusk Herb.
- The exit on the right - Leads to the last area, near the boss gate. A Possessed Armor will also be guarding two bodies holding 1x Titanite Chunk, 3x Cracked Eye Orb, and 3x Old Growth Balm.

Co-Op Strategy
If you are summoning help, or being summoned, Iron Passage becomes a lot more manageable. Rather than choosing one path, it is best to split up, with two players passing through the first gate, while the other two, preferably the host and either another player or an NPC summon, stay behind and go through the "main" route using the passage to the left.
The two players going through the gate can simply wait next to the gate while the host pulls the lever. The two players taking the high route can split up a second time at the second gate, with one going through while the other pulls the lever again. Doing this allows all of the enemies on each level to be engaged directly, and doesn't require anyone to attempt to dash through the gauntlet.
If you have less than four players, it is generally better for players to go through gates when possible, since the players on the higher levels can easily support the player on the lower level with archery or spells once they have defeated the enemies on their part.
Also note that, if you are the host, it is preferable if you don't engage the Iron Warrior outside the boss gate until the players on the higher levels have dealt with their enemies, and are able to come down and assist. Remember, if a phantom dies, you're down one phantom, but if the host dies, it's all over!
 Anonymous
I enjoyed ds2 but this area is simply bad, no interesting loot and the worst gank run to fight a reskin demon, just skip this

 Anonymous
the fear in this comment section is unreal. Going into this area I was prepared for a hell worse than death and honestly if you do things right this area is laughably easy.
Step 1: you are running through everything. There is no loot here worth anything except the mask, which you get after the boss anyways, so don't even bother. Unless you're some weirdo who needs the astrologists set, there is nothing for you here.
Step 2: take the lower path. Reliably, if you run through the first room, you'll only aggro a few enemies. When you drop down you'll be in a little alcove where the next room won't aggro onto you yet. Dispatch the one or two enemies which follow you down, without leaving your little cubby hole. Could cost you a couple estus, or lifegems, because hey, those still exist even if you're in the lategame.
Step 3: walk into lower path room and aggro Astrologist and nothing else. Despite its ranged capabilities, this dumbass will run towards you if you aggro him and then duck back into your little cubby hole. In melee he's a joke.
Step 4: congratulations, that's the hard part out of the way and it probably took you less than 2 minutes and like 1 arrow. Now just sprint and roll, hugging the left side, and you're home free at Blue Smelter Demon, which with the +3 Magic defense ring, obtainable earlier in the DLC, and even a modicum of decent armor shouldn't be able to do more than 3 shot you at 40+ Vigor. That is a bit of a harsh damage amount, but the dude leaves lots of windows to heal after his combos, or slam attack, and also, getting 3 shot by a boss is not abnormal. I beat him first try with just a fully upgraded craftsman's hammer and minimum stat requirements.
I swear DS2 players act like this is the hardest game in the world that expects you to play completely differently from the other souls but this is the kind of boss runback strategy that works in literally every game and is a staple of avoiding death. Aggro from far away, get cover from ranged attacks, take out enemies in safe and manageable amounts.
 Anonymous
this is the first result when typing "cancer" in the search bar

This area on ng+ is worse than frigid outskirts. You can deal with frigid by having all summons, knowing where to go, healing them in the houses.
You cannot ever run thru this area without getting trashed once red phantom enemies start being a thing, you need to spam arrows and go thru little by little with no space to fight half the time.
There are two smelter enemies next to the boss fog. You habe a Maybe 30% chance of not getting combo'd trying to run past into the boss fight.
 Anonymous
 Anonymous
 Anonymous
This right here (alongside with some other of DS2) is what happen when someone who doesn't understand the concept of a game try to make a sequel to it. Whoever was behind of this area design, thought that dark souls is hard just for the sake of being hard, so they created this totally unfair, unbalanced and really annoying area, made on a way that I don't think that's even possible to make it worse, because they thought that making it extremely hard is what dark souls is meant to be and ppl would like it

 Anonymous
 Anonymous
Pro tip, use a short bow and poison arrows to snipe the astrologists. If you have decent stamina you can hit them four times in quick succession, at which point the poison will proc and you can just wait for them to die. Once the poison kicks in they will usually run straight at you and start spamming lightning spears, so bring gear with decent lightning defense and/or use the cave walls to your advantage.
Poison also works on the fume sorcerer in the first chamber but it takes a few more hits to proc (around 6 by my count).
 Anonymous
 Anonymous
Thank god they didn't put anything worth getting in this shithole aside from the Pharros Mask. I just ran to the boss avoiding everything to get the mask and pretend this area doesn't exist.

 Anonymous
I really don’t get these sections, the dlc locations are all masterpieces and then theres these side trips that are just pure **** and use recycled enemies too. what can be the point other than just **** the dlc up?

 Anonymous
"run down the corridor, ensuring to hug the right wall."
Does not work. Hugging the right wall, the fireballs drift to the right. Hugging the left wall, they drift to the left.
 Anonymous
This area has made me the saltiest I’ve ever been playing this game. I understand that joke of the DLC’s just place more enemies to increase difficulty, but this just takes the cake to the point where it’s borderline unfair.
A nice row of tight corridors combined with at least 3 soldiers per room along with stupid-accurate archers, annoying sorcerers and those completely BS NPC astrologists that spam Walk of Peace.
Many words can be used to describe this short area, but the best two I’ve found: disappointing and unfair.
 Anonymous
Use the two invocations to distract him while you strike him from time to time with a physical weapon. Block with your shield or roll untill they focus back to the summons. Embue with dark resin for better result. One summon survived.

 Anonymous
im usually one to not complain about difficulty in these games, and i even like the frigid outskirts, but this place is genuinely just dumb.
what were they thinking with the timed door where you have to dodge a bunch of enemies and fire balls in a tight hallway before it closes? did they just expect you to despawn all the enemies? then 2 seconds after that theres the exact same hallway "puzzle" again, except this time an invisible sorceress ganks you too.. just why. also i love when im clearly still under the door as its closing but my character can't go through it because i guess the collision is just jank.
the worst part though is the astrologists, not even because they're hard but because it's just ****ing dumb. they're not really designed enemies with movesets and stuff for you to figure out, but rather normal npcs with the standard random and unpredictable and annoying npc ai. also their fashion is horrible.
 Anonymous
This is a great example of how not to design an endgame area.

 Anonymous
 Anonymous
HAHAHAHA bro I'm literally not even mad at this point, this **** just made me laugh out loud at how stupid it is .. I get to the gate, I'm slow rolling obviously, a sliver of health, somehow dodging the millions of attacks being spammed at me, just to make it up to the gate and get smashed from behind (giggity) as I press enter

 Anonymous
Grab the two summons in the starting room next to the bonfire, then run through the long way to get to the boss fog gate, skipping all of the enemies. Take a wide turn around the big ass dude guarding the gate as he swings and misses you. As you go through the fog gate, your summons will high tail it and be there in no time.
Your summons will take most of smelly demon's agro, so you can either cast spells (dark orb) or just stay behind him and melee.
There is nothing worth while in this zone other than the pharros mask, which is located in the next room after the fight.
Brightbug yourself (and other buffs) in the starting room before making the run if you need to.
 Anonymous
You can truly see the genius desing here. This area is masterfuly crafted to counter every build you can think of. Wanna go melee? We put archers and mages in unreachable area, Wanna go magic? These mages cast spells that don't allow you to cast anything, Wanna exist? Well we cleverly countered this by making you slowed troughout the expierience! This area is a special kind of pain for magic builds as the boss is so resistant to magic weaker spells may fail to even move his healthbar visibly and also you can't cast anything like 90% of the time. Truly one of the areas of all time

 Anonymous
 Anonymous
 Anonymous
I wish every area was like this, would make the game much better

 Anonymous
 Anonymous
Amazing level design, probably my favourite area in the game, can’t wait to come back on NG+. My favourite is the Astrologists that slow you down from across the map, it really forces you to be strategic. My only complaint is that they could have added a few more enemies and maybe given the boss a bit more health. 9.5/10

 Anonymous
 Anonymous
 Anonymous
WAIT THERES NPC SUMMONS!? HOW DID I MISS THAT SFGHJUYTRDVBHYTRD I HATE MY LIFE DFGHYHGTFRD

 Anonymous
So I managed to genocide the entire area and kill the boss, a decent amount of souls, but can't work out why this page seems to be three seperate walkthroughs one after the other, with mention of jester gloves and a ring (with dead links) that I can't find for the life of me. Can anyone enlighten me?

 Anonymous
Aimbot enemies on unreachable areas, cool. Another giant middle finger to melee characters.

 Anonymous
IT IS NOT WORTH IT. Just kill the boss, grab the mask and move on.
And cheese the boss, just so you dont have to go thru it more than you need. Bring 1 flash sweat, 1 poison mist and 2 toxic mist (NG)
 Anonymous
"Congratulations on making through the incredibly difficult optional path! Your reward? Consumables you can buy for like 2k from NPCs"

 Anonymous
I had never gone to the old iron king DLC yet, and my initial plan for this playthrough was to clear the full game, and save the frigid outskirts for when I have maximum strength because that area is cancer - but after discovering the iron passage and spending two fruitless hours there, I've decided I will do neither of those two areas. Jesus ****.

 Anonymous
 Anonymous
 Anonymous
 Anonymous
i hate this i hate this i hate this i hate this i hate this i hate this i hate this i hate this i hate this i hate this i hate this i hate this i hate this i hate this i hate this i hate this i hate this i hate this i hate this i hate this i hate this i hate this i hate this i hate this i hate this i hate this i hate this i hate this i hate this i hate this i hate this i hate this i hate this i hate this i hate this i hate this i hate this i hate this i hate this i hate this i hate this i hate this i hate this i hate this i hate this i hate this i hate this i hate this i hate this i hate this i hate this i hate this i hate this i hate this i hate this i hate this i hate this i hate this i hate this

 Anonymous
Completely worthless area. no good loot. Pretty fun boss which is ultimately just a smelter demon. No point in completing unless you're a completionist, a masochist, or both.

 Anonymous
Thank you Lorrie and Aidel. These NPCs makes the boss fight much easier.

 Anonymous
There's an easier way to cheese the skellies here without using items or quit/reload.
Equip a fog spell, and press up against the far right gate at the first gauntlet and cast the spell towards the mob. It won't hit them, but you'll notice it puts all of them in a walking alert state. Run back, pull the lever, and run through dodging the fireballs. You'll notice the skellies don't run out of their cells now, and all you have to do is dodge the salamander stuff.
At the next gauntlet, do the same thing, just this time with the far left skellie.
No need to grind, summon, or farm. Just break their AI by putting them into an alert state :)
 Anonymous
CHEESE: Summon both phantoms, run straight to the boss and pray you'll get there with ~8 estus and enough lifegems. Then, alt+f4 so you can quit quickly. Open the game again, you should spawn in front of the boss room with no summons. You should be in the clear right now (except that ******* iron warrior who can sometimes come and pancake you), so you can buff yourself up if you want to.
Now quit the game and back up your save file.
Open the game again, and give an attempt at smelter. If you die, alt+f4 and replace your current file with the backup you just made.
When you load up the game again, you should be still in front of the boss gate, and now you can do the boss again without having to go through hell.
If you have a brightbug you can use them here. You won't be able to waste them since you're always going to loop back to the save before you use it, if you die.
I know this is scummy, but the devs were kinda scummy too when they made this area, so in the end its all fair play.
If you wanna know about making backup saves, just ask google.
Oh and don't you ****ing dare 'git gud' me, i ****ing *****slapped sinh ivory king and fume first try without summons so i think i'm 'gud' already.
 Anonymous
Pro tip if you want to get past the skeletons in the fireball corridors without killing them 12 times- Soul Appease. It can hit them whilst the cells are still closed and at 52 Faith with a Dragon Chime it kills them in 3-4 casts. Bring herbs or the Iron King Crown and some patience.

Did this in one try in NG+2. I used alluring skulls before each section, then rushed to the next section. The last section is tough because there are 2 astrologists and 2 giant warriors with maces, accompanied by 1 possessed armor. Just bait the astrologists to come near the start of the section then smack them. Kill the possessed armor with ranged attacks, or get lucky and wait for it to fall, then melee kill. Buff and rush to the boss gate. If you got hit by the giant dudes, heal after entering the fog gate.

 Anonymous
 Anonymous
 Anonymous
If anyone's played Castlevania Order of Ecclesia, I recommend playing 'RIDDLE' while running through here. Def gave me a boost lol

 Anonymous
Whoever designed this crap needs to seppuku. Literally disgraced their family and the DS community. CANCER

 Anonymous
Oh boy an optional dlc area, I sure do hope I won't be ganked repeatedly and be rewarded with a reused worse version of an already atrocious boss that doesn't even have it's own boss theme

 Anonymous
people complain about the boss run here but its much better than iron keep, where you pretty much have to fight the enemies. With proper rolling its very doable to get to the end of each room, where there's an intermediary ledge you can heal up on before dropping to the next lowest room. Even blue smelter is nice enough to give you time for an estus before attacking.

 Anonymous
Followed somebody's recommendation to increase my magic resistance. Survive to blue magic sword phase and then it's a piece of cake. His magic blue sword caused 0 damage making the kill much easier

 Anonymous
Even the boss fight theme song is reused (Ruin Sentinels theme song). And THOSE ASHEN WARRIORS HAVE THE MOST ANNOYING SOUND I'VE EVER HEARD. I had to play this DLC on mute because i was getting sick of listening to those vomit sound effects they make all the time. I hope the other DLCs are better than this one.

 Anonymous
 Anonymous
The Aged Smelter Sword isn't even better than the Moonlight Greatsword... what's the point of all this?

 Anonymous
Just bring a bow. My lightning short bow with poison arrows said GG to the astrologists and anything else it could hit without any problem. My NPC summon stayed behind me the whole time. I don’t see what’s so massively different about this area to everyone. Twin blade NPC and I took care of blue boy no problem.

 Anonymous
 Anonymous
The funniest part of this area is the mages who are out of range and cast spells that weight you and make you fat roll so you can't even rush through the area :D
Reused boss, reused assents, Gank of enemies, definitely worth the time
 Anonymous
 Anonymous
SOTFS: If you throw a Alluring skull on the first prison cell before pulling the lever, the inmates will not rush out like crazy and you can run trough. Just watch the Fireballs , dodging is recommended. Praise the Sun!

 Anonymous
This area is a ****ing joke. Literally nothing of value unless you want a blue sword instead of a red one. How people praise the DLC in this game is beyond me. Miyazaki barely had a hand in it because he was working on Bloodborne and it shows.

 Anonymous
Wow, they really struggled to make dlc optional areas fun and fair, huh? First an area with infinitely respawning enemies, Petrification: the area, and iron cluster****, where you get 4 times the ganks in 1/4 the area size. And to add insult to injury, all the bosses are lazily designed or straight up reused bosses. It's like they had a quota for how much content they had to add, ran out of time and decided to make these lazy excuses for fun.

 Anonymous
How to make a good area 101: 1. Add enemies 2. Add more enemies 3. Add more ranged enemies that are impossible to hit with a melee weapon 4. Put a reused boss at the end, but this time with two shot attacks, somehow worse hitboxes, and a metric ****ton of health

 Anonymous
How to make a good area 101: 1. Add enemies 2. Add more enemies 3. Add more ranged enemies that are impossible to hit with a melee weapon 4. Put a reused boss at the end, but this time with two shot attacks, somehow worse hitboxes, and a metric ****ton of health 5. 6.

 Anonymous
 Anonymous
40k souls? You gotta bump those numbers up, those are rookie numbers.

 Anonymous
 Anonymous
Easy as ***** with a friend. One person go back way, you and the 2 NPCs go main path. GG, beat it first try. Also, blue smelter demon is easier than the first one... I was so worried because of the comments but this place is overhyped!

 Anonymous
 Anonymous
Yeah this area was poorly made, at least the other coop areas weren't made entirely of gank funnels

 Anonymous
Worse DLC area of all time. Two of the three bosses are complete bull*****Oh yeah let's have the path between the bonefire and boss be full of traps and enemies! Because that's what players want to do after they've been beaten several times! Blue Smelter Demon radiates aids gets to his 3rd phase at 75% health and unlike every other health sponge boss he takes reduced damage during his changes. Alonne isn't too bad but his black stabby attack hitbox is broken (like a few on the mechanics in this game). Fume was the better of the three and he's regarded as the most difficult boss? lol

 Anonymous
It took me 3 hours but I did it. Yeah....those astrologists along with the really accurate possessed armor dudes.....deadly and unfair. You can't hit a good deal of the enemies unless you use ranged weapons which takes a long time on the possessed armor because they have so much health. Meanwhile, you are getting attacked by the undead dudes who are EVERYWHERE. I think I used like 10 humanities. So it is official, the two runs I hate the most are both leading to the Smelter Demon.

 Anonymous
 Anonymous
 Anonymous
i can run through and dodge all enemies before boss fight lol, git gud

 Anonymous
This level was the reason why I stopped playing DS2 and stayed on DS3. The idea of not being able to complete the game fully just absolutely p***** me the absolute f*** off.

 Anonymous
>The exit on the right - Leads to the last area, near the boss gate. A Possessed Armor will also be guarding two bodies holding 1x Titanite Chunk, 3x Cracked Eye Orb, and 3x Old Growth Balm. In SotFS there is no Chunk, just the Orbs and the Balms

 Anonymous
I've used more effigies in this section than in my entire NG playthrough. Such bull*****design. Practically forces you to do extinction runs on the jail cell hallways before you can sprint through the portcullis on the ends.

 Anonymous
 Anonymous
This area in NG+3 is pure cancer. The last section contains a red astrologist and a red iron warrior

 Anonymous
NG++ magic gradually becomes useless and only melee. It takes a heap of life gems to recover from the boss's heat.

 Anonymous
 Anonymous
Your reward for getting past all the bull*****in this area is a *****ing re skin boss.

 Anonymous
I did this solo pure strength build NG+ CoC by pulling meleers one at a time and sniping rangers. When I fully cleared the lower area once and died to the boss I ran past all enemies with Gowers Ring of Protection on and switched it out when I entered the fog gate. If rings broke I used the Pagan Tree in Shulva to repair them.

 Anonymous
There is a longer delay around 0.5sec when rolling around the slashing Smelter Demon. So the sequence is: roll, wait 0.5sec, roll, wait 0.5sec, roll, attack/heal/roll away, etc.

 Anonymous
Whichever metric ton of scabby d!ldos thought that this was an acceptable thing to put into any game, I absolutely hope that they wake up in the morning with ten thousand porcupine quills inside their bladder. I’d have more fun stapling my hand to a table using a nail gun powered by compressed rhino farts!

 Anonymous
I hope whoever made this section gets their balls caught in the spokes of a moving bike, this area is a mess it isn't even trial and error its just RNG, sometimes you make it and other times you get killed in the snap of a finger, wanted to like this dlc area man...

 Anonymous
If those mother*****ing faith *****s weren't there and you didn't have to fatroll through all of that mess this area would be so much easier

 Anonymous
F^ck this sadistic, minimal-payoff level in the spine. Hard. And while we're at it, the designers of this level can go and fornicate themselves sideways with a giant pineapple. This BS level isn't fun, it's just a sick grinding joke.

 Anonymous
this area is just poorly designed and unfair, i thought the red smelter demons area was bad but that's just about patience. this is like smashing your face into a wall of meat grinders until you just happen to make it through in one piece

 Anonymous
For anyone having trouble with the undead in the cages, Soul Appease can kill them before you pull the lever.

 Anonymous
This place would have been manageable if there weren't any of these stupid astrologists.

 Anonymous
This area is not hard. It's not challenging. It just sucks.
It's either kill everything 12 times or get through with pure luck.
 Anonymous
All Estuses used to get to the boss and then fightinf smelter demon with 50 lifegems, funnny, but challenging.

 Anonymous
I've never had so much trouble in a Dark Souls game until I played this area. Like what the *****. It's annoyingly hard, and barely gives the player a chance. Takes zero skill, just repetition and luck.

 Anonymous
perma kill ashen warriors in first cells, go through gate, backstab the mage dude on the right (+10 makrumo, 40str/dex + flyns = 1 hit kill), kill sorceress in the room on the right with the switch in it. perma kill the soldiers in these cells here (I just perma killed the sorceress and the mage dude as well). go through second gate. take path on the right. run straight ahead past undead armor, jump down and sprint to gate.
I used the R2 on the curved dragon GS whilst perma killing the ashen knights (aoe attack + fireballs from the lizzards + great range on the attack)
after ashen warriors are perma killed, i just ran through with no armor on for the faster run speed/dodge. may need to dodge the first or second fireball then hug a wall.
 Anonymous
Yearn is useful when running through the iron gates with the salamanders.. keeps the ashen warrior distracted

 Anonymous
omg what a terrible zone. not fun. ended up just grinding down all the baddies until they stopped spawning out of spite.

 Anonymous

seeing the astrologists sidestepping my arrows is the most infuriating thing istg
0
+10
-1