No-Man's Wharf
 No-man's Wharf is a location in Dark Souls 2. It is a port town with undead pirates and plenty of treasure. The area makes use of the torch and fire features for enemy attacks and defenses, so be on the lookout for useful contraptions and bring a torch with you. Chase from Chase and Torr had quite a hard time getting through here, so make sure to follow our guide if you need any help!
General Information
- Previous: Heide's Tower of Flame
- Next: Lost Bastille
- Recommended Levels: 35 to 45
- Bosses: Flexile Sentry
- Bonfires: Unseen Path to Heide
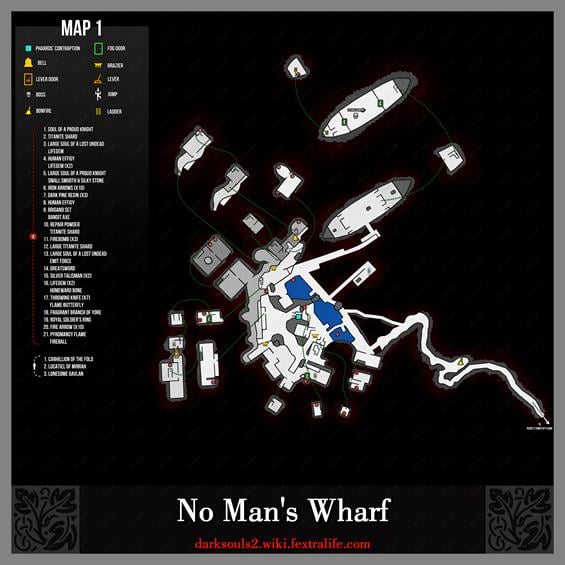
No-man's Wharf Map
NPCs in No-man's Wharf
Items
Weapons & Equipment
- Greatsword
- Varangian Set
- Royal Soldier's Ring
- Brigand Set
- Bandit Axe
- Pyromancy Flame
- Fireball
- Emit Force
- Firebomb x3
- Throwing Knife x7
- Flame Butterfly
Consumables
- Repair Powder x1
- Human Effigy x2
- Fragrant Branch of Yore
- Fading Soul
- Large Soul of a Nameless Soldier
- Soul of a Nameless Soldier
- Iron Arrow x10
- Large Soul of a Proud Knight
- Large Titanite Shard
- Titanite Shard x2
- Soul of a Proud Knight
- Lifegem x7
- Large Soul of a Lost Undead x2
- Dark Pine Resin x3
- Homeward Bone x1
- Fire Arrow x10
Specials
Enemies
- Hollow Varangian
- Hollow Infantry
- Darkdweller
- Stray Hounds
- Suspicious Shadow x2 NG
- Dark Spirit (NG+)
- Suspicious Shadow (+ 2 at boss fight @ NG+)
Boss
Notes/Tips:
- Shooting an arrow at the bell will also call the ship. This can be used to skip certain sections of the area as you have no need to travel to the bell yourself this way.
- The area is completely optional if you take the Pursuer's bird nest to reach here.
- Lighting the sconces as you advance through the zone makes it substantially easier to navigate through if you die. Torches are your best friend in No-Man's Wharf.
- Darkdwellers are afraid of light. If you have a torch out they will not rush you, and instead will shreik and flee away. If they flee for too long without being killed, they will become aggressive and attack you like normal.
No-Man's Wharf Walkthrough
Reaching the Wharf from Heide's Tower of Flame
From the area above where you defeated the Dragonrider, exit straight onto a walkway and into another tower with a spiral staircase. Descend down and hidden behind the staircase is a corpse with a Monastery Charm. Go through the doorway and down the hall.
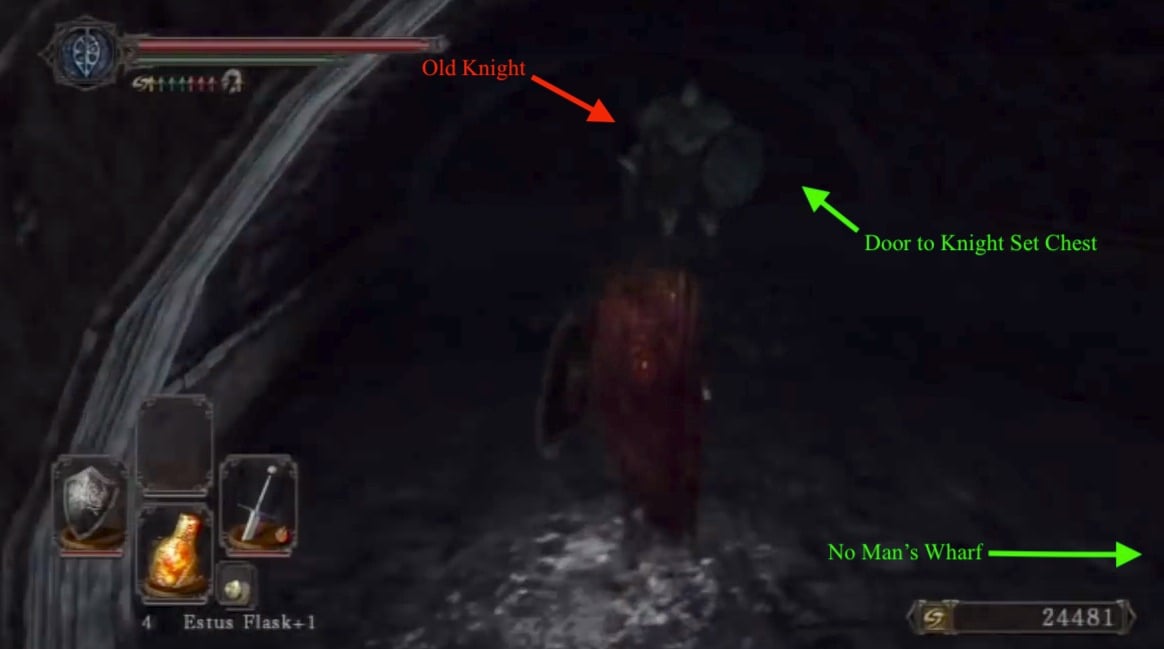
On your right the hallway opens up and you meet an Old Knight guarding a doorway. Kill the Old Knight and continue straight to the end of the hall where you find a corpse hanging over the railing with a Human Effigy and a Dark Troche. Close by are two corpses with a Soul of a Proud Knight and an Old Knight Halberd. Go back down the hall and into the doorway the Old Knight had been guarding.
Down the flights of stairs brings you to the next level down. Going left leads to a dead end where a Royal Guard protects a metal chest that contains 1x Sublime Bone Dust. To the right is a hallway which leads to a round room with a pressure plate elevator in the center. Stand on the plate and descend to the next level down.
At the bottom, head out into the flooded corridors, passing the first small alcove to find a larger area to your left. This area holds a Basilisk and a few Hollow Infantry that rise up from the waters. There is a doorway behind these enemies that is blocked by a petrified enemy. If you unpetrify it and go up the stairs you will find a Primal Knight and a corridor. A body hang on the railing and it holds 1x Estus Flask Shard, going left leads to a dead end at an iron door. Going right to the end of the hallway brings you to an iron chest in the alcove to the right which contains the Knight Set of armor.
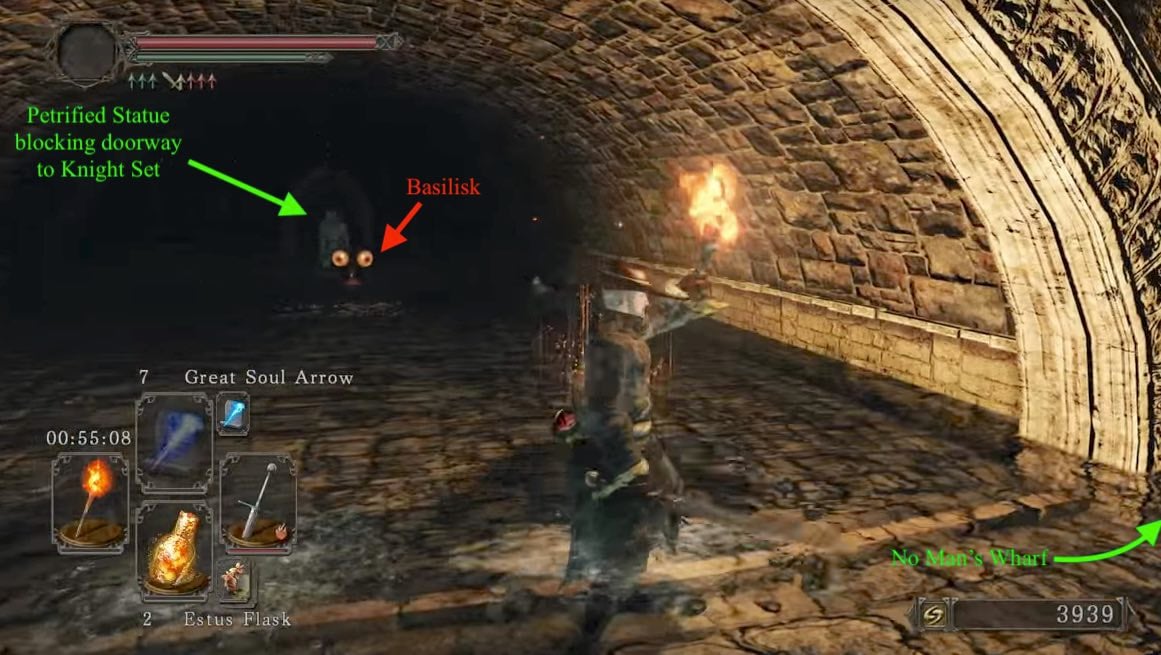
Continue and at the end of the hallway, a knocked out hole in the wall leads to path and a bonfire. Continuing on from here will bring you to No-Man’s Wharf. That being said, No-Man's Wharf could be considered an "optional" area as players can opt to take the large eagle behind The Pursuer instead of taking the boat to The Lost Bastille.
From the Bonfire
As soon as the title prompts, letting you know you've arrived the No-Man's Wharf, you will be greeted by a Stray Hound and a Hollow Infantry. Be careful here, as there two archers, one on the dock straight ahead and the other on the far right, who will continue to shoot fire arrows at you until you kill them, which is made more dangerous by the Hollow Varangian in this area that will try to douse you with thrown oil bombs. When they get it right, it hurts. In any case, if the archer hits you, take a step back until his arrows no longer reach you. From here you can snipe him with a bow and arrows. You may want to clear the immediate bottom level of enemies by luring them back to the bonfire, and light the multiple fire torches to give you better visibility of the area.
Head through the hole in the wall to enter a room with two more Hollow Infantries. After dealing with them, head up the stairs where there is a chest containing a Titanite Shard, and deal with the Varangian on the balcony to claim a Soul of a Proud Knight from the corpse hanging off the ledge. Head back down and left. You should see a small shade sign of Bradley Of The Old Guard a bit in front of you and an item in the water to your left, which is a Large Soul of a lost Undead and a Lifegem. Climb up the steps next to you, and before you proceed left, beware that you'll be engaged by another four Hollow Infantries.
After clearing these, there are three ways you can go:
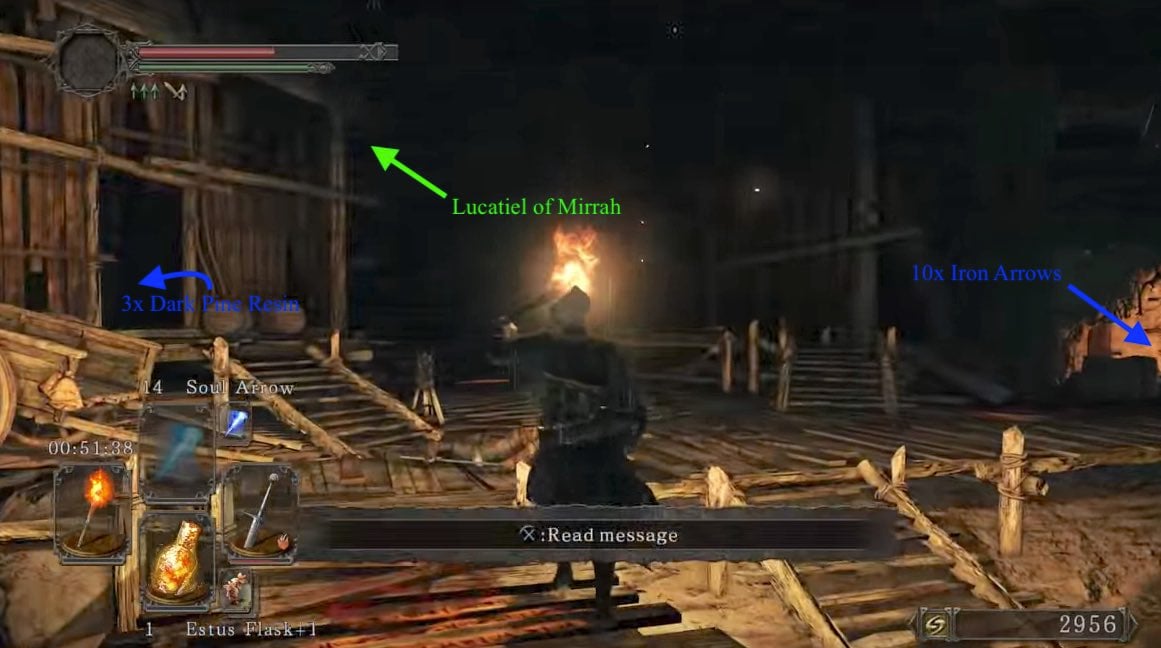
- Heading right will bring you to a seemingly inaccessible room, blocked by some crates. Destroy these then attack the neutral torch wielding hollow, who is targetable but will not attack. You'll be attacked by another Varangian shortly after. Pick up the 10x Iron Arrows here too.
- Heading into the building on the left, you'll find a body holding 3x Dark Pine Resin.Go up the stairs, kill the enemies that approach you and enter the building on the left.
- Go up the stairs in the middle, which continues with the rest of the walkthrough.
You will be attacked by a Varangian, and a Hound. Deal with them then break the carriages on the right and proceed. Here you should find the archer from earlier, as well as 3 Hounds and a Hollow Varangian in front of the building. Once you got rid of those and the Hollow Varangian hiding inside the building, go to where the archer was. You should see a stone face (Pharros' Contraption) on the ground, if you use a Pharros' Lockstone here, the overhead lantern will light and the Darkdwellers will be largely confined to building interiors. This makes travel significantly easier through No-man's Wharf. The rest of this walkthrough assumes you have lit this lantern.
Enter the building on your left to dispatch 4 Varangians, some of them sleeping. There's a chest here containing Brigand set and a Bandit Axe. Dash up the stairs and take out another: if you're too cautious here, the bandit will hit you with a plunging attack on the stairs. In the room at the top of the stairs is a chest with a Repair Powder and a Titanite Shard. Outside this room are two more archers. Dispatch them and note the locked gate here -- we'll open this later for a handy shortcut.
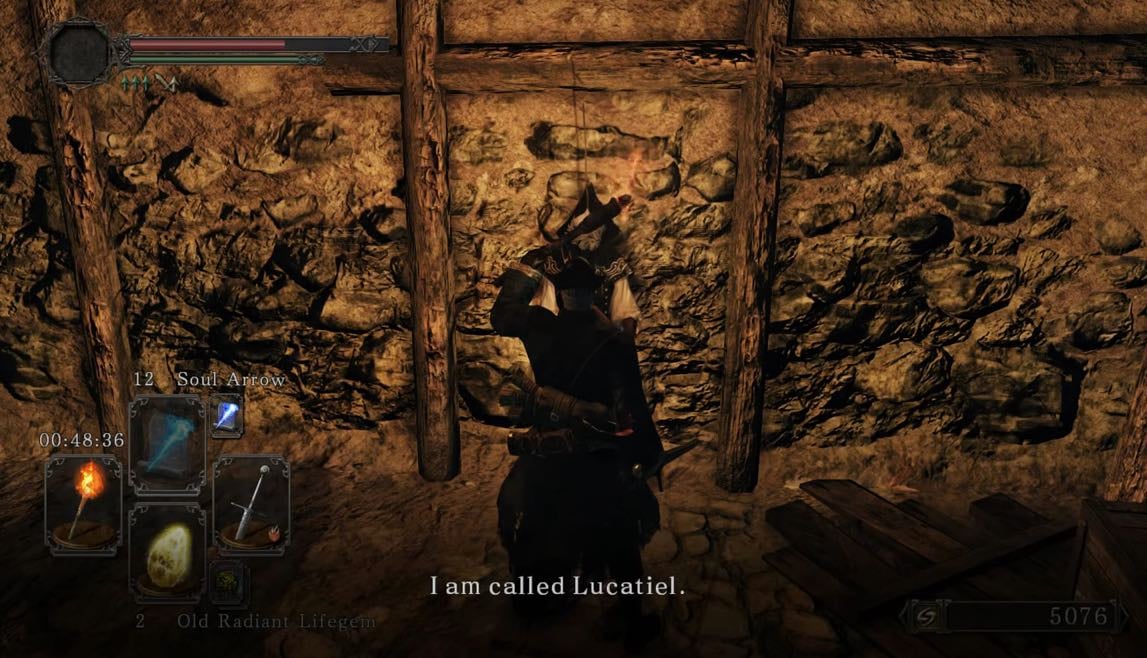
Go back to where the Pharro's Contraption was and go a bit further onto the ledge, then turn left. There, you can find a Large Soul of a Proud Knight, and a Small Smooth & Silky Stone. Grab these, drop down, and go up the stairs. On your way up, a Hollow Infantry will wake up in the alcove on the right side wall of the stairs, further up, another Hollow Varangian and Stray Hound will wait for you. In the room on the left, you will find Lucatiel of Mirrah. If you have already met her at Lost Bastille before (by flying there with the giant crow after the fight against the Pursuer in The Forest of Fallen Giants), she will share a bit more of her story and give you a Human Effigy.
On the left of the doorway, destroy the wooden structures to reveal a little alcove with a body holding Human Effigy. Outside 2 Varangians wait. Ahead, another 2 Hounds and another Varangian also wait. At the very right of the area, you will find a set of stairs up, and there will also be an archer, and a Oil Urn-tossing Varangian. This combination is no bueno. So either take them out quickly using ranged attacks, or run up the stairs. This will lead to the Darkdwellers area.
Dealing with the Darkdwellers
The Darkdwellers are not very hard unless you are impatient or over encumbered. The best way to go about this is to activate the Pharros contraption to raise the lantern, then bait them out one by one. Either way, as long as you avoid fighting multiple at the same time, they are still quite manageable:
- Wielding your torch will cause them to cower for a upon initial contact. This gives you enough time to take them out, but if you're not quick enough, they will find their composure and ignore the torch.
- Lightning or Fire are effective against these enemies.
- If you don't have access to these or you're a melee build, try wearing light armor (25-50% load for the most agile rolls) and a reasonable shield (tested using Crimson Parma & Large Leather shields). Simply move within range of their attack and then immediately retreat several steps.
- As with most enemies, they will telegraph their attacks. When you see them hunching their shoulders before a swing, roll away then jump in and swing for one hit.
- If they stagger, which they generally will, continue to swing until your stamina is low or they die, then repeat. Watch your stamina to be sure you have enough stamina left to roll back and NEVER take on more than one at once. If you do, they will essentially stunlock you by trading off attacks and you'll be helpless against the cumulative Bleed damage.
- Every single one of them can be baited out on their own. Standard practice applies: If a second follows, simply back up until the second returns to their hidey-hole. If the target returns too, re-aggro it via melee or long-range attack. Arrows are useful for this.
Note: Engaging the lantern will confine the Darkdwellers to the shadowy rooms allowing you to bait them out one at a time! See above for details.
Past the First Dweller
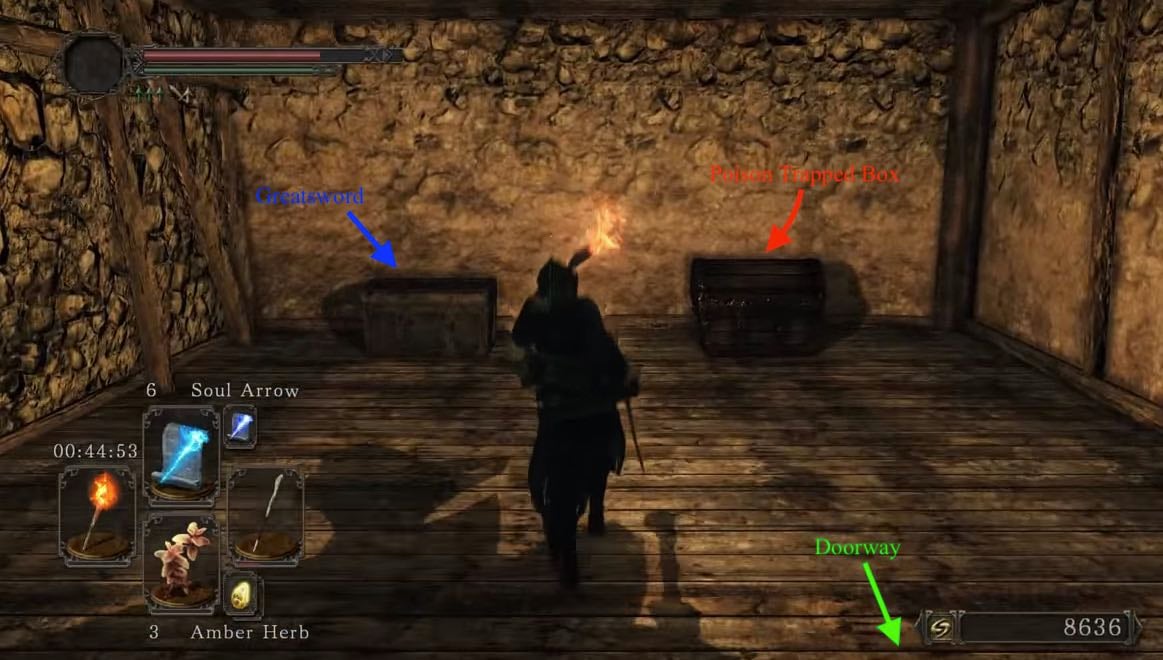
Passing the first three Darkdwellers, you'll find an item on a small cliff on the right. Pick it up (1x Large Soul of a Lost Undead, Emit Force) then head into the room through the hole. You will find only a door in here, which you should open and then immediately roll away as a Darkdweller destroys the wall to reveal a two Darkdwellers in the room, with another set to jump down through the hole in the ceiling. Once dealt with, head upstairs and take care of the final Darkdweller in this building. The door in here will lead to a room with a hole in the wall on the right, and two chests on the left. Of the two chests, the one on the right contains a poison trap, which you can trigger by opening it then rolling away to avoid damage. Within in, find 2x Silver Talisman. The chest next to it is a lot more straightforward, and contains the Greatsword. Drop down the hole and continue to the end of the path. Head up the stairs dispatch the 2 Varangians here. Go out the doorway, then left up a set of stairs to a platform. There's a bell here with a lever. Pulling the lever will cause the bell to ring and the ghost ship in the harbor to move towards the dock, so that you can eventually access it, and ultimately the Flexile Sentry boss.
Continue on, dropping down the gap to the left of the bell. There's a corpse here with 2x Lifegem, and a Homeward Bone. Drop underneath the platform you just dropped from, and then again and kill the Varangian standing directly below you, and the one hanging off the side on the left. Open the door and head into the small room with containing two more Darkdwellers. Halfway up the stairs is a corpse with 10x Fire Arrow. Head back out the room and down the ramp to trigger a Suspicious Shadow to drop from his hiding place near the door. At the bottom of the slope, you'll get jumped by another so keep your guard up.
Head down the rock ramp and drop down to the stone-paved yard. Head straight past the brazier on your right, to an archway leading to a door and a room. Opening the door, go straight ahead to an Illusory Wall. Inside are two chests with a Large Titanite Shard and 3x Firebomb. Head back out and up the stairs to fight a waiting Varangian then continue up to the NPC Lonesome Gavlan; you can sell gear you don't need to him for some extra souls.
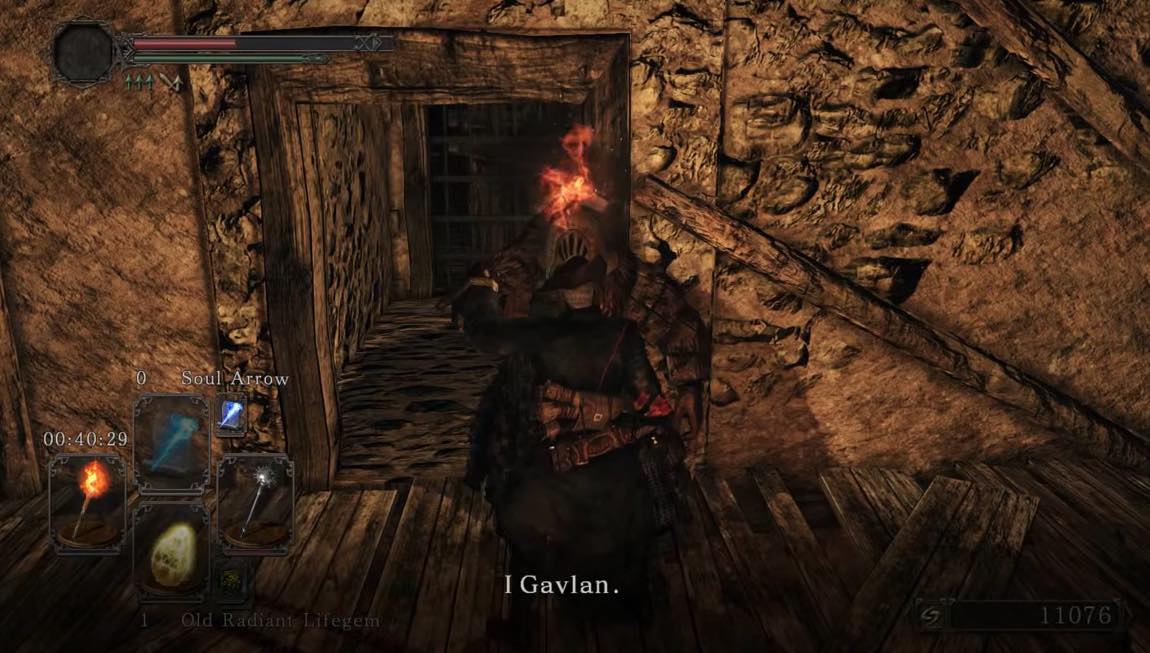
Continue behind him, and raise the shortcut portcullis by pulling the chain, which leads back to a ledge above the courtyard with the Pharros' Contraption. Now backtrack to the ground floor and head back to where you originally dropped down. Just past here on the left is a small room with two sleeping Varangians, and a bunch of urns filled with poison. Another Shadow will show up when you get near the door. Lure the Varangians outside, and dispatch them. Once back in the room, don't break any urns unless you do so from a distance with a long spear or such. Entering the room, on the left are two urns blocking a corpse with Throwing Knife x7 and a Flame Butterfly. In the right corner, behind some other urns is a chest with a Fragrant Branch of Yore. To the left of the chest is an unstable wall which you can shatter with a strong leaping attack or a spell. Behind the wall is a Crystal Lizard, so move quick. There's also a chest in here with a Royal Soldier's Ring.
Yo Ho! A Pirate's Life for Me
Head back out of the room and right to a stone stairway heading down. As you near the bottom, you'll see to Darkdwellers with their butts sticking out of a large hole in the wall. Past the room, continue straight onto a dock. You'll see notice a corpse hanging off a boat to your right. Head past that for now, and turn right. There are two more Varangians hiding here, hanging off the side of the dock. Take care with them but with caution, as falling off the far side of the dock is instant death. Once they're gone turn right back towards the beach; there's another Varangian playing dead in the water here. Take him out, and you're clear to loot the corpse hanging on the dinghy, for Lifegem x2 and a Human Effigy.
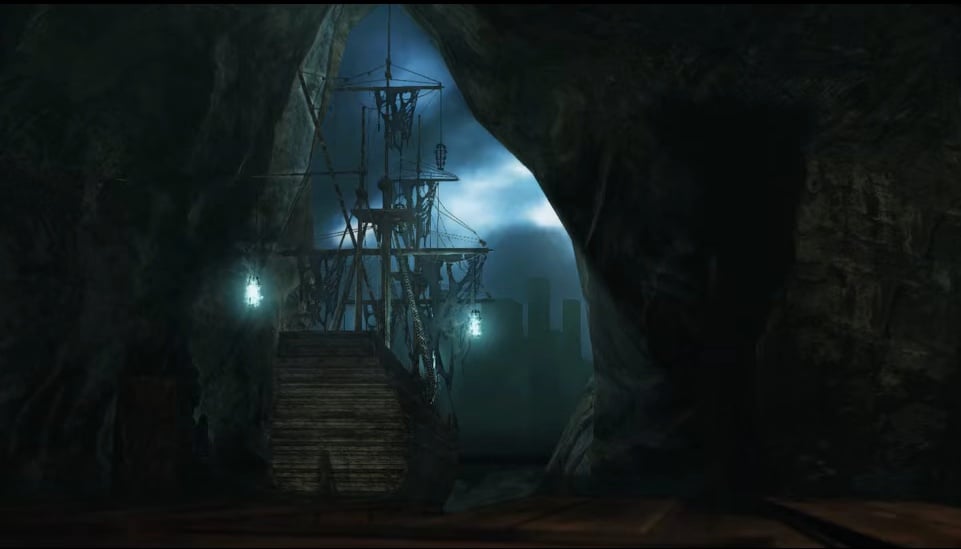
Continue on, pass where the Varangians were hanging to find a summon sign for Lucatiel of Mirrah. Continue left down a narrow dock and kick the wooden platform to open a shortcut to the starting area. Now head left and up some stairs to reach Carhillion of the Fold at the top, and if your intelligence is 8 or above, he'll sell to you. Exhausting his dialogue will send him to go to Majula. Head back the way you came, but this time head down the dock towards the ghost ship. Once you board the ship, head immediately left and up onto the raised platform on the bow, and take out the Archer here quickly. A Varangian and a Gaoler will come running from the other end of the ship. Deal with them, and then head toward the ship stern. Head through a small doorway and down the stairs into the hold to the boss mist.
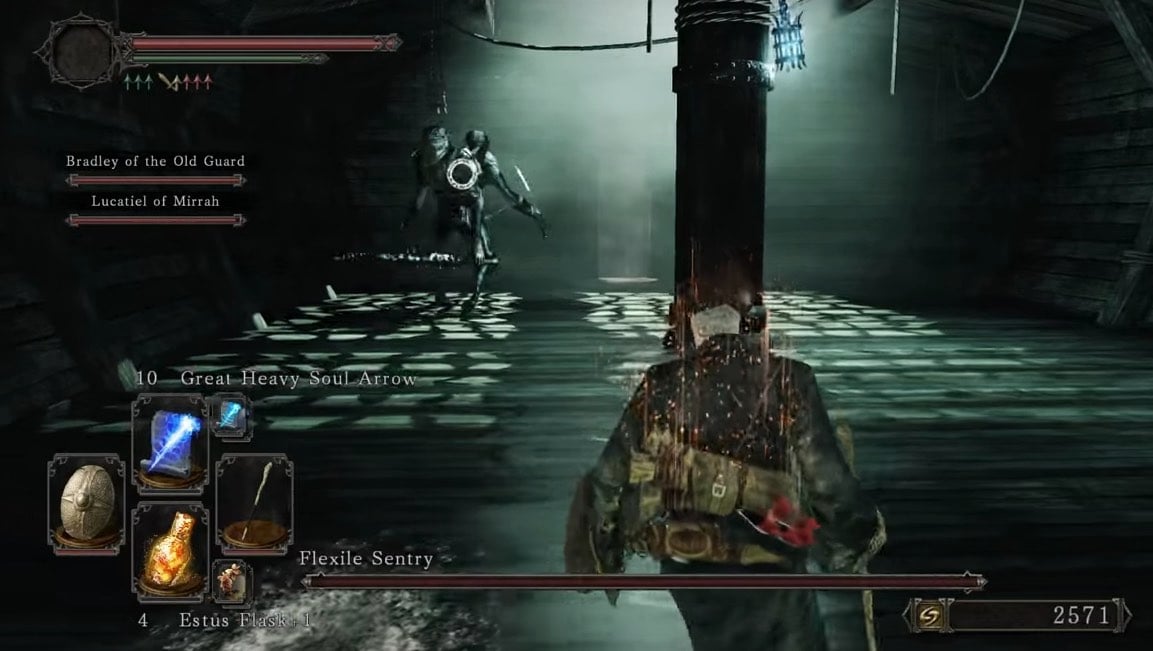
BOSS FIGHT: Flexile Sentry
After defeating the boss proceed to the next room and up a ladder to find a chest and a strange contraption; the chest contains a Pyromancy Flame and a Fireball, while examining the contraption triggers a cinematic showing the player sail the ship to the next area, Lost Bastille.
Map
by Chris Brandt
General Information
- Previous: Heide's Tower of Flame
- Next: Lost Bastille
- Recommended Levels: 35 to 45
- Bosses: Flexile Sentry
- Bonfires: Unseen Path to Heide
No-man's Wharf Map
NPCs in No-man's Wharf
Items
Consumables- Large Titanite Shard x1 (Same hidden wall as Firebomb)
- Silver Talisman x2 in a chest after killing many of the Darkdwellers;
- Pyromancy Flame and Fireball in chest after boss fight Flexile Sentry, up ladder in a room with the contraption. (if contraption is examined first, the player is moved and must return to No-man's Wharf to get this);
- Titanite Shard x2
- Soul of a Proud Knight x1
- Lifegem x7
- Large Soul of a Lost Undead x2
- Dark Pine Resin x3
- Emit Force
- Homeward Bone x1
- Fire Arrow x10
- Firebomb x3 (Behind hidden wall near ship. Building with the lit sconce next to it.)
- Repair Powder x1
- Human Effigy x2
- Estus Flask Shard x1 Inside a chest in a stone house beneath the bell.
- Fading Soul x1
- Large Soul of a Nameless Soldier x1
- Soul of a Nameless Soldier x1 (The three Soul items to the left and above are in the same location as the Royal Soldier's Ring)
- Flame Butterfly x1
- Throwing Knife x7
- Iron Arrow x10
- Large Soul of a Proud Knight x1
- Small Smooth & Silky Stone x3
- Greatsword next to a trapped chest near Gavlan
- Varangian Set
- Royal Soldier's Ring on the ground floor of the house under the bell lever used to dock the boat, inside a room with poison pots. A chest behind a wall that must be attacked.
- Brigand Set in a chest in house near Pharros Lockstone Contraption;
- Bandit Axe in a chest in house near Pharros Lockstone Contraption;
- Ring of life protection There's a larger area on the bottom level where you'll be ambushed by three bandits. Between two houses is a flight of stairs, go up the stairs. At the first landing, go through the door to your left. Go upstairs, kill the bandit, break the shelves
Enemies
- Hollow Varangian
- Hollow Infantry
- Darkdweller
- Stray Hounds
- Dark Spirit (NG+)
- Suspicious Shadow (NG+)
Boss
Notes/Tips:
- Shooting an arrow at the bell will also call the ship. This can be used to skip certain sections of the area as you have no need to travel to the bell yourself this way.
- The area is completely optional if you take the Pursuer's bird nest to reach here.
No-man's Wharf Walkthrough
From the area above where you defeated the Dragonrider, exit straight onto a walkway and into another tower with a spiral staircase. Descend down and hidden behind the staircase is a corpse with a Monastery Charm. Go through the doorway and down the hall.
On your right the hallway opens up and you meet an Old Knight guarding a doorway. Kill the Old Knight and continue straight to the end of the hall where you find a corpse hanging over the railing with a Human Effigy and a Dark Troche. Close by are two corpses with a Soul of a Proud Knight and an Old Knight Halberd. Go back down the hall and into the doorway the Old Knight had been guarding.
Down the flights of stairs brings you to the next level down where you encounter an Old Knight. The left passage leads to a dead end so we'll head right to find yet another Old Knight, and beyond a hallway which leads to a round room with a pressure plate elevator in the center. Stand on the plate to descend to the next level down.
At the bottom, go through the doorway into the flooded hall. An Old Knight will stand in a room on the left, in front of a doorway. Past the doorway and up the stairs, the left path leads to a dead end at an iron door. Going right to the end of the hallway brings you to an iron chest in the alcove to the right, which contains the Knight Set of armor. Go back down the stairs and return to the lowest level. Head left and at the end of the hallway, a knocked out hole in the wall leads to path and a bonfire where the NPC Lucatiel of Mirrah stands in rest against a stone spire. Continuing on will bring you to the location No-Man’s Wharf.
From the Bonfire
As soon as the title prompts, letting you know you've arrived the No-Man's Wharf, you will be greeted by a Stray Hound and a Hollow Infantry. Be careful here, as there two archers, one on the dock straight ahead and the other on the far right, who will continue to shoot fire arrows at you until you kill them, which is made more dangerous by the Hollow Varangians in this area that will try to douse you with thrown oil bombs. When they get it right, it hurts. In any case, if the archer hits you, take a step back until his arrows no longer reach you. From here you can snipe him with a bow and arrows. You may want to clear the immediate bottom level of enemies by luring them back to the bonfire, and light the multiple fire torches to give you better visibility of the area.
Head through the hole in the wall to enter a room with two more Hollow Infantries. After dealing with them, head up the stairs where there is a chest containing a Titanite Shard, and deal with the Varangian on the balcony to claim a Soul of a Proud Knight from the corpse hanging off the ledge. Head back down and left. You should see an item in the water, which is a Large Soul of a lost Undead and a Lifegem. Climb up the steps next to you, and before you proceed left, beware that you'll be engaged by another four Hollow Infantries.
After clearing these, there are three ways you can go:

- Heading right will bring you to a seemingly inaccessible room, blocked by some crates. Destroy these then attack the Darkdweller (See below on instructions on how to deal with them). You'll be attacked by another Varangian shortly after. Pick up the 10x Iron Arrows here too.
- Heading into the building on the right, you'll find a body holding 3x Dark Pine Resin.Go up the stairs, kill the enemies that approach you and enter the building on the left.
- Go up the stairs in the middle, which continues with the rest of the walkthrough.
You will be attacked by a Varangian, and a Hound. Deal with them then break the carriages on the right and proceed. Here you should find the archer from earlier. Deal with him then enter the building on your left to dispatch two sleeping Varangians. There's a chest here containing Brigand set and a Bandit Axe. Dash up the stairs and take out another: if you're too cautious here, the bandit will hit you with a plunging attack on the stairs. In the room at the top of the stairs is a chest with a Repair Powder and a Titanite Shard. Outside this room are two more archers. Dispatch them and note the locked gate here -- we'll open this later for a handy shortcut.
Once all the bandits in the building have been eliminated, go back down to the courtyard outside the ground floor and move towards the cliff overlooking the beach. You should see a stone face (Pharros' Contraption) on the ground and another Varangian bandit. If you use a Pharros' Lockstone here, the overhead lantern will light and the Darkdwellers will be largely confined to building interiors. This makes travel significantly easier through No-man's Wharf. The rest of this walkthrough assumes you have lit this lantern.
Dropping off a short ledge onto a roof after the Pharros' Contraption, head left to a corpse with a Small Smooth & Silky Stone and a Soul of a Proud Knight. Drop back down to the beach, taking care to avoid the Darkdweller in the room below. Heading back up the stairs to the landing in the middle, snipe/pull the Varangian at the top of the stairs. Then, instead of continuing up the stairs, head left and up a flight of stairs to a waiting Varangian. There's a pantry shelf in the corner of the room, which you can destroy to expose a corpse with Ring of Life Protection. Head out the doorway, taking care to deal with theVarangian just outside in an alcove on your left. Continuing ahead will bring you to another Varangian and a Stray Hound.
Dealing with the Darkdwellers
The Darkdwellers are not very hard unless you are impatient or over encumbered. The best way to go about this is to activate the Pharros contraption to raise the lantern, then bait them out one by one. Either way, as long as you avoid fighting multiple at the same time, they are still quite manageable:
- Wielding your torch will cause them to cower for a upon initial contact. This gives you enough time to take them out, but if you're not quick enough, they will find their composure and ignore the torch.
- Lightning or Fire are effective against these enemies.
- If you don't have access to these or you're a melee build, try wearing light armor (25-50% load for the most agile rolls) and a reasonable shield (tested using Crimson Parma & Large Leather shields). Simply move within range of their attack and then immediately retreat several steps.
- As with most enemies, they will telegraph their attacks. When you see them hunching their shoulders before a swing, roll away then jump in and swing for one hit.
- If they stagger, which they generally will, continue to swing until your stamina is low or they die, then repeat. Watch your stamina to be sure you have enough stamina left to roll back and NEVER take on more than one at once. If you do, they will essentially stunlock you by trading off attacks and you'll be helpless against the cumulative Bleed damage.
- Every single one of them can be baited out on their own. Standard practice applies: If a second follows, simply back up until the second returns to their hidey-hole. If the target returns too, re-aggro it via melee or long-range attack. Arrows are useful for this.
Reaching Gavlan
Passing a small room on your left, you'll come to the base of a stairway, which you should ascend. At the top, follow a pathway to the right. You'll see a room ahead, filled with Darkdwellers. Unfortunately, you want to get in that room, because once you clear out all the Darkdwellers, you'll be able to head up the stairs and find Lonesome Gavlan, to whom you can sell for souls anything you don't want. Note that you only get one shot in No-Man's Warf to sell things to Gavlan; he will again appear later, but not too soon, and not here. Anyhow, back to the Darkdwellers, be patient, pulling them out with ranged attacks one at a time, and taking care with their long reach. DO NOT try to run past them to Gavlan; They will tear down the wall! A spear or halberd can be helpful.
[pic of gavlan]
There are some Stalkers in the room below, more in the adjacent room, and more again upstairs. Once you get through them all there's a chest with 1x Greatsword, and another POISONED chest on the right with 2x Silver Talisman, and Gavlan.
Heading back out of the Gavlan building, note the corpse with Emit Force, and a possible drop here to the next section. Better to head left to a wooden platform with a door on your left. Dispatch a Varangian Bandit here, and head (carefully) up the stairs to another who is ready to pounce. Go out the doorway, then left up a set of stairs to a platform. There's a bell here with a lever. Pulling the lever will cause the bell to ring and the ghost ship in the harbor to move towards the dock, so that you can eventually access it, and ultimately the Flexile Sentry boss.
Journey to the Royal Solider's Ring
Continue on, dropping down the gap to the left of the bell. There's a corpse here with 2x Lifegem, 1x Homeward Bone. Heading back to where you just dropped onto this roof, take another short drop. Turn around, and head into a small room with stairs heading down. There are two Darkdwellers below. Halfway down the stairs is a corpse with 10x Fire Arrow. Lure them up the stairs, and/or head back out of the room and drop down to the rocky ledge below, which gives you access to a doorway leading into the same lower room where the Stalkers are.
Head down the rock ramp and drop down to the stone-paved yard. Head straight past the brazier on your right, to an archway leading to a door and a room. Opening the door, go straight ahead to an Illusory Wall. Inside are two chests with a Large Titanite Shard, 3x Firebombs. Head back out and left up the stairs to a waiting Varangian.
Continue behind him, and raise the shortcut portcullis by pulling the chain, which leads back to a ledge above the courtyard with the Pharros' Contraption. Now backtrack to the ground floor and head back to where you originally dropped down. Just past here on the left is a small room with two sleeping Varangians, and a bunch of urns filled with poison. Another Shadow will show up when you get near the door. Lure the Varangians outside, and dispatch them. Once back in the room, don't break any urns unless you do so from a distance with a long spear or such. Entering the room, on the left are two urns blocking a corpse with Throwing Knife x7 and a Flame Butterfly. In the right corner, behind some other urns is a chest with a Estus Flask Shard. To the left of the chest is an unstable wall which you can shatter with a strong leaping attack or a spell. Behind the wall is a Crystal Lizard, so move quick. There's also a chest in here with a Royal Soldier's Ring.
Yo Ho! A Pirate's Life for Me
Head back out of the room and right to a stone stairway heading down. As you near the bottom, you'll see to Darkdwellers with their butts sticking out of a large hole in the wall. Past the room, continue straight onto a dock. You'll see notice a corpse hanging off a boat to your right. Head past that for now, and turn right. There are two more Varangians hiding here, hanging off the side of the dock. Take care with them but with caution, as falling off the far side of the dock is instant death. Once they're gone turn right back towards the beach; there's another Varangian playing dead in the water here. Take him out, and you're clear to loot the corpse hanging on the dinghy, for Lifegem x2 and a Human Effigy.
Continue on, pass where the Varangians were hanging to find a summon sign for Lucatiel of Mirrah. Continue left down a narrow dock and kick the wooden platform to open a shortcut to the starting area. Now head left and up some stairs to reach Carhillion of the Fold at the top, and if your intelligence is 8 or above, he'll sell to you. Exhausting his dialogue will send him to go to Majula. Head back the way you came, but this time head down the dock towards the ghost ship. Once you board the ship, head immediately left and up onto the raised platform on the bow, and take out the Archer here quickly. Two more Varangians will come running from the other end of the ship. Deal with them, and then head toward the ship stern. Head through a small doorway and down the stairs into the hold to the boss mist.

BOSS FIGHT: Flexile Sentry
After defeating the boss proceed to the next room and up a ladder to find a chest and a strange contraption; the chest contains a Pyromancy Flame and a Fireball, while examining the contraption triggers a cinematic showing the player sail the ship to the next area, Lost Bastille.
 Anonymous
Replayed Vanilla for the first time in years and omg this level is actually balanced and fun??? No longer there are extra archers and bombers and less overall ganks. Also no shadows which is waaaay better

 Anonymous
Does lighting all the braziers here even do anything? I just figured out you can light wall torches as well, but I only found one of those…

 Anonymous
Something cool that I found out is a neutral "hollow?" in one of the houses where there's a guy that jumps down on you, the hollow won't attack you and has a torch, I went through the whole area with his help lighting the way and keeping those creepy mfs away, it's a bit hard not to hit him by chance because the game automatically targets him, but the adventure was definitely worth it

 Anonymous
The illusory wall mentioned in the guide isn't an illusory wall, it's a secret door. You have to stand in front of it and press the activate button, although there's no prompt.

 Anonymous
This area gives me some ghost ship vibes from Devil May Cry.

 Anonymous
 Anonymous
Honestly, I guess I spent a while here but it never got annoying like how everyone else describes it. Its a cool area, I like how it implements the use of the torch.

 Anonymous
Expected rather worse tbh. Finished the area in one run, the bow was a BIG help. Take at least 150 arrows, maybe more like 200. Didn't need to fight even one darkdweller face-to-face.

 Anonymous
Absolutely dreadful location where tf are bonfires? After you deal with the boss there are no bonfire either. Why are archers aim******* like crazy? why are there are so many enemies all around you as a sorcerer it's either run around or die while casting. I'm starting to understand why this game is so hated.

 Anonymous
Ahhhhh. So many of my characters have died here, never to be touched again. I wished the area wouldn’t be so bad, it could actually be extremely fun. Alas

 Anonymous
Another area cleared and no mobs are left to respawn. I love this game

 Anonymous
After a painful encounter with the pursuer. Skipping this hell made it worth the pain.

 Anonymous
 Anonymous
Once I finally stumbled on the short cut behind the fat guy I went from despising this place to liking it, then I loved it after knocking down the bridge shortcut. Before that tho, this place can *** ** ****

 Anonymous
that NPC that you can summon there...feels like hard cheating oO
damn that dude clears it all alone, heals, have range atacks and an aoe-kockback.
wtf
 Anonymous
 Anonymous
 Anonymous
 Anonymous
This was where I started to actually enjoy DS2. It might be my favorite level in the whole game, actually.

 Anonymous
dark souls II is what people that didnt play dark souls I think dark souls is

 Anonymous
 Anonymous
 Anonymous
 Anonymous
 Anonymous
i actually like to explore this area, beside the difficultie

 Anonymous
 Anonymous
after avoiding dark souls 2 for the longest time i finally beat it and i can say that i have never struggled with a single area more than this in any videogame, **** the damn bleed monsters and the random ass ganks iron keep was easier than this bull ****

 Anonymous
Definitely one of the best areas in the base game. The ambushes make sense, the atmosphere is tense, and torches are actually useful here

 Anonymous
 Anonymous
this guide doesnt mention the summon sign available to help with the area at the very beginning. from the bonfire, kill the first dog/ambush combo, then veer right onto the dock, kill guy hanging off the dock to the right, kill archer, kill second guy beside the archer. there's a summon sign right there. can also save him to double up on the boss once the shortcut is opened.

 Anonymous
every time I get ambushed here I get a little closer to becoming the joker

 Anonymous
"how do we make this area challenging"
"idk put a billion enemies"
"mark you're a genius"
 Anonymous
Not my favorite area (though I do love the pirate ship at the end), but once you go through it and learn the enemy placements, it's really not as bad as some are complaining here. Turning on the lights with the Lockstone makes it much easier to traverse. Keep your shield up. Boss is easy with Lucatiel, so there's that.

 Anonymous
I actually like No-Man's Wharf. I don't understand why this zone is getting so much hate.
I like it that this zone looks a bit like a pirate hideout. And I like that whole ghost ship where you fight the boss idea.
This zone does have only 1 Bonfire, but the 2 shortcuts I found (The door behind Gavlan and the wooden platform) where very rewarding and loops you right back at docks. All the enemies in this zone have a fair weakness that you can abuse (if you play patient and with brain). Those Darkdwellers fear light/fire, and there are a lot of lighting scones to light up in the area, and also a Pharros Contraption that you can use against them (if you don't mind spending one of your Pharros' Lockstones). You can sneak in easy backstabs on sleeping Varangians, and against dogs I always just counter attack after a successful shield-block, works every time. No-Man's Wharf is a fine zone, really :D.
 Anonymous
Ambush after ambush after ambush AFFER GODDAMN AMBUSH. SotfS is such unbalanced trash, like holy ****

 Anonymous
 Anonymous
I weirdly love this area cause well, cause of thr way the bleed inflicting spider monkeys back off when you wield a torch, my sense of humour is weird I know.

 Anonymous
i see why people callthis the worst souls game bossesare cakewalks getting to bosses and explorong is a stunlock hellfire

 Anonymous
Does burning a Bonfire Asetic reset all the torches in the area, as well as the shortcut? I want to do Lucatiel's questline and finish here, as I missed the Lost Sinner, don't want to summon for the Smelter Demon because I hear he's incredibly fun and difficult so I don't want to spoil the experience, and the Rotton is the worse boss fight, so I'm not eager to repeat it. I really don't want to run through and light all the torches and get the shortcut again, because it's really annoying, so I was wondering if a Bonfire Asetic resets them all. If it does, I'll just suck it up and do the Rotton, but can someone please let me know?

 Anonymous
 Anonymous
I missed the chest and activated the cutscene, can I get ti back?

 Anonymous
 Anonymous
This location really suck for invades ! You get spawn behind the bridge and you cant get up so Host will go back to the bonfire and he wait til you will be disconnected after 15 mins

 Anonymous
I quit in this area, it's just ****ing bad. Same with the rest of the game

 Anonymous
I have developed a crippling depression. Maybe I will also develop a crippling **** addiction with Shrine of Amana.

 Anonymous
I'm at the dock that should lead to the ghost ship, but theres no pathway to it?? Am I missing something? help pls?

 Anonymous
 Anonymous
Is there some conditions that have to be in place to summon Lucatiel? I did not see her summoning marker anywhere. Could it be glitched by the fact that I met her first in The Lost Bastille?

 Anonymous
What's up with the ridiculous amount of enemies tho? As a sorcerer with only few sorceries, this place sucks hard

 Anonymous
This might be too late considering how old this game is but on the platform that leads to carillion there's a bridge you can knock down that leads to the first set of platforms which is a better short cut than just going through all the other enemies

 Anonymous
When you come to the house where you use a Pharro's Lockstone to light up No Man's Wharf, face the house, and along one of the left front corners of the house is an invisible hallow.

 Anonymous
We're is the TUCKING BELL I'M USING THE BLUE MOON GREAT SWORD TO GET PAST THESE *****ERS AND IT'S STILL HARD

 Anonymous
Do not light the sconce ! It make the ennemies aggro from 10x. I just lost 100k souls bc half the map aggro on me as soon as I step on the wonden plank. Wtf FromSoft was it your time of the month ?

 Anonymous
 Anonymous
 Anonymous
The trapped chest can definitely vary, I was just killed by a crossbow trap.

This NPC shade is available near the shortcut bridge, and is very useful for getting through the area, or fighting the boss, as he uses group heals.


I sold my stuff to the gavalan and then died with 20,000 souls. Then got killed by a big evil darkness spider on my way back. 20,000 souls, this place claimed.
1
+10
-1