General Information
- Previous: Forest of Fallen Giants
- Next: Cathedral of Blue / No-Man's Wharf
- Recommended Levels: 30-40
- Bosses: Dragonrider
- Bonfires: Heide's Ruin, Tower of Flame
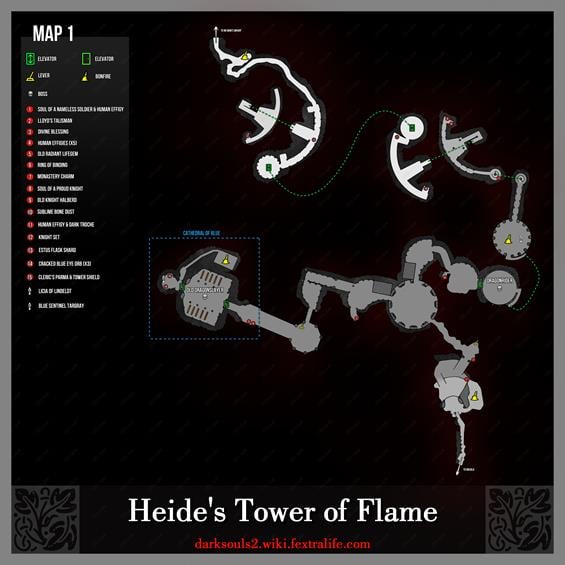
Heide's Tower of Flame Map
NPCs in the Heide's Tower of Flame
Licia of Lindeldt
Items
Consumables- Sublime Bone Dust
- Human Effigy x7
- Divine Blessing x1
- Green Blossom x3
- Soul of a Nameless Soldier x1
- Lloyd's Talisman x1
- Old Radiant Lifegem x1
- Cracked Blue Eye Orb x3
- Monastery Charm x1
- Dark Troches x1
- Soul of a Proud Knight x1
Enemies
Bosses
New Game+ Enemies
- Black Phantoms (NG+)
Notes
- Very common area for invasions.
- Most enemies can be sprinted past easily, save for the two on either side of the fog.
Heide's Tower of Flame Walkthrough
Accessing from Majula
To the left of the cliff where the Victor’s Stone is, there is a large stone archway, with a staircase going down a tunnel. Coming to a circular room, there is a pillar in the center with a symbol on it. Examining it mentions that the the contraption does not move. Licia of Lindeldt is able to later open a path to Huntsman's Copse after encountering her in Heide's Tower of Flame.
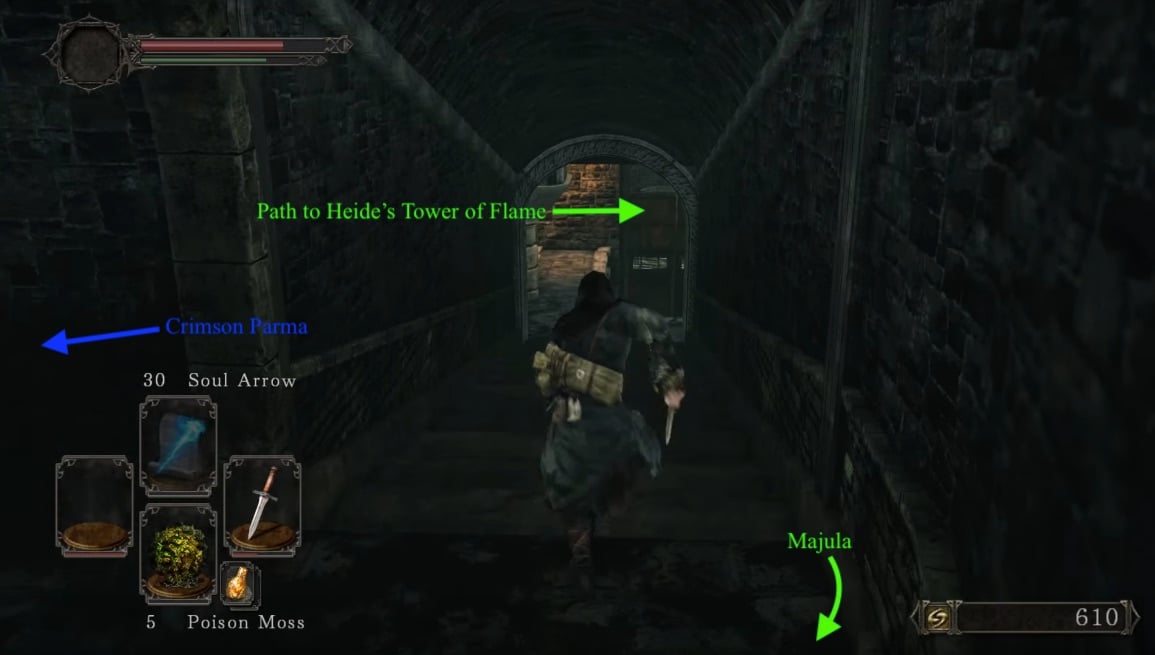
Going to the right down the hallways to a spiral staircase, on the left there is a chest with Crimson Parma. Continuing down the stairs takes you to a room which will bring you to a pull chain on the ledge on the left, which raises the big door below. Going through the door leads to a waterway, and up the stairs is another pull chain to open the door should you wish to go back and further on a corpse with Soul of a Lost Undead and Broken Thief Sword. Going down the hallway takes you to the entrance of Heide's Tower of Flame.
Abundance of Old Knights
As you enter through the waterway from Majula, you are greeted with a beautiful vista of the flooded towers and sprawling walkways. Straight ahead is a round platform with an Old Knight wielding a large greatsword. Just before confronting him, there is a staircase to the right which leads down to the first bonfire of the area. After passing the first enemy, head straight up the stairs to encounter another one. Killing him guarantees a Sublime Bone Dust drop, and he does not respawn (his drop will also disappear if you are killed before picking it up, preventing development of your Estus Flask). On the right, draped along the railing is a corpse with a Soul of a Nameless Soldier and a Human Effigy.
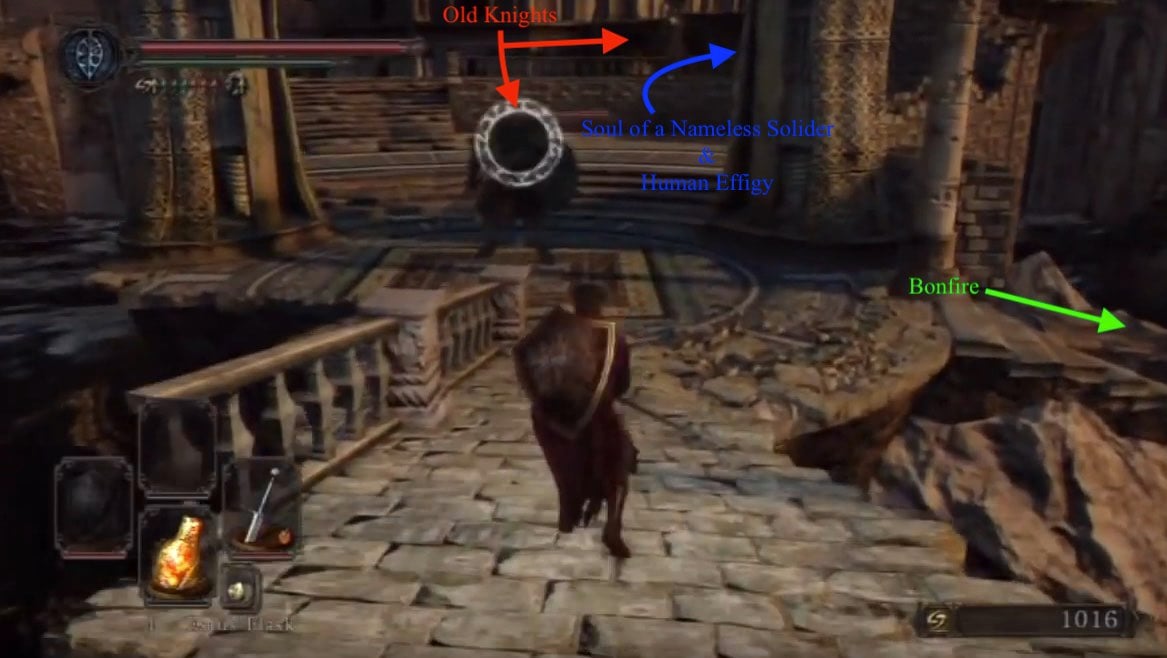
Proceeding upstairs bring you through an archway another platform with yet another Old Knight who wields a greatsword and shield. Approaching the cliff directly in front of the arc, will raise a post with a lever, from the ground. Pulling the lever raises the outer ring of the platform on the tower directly across from the lever. Laying in front of the right column of the arch you've just come from is a corpse with Lloyd’s Talisman. Continue down the long walkway to enter a tower base where three more Old Knights await.
This can be a fairly difficult fight early in the game, and it's advisable to lure the middle Old Knight wielding a greatsword out onto the walkway first. The other two Old Knights are happy to wait for you to dispatch the first one, but will both try to rush you together once their comrade is dead. A good way to deal with this encounter in melee is to get close enough to provoke both into attacking at the same time. These Old Knights almost always use the same three-slash attack pattern, and dodging around both of them while they do this will give you some openings. Alternatively, if you can manage to lure them onto a ledge then knock them down, it would make for an easier confrontation. After dealing with these three nuisances. a lever pop out the ground on the right of the entrance in this tower. You can proceed down either side of the tower.
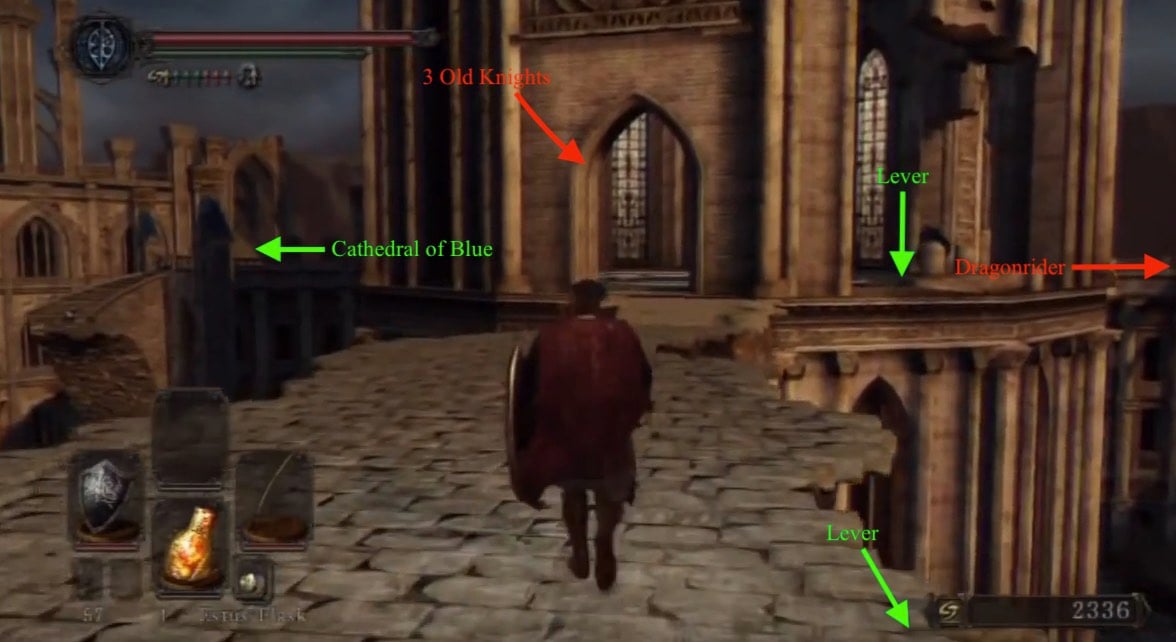
To the Dragonslayer
Going to the left will bring you to two more Old Knights. (In NG+. 3 Black Phantoms wielding a Halberd guard the way, once killed, each of them drop a Cracked Blue Eye Orb and a Token of Fidelity). On the left of this area, you'll find a broken dead-end staircase that leads down close to the water. At the bottom of these stairs you'll find a corpse with a Divine Blessing.
Straight ahead of where you entered is a stairway up to another level and into a railing-less platform with a Old Knight who wields a sword and shield. On the platform is another contraption, which also raises when you approach. Pulling the lever lowers the bridge allowing the player access to the Cathedral of Blue and Old Dragonslayer Boss fight. At the top of the bridge on the left is a corpse with an Old Radiant Lifegem and an iron chest containing a Ring of Binding and 5x Human Effigies.
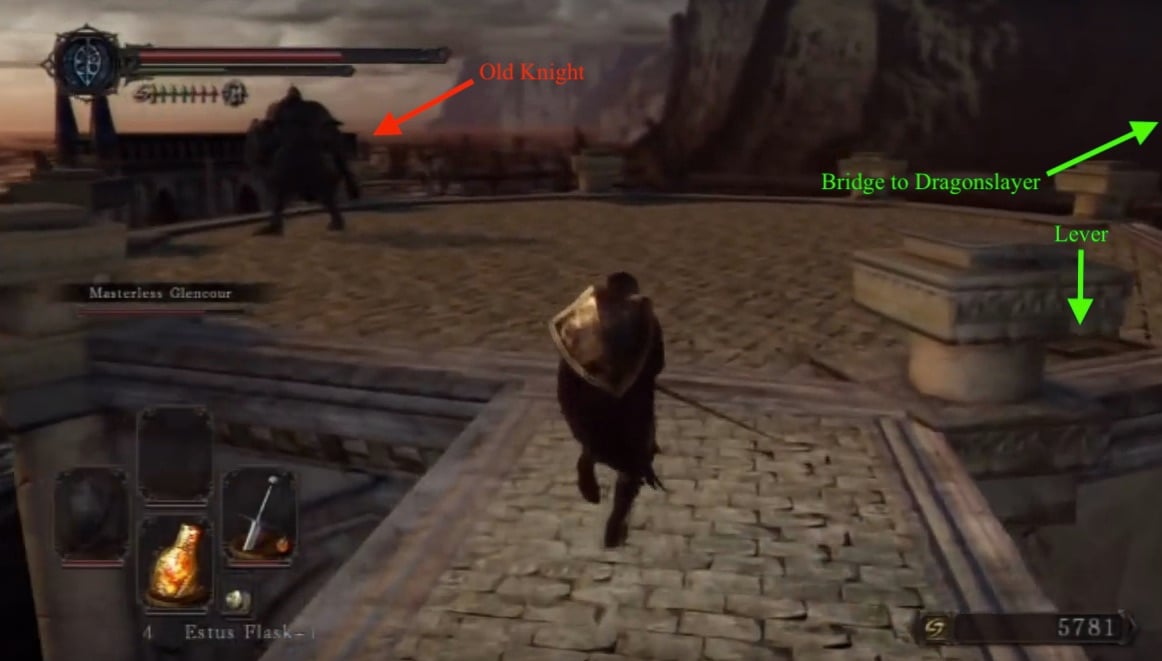
To the Dragonrider
Going to the right leads to a walkway and a staircase down to another platform and a sentinel. (In NG+. a Black Phantom with a chariot lance appears on the platform, it drops a Token of Spite when killed). The chest on the right contains 3x Green Blossom. Going through the mist takes you to the boss of this area; if you are in human form, you can summon an NPC phantom named Masterless Glencour right outside the mist.
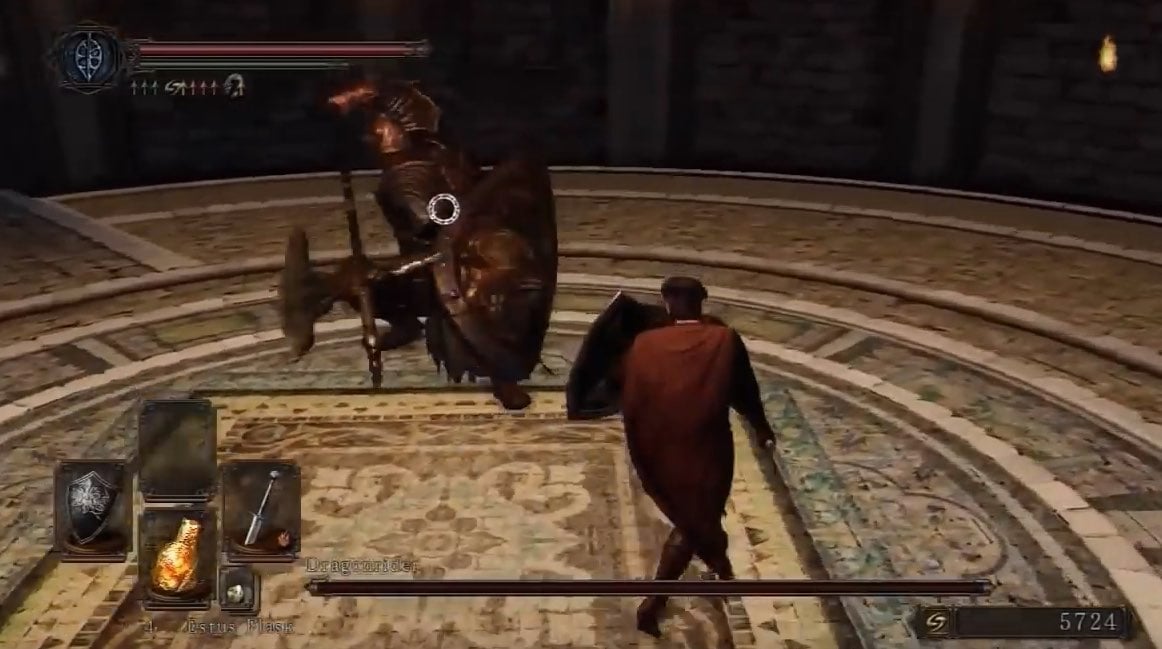
BOSS FIGHT: Dragonrider
A few notable things about this boss fight:
- He wields a halberd and greatshield.
- He is not particularly fast and becomes a timing pattern easily dispatched.
- Circling around to his back will keep you safe from his sweep attacks and leaves him open for attack.
- He can be staggered after several hits.
- He can also be attacked via bow if you aim at him from where the first lever appears. Once you have gotten him to almost zero health he will turn around and face you with his shield. Once he does this all it is is a matter of getting to him. He should die with just one hit.
To No Man's Wharf
After killing boss, proceed through the doorway and up the stairs. You come to a platform inside the tower with a bonfire. Nearby is the merchant NPC Licia of Lindeldt who sells miracles. After you exhaust her dialogue, she will move to Majula, in the room with the mysterious contraption, and can open the path to Huntsman's Copse. She will also give you the Saint's Set and the Idol's Charm, if your faith is up to level 30.
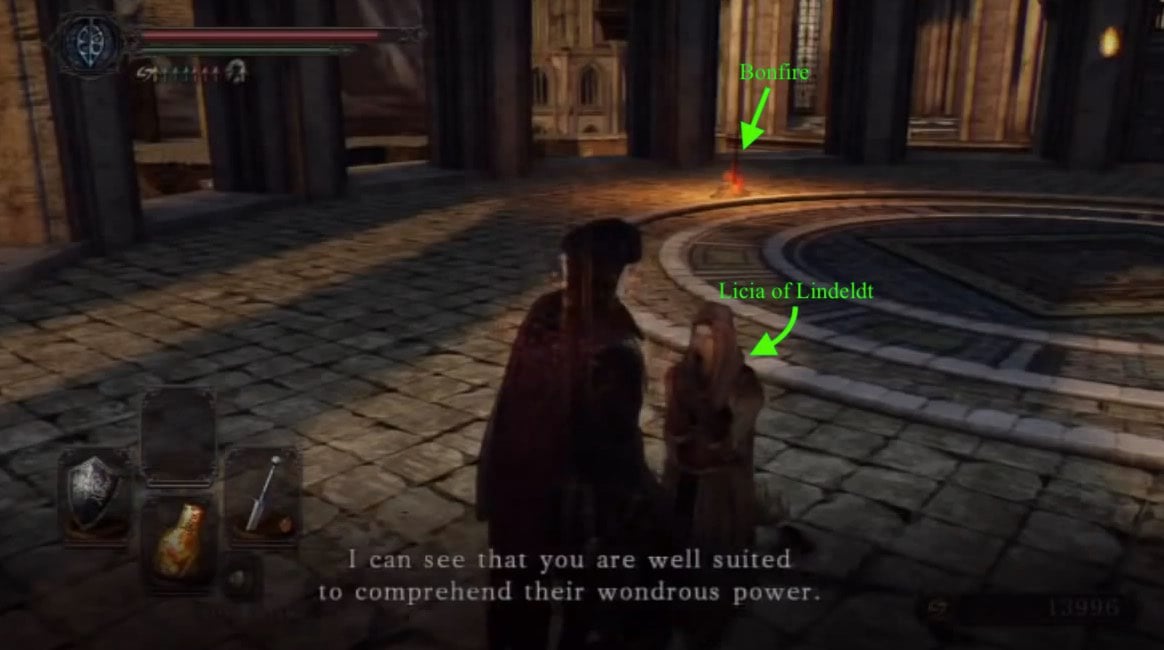
You can kill her however, and when you leave and reload, you''ll find the Idol's Chime and Rotunda Lockstone in her place.
From the tower, exit straight onto a walkway and into another tower with a spiral staircase. Descend down and hidden behind the staircase is a corpse with a Monastery Charm. Go through the doorway and down the hall.
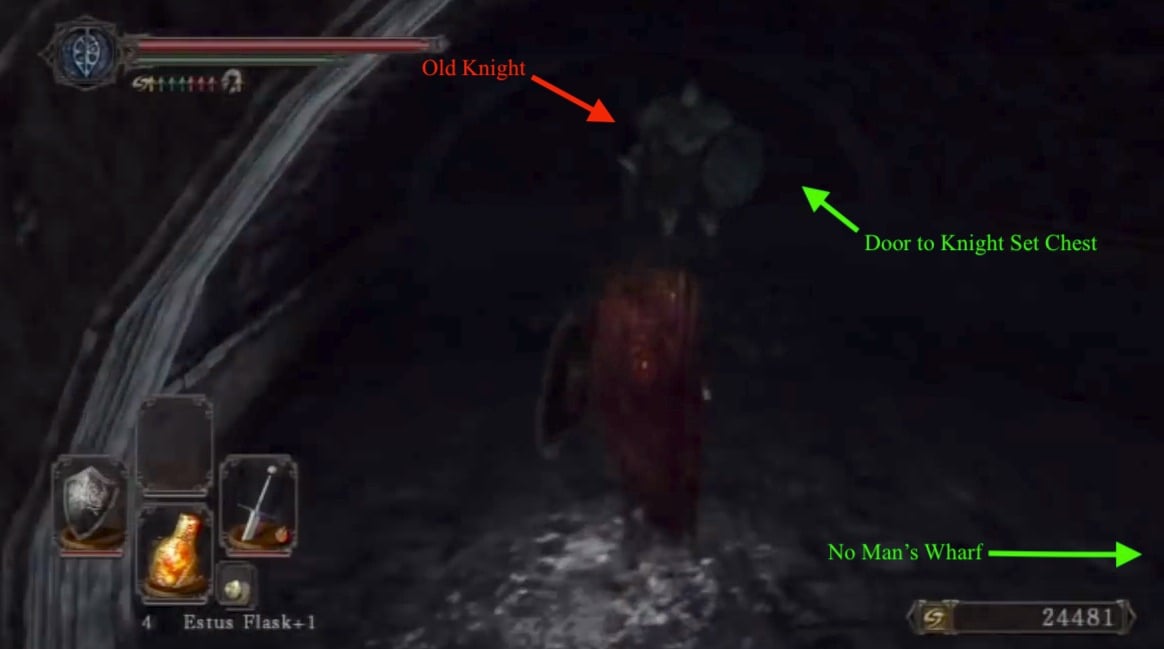
On your right the hallway opens up and you meet an Old Knight guarding a doorway. Kill the Old Knight and continue straight to the end of the hall where you find a corpse hanging over the railing with a Human Effigy and a Dark Troche. Close by are two corpses with a Soul of a Proud Knight and an Old Knight Halberd. Go back down the hall and into the doorway the Old Knight had been guarding.
Down the flights of stairs brings you to the next level down where you encounter an Old Knight. The left passage leads to a dead end so we'll head right to find yet another Old Knight, and beyond a hallway which leads to a round room with a pressure plate elevator in the center. Stand on the plate to descend to the next level down.
At the bottom, go through the doorway into the flooded hall. An Old Knight will stand in a room on the left, in front of a doorway. Past the doorway and up the stairs, the left path leads to a dead end at an iron door. Going right to the end of the hallway brings you to an iron chest in the alcove to the right, which contains the Knight Set of armor. Go back down the stairs and return to the lowest level. Head left and at the end of the hallway, a knocked out hole in the wall leads to path and a bonfire where the NPC Lucatiel of Mirrah stands in rest against a stone spire. Continuing on will bring you to the location No-Man’s Wharf.
