The Gutter
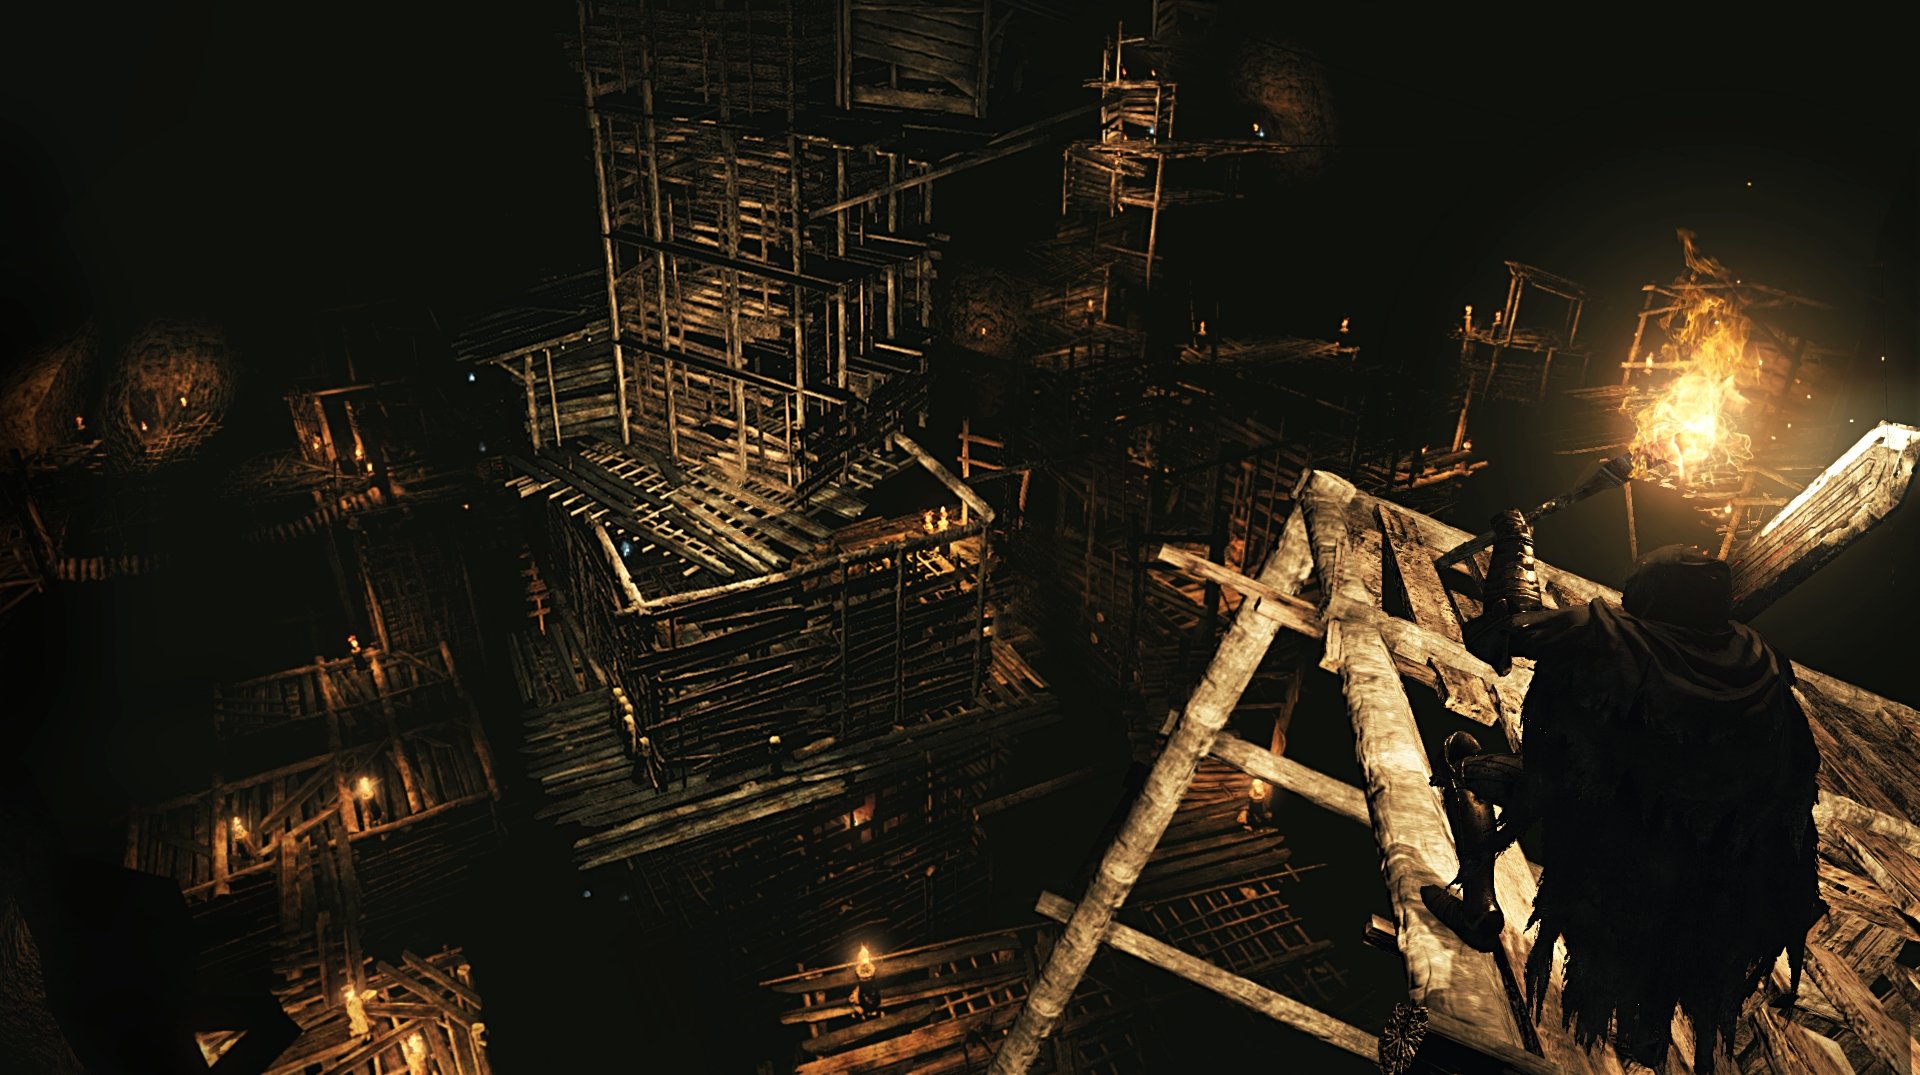 The Gutter is a Location in Dark Souls 2; a forsaken area of darkness and poison, where things are abandoned and forgotten. Its lore is reminiscent of the Valley of Defilement from Demon's Souls, and aesthetically it is an amalgam of that world and Blighttown from Dark Souls.
General Information
- Previous: Grave Of Saints
- Next: Black Gulch
- Recommended Levels: 65 to 75
- Bonfires: Central Gutter, Upper Gutter
The Gutter Map
Central Gutter Map (3D)
Made by Antediluvian
NPCs in The Gutter
- Rotten Vermin (Giant Ant) - Will not attack the player, produces a corrosive blue gas that cures poison but damages equipment.
Items
Consumables- Estus Flask Shard
- Twinkling Titanite x1
- Fragrant Branch Of Yore x2
- Dark Pyromancy Flame
- Flame Butterfly x2
- Titanite Chunk x1
- Dark Fog
- Smooth & Silky Stone x2
- Havel's Armor Set (Forgotten Key)
- Black Witch Armor Set (Gutter Denizen)
- Tattered Cloth Armor Set
- Aurous Set
- Great Club
- Wicked Eye Greatshield
- Ring Of Soul Protection
- Bandit's Greataxe
- Dark Armor
- Heide Lance
- Heide Knight Iron Mask
- Lightning Winged Spear
Enemies
Non-Hostile
- Rotten Vermin (Giant Ant)
NPC Invasions
- Melinda The Butcher
- Gutter Denizen
Tips
- It is a good idea to turn your TV's brightness, contrast and background settings to as much as possible (without having to wear sunglasses to play) if you are playing this area without any sconces lit. You'll be able to avoid unnecessary falls and spot enemies.
- Before coming to this area stock up on anti-poison items and Flame Butterflies, and equip your shield in your right hand as you will want your shield always up and a torch prohibits this if it's in your left hand.
- Alternately, if you have Cast Light, you can skip a torch, but it's still helpful for lighting sconces.
- A whip is handy for destroying the statues. It can be used to break statues from a distance, and the attack also goes through walls, allowing you to destroy them from behind cover.
The Gutter Walkthrough
From the Grave to the Gutter
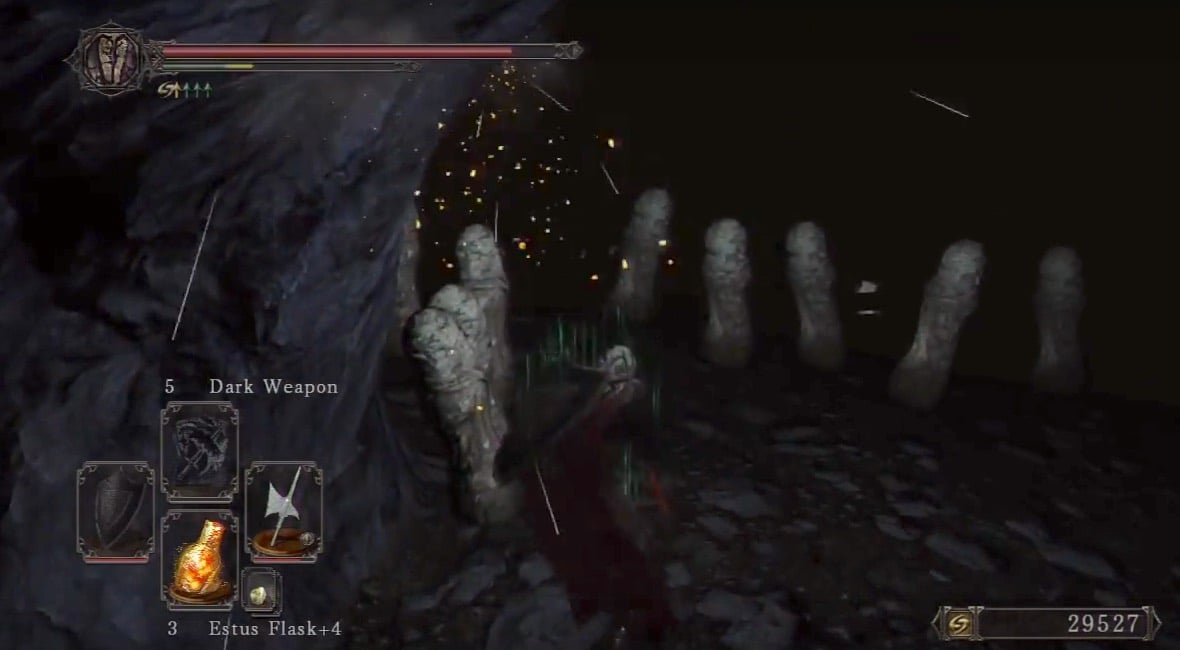
Immediately after emerging from the tunnel from the Grave of Saints, you'll find yourself on a ledge with multiple stone statues that can and will spit poison at you; these will be scattered all over the area and should be destroyed to avoid taking unnecessary damage that can potentially be a matter of life and death down here. Destroy them before they get the chance to, then drop down to the wooden ramp below before dropping off again onto the highest side of the wooden ramp.
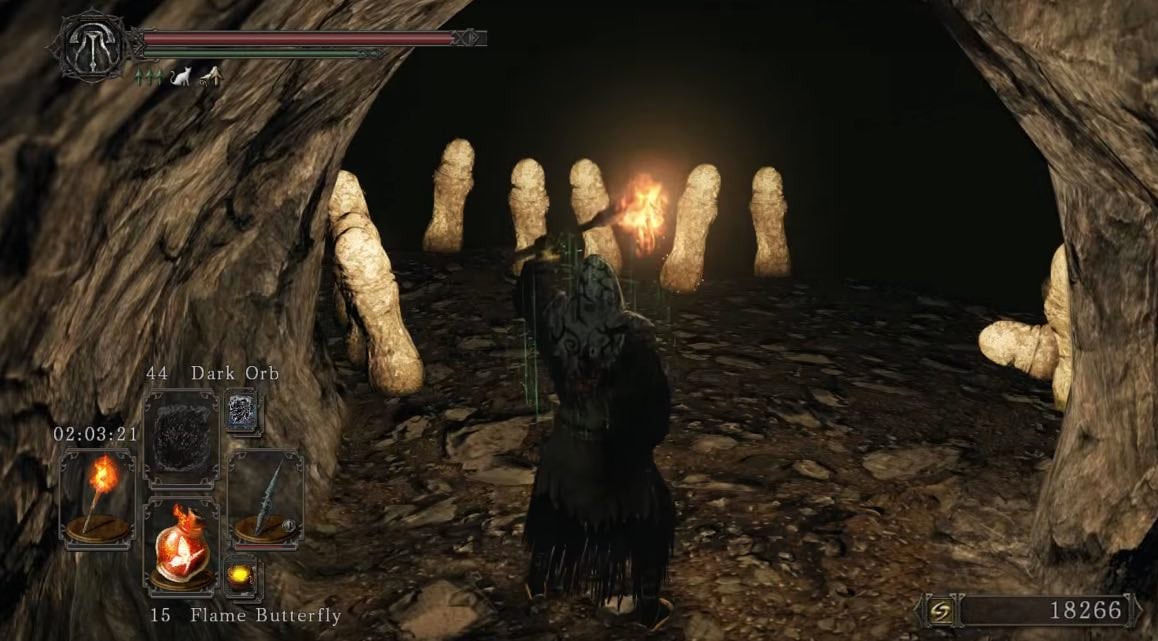
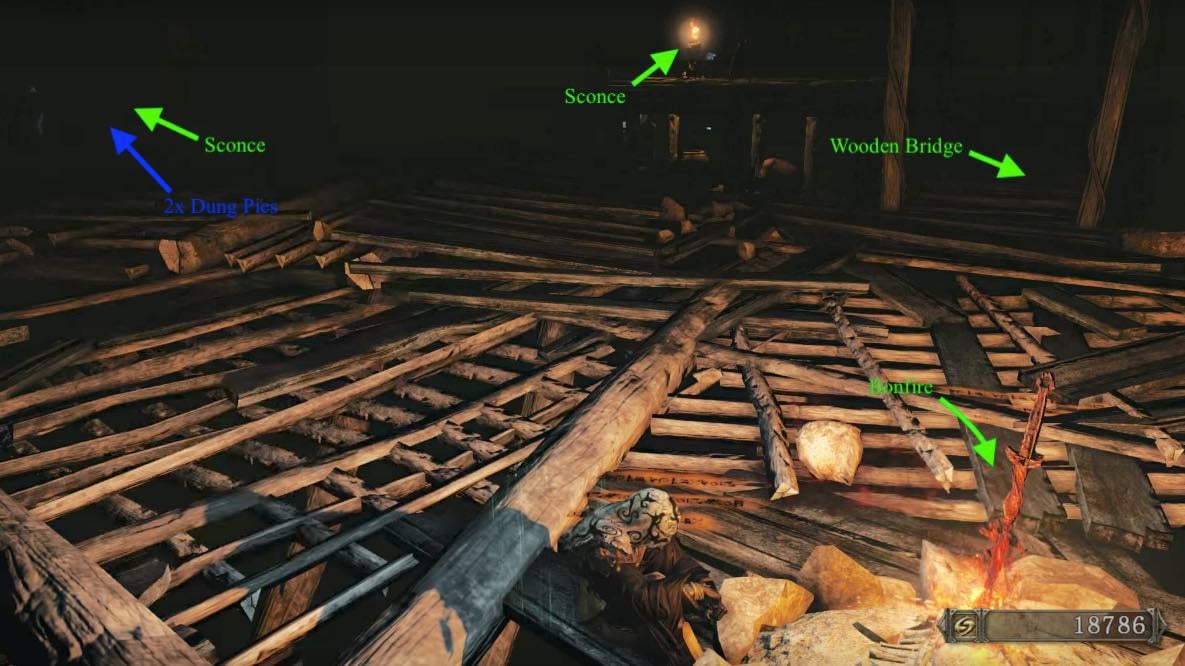
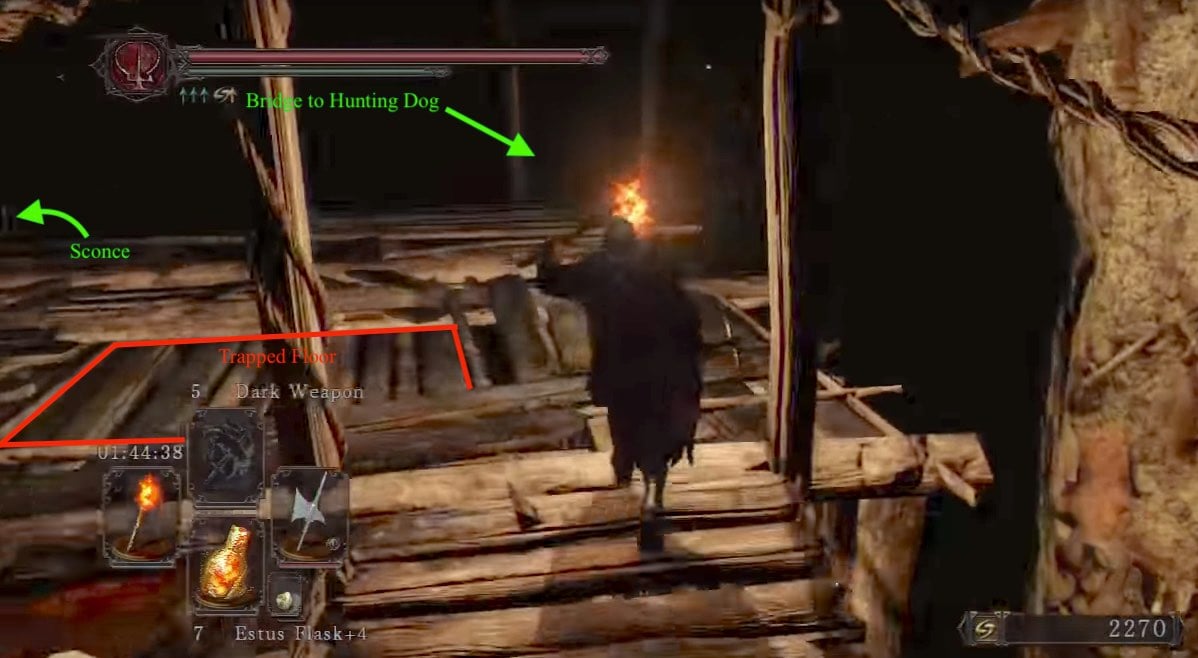
You'll land on a stone platform holding a Hollow and a few jars. There doesn't appear to be a way back onto the ramp so wear the Silvercat Ring, and drop to a larger wooden structure, where you can light a sconce and find the Bonfire across a small bridge (hug the edges of the platform to get to the bridge). From the bonfire, there's a jar, on the left, hiding 2x Dung Pie next to a sconce you can light. Head back to the bonfire and walk back up the the wooden bridge. If you continue in the middle of this platform the floor will collapse under you, only this time you'll land in a room with multiple Hollows. This is one of the many split paths in this place so let's cover one scenario at a time.
Meeting Melinda
Assuming you haven't fallen through, head up the ramp to the right to fight three Hollows, then light the sconce at the end and kill the lurking Hollow. There is another one of those poison statues so break it, then head up the multiple ramps here to find more poison statues, yet another Sconce and Hollow at the top, and an area you can drop down to below. Down here are multiple Hollows and a Coal Tar hiding in one of the tar pools (the one furthest from the sconce). Break vases and loot a Large Soul Of A Nameless Soldier.
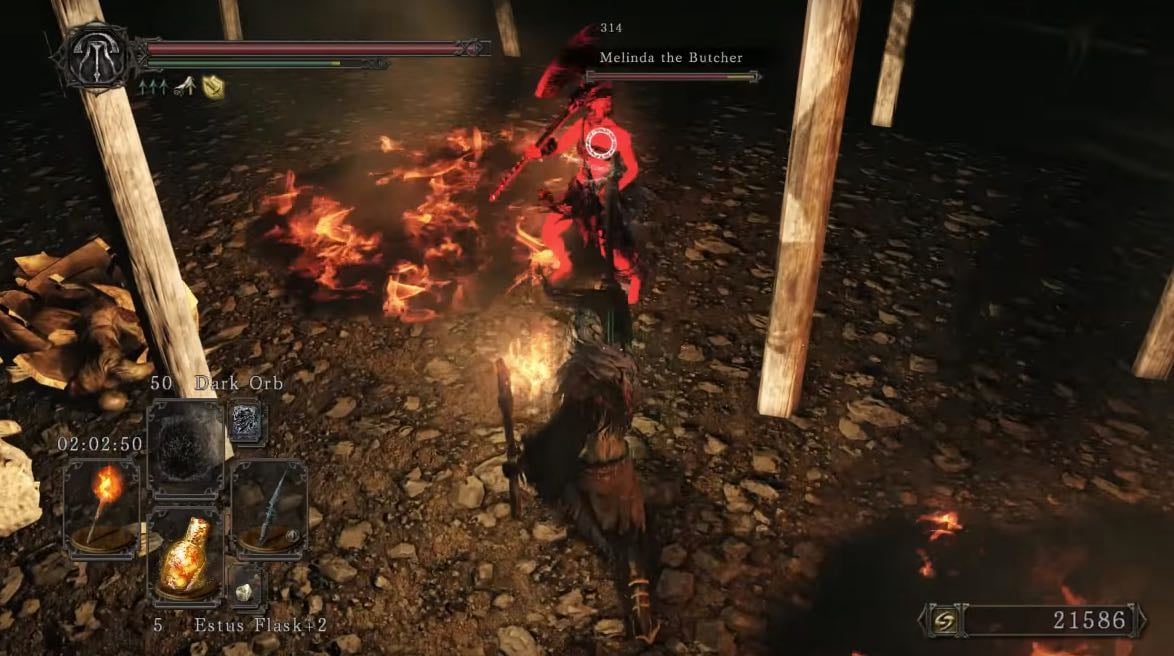
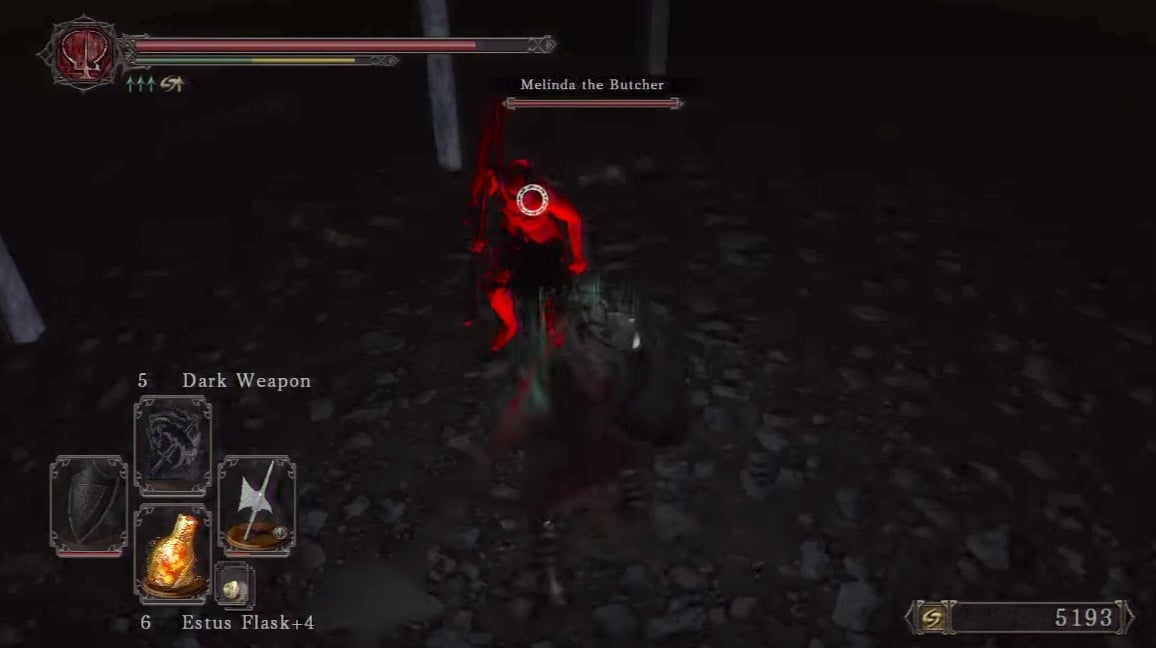
Off the right side is a wooden ramp leading up, but we're heading off the far left side , hugging the the wall with a Sconce, drop onto the side of the building then down to the ground level and circle the building to find a ladder. Next to it, is a room blocked by 3 vases separating you from the 3 Hollows and 2 Rupturing Hollows inside. Take them out, then circle around the building to destroy the poison statues and light the sconce. Up the ladder, light another sconce before jumping onto the area to your left containing a chest containing Ring Of Soul Protection. Still on this platform on the right, you'll find a Sconce and a Poison Statue (BEWARE: lighting this Sconce will most likely trigger Melinda the Butcher invasion).
Treasures
From the Sconce you can drop back down to the original platform we were at before we dropped off to the stone pathway (where we encountered the Coal Tar). But before we do that, return towards the chest and face the building we arrived from to see a small ledge below which you can jump to. Inside the room resides a Mimic, items dropped from him usually fall through the floor, down to the lower room. Use the hole in the floor to reach the lower room and loot the items dropped: Lightning Winged Spear and Dark Armor. Once that's done, return outside and drop back down to the ground level, and climb up the ladder once more to return to the chest and sconce. Turn left and past the Sconce off the edge onto the wooden ramp we skipped earlier. Head up to soon reach 3 Jars, one of which, holds a Lifegem. Past the jars is a ledge leading down to the first bonfire. Go back up the small bridge and move towards the middle of the platform to have the floor break under you. Defeat Hollows and head to the doorway blocked by a jar. From here you can see quite a remarkable platform with 6 Sconces.
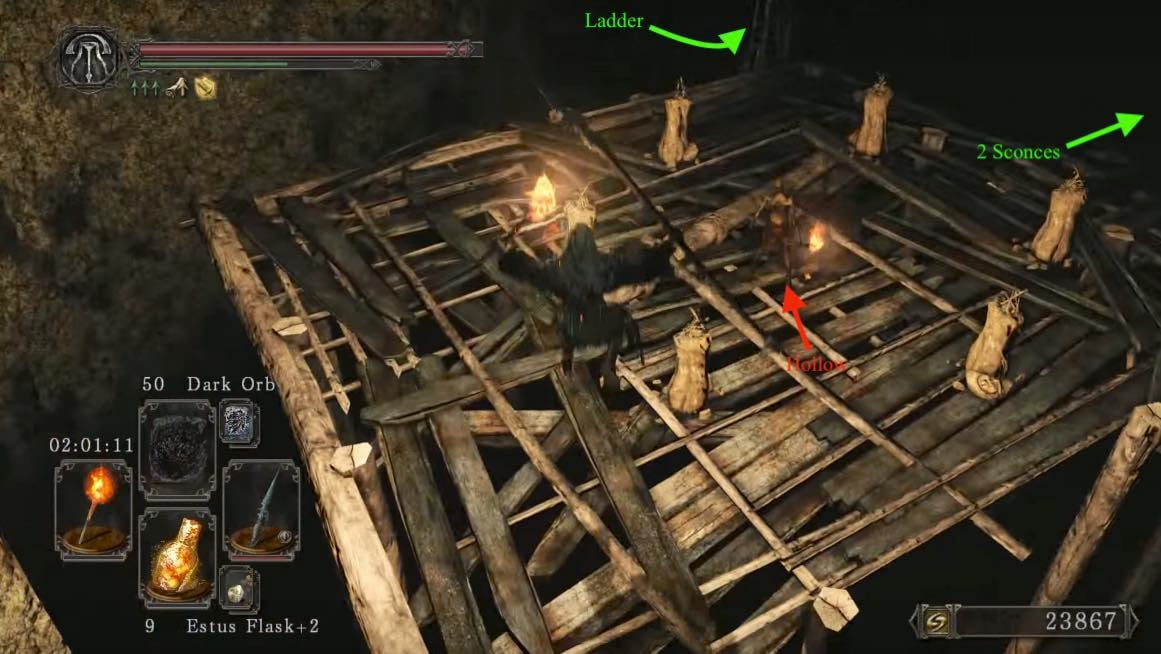
Give yourself a long-enough run up and do a long jump. If you released him from his prison in Aldia's Keep, Royal Sorcerer Navlaan could invade you after making this jump. After lighting all Sconces, head up to the ladder. Upstairs is a Sconce and a cave with multiple Poison Statues, and a Large Locked Door, on the far end. Behind it lies lots of Poison Statues guarding a few jars, containing the best physical defence set in the game - Havel's Armor Set. To open the door you need to acquire the Forgotten Key, which is located in Black Gulch, so we have to ignore this door for now, and head back out. Return to 6 Sconces and proceed to the next platform. Light the two Sconces out here, and look to snipe the Rupturing Hollow on the bridge, before you drop down through the hole in the floor. Continue through the doorway to reach a ledge with 3 jars, but be carefull of the Hollow jumpin behind you when you go near them. Break them to reveal a corpse holding Dark Pyromancy Flame and 3x Rotten Pine Resin. Enter the doorway you passed before and you will find yourself in the room full of weird looking jars closely resembling a heart (breaking them causes armor durability degradation). A Hunting Dog can be found among the jars in the far left corner of this room as well as some Hollows, kill them, light the sconce, then climb the ladder.
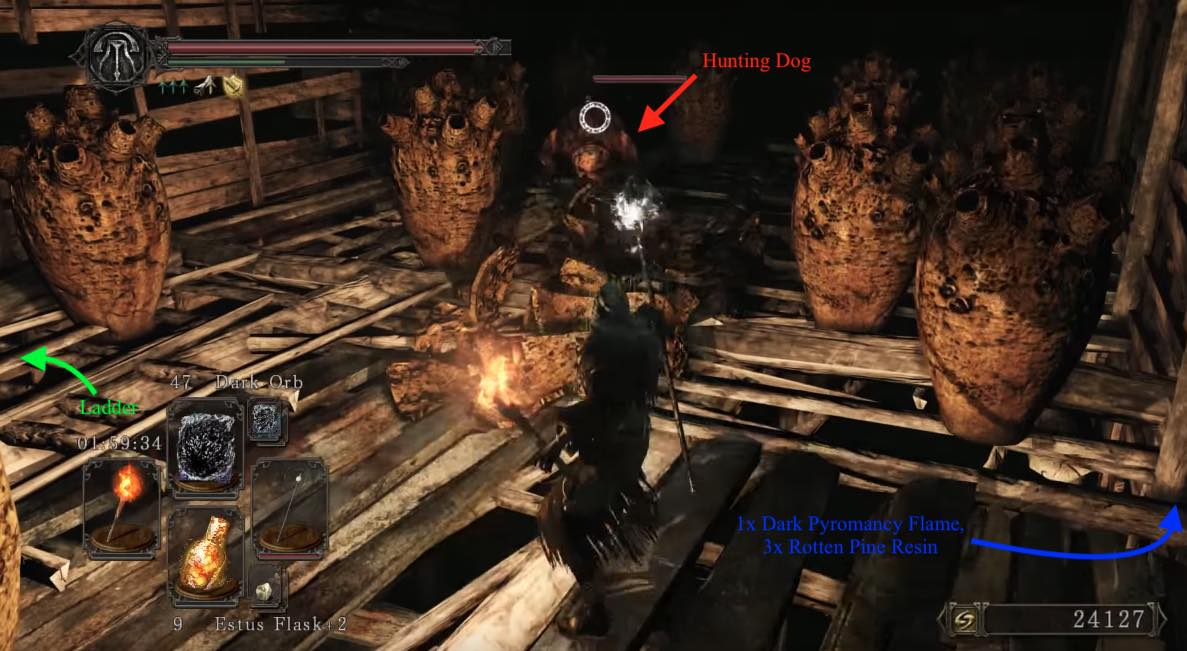
There is nothing interesting on the second floor apart from a Hollow and a Sconce. Climb the ladder to reach the final floor of this building. Up here there are 3 jars, one of which contains a Soul Of A Nameless Soldier and a group of 5 corpses, each holding a treasure. Loot the Twinkling Titanite, Human Effigy, Fragrant Branch of Yore and 2x Smooth & Silky Stone from them. Behind the Sconce, there is an outside ledge, DON'T proceed too far on this ledge (past big group of Posion Statues) as the floor may break and you will get yourself killed (NOTE: From this ledge, it's a short jump back to the first bridge near the first bonfire. Helpful if you fell through the trap floor in the beginning). From this floor make a small drop down to the platform with 3 Sconces. Light them, then cross the bridge.
Heide Fight (K)Night
On the other side, there is another sconce to light, and are multiple Hollows and a Hunting Dog which may (or may not) come from neighbouring room across the small ramp to the right. Kill them and go up the ladder to find a Poison Statue and a chest containing 3x Black Firebomb. Go back down the ladder. Face the bottom of the ladder and move around to light another sconce, as well as a Invisible Hollow. Head straight to a small wooden ramp hanging over the far right side. From it, drop down carefully to the wood below, then drop again to the platform with a Hollow. Circle around the structure to find 2 Jars hiding a corpse and a Titanite Chunk, with a sconce nearby. Move back around the structure and through the hole in the wall to drop down into the next room. Ahead you'll find another sconce and 2 more jars on the far left containing the Tattered Cloth Set. From here you can see a Heide Knight sitting on the ledge. Kill him to obtain Heide Lance and Heide Knight Iron Mask. Be careful though, as there is a Hanging Poison Statue that you cannot reach, try to snipe it with Firebombs or avoid it entirely. Light a Sconce on one end of the ledge and the chest containing Aurous Set, on the other end. There is also a long ladder to climb when you've covered these three things.
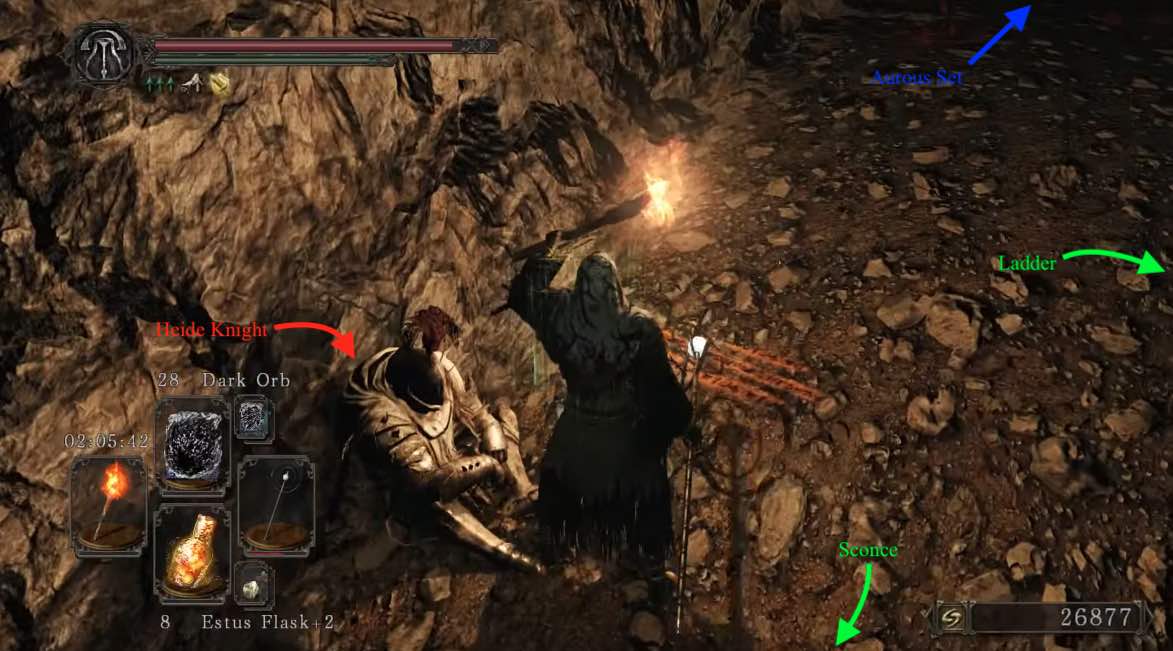
Atop, right next to you is a corpse holding Estus Flask Shard. Ahead you'll find a sconce, and to your right are jars containing a Soul Of A Proud Knight. Circle around the structure to find 2 more Jars containing a Bandit Greataxe. From here you can make a small drop to a slanted platform with 2 Hollows. Then, drop down to another platform with one Poison Statue. From there follow the wall to the right to drop down again to a path that leads to an urn containing 2x Flame Butterfly. Now you can drop to the platform with the chest that previously contained Firebombs. Make your way back to the top platform, and climb up to the roof of the structure. Up here, there is a zip line that will transport you to the top of the 3-story building with heart-like jars that you visited previously.
Reaching the Giant Ant Queen
After riding the zip-line, go straight ahead and light the Sconce, then proceed forward and drop down through the hole. Drop to platform with 3 Sconces again and cross the bridge. Now turn right and cross the small ramp. There might be a Hunting Dog, only if you did not kill it before. Climb up the ladder and proceed to the bridge. You may find yourself standing on a big open platform with another bridge connected to it. Mind the hole in the floor to the left, as it drops you into a room with another Hunting Dog, a jar containing 2x Black Firebomb and another sconce; it's not worth dropping down now because there is a jump to a ledge full of Poison Statues to get away from this area. If you do decide to jump down, move to the outer ledge and jump across towards the multiple Poison Statues to reach the Bonfire platform, as will be mentioned later in this guide.
NOTE: You won't be able to get back to the bridge mentioned next without fast traveling all the way back to the start.
Ignore the hole and head across the bridge with the Exploding Mummy, and continue forward. Take a right to the entrance of a cave. Inside are multiple Corrosive Egg Crawlers waiting to ambush you. Wipe them out to safely loot the Wicked Eye Greatshield from the chest. Make your way out of the cave and drop down to the platform with Fog Gate (before dropping down its a good idea to snipe an Exploding Mummy down there).
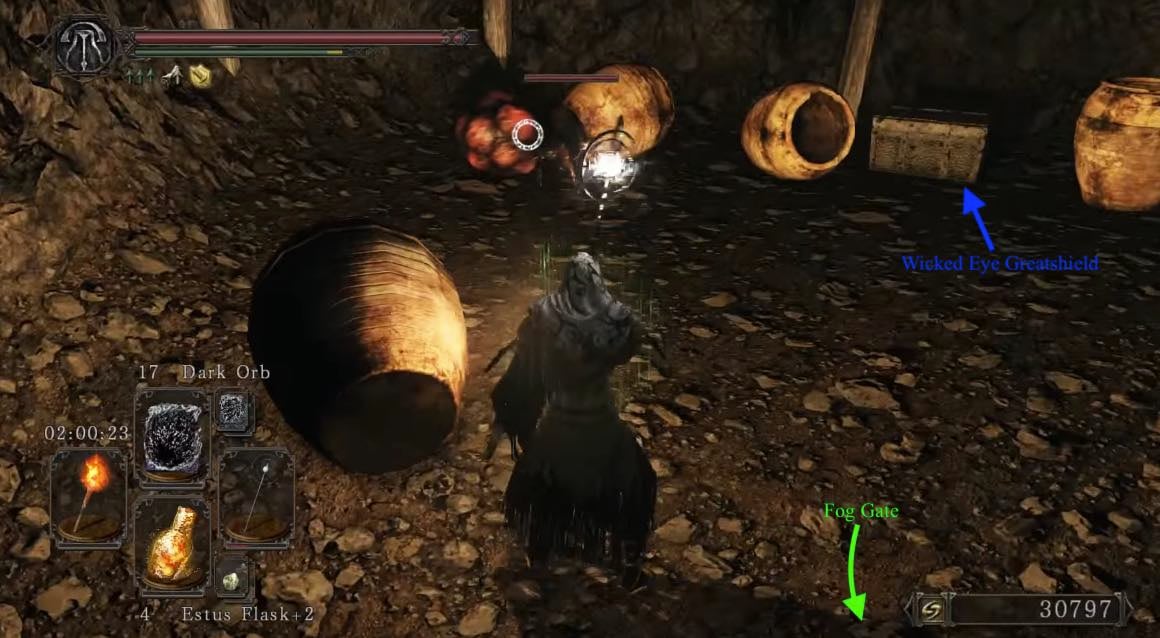
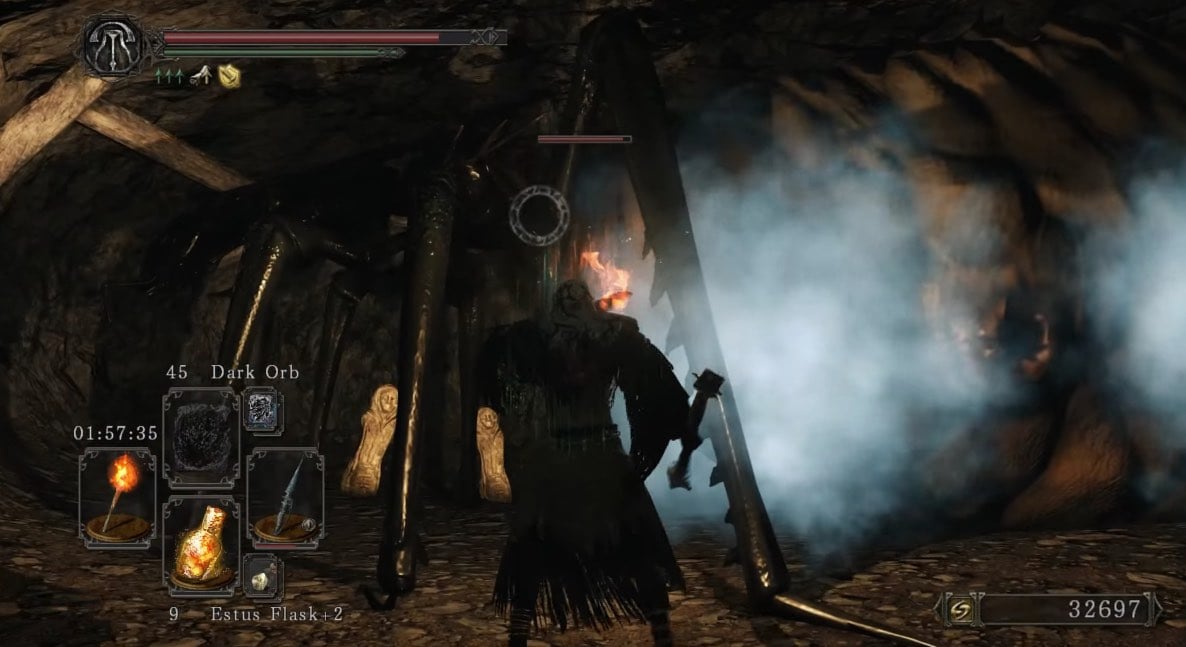
Clear the area of Poison Statues and Hollows, and smash the jars in the middle of the area to get 20x Poison Arrow . Head to a small cave with blue fog coming from it. Inside is a Rotten Vermin (Giant Ant Queen) that emits constant blue gas. DO NOT KILL THIS GIANT ANT, no matter how terrifying it may seem. This giant ant is actually friendly and will not attack the player, and the gas released will cure poison (at the cost of slight equipment durability damage). She is guarded by Poison Brumer that you can lure out or take from a distance to avoid doing damage to the Queen. After killing them, move deeper into the room and break the Poison Statues and the 2 Jars to collect 4x Poison Moss.
Big Black Gulch
Before heading through the fog gate, light up the sconces in this area and take care of another Invisible Hollow a the right sconce at the fog gate. Let's head through the fog door to find a few Hollows and Poison Statues. There are multiple ladders, but most of them are pointless so we will focus on the important ones. First, ignore everything and head straight to the opposite wall in the room, with some Hollows to the left. On this wall, there is a breakable section that leads outside to a Bonfire. Use the bonfire as you please, then head back into the room with all the ladders. Upon entering from the bonfire, head straight and towards the jars on the upper left. These hide a ladder as well as 3x Dung Pie. Climb down and drop off the edge ahead onto a rock platform holding 2 jars. One of which holds another 3x Rotten Pine Resin. Drop down once again, off the left side, onto another rocky platform to find a chest containing the Great Club. Continue to take the next ladder down, but be careful as there are many Hollows waiting at the bottom. If you have lit all the Sconce in the Gutter, an NPC invasion will occur here (if you have been following the guide so far and light up all the sconces, there will be a few remaining ones, which can all be reached by climbing up the ladders from here. Be careful though, as one of the remaining sconces is near an exploding Rupturing Hollow). The invader is Gutter Denizen, a mage, who drops the Black Witch Veil Set.
Explore this area, break all jars to obtain a total of 20x Lifegem, 1x Dark Fog and 1x Torch. Finally, find a hole in the wall blocked by more heart-like jars, and drop down onto the ledge. Light the Sconce and grab the Fragrant Branch Of Yore. Deal with more poison statues and head through the fog gate into the Black Gulch.
General Information
- Previous: Grave Of Saints
- Next: Black Gulch
- Recommended Levels: 65 to 75
- Bonfires: Central Gutter, Upper Gutter
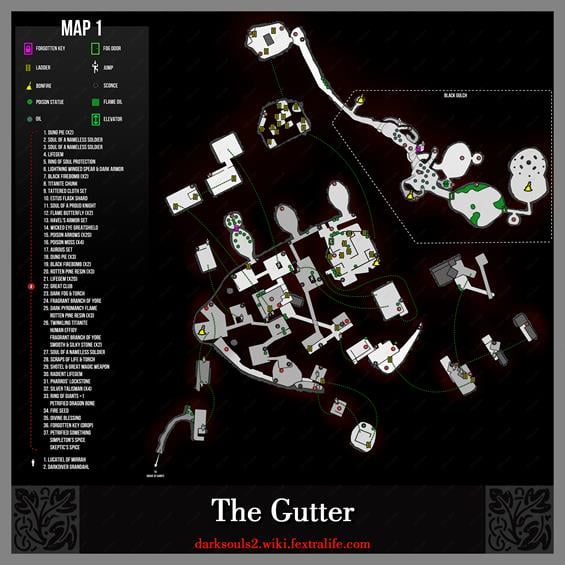
The Gutter Map
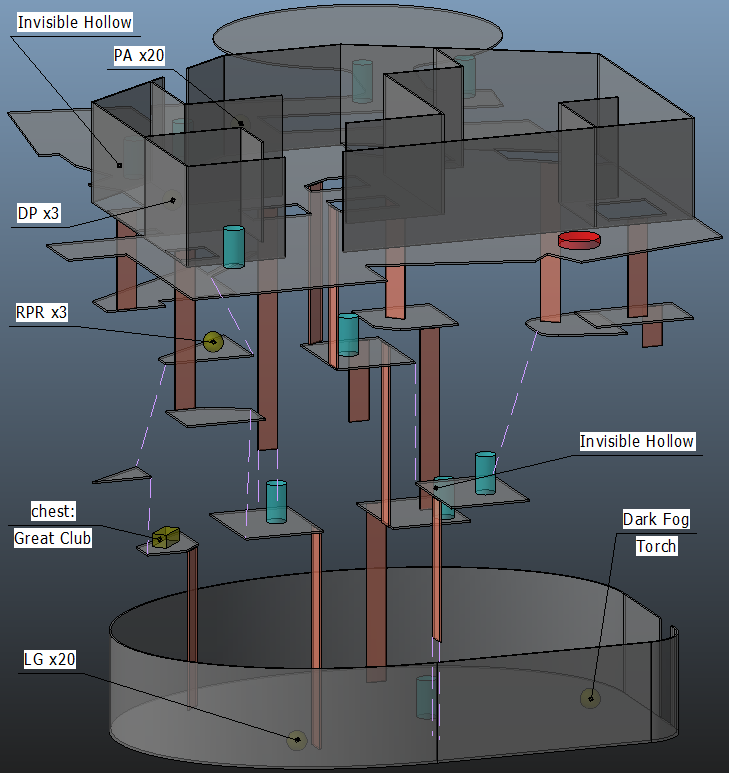
Central Gutter Map (3D)
Made by Antediluvian
NPCs in The Gutter
- Rotten Vermin (Giant Ant) - Will not attack the player, produces a corrosive blue gas that cures poison but damages equipment.
Items
Consumables
- Twinkling Titanite x1
- Fragrant Branch Of Yore x1
- Dark Pyromancy Flame
- Flame Butterfly x2
- Titanite Chunk x1
- Dark Fog
Equipment
- Ring Of Soul Protection
- Tattered Cloth Armor Set
- Bandit's Greataxe
- Great Club
- Ring Of The Evil Eye
- Wicked Eye Greatshield
- Havel's Armor Set (Forgotten Key Required)
Enemies
- Abandoned Hollow
- Hunting Dog
- Rupturing Hollow (Exploding Mummy)
- Poison Tick (Poison Brumer)
- Coal Tar
- Mimic
Non-Hostile
- Rotten Vermin (Giant Ant)
NPC Invasions
Notes
- It is a good idea to turn your TV's brightness, contrast and background settings to as much as possible (without having to wear sunglasses to play) if you are playing this area without any sconce lit. You'll be able to avoid unnecessary falls and spot near enemies.
- Before coming to this area stock up on anti-poison items, Flame Butterflies and equipping your shield in your right hand as you will want your shield always up and a torch prohibits this if it's in your left hand.
- Alternately, If you have Cast Light magic, you can skip needed a torch all the time, but it's still helpful for lighting Sconces.
- A whip is handy for destroying statues. It can be used to break statues from a distance, and the attack also goes through walls, allowing you to destroy them from behind cover.
The Gutter Walkthrough
From the Grave to the Gutter
Immediately after emerging from the tunnel from the Grave of Saints, you'll find yourself on a ledge with multiple stone statues that can and will spit poison at you; these will be scattered all over the area and should be destroyed to avoid taking unnecessary damage that can potentially be a matter of life and death down here. Destroy them before they get the chance to, then drop down to the wooden ramp below before dropping off again onto the highest side of the wooden ramp.
You'll land on a stone platform holding a Hollow and a few jars. There doesn't appear to be a way back onto the ramp so wear the cat ring, and drop to a larger wooden structure, where you can light a sconce and find the Bonfire across a small bridge (hug the edges of the platform to get to the bridge). From the bonfire, there's a jar, on the left, hiding 2x Dung Pie next to a sconce you can light. Head back to the bonfire and walk back up the the wooden bridge. If you continue in the middle of this platform the floor will collapse under you, only this time you'll land in a room with four Hollows. This is one of the many split paths in this place so let's cover one scenario at a time.
Meeting Melinda
Assuming you haven't fallen through, head up the ramp to the right to fight your first Hunting Dog, then light the sconce at the end and kill the lurking Hollow. There is another one of those poison statues so break it, then head up the multiple ramps, fighting another two Hollows and lighting another Sconce, on the next platform. At the top, you'll find yourself overlooking an area you can drop down to below. Down here are multiple Hollows. Kill them, destroy the statues, and break the vases to loot a Soul Of A Nameless Soldier.
Off the right side is a wooden ramp leading up, but we're heading off the far left side for now, hugging the the wall with the Sconce, drop onto the side of the building then down to the ground level and circle the building, firstly to destroy the poison statues and light the sconce, then to find a ladder. Next to it, is a room with nothing but three empty vases inside. Up the ladder, light another sconce before jumping onto the area to your left with a chest containing Ring Of Soul Protection. Still on this platform on the right, you'll find a Sconce and another Poison Statue (BEWARE: lighting this Sconce will most likely trigger Melinda the Butcher invasion).
Treasures
From the Sconce you can drop back down to the original platform we were at before we dropped off to the stone pathway (the platform we were on on the first paragraph of 'Meeting Melinda'). HOWEVER, before we do that, return towards the chest and face the building we arrived from to see a small ledge below which you can jump to. Inside the room you'll find a chest containing a Twinkling Titanite and 3x Small Smooth & Silky Stone. Once that's done, return outside and drop back down to the ground level, and climb up the ladder once more to return to the chest and sconce. Turn right and past the Sconce off the edge onto the wooden ramp we skipped earlier. Head up to shortly reach 3 Jars, one of which, holds a Lifegem. Past the jars, there is a ledge leading down to the first bonfire.Go back up the small bridge and move towards the middle of the platform to have the floor break under you. Defeat Hollows and head to the doorway blocked by a jar. From here you may or may not see a platform in the distance that you can in fact, jump to, containing two Hollows and a sconce. Give yourself a long-enough run up and do a long jump.
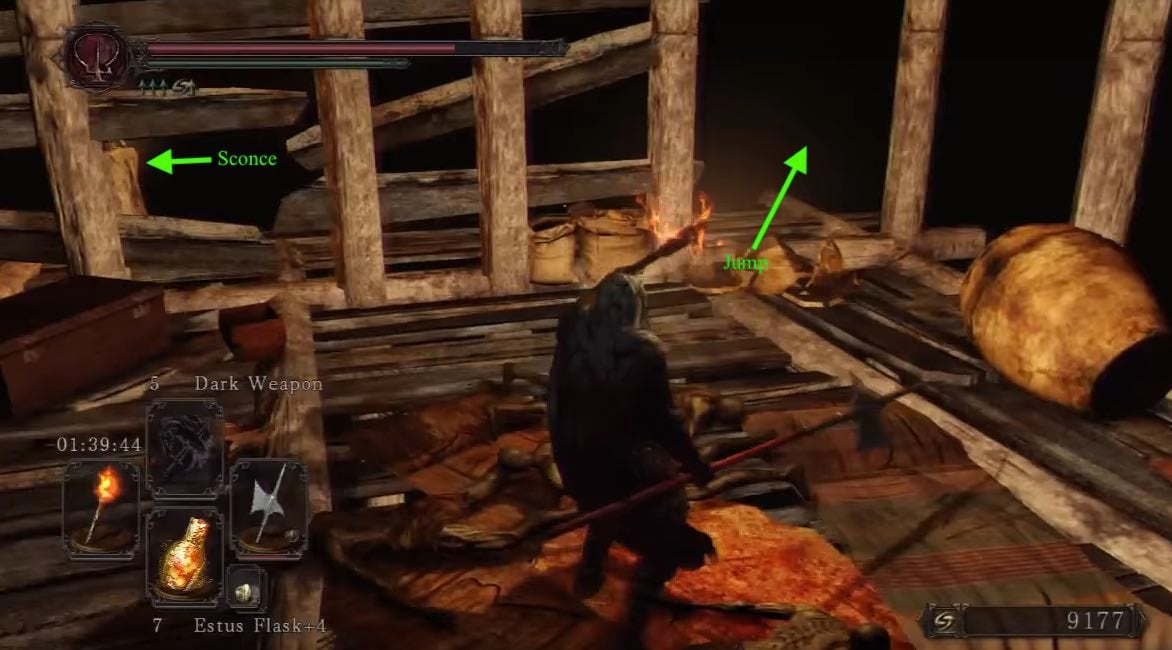
If you released him from his prison in Aldia's Keep, Royal Sorcerer Navlaan could invade you after making this jump.
After lighting the sconce, head up to the ladder. Upstairs is a Sconce and a cave with multiple Poison Statues, and a Large Locked Door, on the far end. Behind it lies a load more Poison Statues guarding a few jars, containing the best physical defence set in the game - Havel's Armor Set. To open the door you need to acquire the Forgotten Key, which is located in Black Gulch, so we have to ignore this door for now, and head back out.
Return down the ladder and proceed to the next platform. Light the sconce on the left, before you drop down through the hole in the floor. Once down the hole, continue through the doorway to reach a ledge with 3 jars. Break them to reveal a corpse holding Dark Pyromancy Flame and a Rotten Pine Resin. Enter the doorway next to the jars, to find a Hunting Dog and a couple of Hollows, kill them then climb the ladder.
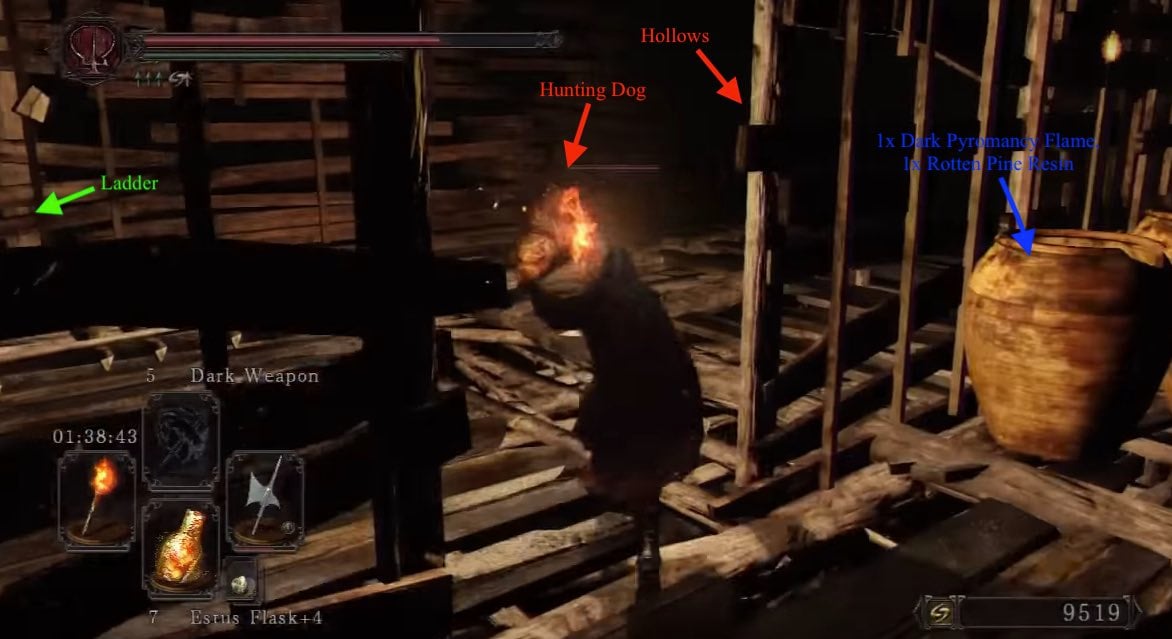
There is nothing interesting on the second floor apart from two Hollows - a third may or may not descend the ladder, if it does, then that's one less to deal with upstairs- and a Sconce. Climb the ladder to reach the final floor of this building. Up here there may be a Hollow, and definitely 3 jars, one of which contains a Soul Of A Nameless Soldier. Behind the Sconce, there is an outside ledge, DON'T proceed too far on this ledge (past big group of Posion Statues) as floor may break and you will get yourself killed (NOTE: From this ledge, it's a short jump back to the first bridge near the first bonfire. Helpful if you fell through the trap floor in the beginning). From this floor make a small drop down to the platform with 2 poison statues, a sconce, and a bridge. Break, light, then cross, respectively.
To the Zip Line
Upon crossing, a Rupturing Hollow will rush you, and another Hollow will drop from above. On the other side, there is another scone to light, and are multiple Hollows, and a Hunting Dog on the right. Kill them then head up the ladder to find a Sconce, and a chest containing 3x Black Firebomb. Go back down the ladder. Facing the bottom of the ladder, move around the right side. Head straight to a small wooden ramp hanging over the far right side. From it, drop down carefully to the wood below, then drop again to the platform with a Hollow. Circle around the structure to find 2 Jars hiding a corpse and a Titanite Chunk, with a sconce nearby. Move back around the structure and through the hole in the wall to drop down into the next room. Ahead you'll find another sconce and 2 more jars on the far left containing the Tattered Cloth Set.
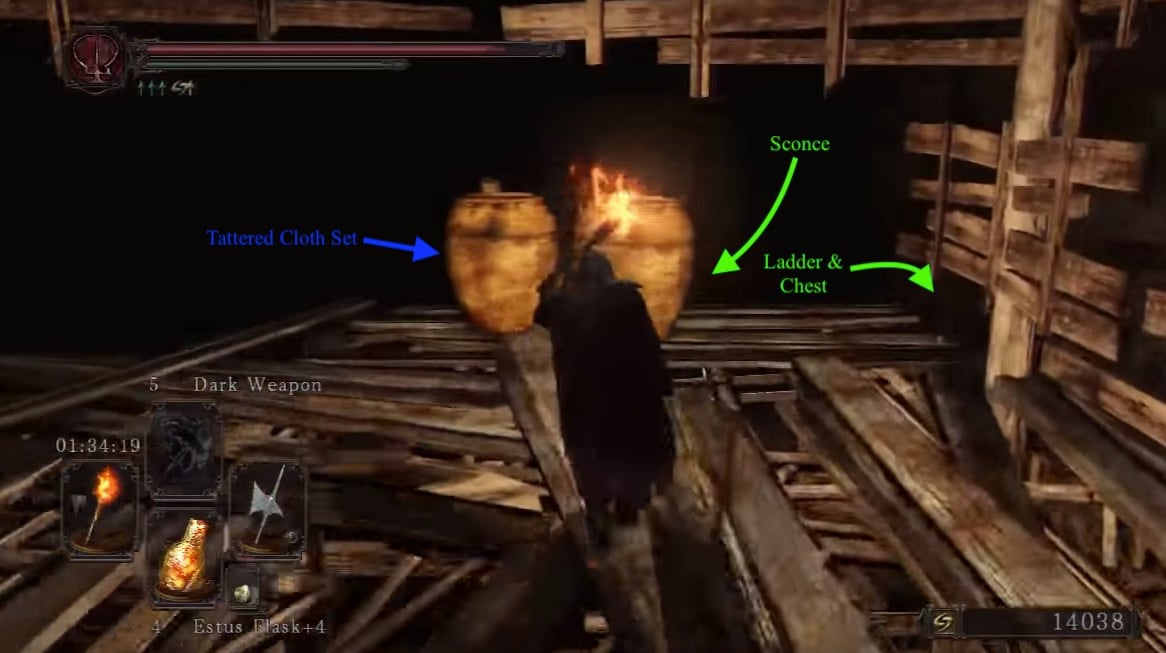
From here you can see a ledge to jump on. Be careful though, as there is a hanging Poison Statue that you cannot reach, try to snipe it with Firebombs or avoid it entirely. Light a Sconce on one end of the ledge and loot the chest containing Ring Of The Evil Eye, on the other end. There is also a long ladder to climb after fighting the small wave of Hollows here.
At the top, a bit ahead you'll find a sconce, and to your right are jars containing a Soul Of A Proud Knight. You should also find two Hollows playing dead. Circle around the structure to find a Rupturing Hollow and 2 more Jars containing a Bandit Greataxe. From here you can make a small drop to a slanted platform with a sconce. Then, drop down to another platform with one Poison Statue. From there follow the wall to the right to drop down again to a path that leads to an urn containing 2x Flame Butterfly. From here, you can drop to the platform with the chest that previously contained Firebombs. Make your way back to the top platform, and climb up to the roof of the structure. Up here, there is a zip line that will transport you to the top of the 3 storey building with the Soul of a Nameless Soldier.
Reaching the Giant Ant Queen
After riding the zip-line, go straight ahead and light the Sconce, then proceed forward then look for the bridge directly below the end of the zip line. Drop down to fight a Hunting Dog, and light the sconce. Climb up the ladder and proceed to the bridge. You may find yourself standing on a big open platform with another bridge connected to it. Mind the hole in the floor to the left, as it drops you into a room with another Hunting Dog and a jar containing 2x Black Firebomb; it's not worth dropping down now because there is a jump to a ledge full of Poison Statues to get away from this area. If you do decide to jump down, move to the outer ledge and jump across towards the multiple Poison Statues to reach the Bonfire platform, as will be mentioned later in this guide.
NOTE: You won't be able to get back to the bridge mentioned next without fast traveling all the way back to the start.
Ignore the hole and head across the bridge, light the sconces on the wooden platform, and enter the cave. Inside are multiple Hollows here. Wipe them out to safely loot the Wicked Eye Greatshield from the chest. Make your way out of the cave and drop down to the platform with Fog Gate (before dropping down its a good idea to snipe an Exploding Mummy down there).
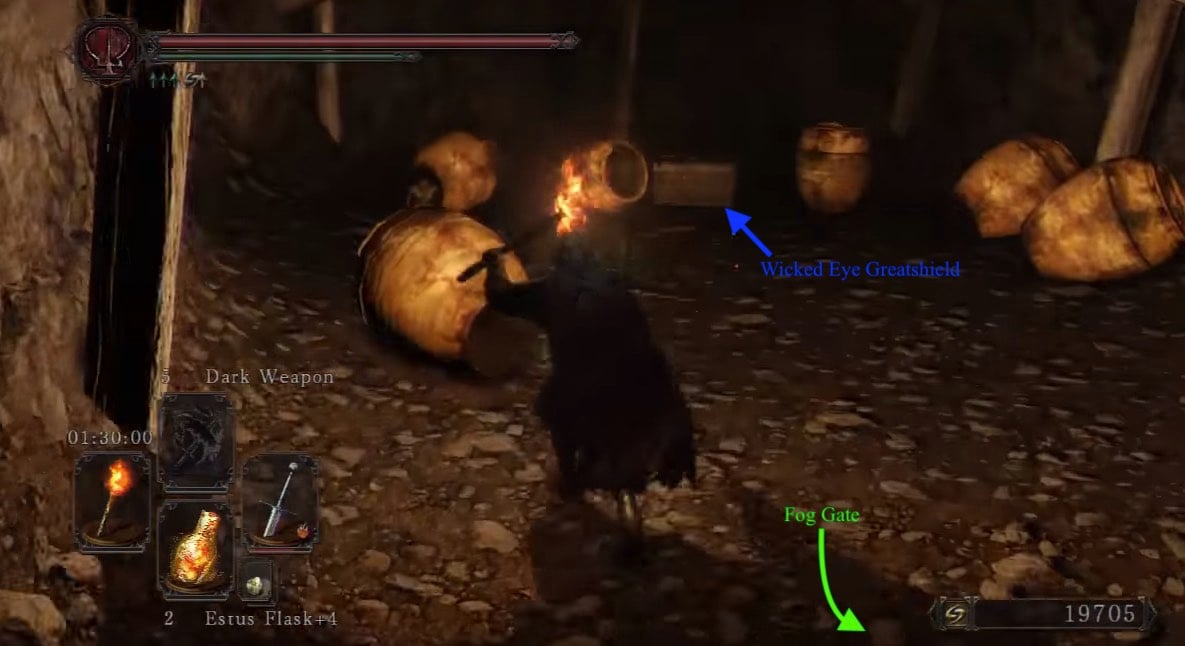
Clear the area of Poison Statues and Hollows, and smash the jars in the middle of the area to get 20x Poison Arrow . Head to a small cave with blue fog coming from it. Inside is a Rotten Vermin (Giant Ant Queen) that emits constant blue gas. DO NOT KILL THIS GIANT ANT, no matter how terrifying it may seem. This giant ant is actually friendly and will not attack the player, and the gas released will cure poison (at the cost of slight equipment durability damage). She is guarded by Poison Ticks that you can lure out or take from a distance to avoid doing damage to the Queen. After killing them, move deeper into the room and break the Poison Statues and the 2 Jars to collect 4x Poison Moss.
Big Black Gulch
Let's head through the fog door to find a few Hollows and Poison Statues. There are multiple ladders, but most of them are pointless so we will focus on the important ones. First, ignore everything and head straight to the opposite wall in the room, with some Hollows to the left. On this wall, there is a breakable section that leads outside to a Bonfire. Use the bonfire as you please, then head back into the room with all the ladders.
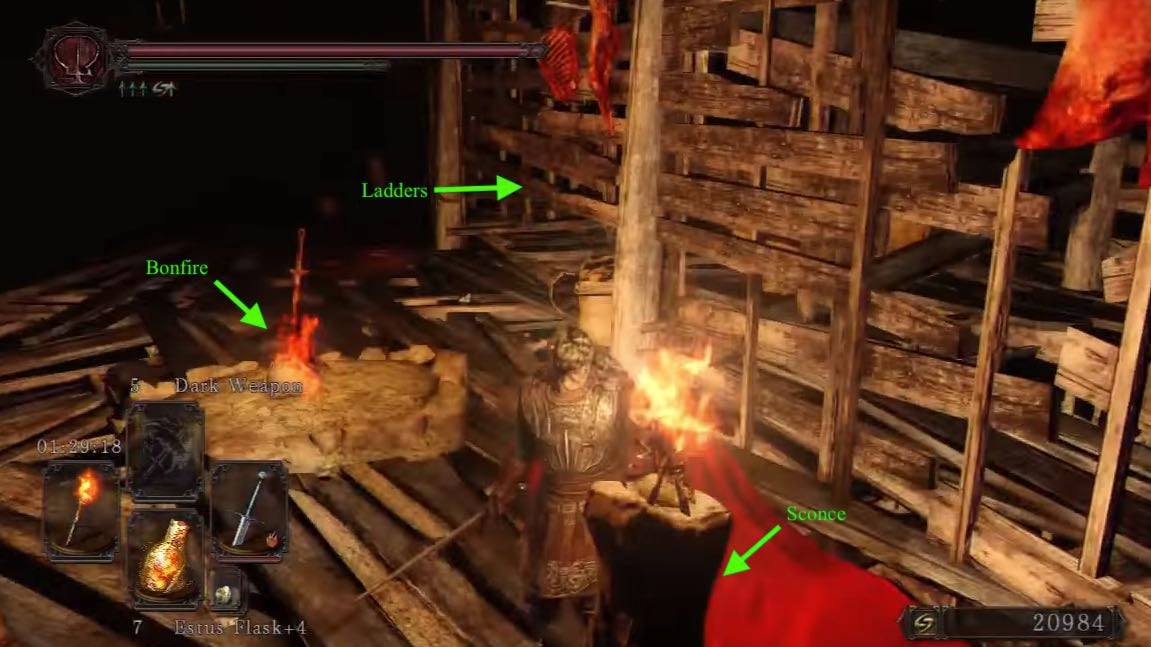
Upon entering from the bonfire, head straight and towards the jars on the upper left. These hide a ladder as well as 3x Dung Pie. Climb down and drop off the edge ahead onto a rock platform holding 2 jars. One of which holds another 3x Rotten Pine Resin. Drop down once again, off the left side, onto another rocky platform to find a chest containing the Great Club. Continue to take the next ladder down, but be careful as there are many Hollows waiting at the bottom.
Explore this area, break all jars to obtain a total of a whopping 20x Lifegem, 1x Dark Fog and 1x Torch. Finally, find a hole in the wall blocked by more heart-like jars, and drop down onto the ledge. Light the Sconce and grab the Fragrant Branch Of Yore. Before proceeding into the Black Gulch.
 Anonymous
 Anonymous
 Anonymous
I died more times in the Gutter than I think I have in all other FromSoft games combined. What a poorly designed area.

 Anonymous
Playing with a shader to try to imitate the early ds2 footage with the lighting system, and this level is a lot more "fun" with the Torch and braziers. Better than Tomb of the Giants anyway.

 Anonymous
wow! this is my 3rd playthrough and I didn't know until now there are sconces to light up here. I just thought they were all broken poison statues

 Anonymous
Bonfire ascetic does not revive the giant ant queen... FORGIVE ME!!

 Anonymous
What a great walkthrough. I start looking around for the bonfire at the start of the gutter, can't find it, and fall through a collapsing floor. "Yeah bro, don't fall through that hole. Now, continuing the walkthrough assuming you didn't..." so now I'm lost and if I die I'll be back in Majula.

Heide Knight needs to be added to the enemy list, and for some reason I can't edit that part of the page.

 Anonymous
'Assuming you have fallen through the platform' would be a nice addition. Could you knock that up for me in the next few minutes, please?

 Anonymous
love the fact that 3+ ascetics at the minimum here causes the cucks with those broken dark infused swords to borderline 2 shot you, not to mention they have that always fair ai that definitely doesn't read your inputs so they'll be rearing up to attack you as you hit them so you take even more damage from the counter trade
tl:dr i hate farming for the heide greatlance
 Anonymous
 Anonymous
If the Black Witch set didn't drop here, I would spend as little time in this area as possible

 Anonymous
 Anonymous
 Anonymous
 Anonymous
"You won't be able to get back to the bridge mentioned next without fast traveling." So without homeward bone you are stuck?

 Anonymous
 Anonymous
 Anonymous
 Anonymous
 Anonymous
anyone stuck with the mimic drop to the second floor, try this: run first, THEN roll
I did this from the bottom right corner (if we define the directions so the hole is in the top right), ran up and only hit roll once I was partway falling, then turned a hard left.
I had previously missed this roll like 10 times
 Anonymous
 Anonymous
Players disliked Tomb of the Giants and Blighttown? Ok lets put them together

 Anonymous
Please , read this comment: in this area there is no boss. i spent 6 hours realising it.

 Anonymous
Making a fextralife account today. Going to attempt to fix this abomination of a guide. Wish me luck.

 Anonymous
The only reason I went down here was for havels set and I never want to see it again

 Anonymous
When game dev think Tomb of The Giant and Blighttown is not hard enough for the next game . With me the most annoying in this area is the terrain, some spots doesn’t have ladder to climbing out once you falling in

 Anonymous
Each playthrough I delay going to the gutter because I have bad memories of this place, but when I finally do it I remember that I know the place inside out and breeze through it pretty quickly, grabbing all the loot and torches as well. The poison statues are the only thing I genuinely dislike about the gutter.

 Anonymous
 Anonymous
 Anonymous
 Anonymous
In The Gutter you have to follow a specific path until the end of the area. Passing the area is like a boss fight (because you know, we have to memorize how to beat the boss, it's attack patterns etc. You are doing the same thing for the Gutter.) Everything about the Gutter is iconic, from the entrance to the exit.
In the end, much much better experience than an annoying swamp in my opinion. You can't even find bonfire in Blighttown if you don't have the Master Key lol. I finished DS1 totally offline i can say Blighttown could be the worst place of DS1.
 Anonymous
It's like you people forget that Dark Souls is supposed to be hard.

 Anonymous
the ds2 devs were really like “how can we make blighttown even worse” and then put this abortion of an area in the game

 Anonymous
Easily one of the best areas. It has the same feelings from the DLCs. You keep going back and forth taking different paths and doing detours here and there.
All you need to get through this is patience and prudence.
You won't fall from nowhere if you use your eyes.
You won't get killed by no one if you take your time.
Enemies are hard for rushers, they attack prematurely, just bait them, let them finish and take ur turn.
Not much else to say, just be chill and u'll be cruising through the area in no time, easily one of my favorites from the base game.
It's small if you just wanna go through, yet feels pretty if you keep running back and forth for the items and torches.
 Anonymous
 Anonymous
I just got invaded by the Gutter Denizen for the first time. She dropped the Black Witch gear. (Exept the Hat, I got the veil) If only i knew that in my other playthrough where i was farming these pieces in belfry sol from the Non respawning shadows. I've heard there is an invader that only spawns If you have lit all torches in the gutter. I guess that was the denizen?

 Anonymous
Insert "Mom, can we have Blighttown? No, we have Blighttown at home" meme

 Anonymous
Should be noted there is a bugged piece of floor near the Giant Bug, it looks like an ordinary wooden floor but you can slip through it and fall to die.

 Anonymous
Majula resident: Hey, where you going today?
Bearer of the curse: Down to the shi*tter, see you Monday.
 Anonymous
Hmm I believe it should be noted on this page that there a Black/Silhouette Great Moth in SotFS. Just before the central gutter bonfire, you have a chance to drop into small room with Swollen Mongrel (if you hit the floor you can even accidentally break into the room) - the moth is just hanging on the wall inside this confined space.

 Anonymous
Surprising to see people say this is worse than Blighttown. When I first got here I expected a nightmare but it's pretty easy? No tough enemies so light a torch, light every sconce you see and it's pretty straightforward. I found Iron Keep and Shrine of Amana far worse than this.

 Anonymous
 Anonymous
 Anonymous
make this jump and continue to the path to the bonfire. oh amd if you fall through the fake floor in between you and the bonfire that we didn't mention until now you'll have to start all over whoopsie teehee

 Anonymous
What is the actual F***ing point of the 2nd campfire?! Some kind of sick joke or serious F*** You from devs?

 Anonymous
found something to do in one paragraph, and then said not to do that in the next paragraph way below a picture... You gotta arrange this a bit better guys...

 Anonymous
After killing the mimic the items dropped through. I went to the bottom and looked up only to see it in the ceiling. While trying to access the 2nd floor I died. The items are gone and the mimic as well. Have I missed them? Do I have to wait till ng+? Use ascetic? Anyway to get them now?

 Anonymous
This area is the worst. seriously. and i went to Blighttown in DS 1 before anywhere else, so I pretty much got destroyed out of the gate\ (I didn't find out until later you aren't really supposed to go there first lol)

 Anonymous
i know everyone hates this place, but i actually love it. when you start to learn the layout, you feel like a genius when you successfully find yourself in the place you wanted to be

 Anonymous
 Anonymous
Worst area in the game, very boring. Every time you die it'll probably be because you fell through a gap in the floor that you didn't notice.

 Anonymous
 Anonymous
 Anonymous
Items falling through the floor, items falling through the floor, items falling through the.... FLOOOOO

 Anonymous
 Anonymous
***** what they did with the mimic that drops the Dark Armor. The item fell through the floor onto a bunch of hallows and while I'm trying to get it Melinda invades and splits my dome so now the item is just gone.

 Anonymous
The 2D map in the sidebar with the white background is probably for DS2 vanilla - a few chest contents are inaccurate to SotFS - but it is SO MEGA HELPFUL. I CANNOT EXPLAIN HOW HELPFUL IT IS.

 Anonymous
So there's really not a Lower Gutter bonfire? I was going crazy, certain there was, since doesn't that make sense from the naming? IF there was only two, why not name the first one, Upper Gutter, and the second, Lower Gutter? Having a 'central' makes it seem like the second out of three! Phoooo, this whole level is INSANE.

 Anonymous
SOTFS : Heide Lance and Heide Knight Iron Mask are not a guaranteed drop: the knight can jump out of the platform on its own. Ok, I poisoned him at first but really T_T

 Anonymous
this are is so easy, i get through there in 2 minutes without dying usually, and don't even need a torch. after going there like 3 to 5 times you know it like the back of ur hand

 Anonymous
 Anonymous
In sotfs version theres an invisible hollow that drops smooth and silky stone at the fog gate before the 2nd bonfire. The sconce on the right

 Anonymous
The gutter is a trashcan, both literally and metaphorically.

 Anonymous
Level reliant on a consumable that can't be bought, decks every Hollow in it with Darkpine Resin. *****in' A.

 Anonymous
Also to note when dropping in to this area (what is said in From The Grave To The Gutter) if u proceed to the lower end of the building instead of going on the platform with the hollow and jars there's a spot that breaks and has u land right next to the bonfire in that area. (this is towards the lower end of the ramp that u fall on to after first coming in to the area

 Anonymous
 Anonymous
The guide is horrible. Without the video I'd have missed half the ways, there's no mentioning of the ladders at the end, not all the scones are mentioned. sorry but this guide probably killed and frustrated me more than it was useful.

 Anonymous
This guide is seriously hard to understand the explanations are all mixed up it tells me to do things then after it tells me to ignore them alot of the locations are inaccurate on how their set up I was literally playing through it while reading this and none of it made sense because half the stuff it said was there wasn't there no I have the game of the year edition for PlayStation 3

 Anonymous
 Anonymous
 Anonymous
FYI the Heide Knight and Aurous set are *not* off a small ramp as the guide says, it's just a ledge that you have to peer down to see that you can fall. Look for the sconce surrounded by 5 dead bodies, one leaning against it. There's a very tall building just next to the ledge a few steps away from the sconce. Go to the ledge, look down, and you'll see a spot you can drop to.

 Anonymous
While I appreciate the effort of whoever tried to make this guide, it's such a huge mess and absolutely impossible to follow. It uses ramp and bridge interchangeably when there are a dozen times that both are available, it generalizes things like "room over there" without any further clarification, and it explains two entire paths before putting as the last sentence of the paragraph "BUT DON'T DO THAT YET."
This is already such a confusing level, this guide honestly just makes it harder.
 Anonymous
 Anonymous
No heide knight or auros set, only ring of evil eye. No mimic either :(

 Anonymous
 Anonymous
Okay but it make no sens I did the entire area without a single problem. I reach the black gulch get killed and now I can make it without an hollow backstabbing me, a mummy exploding on me or falling down invisible holes. I'm about to lose my freaking sanity. It's literally impossible that I got unlucky exactly at the same spot for over 3 hours!

 Anonymous
Anyone else notice the Alien references with the creepy bug queen and the face huggers?

 Anonymous
"It is a Mimic." "Oh, okay. I throw a bomb." *It wasn't a Mimic. Say bye bye to the first cool item set available to you that you didn't buy*

 Anonymous
In the PS4 doesn't rot equip but I lead the little bug to the saint statue and it stop spitting poison. However the bug will not follow me.. I believe if we can get the bugs to follow to the boss path it deactivate the poison statues. Just a theory.

For the regular version (not Scholar of the First Sin), there exists only ONE Fragrant Branch of Yore; it is located at the very end after dropping down to the Black Gulch entrance. Of the other two identified (both being SOTFS only), one is incorrectly said to exist near the end in the ladder room of the regular version

 Anonymous
Now when you light all the torches... it will invade one npc who drops the set of the black witch with the VEIL instead of the hat...

 Anonymous
Someone explain to me why my SotFS version doesnt have the aurous set instead of the ring of evil eye...

There is an area where a Mimic is, I mistook that for a treasure with "Twinkling Titanite and Smooth and Silkies", it drops Dark Armor and Lightning Winged Spear. Its drop WILL drop below to another level of the wooden structure, where it is hard to get to, and I had to go there. When I did, I got the above treasure "Dark Armor" which isnt listed on this page. Message there: Hurrah for Mimicry!

it really needs to be updated, there's several places where i know you can jump to without dying even without the cat ring, and the sconces are all over the place... and i'm not even sure they're in the right places.

 Anonymous
Around the area where you find the Tattered Cloth Set, there is an Estus Flask Shard to be found. I don't remember exactly where, but I know I got it. Also, the part that says: "After lighting the Sconce 3 Hollows will climb the cliff behind you and attack.", is not correct anymore.


For me this was the worst area in any Soulsgame I've played and I played them all. No visibility? Check. Slight misstep at any given time, leading to gravity death? Check. Hollows with a broken sword that can 2-shot you? Check. Mimic in a tiny, cramped room? Check.
I arrived kind of late and over leveled to this area, after clearing Iron Keep and Brightstone Cove Tseldora, but still died more here than those 2 areas combined. I'd say about a good 90% of my deaths were due to gravity even with all the sconces lit, it's still dark. This area is the literal definition of wasting time, they put Blighttown and Tomb of the Giants together and still managed to make it even worse.
1
+10
-1