Sir Tiedemann
“Finely skilled swordsman. Fights gracefully with strong weapons in both hands.”
This is a minimalistic, challenge-oriented PvE build made to showcase the game’s power stance mechanic- a stand-out feature of Dark Souls II. The page includes three main RH1/ LH1 sets that help give the build some small degree of rounding. These variations in equipment will be a vital boon when you find yourself stuck in an area (or if your moves are getting stale!). As a welcome bonus, most of the needed equipment is available early in the game’s progression.
It is important to note that this build is as much stylistic as it is refined. Sitting slightly uncomfortably at SL135, the build is made to never give you more than you need, nor more than you deserve. A fine balance has been struck between necessary strength and audacious disadvantage in the pursuit of becoming a true champion! All stat investments have been chosen with specific breakpoints in mind, and all of the variations in equipment fit neatly in the carry weight allotted.
The page is written with the presumption that power stancing is always enabled.
‘Sir Tiedemann’ is a rough idea I had years ago for a red-headed man who was both a confident duelist and a renowned swordsman. In my initial blurry imagining of a confident man, only a few details were clear. He bore no shield and his frame was slight, but his masterful swordplay spoke for itself. Perhaps most importantly, he was an undeniably charming, rosy-faced man with a dazzling moustache and a flare for the fanciful.”
STATS & OVERVIEW
Lv: 135
Class: Swordsman
Gift: Healing Wares
Below is a rendition of what the peak damage potential of this build could look like. Blue Flame allows both weapons to be enchanted simultaneously- and with a well-executed combo this setup is able to decimate most normal enemies in the game.
| RH1 |
  |
| LH1 |
 |
Of course, Flame Weapon is not without its faults- the build can be operated much more sustainably by focusing on just Magic Weapon. Even so, this build does make some small concessions favouring flare over heightened potential.
| VIG | 35 | ⇒⇒⇒ | 1816 HP¹ |
| END | 28 | ⇒⇒⇒ | 144 Stamina² |
| VIT | 22 | ⇒⇒⇒ | 80.4 Equip load³ |
| ATN | 16 | ⇒⇒⇒ | 3 Slots |
| STR | 22 | ⇒⇒⇒ | *Blacksmith’s Hammer |
| DEX | 24 | ⇒⇒⇒ | *Scimitar |
| ADP | 20 | ⇒⇒⇒ | 99 AGL⁴ |
| INT | 16 | ⇒⇒⇒ | *Witchtree Branch |
| FTH | 5 | — | N/A |
1. boosted 7.5% via Third Dragon Ring from 1690 HP
2. boosted 12.5% via Third Dragon Ring from 128 stamina
3. boosted 12.5% via Third Dragon Ring from 71.5 equip load
4. 99 agility provides 0.4 seconds iframes
*factors that dictate the other stat investments will be detailed in the equipment section
| ♦♣♠♥ |   |
— |  |
 |
|||
 |
— | — |  |
 |
|||
 |
 |
 |
 |
♦♣♠♥ |
Among the living, he was famous for never allowing so much as a slightest nick of tarnish to mark his armor. He seemed to bear his swords and armor in higher esteem than any of the graces ever bestowed to him by Kings or Lords. Some years later, plagued by the despondency of undeath, Tiedemann has had to abandon this legacy. He has found himself hardened through struggle. For the first time, he has learned to test his mettle by trading blows- and in doing so, forgotten his vanity.”
THREE MAIN WEAPONS
| HEIDE KNIGHT SWORD |
SCIMITAR |
BLACKSMITH’S HAMMER |
| This is the first power stance as it requires the lowest investment. Easily the most balanced moveset with regard to managing crowds. | Though a starting weapon, it requires 22 DEX before it can be power stanced. This weapon excels in controlling single engagements and drawn out DPS pressure. | Requires 22 STR to be power stanced. It can be tricky to use, but arguably the most rewarding in terms of raw damage. |
|
|
|
THREE PRACTICAL SPELLS
Magic Weapon |
Flash Sweat |
Repair |
| 50+ magic damage- easily maintainable and highly visually appealing. A trademark spell. | Sits in the back pocket until needed. 300 fire resist. That’s a lot. The most powerful spell in all of Dark Souls. | Utilitarian comfort for the Scimitar. Later becomes an essential option for use in long-lasting boss fights. |
PROGRESSION
GETTING STARTED
The starting class being Swordsman, simple milestones can be set to can follow. The Swordsman starts with a Scimitar +1 and Shortsword +1 already at hand.
- Firstly, kill the ogre in Things Betwixt before greeting the witches. Equip the Stone Ring.
- At the Cardinal Tower, a checklist of items are to be collected.
- Collect the Small Leather Shield from the room above the bonfire.
- Buy a Pharros Lockstone and a small handful of firebombs from Melentia.
- Blow up the breakable wall shortcut and proceed to the right-hand room with the ballistae. In the basement behind a Pharros illusory wall, collect the Chloranthy Ring.
- Before leaving, buy the Travelling Merchant Hat (Silver Serpent Ring optional) from Melentia. Be sure to exhaust her dialogue to trigger her move.
- Move on to Heide’s Tower of Flame. Using the aforementioned items, farm the Heide Knight Sword there.
- Return to Majula. Use the souls farmed to level STR to 16, enabling power stance.
- Before departing, increase INT to 8 (only 1 level) to enable Carhillion’s merchant services. Any remaining souls can be used freely to level up or stock up on items.
- Work through Heide’s Tower and into No Man’s Wharf. Carhillion is waiting at the end- he sells both Magic Weapon and a starter catalyst. ATN 10 is needed before any spells can be cast.
- Blacksmith Lenigrast will gift the Blacksmith’s Hammer once 8k+ souls have been spent on reinforcement. He can alternately be killed for it.
 |
 |
|
 |
||
| — |  |
 |
 |
 |
- Collect the rest of the gear- most notably the Witchtree Branch and the Sea Bow. Complete the base build.
- Both flames
- Second Dragon Ring is given by Tark after defeating the Scorpioness.
- Upgrade order should start with one of the 3 main weapons. The second titanite slab should go to Blue Flame (or Shortsword).
- Following titanite slabs should go to armor, then any extra weapons.
- The Third Dragon Ring is held in the Dragon Shrine.
- The Chloranthy Ring +2 can be earned by using a bonfire aescetic to kill the Chariot boss again.
- Covetous Gold Serpent Ring
- The Ring of Blades +2
| Shortsword |
Blue Flame |
| “Ol’ reliable” This weapon deserves more credit than it gets. It plays a key role in the early progression of this build until it’s made obsolete by the Blue Flame. Unfortunately, Blue Flame supersedes it in almost every way- including a longer reach. The LT thrust attack is the only useful trait it holds over its replacement. |
Being both a catalyst and an improvement upon the Shortsword, it takes over as the permanent left hand immediately upon obtaining it. This weapon also makes possible a signature technique- dual enchanted swords. To achieve this, equip a second catalyst (or flame) in an alternate slot on the opposite hand. |
Collect the rest of the gear- most notably the Witchtree Branch and the Sea Bow. Complete the base build.
Both flames
Second Dragon Ring is given by Tark after defeating the Scorpioness.
Upgrade order should start with one of the 3 main weapons. The second titanite slab should go to Blue Flame (or Shortsword).
Following titanite slabs should go to armor, then any extra weapons.
The Third Dragon Ring is held in the Dragon Shrine.
The Chloranthy Ring +2 can be earned by using a bonfire aescetic to kill the Chariot boss again.
Covetous Gold Serpent Ring
The Ring of Blades +2
ADVANCED DEVELOPMENT
FOREST OF FALLEN GIANTS
Most enemies here are vulnerable to magic- the Turtle Knights being a notable exception. Recommended equips include
 |
 |
|||
| Widely effective in FoFG | Widely effective in FoFG | Not recommended except for Turtle Knights. |
BUILDS
As NG cycles progress and multiple copies of weapons and other equipment become more readily available- the character can begin “power crawling”.
SKILLS, TECHNIQUES & STREAMLINING
“When you drain your stamina completely you get hit with a movement penalty. All attacks, rolls, raising your shield, and using items are delayed. And of course stamina regenerates slower… You will be hit with this penalty until about two seconds AFTER your stamina completely regenerates.” -infamousralphst, GameFAQs
This chart briefly details two important resources that explain everything else you need to know about mobility: agility and roll distance.
There are AGL (iFrames) breakpoints at 88, 92, 96 and 99 (AGL is directly linked to ATN & ADP).
| EQUIP LOAD | ROLL DISTANCE | ⇐⇐unrelated⇒⇒ | AGL | iFrames (seconds) | |||
| 0-9% | 100% | ⇐⇐unrelated⇒⇒ | 86 | 0.2667s | |||
| 10-29% | 95% | ⇐⇐unrelated⇒⇒ | 88 | 0.3s | |||
| 30-49% | 90% | ♥♥♥ | ⇐⇐unrelated⇒⇒ | 92 | 0.3333s | ||
| 50-69% | 80% | ⇐⇐unrelated⇒⇒ | 96 | 0.3667s | |||
| 70-99% | FAT ROLL | 65% | ⇐⇐unrelated⇒⇒ | 99 | 0.4s | ♥♥♥ | |
| 100-119% | FAT ROLL | 65% | |||||
| 120% or more… oh boy | no roll | 60% |
*the findings shown in these charts are not of my own research
COMBO ATTACKING
As a general rule, your combo attacks should begin as:
RB ⇒ LB ⇒ RB ⇒ LB ⇒ x
You may be thinking- ‘Why not more LB inputs as a power stancer?’. The simple answer is the relation between weight and stamina consumption. With some RB hits thrown in, you can chain more total damage (+poise damage) than if you spent it all pressing LB. For example:
LB ⇒ LB ⇒ x
BURNS ALL STAMINA- whereas…
RB ⇒ LB ⇒ RB ⇒ LB ⇒ LT
BURNS ALL STAMINA with 2 extra attacks thrown in.
A critical trick of using your stamina bar is knowing what to do with the last bit before the bar is exhausted. Saving the last bit for an evasive roll or a heavy-hitting LT input are two tricks, and letting the bar regenerate without exhausting it is an exercise often crucial to your own survival.
EQUIPMENT
RINGS
| Slot 1 | STONE RING | Slot 2 | Chloranthy Ring +2 |
 |
This ring is the cornerstone of the build. While playing as a Swordsman, you need to be confident in the impact of your swings. The cumulative poise damage will stagger most humanoids- affording you the relative safety to execute your combos in single engagements. The importance of this ring (as pertaining to this build) in general play cannot be overstated. Conversely, when soloing bosses this ring becomes a major flop. Bracing Knuckle Ring +2 becomes increasingly indispensable as the NG cycles wear on (unless you prefer Repair Powder). Life Ring +2 and Dispelling Ring +1 are two other strong contenders. Plainly put- when boss-fighting, this ring becomes an open slot. |
 |
Easy to understand. Switch to Ring of Binding if you’re dying a lot. Can be swapped for Flame Quartz Ring +2 when fighting Blue Smelter Demon. |
| Slot 3 | Ring of Blades +2 | Slot 4 | THIRD DRAGON RING |
 |
A staple. Note that this ring is practically doubly effective as a dual wielder. Likely the last ring to consider changing. |  |
“Too good to pass up”. While this ring mostly speaks for itself, the benefits will be fully explored below for the sake of clarity. It is recommended to keep a spare in your inventory as it is known to break easily. Firstly and most importantly, the 12.5% bonus means enough added stamina for an LT finisher or an extra RB swing in your combos. Longer combos → more time swinging → more staggering your enemies. Also- to touch briefly on the 28 END- at 28, stamina upticks* by 1. With this in mind, it seems an apt place to stop levelling endurance. Luckily, it also seems to almost always afford you just enough stamina needed for either a retreat roll or an LT finisher. *increases by 2 ticks instead of 1 and only with the ring on A 12.5% VIT bonus also proves invaluable in keeping your equip load below 50%- a major asset in mobility. The 7.5% boost to your HP is nothing to sneeze at, either. *if you decide to run with the hammer, you will need to unequip the sea bow if you wish to stay below 50% equip load |
— alternates —
| Slot 1 | >Life Ring; >Dispelling Ring; >Bracing Knuckle Ring; >Protection Rings; >Ring of Binding (Nashandra); >Old Leo Ring | Slot 2 | >Quartz Rings; >Ring of Binding; >Protection Rings; >Strength Ring; >Cursebite Ring |
| Slot 3 | >Gower’s Ring of Protection; >Ring of Giants | Slot 4 | >Gold Serpent Ring; >Ring of Prayer (Vessel Shield) |
“When you drain your stamina completely you get hit with a movement penalty. All attacks, rolls, raising your shield, and using items are delayed. And of course stamina regenerates slower… You will be hit with this penalty until about two seconds AFTER your stamina completely regenerates.” -infamousralphst, GameFAQs
This chart briefly details two important resources that explain everything else you need to know about mobility: agility and roll distance.
There are AGL (iFrames) breakpoints at 88, 92, 96 and 99 (AGL is directly linked to ATN & ADP).
Column 1 of 2 goes here
| EQUIP LOAD | ROLL DISTANCE | ||
| 0-9.9% | 100% | ||
| 10-29.9% | 95% | ||
| 30-49.9% | 90% | ♥♥♥ | |
| 50-69.9% | 80% | ||
| 70-99.9% | FAT ROLL | 65% |
Column 1 of 2 goes here
Column 2 of 2 goes here
| AGL | iFrames (seconds) | |
| 86 | 0.2667s | |
| 88 | 0.3s | |
| 92 | 0.3333s | |
| 96 | 0.3667s | |
| 99 | 0.4s | ♥♥♥ |
Column 2 of 2 goes here
*the findings shown in these charts are not of my own research
WEAPON SLOTS — RH1/ LH1 ONLY
♥all weapons are to be fully upgraded and infused with lightning.
♥all weapons and their movesets will be particularized with the presumption of enabled power stancing.
HEIDE KNIGHT SWORD ![]() [RH1]
[RH1]
“Not everyone seems to like this weapon. A truly divisive sword in the DS2 community. It really seems like you either love it or hate it.”
This sword is a very effective CC and positioning tool. The LB swing is extremely proficient in managing crowds- being able to swat multiple mobs out of your way at once. LB is a reliable option to knock enemies off of platforms without so much forward motion as to risk falling off yourself. The RB attack also demonstrates limited foward movement while maintaining a serviceable reach.
A unique RB sweep has the benefit of being able to hit enemies on the ground. The RB lands consistently in free-aim when drifting aim to the left or keeping enemies on the right. Players who master the RB will (hopefully) concede two things: that this weapon is a monster in its consistency, and that it demonstrates a healthy aversion to overextending yourself.
Two more high-value moves that this weapon flaunts are its RT/ LT attacks. RT can be used to execute on-the-spot 180º turns for incredible horizontal hit retention. The LT ‘X-Slash’ is a gap-closer that comes in handy when an enemy is just out of range. Executed properly, the move’s forward step will dip you within range and immediately knock them back.
Lastly, and not to be under-appreciated- its light weight and high durability mean you can swing this sword left and right with wild abandon…
| pros | cons |
| ⇑⇑excellent crowd control with LB attacks | ⇓⇓⇓damage falls off substantially |
| ⇑⇑high-tracking RT sweep = great hit retention | ⇑⇓highly divisive moveset- love it or hate it |
| ⇑can hit enemies on the ground | |
| ⇑high durability | |
| ⇑reliable in tight spaces (RB)- keep the wall on your left |
| speed | reach (Y axis) | coverage (X axis) | damage | poise dmg | ||
| RB | 3/5 | 3/5 | 2/5 | 2/5 | 2/5 | |
| RB2 | ||||||
| RT |
|
|||||
| RT2 | ||||||
| LB |
|
|||||
| LB2 | ||||||
| LT |
|
|||||
| sprint + RB | ||||||
| roll + RB | ||||||
| backstab |
SCIMITAR  [RH1]
[RH1]
This is a very stylish weapon that offers high pressure potential. The scimitar excels at sticking to its target, and in many cases its moveset can even be used to dance in-and-out of range while juggling mobs. Juggling being the operative word here, it should be noted that while its single-target pressure is high, its performance versus groups can be found somewhat lacking. That being said, flailing your scimitar wildly into crowds (especially LB) can often stun and net you kills- but it will just as often get you killed.
The RT delivers a point-blank ‘gut punch’ that often thwarts incoming hits via a blow to enemy poise. The LT is a supremely sytlish ‘execute’ attack that spans a wide horizontal berth. When both swords connect it is a very strong attack.
Column 1 of 2 goes here
| RB | RB2 | RT | RT2 | LT | sprint + RB | roll + RB | backstab | |
| speed | ||||||||
| reach (Y axis) | ||||||||
| coverage (X axis) | ||||||||
| damage | ||||||||
| poise dmg |
Column 1 of 2 goes here
Column 2 of 2 goes here
| RB | |
| RB2 | |
| RT |
|
| RT2 |
|
| LB | |
| LB2 | |
| LT |
|
| sprint atk |
|
| roll atk |
|
| backstab |
|
Column 2 of 2 goes here
| pros | cons |
| ⇑⇑⇑strong sticking power | ⇓⇓brittle blade requires attention |
| ⇑⇑strong LT finisher can net multikills | ⇓low potential in crowds |
| ⇑good DPS pressure | |
| ⇑moderate stunlock potential | |
| ⇑also reliable in tight spaces (RB)- keep the wall on your right |
| speed | reach (Y axis) | coverage (X axis) | damage | poise dmg | ||
| RB | ||||||
| RB2 | ||||||
| RT |
|
|||||
| RT2 | ||||||
| LB | ||||||
| LB2 | ||||||
| LT |
|
|||||
| sprint + RB | not a bad attack, but committal and therefore dangerous to miss. typically out-performed by sprint + LB and another attack. | |||||
| roll + RB | ||||||
| backstab |
BLACKSMITH’S HAMMER  [RH1/ LH1]
“This was the 3rd weapon to be added to the arsenal. While I initially disliked the idea of Tiedemann wielding a hammer, its credibility as a weapon was not to be ignored. The hammer has the best poise damage of any of the single-handed size weapons (as far as I am aware).”
This weapon really shines when used against enemies with a large frame and are therefore easier to consistently hit. This weapon is a knockback and hitstun machine. If you notice an enemy has high poise, use this weapon to knock whatever’s in front of you the hell out of your way. Note that this weapon will take you above 50% weight capacity unless you unequip the Sea Bow.
Try asking yourself if you suspect your enemy might be vulnerable to strike damage. Are they sporting metal armor, or even hard, scaly skin? A quick study of enemy’s appearance but also their sound queues provides a valuable hint: if they LOOK or SOUND like they are made of either METAL or STONE- try hitting them with a hammer!
To describe LB as point-blank is an understatement. The enemy basically needs to be rubbing up against your left knee to be used safely. The LB could be called ‘impractical’ except when it immediately follows an RB input. RB followed by a fully-realized LB will achieve great burst damage. The LT can rarely hit up to four times (try on cornered targets or mobs too large to be moved). The RT provides a wonderful hitstun, and can be chained by itself.
| pros | cons |
| ⇑⇑high poise DMG | ⇓somewhat slow overall |
| ⇑⇑easy hitstun (RT) | ⇓vulnerable after swinging |
| ⇑very quick LB when following RB | ⇓⇓awkward LB hitbox |
| ⇑⇑very strong backstab |
♣This weapon hits noticeably harder than the two swords. Its biggest drawback is its LB is awfully close-ranged and it can be tricky to land.♣
| speed | reach (Y axis) | coverage (X axis) | damage | poise dmg | ||
| RB | ||||||
| RB2 |
|
|||||
| RT | 5/5 |
|
||||
| RT2 |
|
|||||
| LB |
|
|||||
| LB2 |
|
|||||
| LT |
|
|||||
| sprint + RB |
|
|||||
| roll + RB | ||||||
| backstab | 5/5 |
SHORTSWORD ![]() [LH1]
[LH1]
The Shortsword serves as the main left hand for simple reasons. It has good durability, serviceable damage and low stat requirements. In short- reliable.
HEIDE LANCE ![]() [RH1]
[RH1]
The inclusion of this weapon is somewhat of an afterthought and is thus dependant on the Strength Ring (replacing Chloranthy) if it is to be power stanced. The best time to bring it out is if you’re struggling with highly aggressive humanoids like the archdrake pilgrims or rampart soldiers who tend to penetrate your defensive bubble quickly. A few jabs from this weapon will bring them down with ease (also useful vs swollen mongrels).
Pairs well with the Estoc.
*if choosing not to power stance, consider swapping stone ring for old leo ring
(Dark) Pyromancy Flame  [RH2]
[RH2]
Only for casting Flash Sweat. Either flame works the same.
SEA BOW ![]() [RH3]
[RH3]
This bow offers the best range of any regular bows in the game. Why bother with anything else? Mostly used for picking and luring enemies with rare instances of sniping them down. Also the preferred method for inflicting poison. Note that when using the hammer, this weapon will likely need to be unequipped to keep below 50% encumbrance.
Small Leather Shield [LH2]
Parry option for the lowest available weight. Highly situational. It’s also very useful to have a shield to use against ashen crawlers.
WITCHTREE BRANCH ![]() [LH3]
[LH3]
Last but far from least, this catalyst features the fastest casting speed and the lowest weight available. This and the low INT investment of 16 make it the only choice for this build. The default Sorcerer’s Staff is more than fine as a substitute- weighing 1 unit more and with less scaling power or speed.
| Light Crossbow | Melu Scimitar | Manikin Sabre | Ashen Warrior Sword | Large Club +8 | Vessel Shield | Estoc |
| Sea Bow alternate- useful when infused with Fire | sometimes useful against swarms | re-distributing (INT/ ATN) allows power stance- big damage improvement. Menacing two-handed | not recommended- necessitates the use of Dexterity Ring to power stance | use with Vessel Shield for crossing the Frozen Outskirts | needs Ring of Prayer | worthwhile investment- pairs with Heide Lance |
ARMOR
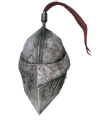
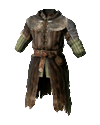
Heide Knight Iron Mask |
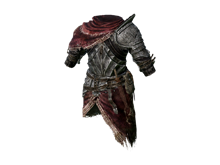
Alva Armor |
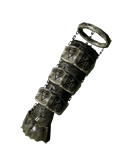
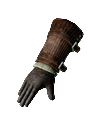
Engraved Gauntlets |
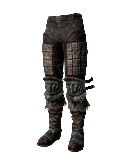
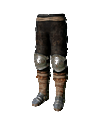
Alva Leggings |
| Kill Ornstein | 16k+ souls spent at Maughlin’s | ENGRAVED GAUNTLETS- Another piece that’s ‘too good to pass up’. A unique piece of armor that gives a 5% chance to inflict 50% more damage with standard attacks, thrown items and spells. The only possible detriment is how popular they are. | 16k+ souls spent at Maughlin’s |
“Among the living, he was famous for never allowing so much as a slightest nick to tarnish his armor. He seemed to bear his swords and armor in higher esteem than any of the graces ever bestowed to him by Kings or Lords. Some years later, plagued by the despondency of undeath, Tiedemann has had to abandon this legacy. He has found himself hardened through struggle. For the first time, he has learned to test his mettle by trading blows- and in doing so, forgotten his vanity.”
| Magic | Fire | Lightning | Dark |
|
|
|
|
|
| FoFG | MAGIC + lightning |
| Heide | magic + lightning / dark |
| Wharf | magic + Fire |
| Bastille | magic + lightning |
| Hunstman | magic + fire |
| Poison Valley & Peak | magic + fire (grave wrdn lgtn) |
| Iron Keep | magic + lightning |
| Woods & Ruins | magic + fire |
The following in an in-depth breakdown of the movesets featured by the three main weapons.
| speed | reach | coverage (X axis) | dmg | poise dmg | notes | |||
| RB | RC | CR | RL |
|
||||
| RB(2) | CR | C | LR | |||||
| RT | RCL | LR | RCL |
|
||||
| RT(2) | C | CC | RCL |
|
||||
| LB | LCR | ??? | C |
|
||||
| LB(2) | RCL | ??? | C | |||||
| LT | C | C | CC |
|
||||
| sprint + RB | C | CC | RL |
|
||||
| roll + RB | C | LR | C | Quick jab. | ||||
| backstab | unmatched damage |
| HEIDE KNIGHT SWORD | RB | RB2 | RT | RT2 | LB | LB2 | LT | roll + RB | sprint + RB | backstab | trait summary |
| speed | 3/5 | — | 3/5 | 4/5 | 3/5 | — | 3/5 | 4/5 | 5/5 | — | [3/5] |
| reach | 3/5 | — | 3/5 | 4/5 | 3/5 | — | 4/5 | 2/5 | 3/5 | — | [3/5] |
| coverage (X axis) | 2/5 | — | 4/5 | 1/5 | 4/5 | — | 2/5 | 1/5 | 1/5 | — | [3/5] |
| damage | 2/5 | — | 3/5 | 3/5 | 4/5 | — | 4/5 | 2/5 | 2/5 | 2/5 | [3/5] |
| poise dmg | 2/5 | — | 3/5 | 2/5 | 4/5 | — | 4/5 | 2/5 | 2/5 | — | [3/5] |
| overall rating | [3/5] | — | [3/5] | [3/5] | [4/5] | — | [4/5] | [3/5] | [3/5] | — | x |
| RB | RB2 | RT | RT2 | LB | LB2 | LT | roll + RB | sprint + RB | backstab | trait summary | |
| ♦♦♦♦♦♦♦♦♦♦♦♦♦♦♦♦♦♦♦♦♦♦♦♦♦♦♦ | ♦♦♦ | ♦♦♦ | ♦♦♦ | ♦♦♦ | ♦♦♦ | ♦♦♦♦ | ♦♦♦ | ♦♦♦♦♦♦♦ | ♦♦♦♦♦♦♦♦♦ | ♦♦♦♦♦♦ | ♦♦♦♦♦♦♦♦♦♦♦♦ |
| SCIMITAR | RB | RB2 | RT | RT2 | LB | LB2 | LT | roll + RB | sprint + RB | backstab | trait summary |
| speed | 3/5 | 4/5 | 4/5 | 3/5 | 3/5 | — | 3/5 | 3/5 | 3/5 | — | [3/5] |
| reach | 3/5 | — | 2/5 | 3/5 | 3/5 | — | 3/5 | 4/5 | 3/5 | — | [3/5] |
| coverage (X axis) | 2/5 | — | 2/5 | 3/5 | 4/5 | — | 5/5 | 4/5 | 3/5 | — | [4/5] |
| damage | 3/5 | — | 3/5 | 3/5 | 4/5 | — | 4/5 | 4/5 | 3/5 | 3/5 | [3/5] |
| poise dmg | 2/5 | — | 4/5 | 3/5 | 3/5 | — | 3/5 | 3/5 | 3/5 | — | [3/5] |
| overall rating | [3/5] | — | [4/5] | [3/5] | [3/5] | — | [4/5] | [4/5] | [3/5] | — | x |
 |
RB | RB2 | RT | RT2 | LB | LB2 | LT | roll + RB | sprint + RB | backstab | trait summary |
| ♦♦♦♦♦♦♦♦♦♦♦♦♦♦♦♦♦♦♦♦♦♦♦♦♦♦♦ | ♦♦♦ | ♦♦♦ | ♦♦♦ | ♦♦♦ | ♦♦♦ | ♦♦♦♦ | ♦♦♦ | ♦♦♦♦♦♦♦ | ♦♦♦♦♦♦♦♦♦ | ♦♦♦♦♦♦ | ♦♦♦♦♦♦♦♦♦♦♦♦ |
| BLACKSMITH’S HAMMER | RB | RB2 | RT | RT2 | LB | LB2* | LT | roll + RB | sprint + RB | backstab | trait summary |
| speed | 3/5 | — | 3/5 | — | 2/5 | 4/5 | 1/5 | 3/5 | 2/5 | — | [2/5] |
| reach | 2/5 | — | 4/5 | — | — | 1/5 | 1/5 | 2/5 | 4/5 | — | [2/5] |
| coverage (X axis) | 3/5 | 4/5 | 4/5 | — | — | 1/5 | 2/5 | 2/5 | 4/5 | — | [3/5] |
| damage | 3/5 | — | 4/5 | — | — | 4/5 | 3/5 | 3/5 | 3/5 | 4/5 | [4/5] |
| poise dmg | 3/5 | — | 5/5 | — | — | 3/5 | 3/5 | 3/5 | 4/5 | — | [4/5] |
| overall rating | [3/5] | — | [4/5] | — | — | [3/5] | [2/5] | [3/5] | [3/5] | [4/5] | x |
 |
RB | RB2 | RT | RT2 | LB | LB2 | LT | roll + RB | sprint + RB | backstab | trait summary |
CONSUMABLES
One thing largely overlooked in FROM SOFT guides is item management.
Assuming that: 1. there’s no imminent danger & 2. VIG 35 (1816 HP)- lifegems can be put to efficient use in making Estus go farther. Below is a table that helps to paint a picture of how:
| current HP | recommended heals | heals |
| 0-10% | Estus + Estus (+ Lifegem) | 1600 HP (+ 500 HP) |
| 11-25% | Old Radiant Lifegem + Lifegem | 1800 HP |
| 26-40% | Radiant Lifegem + Lifegem | 1350 HP |
| 41-50% | Radiant Lifegem (+ Lifegem) | 850 HP (+ 500 HP) |
Having a system helps prevent deaths caused by item fumbling. Assigning slots to types of items really simplifies things. The following is an example- items are arranged in an order that allows for fluid usage & switching. More tips below:
this setup is made for bightstone cove
| I (constant) | II (constant) | III | IV | V |
 |
 |
 / / |
 / / |
— |
| VI | VII | VIII | IX | X |
 / / |
— |  |
— | — |
- slots 1-2 NEVER change
- any projectile in slot 3 helps streamline gameplay
- slots 4-5 are great for heals, Repair Powder
- minimizing selected items is encouraged- you will surely fumble otherwise
| Firebomb | BLACK Firebomb |
| use to clear obstacles like poison jars | use against swarms or clumped enemies |
This build has been written by myself, deemed one of the most excellent builds to take you all the way to the status of champion!
