Dragon Aerie
 Dragon Aerie is a Location in Dark Souls 2. Featured in the Dark Souls 2 reveal trailer surrounded by dragons. The bridge featured in the Dark Souls 2 reveal that is torn apart by a dragon landing on it is in this area. If the player stands too long on the bridge, a dragon will destroy the bridge along with the player, especially if the player destroys some eggs. Destroying more eggs reduces the time before a dragon destroys the bridge while the player is on it. This place is accessed after beating the Guardian Dragon at the top of Aldia's Keep.
The Emerald Herald will relocate to this area to give the player an Aged feather, which can be used as a homeward bone unlimited times. Important note for co-op teams: there is no boss in the Dragon Aerie or Dragon Shrine unless the player attacks the Ancient Dragon. Therefore you will only be able to see the signs of shades/phantoms until then.
SotFS edition: There are 11 crystal lizards in the zone as well as a hefty pile of other loot.
- First dragon area has 2: on a ledge and near the egg pile
- Second dragon area has 3: near entrance, behind the dragon and far side
- Third dragon area has 6: 2 under the dragon, 3 on the far side, 1 in the tunnels
On one path from the start is a petrified hollow. You do not need to unpetrify for a clear but if done and you subsequently use a bonfire ascetic it remains unpetrified.
General Information
- Previous: Aldia's Keep
- Next: Dragon Shrine
- Recommended Levels: 105 to 115
- Boss: None
- Bonfires: Dragon Aerie
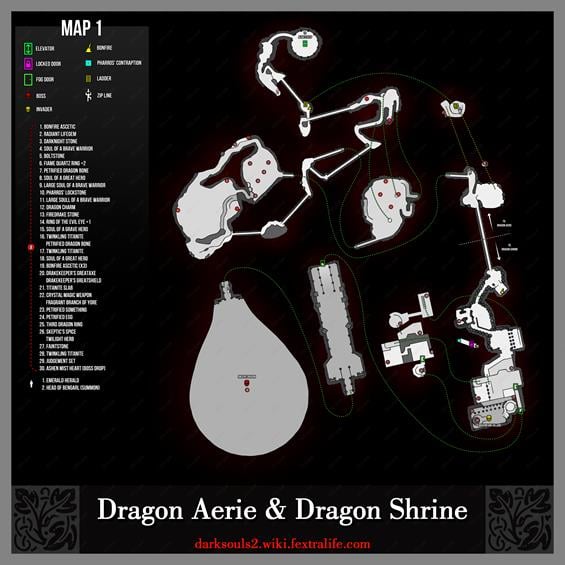
Dragon Aerie Map
NPCs in the Dragon Aerie
Items
Consumables- Twinkling Titanite x2
- Radiant Lifegem
- Soul of a Brave Warrior
- Darknight Stone
- Boltstone
- Petrified Dragon Bone x2
- Soul of a Great Hero x3
- Large Soul of a Brave Warrior x2
- Firedrake Stone
- Dragon Charm
- Pharros Lockstone
- Petrified Something x2
- Note Killing all the Blue Crystal Lizards in the area and picking up all items will yield about x6-10 Twinkling Titanite and x6-10 Petrified Dragon Bone
- Note: The drops from the dragons are completely at random. Sometimes they drop nothing at all. Higher bonfire intensities increases drop rates however)
Enemies
- Rupturing Hollow(Corrosive)
- Blue Crystal Lizards
- Red Dragon
NPC Invasion
Notes
- In NG+, in the cave with the Rupturing Hollow, the drop is 3 x Elizabeth Mushroom.
- The more dragon eggs you have broken, the less time it takes for the wyvern to swoop down, and break the bridge to the Shrine of Dragon.
- Glitch: If you jump attack the third dragon from the cliff, a glitch could happen where you will stay on top of him after you finish the attack, this will cause the dragon to fly into the air and throw very high in the air, killing you
- Glitch: If you got hit on a zipline, you can sometimes defy gravity, as of Calibration 1.07 on 13th June 2014, it'll be fixed so players can no longer defy gravity.
Dragon Aerie Walkthrough
Things to Note
Be wary of breaking the grayish white dragon eggs in this area. If too many eggs are broken, simply rest at bonfire to reset.
- Break 3 eggs - All guardian dragons get a power boost.
- Break 7 eggs - There will be a time limit for crossing the bridge later in the level, to Dragon Shrine, before it gets destroyed.
- Break 10 eggs - The bridge is destroyed and you have no chance of crossing.
Before you begin, consider exploring this area on your own and taking in the epic scenery and layout. Of all the areas, this one is the most visually stunning. It's also pretty easy to get around and you'll probably have a lot more fun with it just on your own. There's not much you can do wrong as long as you remember the rule above, which doesn't really matter since you'll be using your new feather and the big guys don't respawn.
To Skip or not to Skip
As you enter the area, the path splits in two:
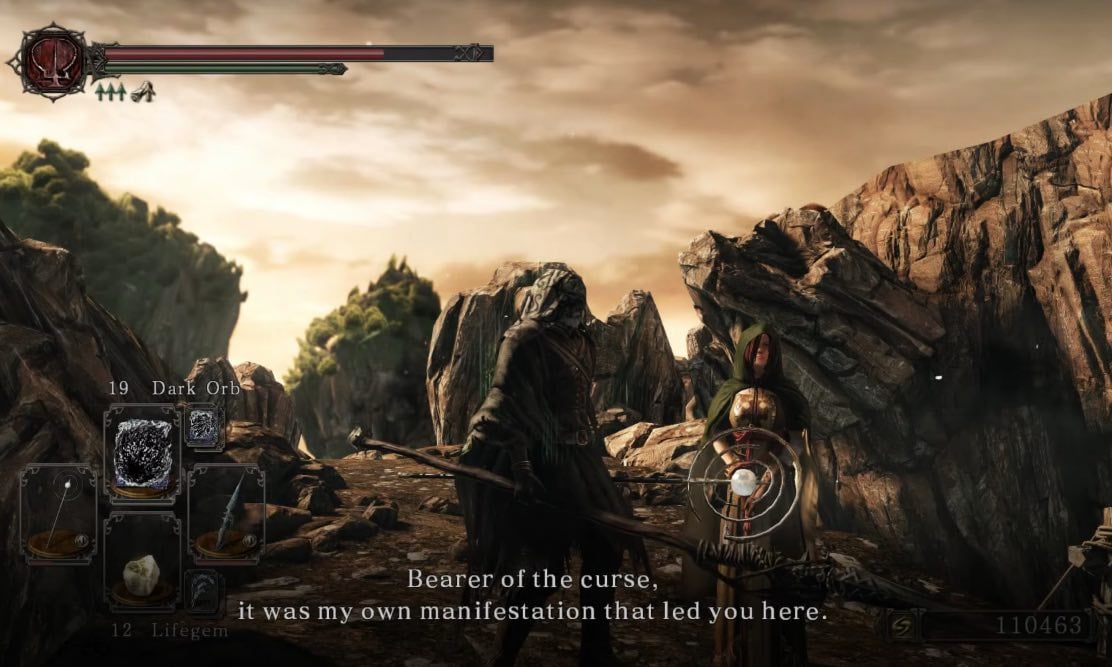
- Following to the right will lead you to a cliff side where The Emerald Herald will engage you in dialogue, revealing that is was she that drew you into this world, and give you the Aged Feather.
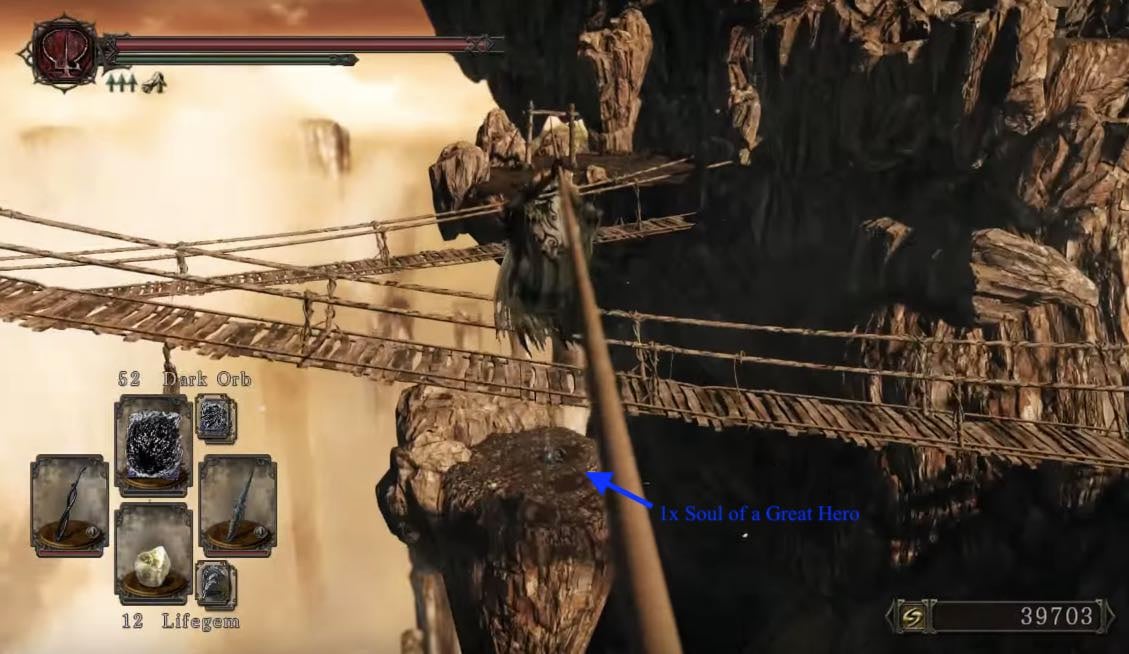
- The path to the left leads to a bridge with a bonfire at the other end. Beside the bonfire is a ladder which leads up to a zipline. This will let you skip the complete area unharmed. Glide across the zipline and drop off -press B/O on your controller- to grab a Soul of a Great Hero. Homeward Bone back to the Bonfire. Climb back up the ladder, cross the zipline and the long bridge to Dragon Shrine. Alternatively, climb down the ladder to explore the area, and continue reading on.
Cave
Back to the bonfire. Exit the room on the opposite side and follow the winding path up to another bridge. This bridge is blocked by a petrified statue at the end. So you'll need a Fragrant Branch of Yore to explore further. Once across the bridge, you will find yourself in a cave, and immediately to your left, a Rupturing Hollow is trying to take you by suprirse; further in the cave, you will find a Bonfire Ascetic. Around the corner is another Rupturing Hollow -the glowing yellow chest indicates that it is corrosive.
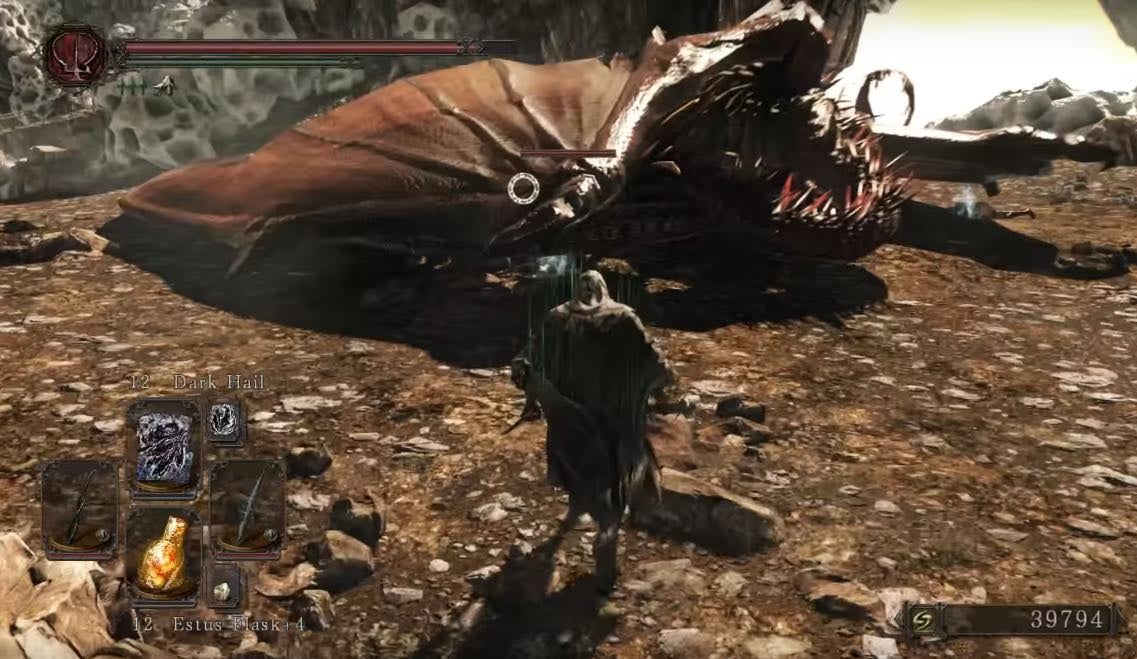
There are two paths, and a recess with a Crystal Lizard and a Radiant Lifegem. The path on the left of the recess leads out to a large area guarded by a Red Dragon. You can dispatch it to enter the proceeding area, and pick up the extensive loot that it was laying on:
Inside the nest with the eggs on this platform lies an Dragon Tooth. There is also a Crystal Lizard on this platform, and another up a ramp to the right, guarded by some Rupturing Hollows. The holes in the floor will drop you back into the cave. To the far left is a bridge looping back round to the path from the right.
Right of the Recess
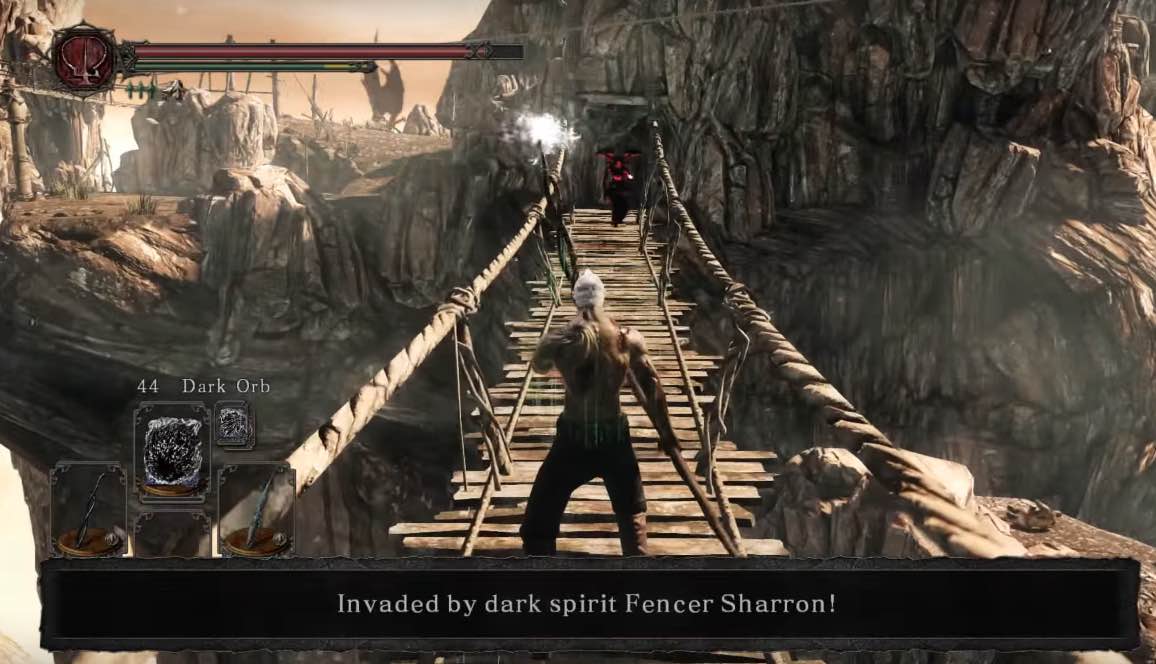
The path to the right of the recess, leads to a bridge and another fork. 3 of those dragon eggs will block your way, you will have to smash at least one to get through. You will be invaded by Fencer Sharron when you try to cross it. At the end of the tunnel, you’ll drop down to a walkway. To the right is a bridge leading to the previous open area, off the side of the bridge you’ll notice a corpse with a glowing treasure. You can’t access it yet, as you’ll need to get to the zipline above it. Follow the bridge to the left, and watch out for the Rupturing Hollow just around the corner. Cross the bridge to your right and follow the path up the side of the hill, then continue to the right, past the Dark Priestess to collect a Petrified Dragon Bone.
Another One
The path splits to the left. A walkway revealing another open area with another Red Dragon, which can also be accessed from the left path. Entering the area will agro the beast so if you've got a strong ranged build, you can simply snipe it from the lower part of the path, or engage in direct combat in the open area. In the open area there are a couple of corpses, each containing one item: a Magic Stone, a Soul of a Great Hero, the other a Large Soul of a Brave Warrior, and 2 Crystal Lizard.
Another One
Again, the path splits into two, the path to the right, past more Rupturing Hollow, leads to a ledge overlooking yet another Red Dragon that you can use to snipe or attack, with spells. Once dispatched, drop down on the ledge to the left to loot the treasure, and down to the next ledge on the right for a Crystal Lizard. Corpses in this area hold:
- 1x Soul of a Great Hero
- 1x Ring of The Evil Eye +1
- 1x Firedrake Stone
- 1x Twinkling Titanite
- 1x Petrified Dragon Bone
- 1x Dragon Charm
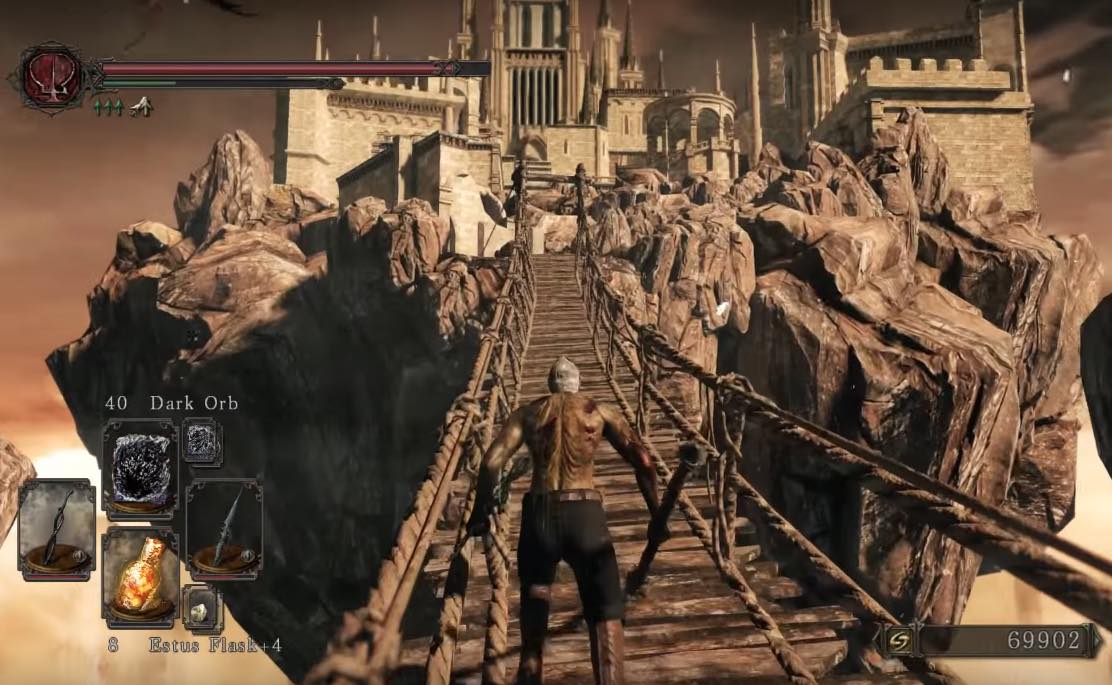
Taking the path to the left brings us back to the previous Dragon area; going over the bridge on the right and past two more Rupturing Hollow, we will end up right in front of the bridge towards Dragon Shrine.
Easy Dragon Strategy
Strategy
An easy strategy for these drakes is to stay underneath them and go for the legs, similar to the Rat Authority fight or Sif from DaS1. Hanging out by one of the legs will bait the stomp attack pretty consistently, which can easily be completely avoided by simply staying directly underneath and running to the other leg, which you can then hit a few times and rinse/repeat.
Make sure to stay directly under when using this strategy; the stomp attack has a pretty wide tracking arc and can easily one hit you if you try backing off or going behind the drake. If you just stay right under his crotch and run to the inside of his other leg, though, he can't bring the stomp further in and will miss you while you get 3-4 good hits in on the other leg.
Resistances
They have very little resistance to lightning as well as poison/toxin, even 4-5 regular poison throwing knives is enough to build the poison meter all the way up. Since the second and third drake are in positions where you can see them before they see you, it's a good opportunity to hit them with poison knives/arrows or dark fog/toxic mist depending on your build, to start of at an immediate advantage. It's also possible to poison the second and third drakes from any number of snipe spots and kill them without having to actually fight them at all.
Equipment Suggestions
Staying under 70% equip load is highly recommended for this strategy to work. Using a +10 lightning shortbow (upgraded the one found in Iron Keep) with 20STR/22DEX, Iron arrows hit for ~111HP per shot and Magic, Dark and Lightning arrows hit for ~200-250HP.
Using the stay-between-his-legs strategy, two-handing a +2 mundane Santier's Spear (broken) with 19 as the lowest stat and gold pine resin did about 1000 damage for every three R1 presses. If you start off with poison and then hug the legs, the fights should be over very quickly with only dodging needed.
General Information
- Previous: Aldia's Keep
- Next: Dragon Shrine
- Recommended Levels: 105 to 115
- Boss: None
- Bonfires: Dragon Aerie
Dragon Aerie Map
NPCs in the Dragon Aerie
Items
Consumables- Twinkling Titanite x2
- Radiant Lifegem
- Soul of a Brave Warrior
- Darknight Stone
- Boltstone
- Petrified Dragon Bone x2
- Soul of a Great Hero x3
- Large Soul of a Brave Warrior x2
- Firedrake Stone
- Dragon Charm
- Pharros Lockstone
- Petrified Something x2
- Note Killing all the Blue Crystal Lizards in the area and picking up all items will yield about x6-10
- Twinkling Titanite and x6-10
- Petrified Dragon Bone
- Note: The drops from the dragons are completely at random. Sometimes they drop nothing at all. Higher bonfire intensities increases drop rates however)
Enemies
- Rupturing Hollow (Corrosive)
- Blue Crystal Lizards
- Red Dragon
NPC Invasion
Notes
- The more dragon eggs you have broken, the less time it takes for the wyvern to swoop down, and break the bridge to the Dragon Shrine.
- Glitch: If you jump attack the third dragon from the cliff, a glitch could happen where you will stay on top of him after you finish the attack, this will cause the dragon to fly into the air and throw very high in the air, killing you
- Glitch: If you got hit on a zipline, you can sometimes defy gravity, as of Calibration 1.07 on 13th June 2014, it'll be fixed so players can no longer defy gravity.
Dragon Aerie Walkthrough
Things to Note
Be wary of breaking the grayish white dragon eggs in this area. If too many eggs are broken, simply rest at bonfire to reset.
- Break 3 eggs - All guardian dragons get a power boost.
- Break 7 eggs - There will be a time limit for crossing the bridge later in the level, to Dragon Shrine, before it gets destroyed.
- Break 10 eggs - The bridge is destroyed and you have no chance of crossing.
Before you begin, consider exploring this area on your own and taking in the epic scenery and layout. Of all the areas, this one is the most visually stunning. It's also pretty easy to get around and you'll probably have a lot more fun with it just on your own. There's not much you can do wrong as long as you remember the rule above, which doesn't really matter since you'll be using your new feather and the big guys don't respawn.
To Skip or not to Skip
As you enter the area, the path splits in two:
- Following to the right will lead you to a cliff side where The Emerald Herald will engage you in dialogue, revealing that is was she that drew you into this world, and give you the Aged Feather.
- The path to the left leads to a bridge with a bonfire at the other end. Exit from the opposite side and follow the winding path up to another bridge. A Rupturing Hollow is clearly visible at the other end, and can be sniped very easily, avoiding the risk of getting blown off the bridge by his explosion.
First of the Drakes
Once across the bridge you will find yourself in a cave with two paths and a recess with a wall of three eggs separating you from a Crystal Lizard and a Radiant Lifegem.
The path to the left leads out to a large area guarded by a Red Dragon. Directly to the right, if you are fast enough is a Crystal Lizard, between some dragon eggs is a Dragon Tooth, a Darknight Stone sits on the edge of a hole in the floor. Kill the other Crystal Lizards and loot the corpses for a Soul of a Brave Warrior and a Boltstone. The holes in the floor will drop you back into the cave. To the right is a path leading up to another Crystal Lizard. To the far left is a bridge looping back round to the path from the right.
To the Second Dragon
The path to the right of the recess in the cave is blocked by more eggs, and leads to a bridge and another fork. At the end of the tunnel, you’ll drop down to a walkway. To the right is a bridge leading to the previous open area, off the side of the bridge you’ll notice a corpse with a glowing treasure. You can’t access it yet, as you’ll need to get to the zipline above it.
Follow the bridge to the left, and watch out for the Rupturing Hollow just around the corner. Cross the bridge to your right and follow the path up the side of the hill. Follow the path to the right and smash through the dragon eggs to collect a Petrified Dragon Bone. The path splits again to the left to a walkway revealing another open area with another Red Dragon, which can also be accessed from the left path. Entering the area will immediately aggravate the Red Dragon that drops a Petrified Something. In the open area there are a couple of corpses, one holding a Soul of a Great Hero, the other a Large Soul of a Brave Warrior, and there's another Crystal Lizard.
Loot City
Again, there are two paths, the path to the right, leads to a ledge overlooking another Red Dragon that you can use to snipe him or attack him with spells. This one drops a Twinkling Titanite and a Petrified Something. Once dispatched, drop down on the ledge to the left to loot the treasure, and down to the next ledge on the right for a Crystal Lizard. Corpses in the area hold:
- 1x Soul of a Great Hero
- 1x Ring of The Evil Eye +1
- 1x Firedrake Stone
- 1x Twinkling Titanite
- 1x Petrified Dragon Bone
- 1x Dragon Charm.
A path to the left, blocked by some more eggs, leads back up to the area where the previous dragon was. To the right is a ledge that you can drop down to, to obtain a Large Soul of a Brave Warrior and a Pharros Lockstone. Homeward Bone or use the Aged feather to go back to bonfire, and retrace your steps to the main path.
Path to the Shrine
Back on the main path, cross the bridge. Immediately to the left is a zipline leading back to the Bonfire and to the right a bridge leading to the castle.
Take the zipline and hug the path to the right to find a hole in the ground with a ladder leading down to the Bonfire. It’s the same one as earlier, so climb back up the ladder to get back on the correct path. Just past the zipline drop down to a ledge to grab the Twinkling Titanite then Homeward Bone back to the Bonfire. Climb back up the ladder and take the zipline across to the castle.
Remember the treasure on the pillar you could see from the bridge earlier? Glide across the zipline and press the "B/O" button to drop off and grab a Soul of a Great Hero. Homeward Bone once again, or drop of the edge, to warp back to the Bonfire. Climb back up the ladder, take the zipline to its completion, and the long bridge to Dragon Shrine.
Easy Dragon Strategy
Strategy
An easy strategy for these drakes is to stay underneath them and go for the legs, similar to the Rat Authority fight or Sif from DaS1. Hanging out by one of the legs will bait the stomp attack pretty consistently, which can easily be completely avoided by simply staying directly underneath and running to the other leg, which you can then hit a few times and rinse/repeat.
Make sure to stay directly under when using this strategy; the stomp attack has a pretty wide tracking arc and can easily one hit you if you try backing off or going behind the drake. If you just stay right under his crotch and run to the inside of his other leg, though, he can't bring the stomp further in and will miss you while you get 3-4 good hits in on the other leg.
Resistances
They have very little resistance to lightning as well as poison/toxin, even 4-5 regular poison throwing knives is enough to build the poison meter all the way up. Since the second and third drake are in positions where you can see them before they see you, it's a good opportunity to hit them with poison knives/arrows or dark fog/toxic mist depending on your build, to start of at an immediate advantage. It's also possible to poison the second and third drakes from any number of snipe spots and kill them without having to actually fight them at all.
Equipment Suggestions
Staying under 70% equip load is highly recommended for this strategy to work. Using a +10 lightning shortbow (upgraded the one found in Iron Keep) with 20STR/22DEX, Iron arrows hit for ~111HP per shot and Magic, Dark and Lightning arrows hit for ~200-250HP.
Using the stay-between-his-legs strategy, two-handing a +2 mundane Santier's Spear (broken) with 19 as the lowest stat and gold pine resin did about 1000 damage for every three R1 presses. If you start off with poison and then hug the legs, the fights should be over very quickly with only dodging needed.
 Anonymous
after the petrified statue near the first bonfire there's a drake with a corpse huddled up underneath it's neck
it may be a dead body that's surprisingly sweet
I wish I had something like that
was just invaded here by Forlorn (Scythe). It was after the Dragon Tooth pickup, across a bridge. It's the small island where 3 Yellow Cored Undead Citizens ambush you, between two bridges :D

 Anonymous
 Anonymous
The realism in this game is amazing. Like how the second red dragon can breathe fire through 20 meters of rock and not only take half my health but knock me off a cliff as well. Why not? Makes total sense to me.

 Anonymous
You've missed the 3 rupturing hollows all bunched up in a tunnel after the fencer sharron invasion. Thankfully they are all facing the opposite direction otherwise kaboom goes the dynamite.

 Anonymous
trying to 1 cycle the crystal lizards is the true final boss of the series

 Anonymous
this page refers to "rapturing hollow" a typo meaning "rupturing hollow" but that typo breaks the link to their respective page

 Anonymous
Could be mis-remembering, but in the vanilla version, I thought the ladder that led to the zipline to skip the area wasn't there initially. It would appear only later, after you progressed through the area normally. Can anyone confirm?

 Anonymous
Heey guys. I didn't find Emerald Herald at the Dragon Aerie like all the tutorials said. I did something wrong? I would like to get the Aged Feather. It's a bug or something?
Thanks
 Anonymous
 Anonymous
There is a missing enemy here. He is near a dragon, looks like a priest and shoots lightining.

 Anonymous
 Anonymous
 Anonymous
 Anonymous
The bridge gets broken regardless if you have broken any eggs or not.
I'm assuming broken eggs just change the timer to be more or less lenient after the seventh?
 Anonymous
 Anonymous
 Anonymous
 Anonymous
In the base game this area is a cool fun romp, but scholar of the first sin edition of course had to turn it into complete goddamn CBT

This could have been the best area of the game if they had put actual enemies with proper tie-in with the lore of the place instead of those exploding mummies...

 Anonymous
 Anonymous
Bro on both fights with the dragons those 2 dumbass broke almost all of their eggs wit htheir stupid tail attack
But i bet that the game still count as if I destroyed them ?
 Anonymous
First dragon area has 4 crystal lizards, second one 3, third one 2 and there is 1 at the beginning in the cave past the bonefire.

 Anonymous
Might as well just get naked when you explore this place. Especially remove your rings, as they are excessively expensive to repair

 Anonymous
I maybe wrong but I don't think the number of lizards for each dragon is correct. In the third dragon area I was only able to find 2 while there are more than 2 in the first area. Someone has the correct number? I'm farming there so I don't want to miss out anything.

 Anonymous
I’m not exactly sure the above information about Crystal lizard locations is correct.

 Anonymous
 Anonymous
 Anonymous
I want to like this area because in hindsight it isn't really a bad area.
But I had such a ****ing awful experience with it that I can't help but despise it.
Long story short, **** Aldia, he got me killed when I was running from Forlorn with all my armour broken because I didn't realise the mummies degrade equipment.
 Anonymous
Beautiful area. I wonder if Archdragon Peak took some inspiration from it. Shame about the exploding mummy ******* spam but whatever.

 Anonymous
Why does this guide bring up the Aged Feather if only one paragraph latter, it tells you to use even more Homeward Bones? If you have the Aged Feather then Homeward Bones are wasted souls.
It literally tells you to get the Aged Feather (infinite bonfire teleportation) and then immediately ignores it again to try to get you back to using consumables you need to spend souls on.
Also, you need to double tap on B on an Xbox Controller to dismount from a zipline. This is advice for anyone trying to get those items you need to make a gamble drop for, because someone thought there weren't enough falling deaths in this game, i.e, 95% of all deaths.
 Anonymous
I'm surprised to see all the complaints about the pretty unchallenging corrosive hollows and none about the multiple places where you can drop down to get an item but can't get back up again, forcing you to use the feather and go all the way back to the bonfire. I don't remember any of the other Soulsborne games intentionally placing items in pits you can't escape from, let alone multiple in the same area.

I'm glad they made it so that you can just bypass this zone if you choose. By the time I got here, I had already done all the DLC and had no use for any of the loot.

 Anonymous
you can avoid spending a branch, by taking the shortcut and going in the zone in reverse.

 Anonymous
The bridge collapsing is the coolest death you can have in this game

 Anonymous
 Anonymous
An ancient secret haven for dragons above the clouds, and they fill it with the exploding zombies from Lost Bastille.
This could've been one of the most epic and awe-inspiring areas of the entire soulsborne series, and they ****ed it up with an obnoxious reused enemy that makes zero thematic sense.
What the hell were they thinking?
 Anonymous
The first dragon had like 4 crystal lizards. Definitely more than 2.

 Anonymous
People having trouble in this area: stay between the legs of the dragons. Do not lock on. Keep hitting them and just dodge (you don't even need to roll) the legs and tail attacks. When the dragon you are fighting starts flying, run to the edge of the arena, but not in a straight line, since it may be preparing a fireball instead of the firebreath. Once it's attack resumes, run by his side (not straight to its face, it may be preparing a fire breath attack) and under its legs and just repeat. Once you learn the attacks it's a piece of cake and can start farming the ore with impunity.

 Anonymous
 Anonymous
I've beaten DS2 50 times, (I know I'm crazy) and on my 50th run I just found out that if you take too long to cross the final bridge, or in my case stop to take in the view, you'll go Into a parried state, fall on your back and a drake will land on the bridge and destroy it. 50 runs and I've never seen that! I swear, every time I play DS2 I always find something new. I love this game so much.

 Anonymous
This area gave me motion sickness (cause of the background I guess), gotta crawl back to the cave/castle.

 Anonymous
The wiki never mentions this : You can get all the loot under the sleeping dragons without attacking them just by walking up to them.
Also, what a disappointment of an area. Looks amazing, but its so tiny.
"Before you begin, consider exploring this area on your own and taking in the epic scenery and layout. Of all the areas, this one is the most visually stunning."
I didn't know Hbomberguy edited this wiki.
"It's also pretty easy to get around and you'll probably have a lot more fun with it just on your own."
It's easy in the sense that you can literally skip the whole area. Kind of sad this is one of the best areas in the game.
 Anonymous
I like how in sotfs they put an ascetic right there because they know exactly what you're up to

 Anonymous
We should get out of here-> continue the line if you get the refrence

 Anonymous
 Anonymous
So if you destroy 10 eggs it's basically game over since u can't progress further to get the mist heart?

 Anonymous
Annoyed by the hollows that break all of your equipment? Take off all rings and armor, they won't destroy your weapons or shields. This area is trivially easy after I realized that I didn't have to spend 20,000 souls every time I died to those stupid gang bangers.

 Anonymous
No mention of the Dark Priestess or petrified dragon bone by the lead up to the ledge overlooking the second dragon?

 Anonymous
I found that the best way to deal with the dragons in this area was by gitting gud

 Anonymous
 Anonymous
I’m playing sotfs, and ran through the level upon entering it, didn’t touch a single egg, nor kill a dragon, and he still broke the bridge. I took the zip line to the bridge, so idk if it’s egg or time related. I think it depends on how long you’re on the bridge.

 Anonymous
 Anonymous
these lizards seem impossible to kill before they despawn or you bounce off a wall 2-3 times on higher NG+'s. I don't even bother anymore.

 Anonymous
 Anonymous
I really hate the fact that I got forcefully thrown upon eggs thus crushing them, it was near the sleeping dragon, and from nowhere these *****tard hollows came and jumped on me and exploded, throwing me upon eggs without me wanting it, now I had to deal with the *****ing sleeping dragon and now I buffed/boosted those soldiers as well????? I *****ing hate this.

 Anonymous
This is by far the best area to burn bonfire ascetics because of the large number of rare materials, weak enemies, and lack of a boss. As another commenter said, it's super easy to shoot poison arrows at the dragons and dispatch them with no risk to yourself. Every single one sleeps in an area surrounded with elevations. After you dispatch the rapturing hollows (takes me 1 arrow each), take up that elevated position and start shooting. Note that 1 out of the 3 dragons will still be able to breathe fire at you, in which case you should wear fire resistant armor and rings, and use flash sweat or GMB to get 900 fire resist.

 Anonymous
the dragons in this area are all passive in SOFTS unless u break an egg or attack them, so for people that have difficulty, just dun attack or break eggs :D

The easiest strategy I found for dispatching dragons is using poison arrows, takes around 4-6 to start the poison damage and it drains about a quarter of their life, dependent on stat investment. Don't even need to get close.

 Anonymous
In case anyone was looking here is the list of stuff you get:
Titanites
Titanite shards: 6
Large titanite: 6
Titanite chunk: 3
Twinkling titanite: 6
Dragon bone: 6
Embues
Blot stone: 1
Raw stone: 1
Magic stone: 2
Faint stone: 1
Dark stone: 2
Fire stone: 1
pale stone: 2
Bleed stone: 1
other:
petrified something: 1
lock stone: 1
Bonfire ascetic: 1 (so you can farm all day long)
Elizabeth mushrooms: 3
old radiate life gem: 1
Dragon tooth: 1 (weapon)
Flame quartz ring +2: 1
ring of the evil eye +2: 1
Fire tempest: 1 (pyromancy)
soul of a brave warrior: 3
If I am missing anything add it in a reply
 Anonymous
 Anonymous
I found its really easy if your wearing light armor to stay away and trigger the flame breath and as soon as it lifts it's head run to its side and hit it 2-3 times and repeat. You stay out of the range of any attacks (lightning halberd+10 two handed killed them in about 8-9 hits usually)


The basic tactic for this place is... Not equip anything except your weapon.. And maybe shield.
0
+10
-1