Dragon Shrine
 Dragon Shrine is a Location in Dark Souls 2. The Dragon Shrine is home to the Ancient Dragon, and a gauntlet of powerful enemies including many Dragon Knights. It is recommended to bring many healing items and equip weapons that can stagger enemies or afflict poison/bleed on them. After meeting the Ancient Dragon the player will receive the Ashen Mist Heart which allows them to access the Memories of the Ancients to unlock the Giant's Kinship and face the final boss at the Throne of Want or unlock additional Souls of Giants which weaken King Vendrick defenses significantly.
General Information
- Previous: Dragon Aerie
- Next: Memories of the Ancients
- Recommended Levels: 105 to 115
- Boss: Ancient Dragon
- Bonfires: Shrine Entrance
Dragon Shrine Map
NPCs in Dragon Shrine
Items
Consumables- 3x Bonfire Ascetic
- 1x Petrified Dragon Bone
- 1x Twinkling Titanite
- 1x Twilight Herb
- 1x Skeptic's Spice
- 1x Titanite Slab
- 1x Crystal Magic Weapon
- 1x Staff of Wisdom
- 1x Petrified Egg
- 1x Ashen Mist Heart
- 1x Drakekeeper's Greataxe
- 1x Drakekeeper's Greatshield
- 1x Black Dragon Greataxe
- 1x Watchdragon Parma
- 1x Washing Pole
- 1x Third Dragon Ring
- 1x Mask of Judgement
- 1x Robe of Judgement
- 1x Manchettes of Judgement
- 1x Tights of Judgement
Enemies
NPC Invasion
Boss
- Ancient Dragon (Optional - drops Giant Soul)
Notes
- ??
Dragon Shrine Walkthrough
Friendly Locals
After arriving from the Dragon Aerie through the bridge, there is a bonfire in a small building left of the stairs. Interact with it to recieve a surprise visit from the Scholar of the First Sin. When he finishes with his dialogue, he will disappear and make the bonfire available for activation.
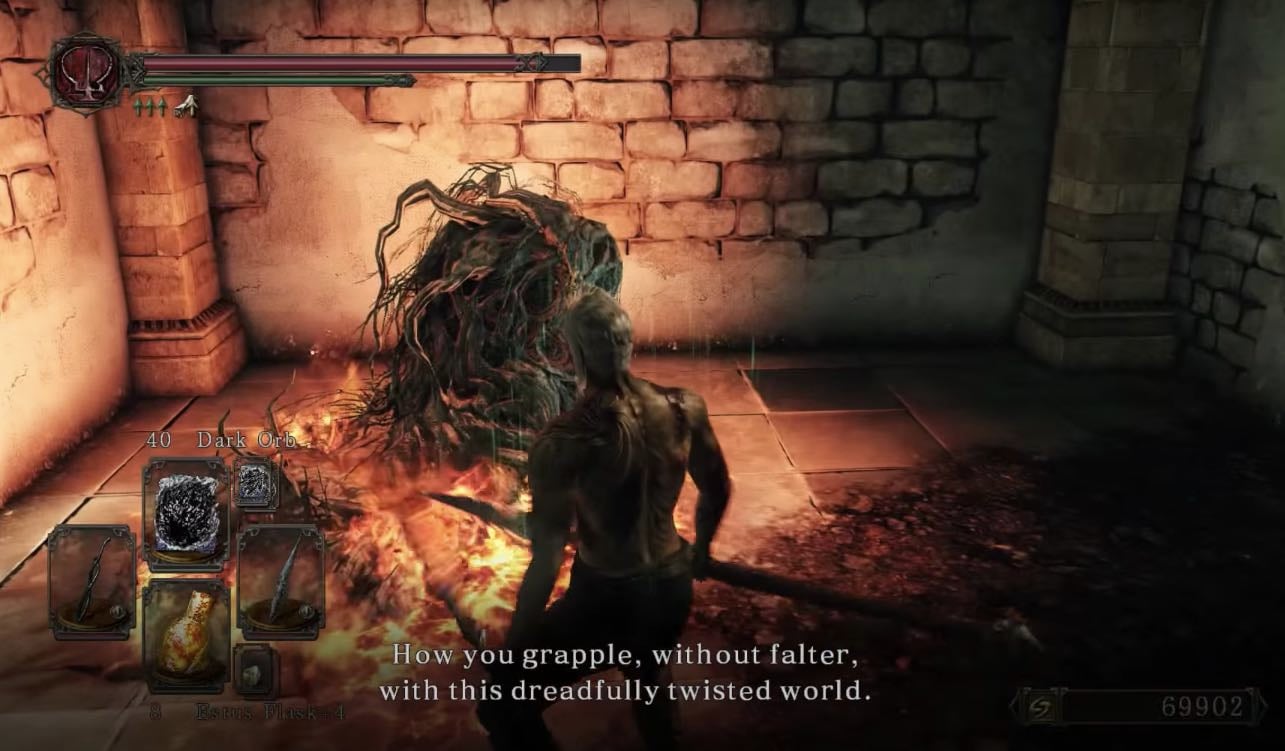
Head up the stairs and you will face a Drakekeeper. The Dragon Knights in this area will be non-hostile, even going as far as performing gestures, unless the player has joined the Dragon Remnants Covenant or you flee from a battle against the Drakekeeper. Note that having a white phantom present in your world will also trigger the Dragon Knights to become hostile on sight. Behind them, in the arches under the upcoming stairs, is a Pharros' Contraption which reveals an illusory wall on the left. Inside is a metal chest with the Judgement Set. Take a right just before the stairs and go through the doorway to find a metal chest with 3x Bonfire Ascetic.
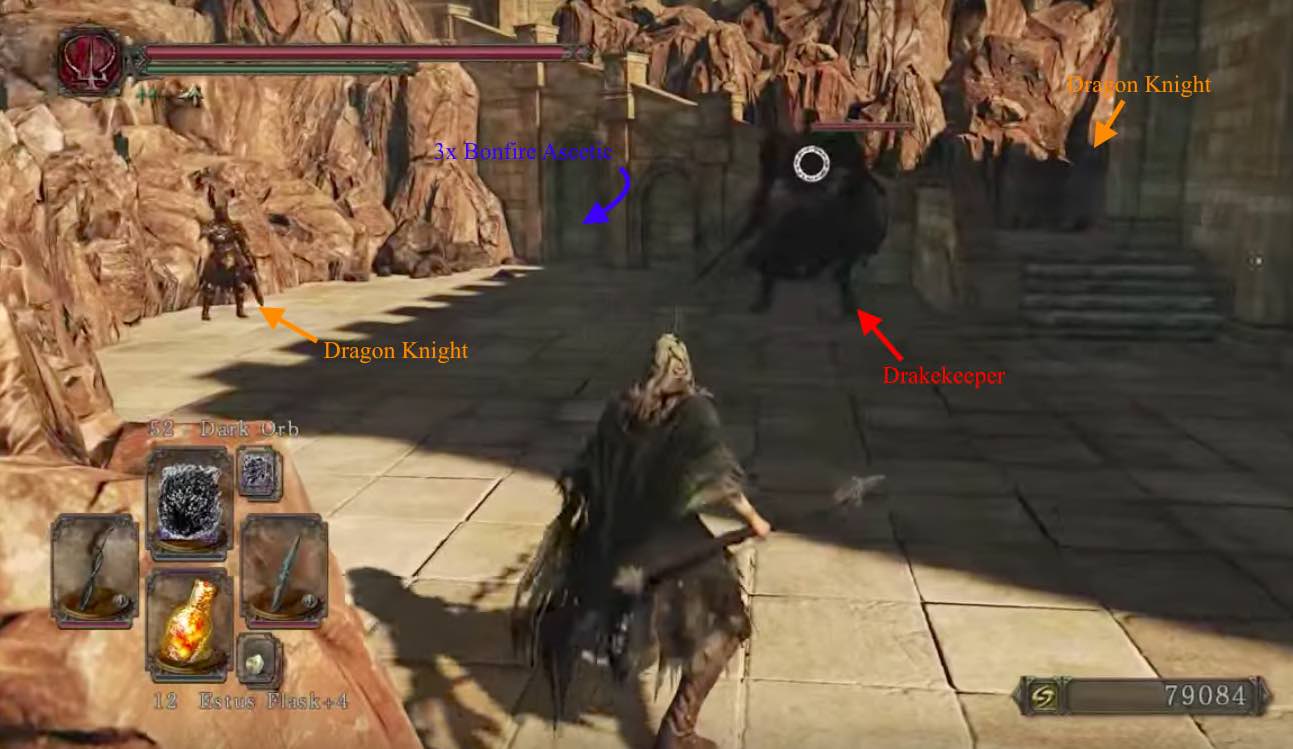
Having looted it, continue up the aforementioned stairs -passing another passive Dragon Knight- and you will find a Drakekeeper ready to attack. Not only is there the added pressure of two Dragon Knights watching, this Drakekeeper also wields a two-handed which makes this fight trickier than the sword-wielding one earlier. This enemy has a relentless flurry and is only open to larger attacks after he swings his mace overhead and smashes it into the ground.
- Melee - Try to keep still and lure him into such an attack.
- Alternatively, fight him from below on the stairs and most of his attacks will swing over you.
- Ranged - Lure him back to the stairs you came up and safely snipe him from there.
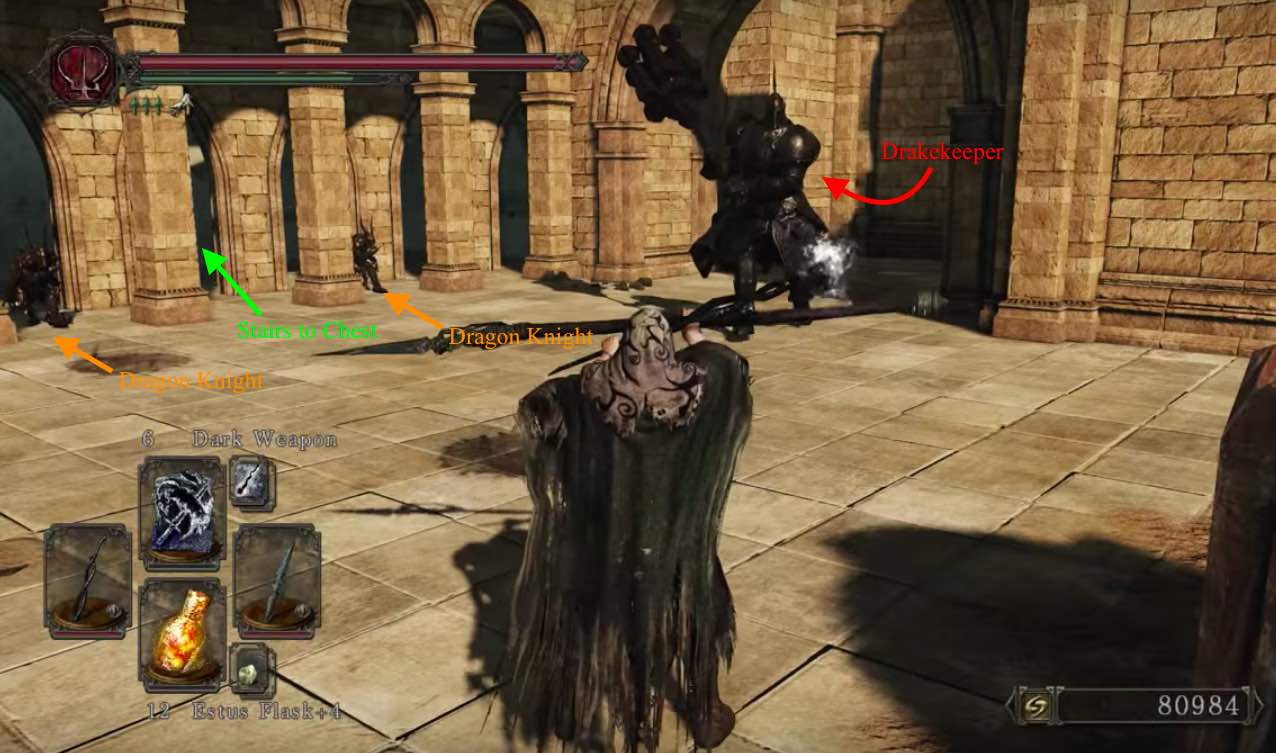
Continuing through the arches guarded by the two Dragon Knights, and up the first flight of stairs will be a chest containing a Twinkling Titanite. There will be another set of stairs to climb into a gazebo-esque structure with two Dragon Knights and a Faintstone. Jump across through the opening in the railing to the next platform to find a metal chest on the right, with a Drakekeeper's Greataxe and Drakekeeper's Greatshield.
Egg Hunt
Drop down to the stairs below and head up to find another Drakekeeper with a sword, and another two Dragon Knights. After he's dealt, head left of the stairs to drop down into a lower level and find a chest containing a Titanite Slab. On the left, before going under the stairs and through the doorway, there is a summon sign for Bashful Ray, but be carefull, as with the white Phantoms, this will make the Dragon Knights be hostile towards you as long as he is around. If you don't intend to fight the Dragon Knights, you can simly banish Ray again with the Black Separation Crystal. Proceed through the doorway to find Drakeeper -wielding a Great hammer and Greatshield- and a Dragon Knight. To the right of the Knight, is a corpse holding Skeptic's Spice and Twilight Herb.
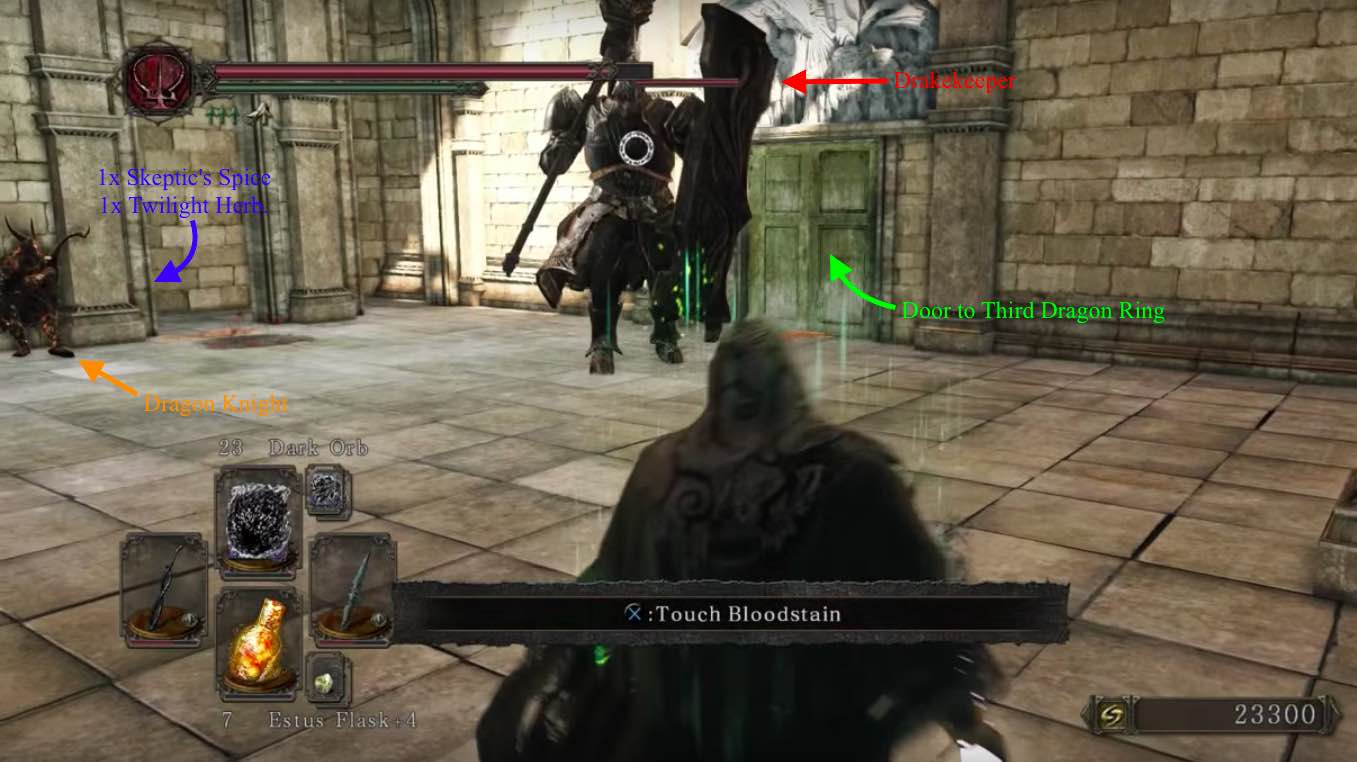
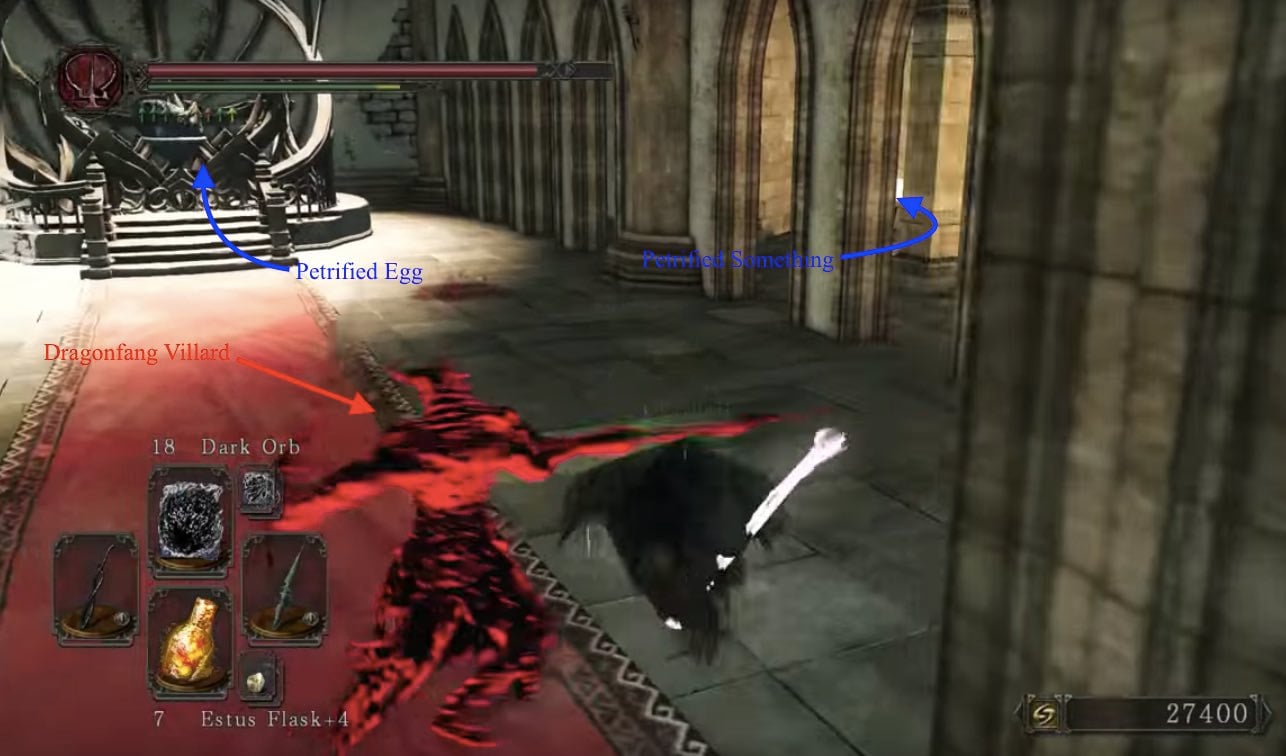
Going through the door, inside is a metal chest containing Third Dragon Ring, that triggers the invasion of Dragonfang Villard upon opening, and a long staircase up. While the invasion is in motion, he actually spawns upstairs at the shrine and will wait for you there. Once defeated, feel free to take the Petrified Egg from the shrine here; this item is use to join the Dragon Remnants later, after you give it to Magerold of Lanafir at Iron Keep.
Route to the Ancient Dragon
Now head to the edge at the right side to find another metal chest containing a Petrified Something, then drop down once again onto the ledge below for another metal chest containing the Crystal Magic Weapon spell, and a Fragrant Branch of Yore. Drop down one final time to arrive at the landing you initially dropped off to find the chest with the Titanite Slab.
Opening the wooden door and another wooden door will lead to a massive staircase leading up. You'll immediately notice the rows of Dragon Knights lined up on either side of the staircase, and may be intimidated. Don't worry, as the same rules apply as all the others, and will not attack you unless provoked.
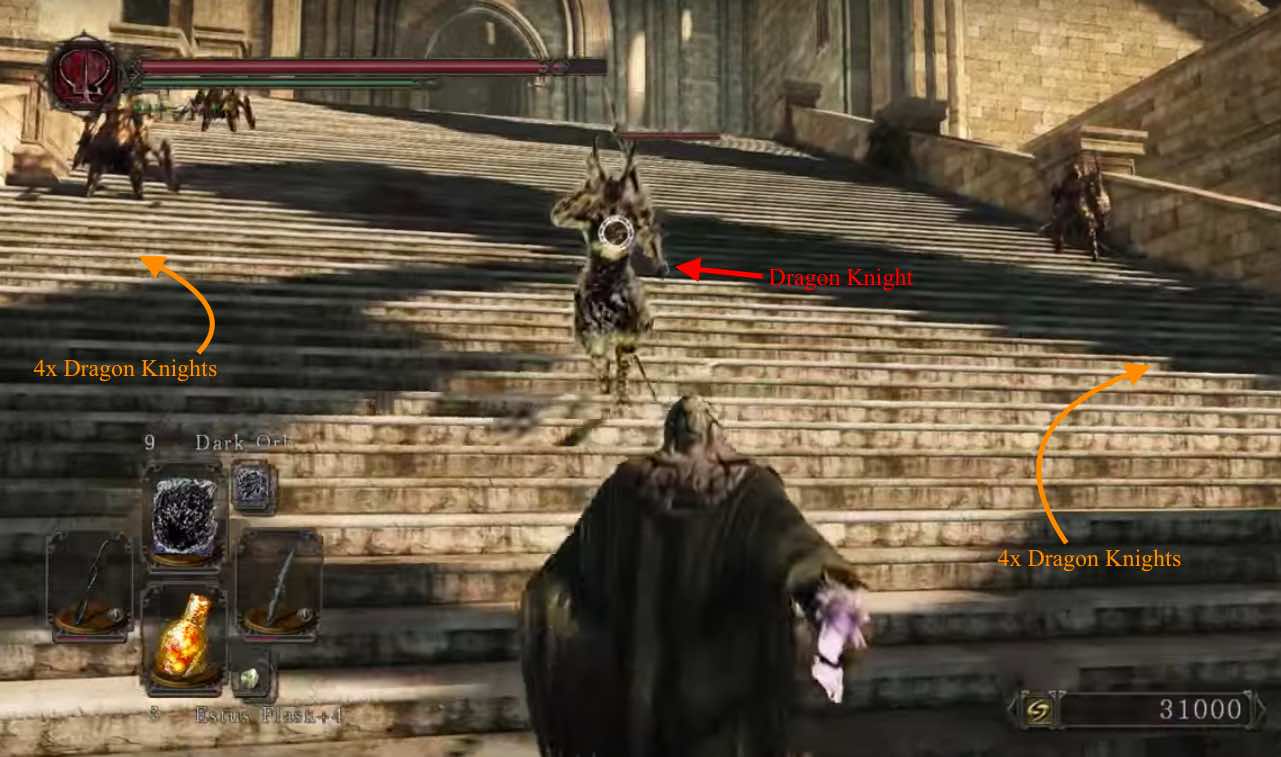
That being said, out of the total 9 on the stairs, the one at the top, in the middle is the only one that will aggro automatically. Defeat him then proceed past the eight on the stairs, and the three in the subsequent corridor. Through here, you'll come out onto a large open platform with the Ancient Dragon waiting for you. Talking to the ancient one will award you with the Ashen Mist Heart. This can be used to access the various Memories by interacting with overgrown bodys of the Giants in Forest of Fallen Giants (progress), Brightstone Cove Tseldora, Undead Crypt (DLC Memory) and Iron passage (DLC Memory).
You can also choose to fight him or not, but there's no real need to.
BOSS FIGHT: Ancient Dragon
Enemy Strategies
Drakekeepers
- These enemies hit hard, and some of them are relatively fast for their size.
- They are vulnerable to bludgeoning attacks, and weapons such as the Large Club or Great Club devastate them. With a strength of around 40 and a fully upgraded weapon, expect them to drop after 2 or 3 hits. If you are using such weapons, it's recommended to use hit and run tactics in order to avoid their oft devastating attacks.
- They are vulnerable to fire. An effective tactic is to simply circle around them to the right and hit them in the back 1-2 times, bait their combo, then repeat.
- For the swordsman, he will do a downward strike or sweep both ways, and the maceman will slash twice in either direction.
- Block his sword attacks if you have a shield and he will be easy to kill, as he leaves a window after his attacks to land a hit with a weapon or a spell.
Dragon Shire Warrior
- These guys are fast, but they are easily stun-locked, even with weapons that deal medium poise damage such as a Claymore.
- They are faster if not meaner than they ever have been but they actually have low poise as they can easily be stun lock by heavy weapon even 2 hits from normal greatsword, such as a Claymore.
- Use pyromancy on them for high amounts of damage.
- Beware they have a shield smash skill just like us if you decide to block all their combo.
General Information
- Previous: Dragon Aerie
- Next: Memories of the Ancients
- Recommended Levels: 105 to 115
- Boss: Ancient Dragon
- Bonfires: Shrine Entrance
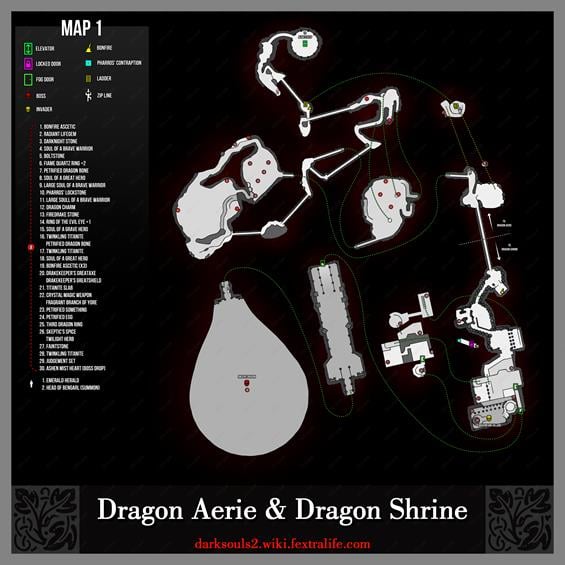
Dragon Shrine Map
NPCs inDragon Shrine
Items
Consumables
- 3x Bonfire Ascetic
- 1x Petrified Dragon Bone
- 1x Twinkling Titanite
- 1x Twilight Herb
- 1x Skeptic's Spice
- 1x Titanite Slab
- 1x Crystal Magic Weapon
- 1x Staff of Wisdom
- 1x Petrified Egg
- 1x Ashen Mist Heart
Equipment
- 1x Drakekeeper's Greataxe
- 1x Drakekeeper's Greatshield
- 1x Black Dragon Greataxe
- 1x Watchdragon Parma
- 1x Washing Pole
- 1x Third Dragon Ring
- 1x Mask of Judgement
- 1x Robe of Judgement
- 1x Manchettes of Judgement
- 1x Tights of Judgement
Enemies
NPC Invasion
Boss
- Ancient Dragon (Optional - drops Giant Soul)
Notes
- ??
Dragon Shrine Walkthrough
Friendly Locals
After arriving from the Dragon Aerie through the bridge, there is a bonfire in a small building left of the stairs. Head up the stairs and you will face a Drakekeeper. Behind him, in the arches under the upcoming stairs, are a pile of boxes hiding a Pharros' Contraption which reveals an illusory wall on the left. Inside is a metal chest with the Judgement Set and the Staff of Wisdom. Take a right just before the stairs and go through the doorway to find a metal chest with 3x Bonfire Ascetic.
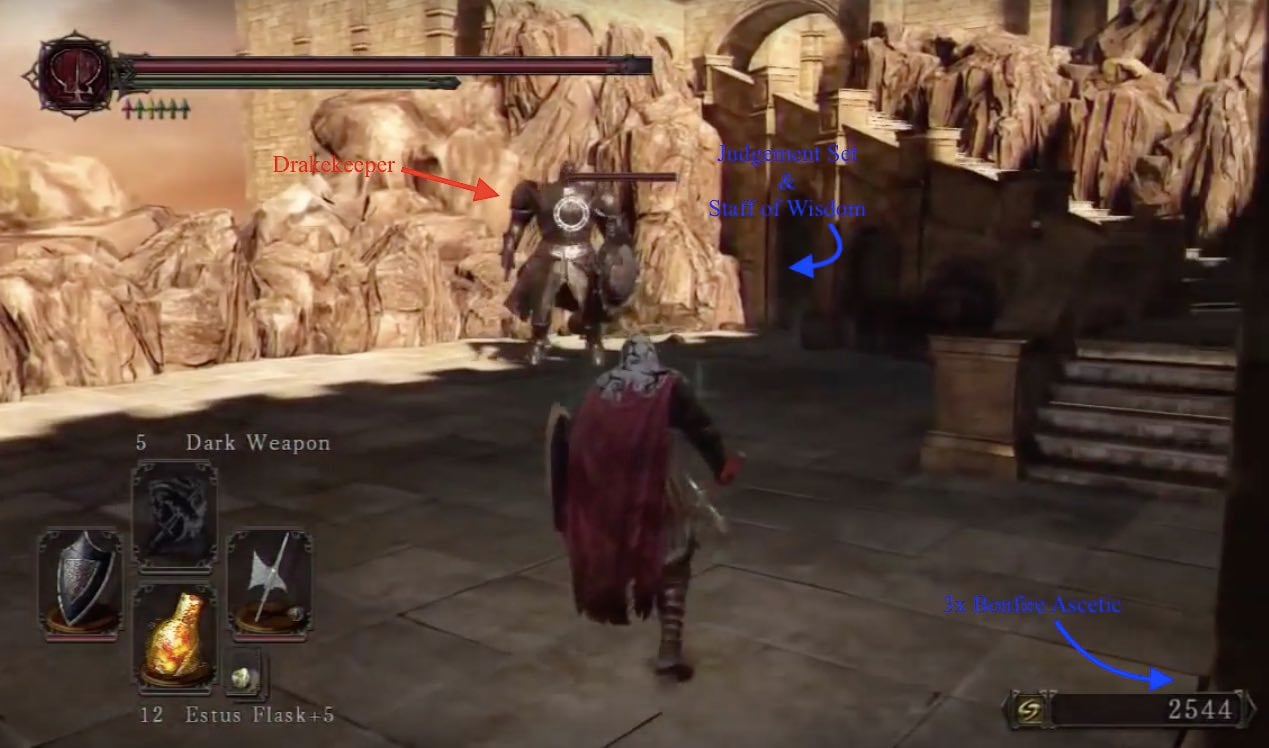
Having looted it, continue up the aforementioned stairs and you will find a Drakekeeper ready to attack. This one also wields a two-handed which makes this fight trickier than the sword-wielding one earlier. This enemy has a relentless flurry and is only open to larger attacks after he swings his mace overhead and smashes it into the ground.
- Melee - Try to keep still and lure him into such an attack.
- Alternatively, fight him from below on the stairs and most of his attacks will swing over you.
- Ranged - Lure him back to the stairs you came up and safely snipe him from there.
Continuing through the arches on the left, and up the first flight of stairs will be a chest containing a Twinkling Titanite. There will be another set of stairs to climb into a gazebo-esque structure holding a Dark Priestess and a Faintstone. Jump across through the opening in the railing to the next platform to find a metal chest on the right, with a Drakekeeper's Greataxe and Drakekeeper's Greatshield.
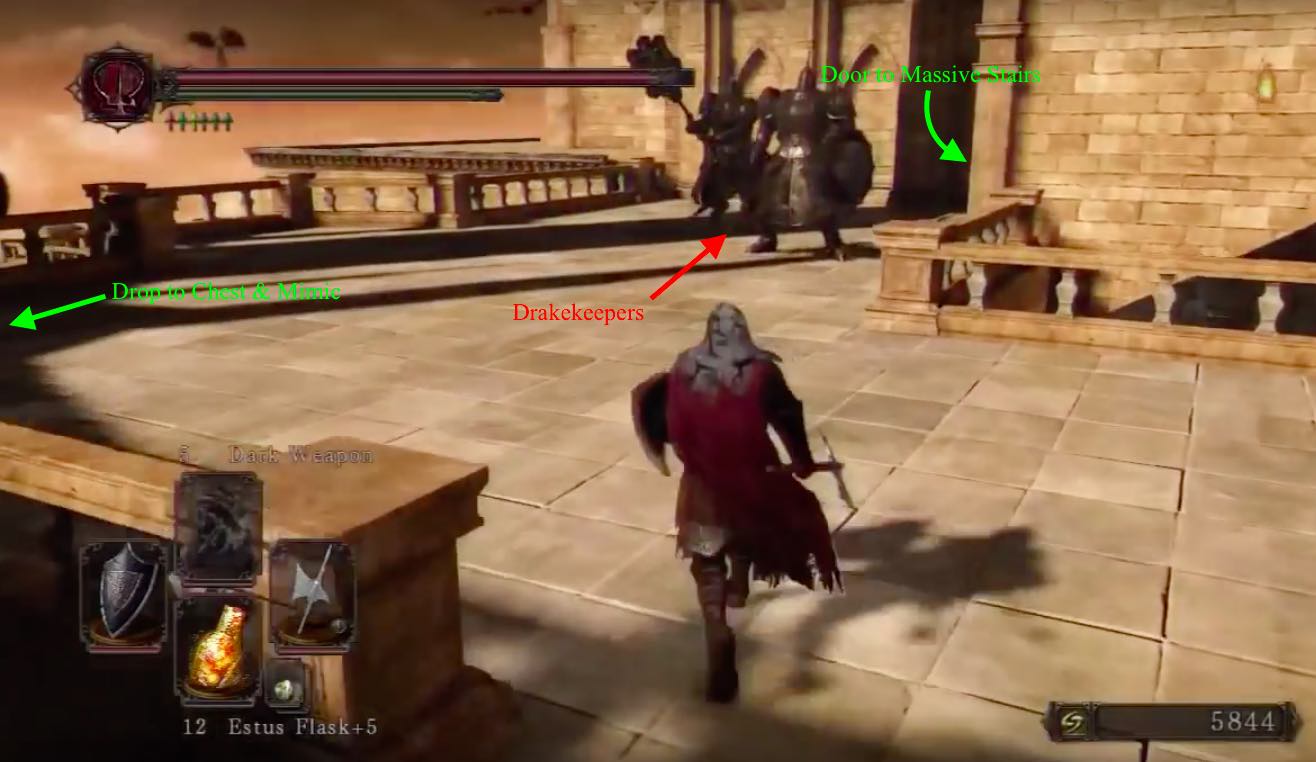
Egg Hunt
Drop down to the stairs below and head up to find another two Drakekeepers. After they have been dealt, head left of the stairs to drop down into a lower level and find a chest containing a Titanite Slab, and a Mimic on the right that drops the Washing Pole and a Petrified Dragon Bone when killed.
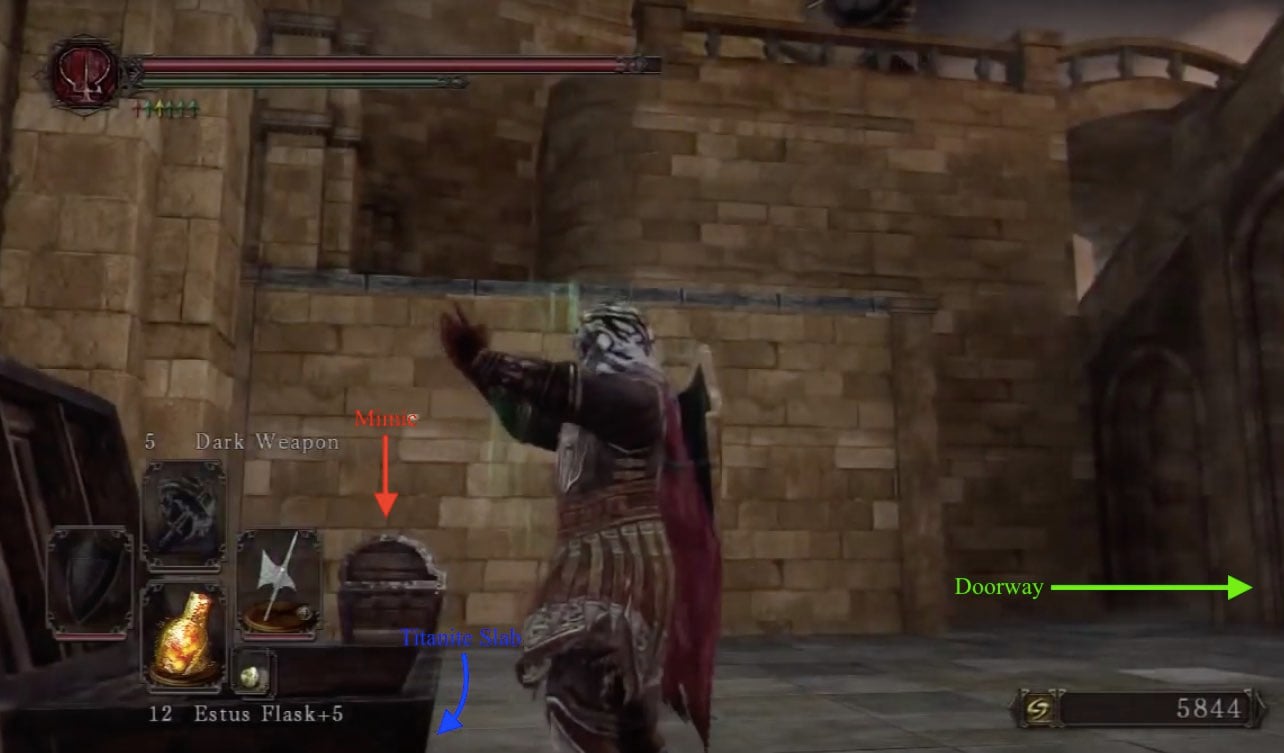
Proceed through the doorway to find Drakekeeper -wielding a Great hammer and Greatshield, with a corpse holding Skeptic's Spice and Twilight Herb, in a small recess on the left of the room.

Going through the door, inside is a metal chest containing Third Dragon Ring, that triggers the invasion of Dragonfang Villard upon opening, and a long staircase up. While the invasion is in motion, he actually spawns upstairs at the shrine and will wait for you there. Once defeated, feel free to take the Petrified Egg from the shrine here; this item is use to join the Dragon Remnants later, after you give it to Magerold of Lanafir at Iron Keep.

Route to the Ancient Dragon
Now head to the edge at the right side to find another metal chest containing a Watchdragon Parma shield, then drop down once again onto the ledge below for another metal chest containing the Crystal Magic Weapon spell. Drop down one final time to arrive at the landing you initially dropped off to find the chest with the Titanite Slab.
Opening the wooden door and another wooden door will lead to a massive staircase leading up. Heading up will bring you initially to a pair of Drakekeepers. Beyond them, but already within your line of sight, are two Dragon Knights. These enemies are very fast and extremely though, and are very hard to deal with in pairs -try to lure one at a time, and avoid fighting the Drakekeepers any higher on the stairs.
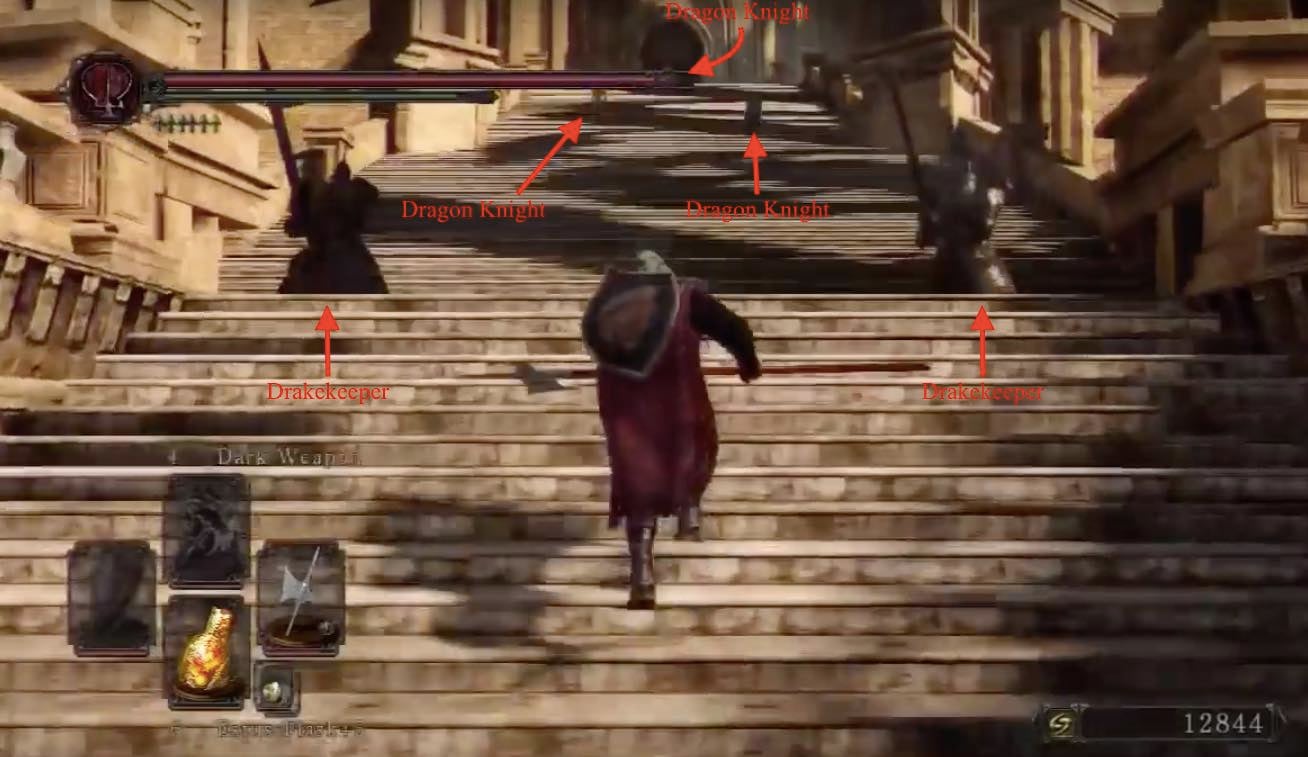
That being said, once you defeat all four, it's not over. You have one more Dragon Knight to deal with before you can cross this corridor to come out onto a large open platform with the Ancient Dragon waiting for you. Talking to the ancient one will award you with the Ashen Mist Heart. Remember all of the strange tree-giant hybrids that are laying around in various places? Now you can finally interact with them.
You can also choose to fight him or not, but there's no real need to.
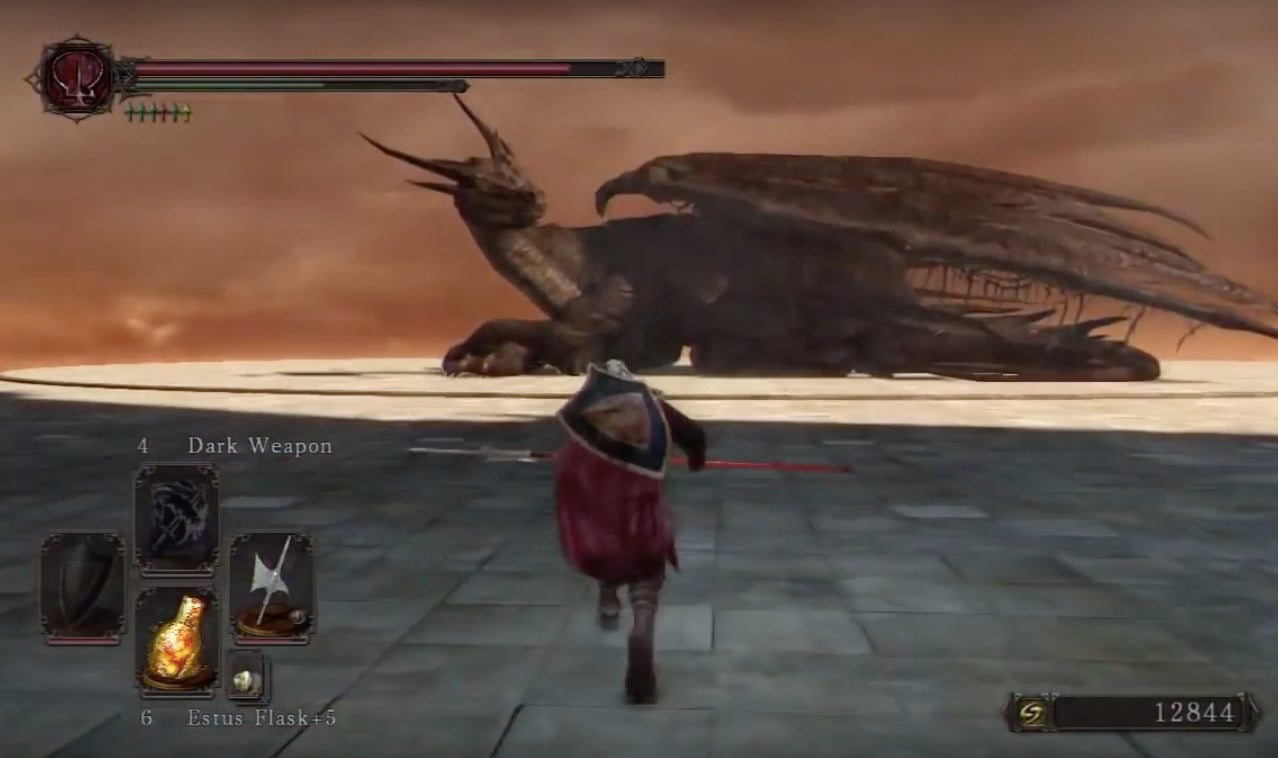
BOSS FIGHT: Ancient Dragon
Enemy Strategies
Drakekeepers
- These enemies hit hard, and some of them are relatively fast for their size.
- They are vulnerable to bludgeoning attacks, and weapons such as the Large Club or Great Club devastate them. With a strength of around 40 and a fully upgraded weapon, expect them to drop after 2 or 3 hits. If you are using such weapons, it's recommended to use hit and run tactics in order to avoid their oft devastating attacks.
- They are vulnerable to fire. An effective tactic is to simply circle around them to the right and hit them in the back 1-2 times, bait their combo, then repeat.
- For the swordsman, he will do a downward strike or sweep both ways, and the maceman will slash twice in either direction.
- Block his sword attacks if you have a shield and he will be easy to kill, as he leaves a window after his attacks to land a hit with a weapon or a spell.
Dragon Shire Warrior
- These guys are fast, but they are easily stun-locked, even with weapons that deal medium poise damage such as a Claymore.
- They are faster if not meaner than they ever have been but they actually have low poise as they can easily be stun lock by heavy weapon even 2 hits from normal greatsword, such as a Claymore.
- Use pyromancy on them for high amounts of damage.
- Beware they have a shield smash skill just like us if you decide to block all their combo.
 Anonymous
I honestly farm this area in the vanilla version. In NG+, I am pulling over 8,000 souls per minute. I am around level 230, right now, and it takes me about 20 to 30 minutes to level up (I need something around 150,000 souls for each). Just finish the area out, join the Covenant of Champions, travel to the bonfire, and kill every enemy between the bonfire and the end of the staircase. 9 big knights that are 3,800 each, three golden dragon dudes at 6,000 a pop, and the spell caster who is only 2,800, but he is annoying. Two or three runs, and you have a level, or enough souls to buy out all the merchants in the game. Did this on regular NG as well. It's a good warm up for the final bosses.
BTW, I am a hex build. First time playing as a squishy. I usually tank or dual wield.
I've tried to figure out how to edit the page, but it just doesn't work..
Either way, I would like to mention a couple of REALLY IMPORTANT FACTS THAT ARE NOT MENTIONED ANYWHERE HERE. These make the location much easier to handle, especially for farming purposes etc.
1. The Dragon Knight Champion on top of the stairs leading to the Ancient Dragon (the one that aggroes and wears a shimmering armour) does not respawn. Weird that this is not mentioned.
2. More importantly, once this champion is killed, the Dragon Knights throughout the area will no longer aggro, EVEN IF YOU JUST RUN THROUGH (I.E. FLEE THE DRAKEKEEPERS), OR EVEN SUMMON BASHFUL RAY.
(I don't play online so I haven't tested with other summons but I suppose it's the same.)
So if you need to farm, just kill the champion and then have a nice time.
Btw, all the Drakekeepers can easily be killed with ranged attacks
 Anonymous
This is where I quit this game. I've had enough. Haven't touched a single bit of the sotfs DLC but I just don't care anymore. How people play this game over and over I will never understand. I'm confident I will never return to it. The naysayers were right.

TIP: If you're having trouble with the 9 or so dragon knights on the stairs; get a bunch of fire bombs (any work but dark and magic seems they did the most dmg). As you're exiting the door to go up the stairs you're gonna want to use a projectile on one of em to aggro them all. After you do that, quickly go back inside that hall and close the door. Now they should all be bunched up against the door. Throw the firebombs at the door and you should be able to damage 4-5 of them each throw.

 Anonymous
This area is a lot easier as a sorcerer. I took down the Drakekeepers with minimal damage with Dark Orb.

 Anonymous
this place is devilish, worst area in the game, even worse than frigid outskirts

 Anonymous
This area is ghost town now compared with the vanilla version. That staircase to the Ancient Dragon used to bring on nightmares.

 Anonymous
the drakekeeper predicted elden ring boss fights before it was even a thing

 Anonymous
Best area of the game, no gank bullshit, just warriors besting each other with honor

 Anonymous
There is a chest in a plataform that I can't reach. Anyone know how to get there?

 Anonymous
The Drakekeepers are only "relatively fast?", Bullshit, Those bastards have aggression and relentless flurries of swings that'd put Father Gascoigne to shame

 Anonymous
Unironically not as bad as the Base game version unless you're using an unupgraded weapon or something, that annoying priest who pelts projectiles that annoyingly knock you over and stun you from across the map is gone, and there aren't as many Drakekeepers around, there are way more Dragon Knights, but they are nowhere near as much of a pain in the balls as the Drakekeepers are, as long as you don't make them mad by fleeing from the Drakekeepers without fighting them, because if you do they WILL come after you in a huge mob, almost as if it's reinforcing its "rule" of killing enemies that are in your path instead of just gunning it past them

 Anonymous
Scholar of the First Sin really turns this place into Heide's Tower of Flame 2.0, Drakekeepers are basically Old Knights on a thousand trucks worth of crack and steroids, and the Dragon Knights, barring a few like the one that powerstances greatswords are similar to Heide Knights the way they're passive until you attack them, only they also will immediately turn hostile and attack you if you flee or get too far away from the Drakekeepers without killing them first

 Anonymous
 Anonymous
This area of the game made me HATE this game. Really??? 9 ****ing enemies attacking you at the same time??? Definitely the worst and the most lazy souls-like ever.

 Anonymous
 Anonymous
the dragon knights just aggroed on me without me attacking them why is that?

 Anonymous
 Anonymous
Still can't believe how much they nerfed this area in SotFS.

 Anonymous
In SOTFS, Dragon Knights didn't aggro when I summoned Bashful Ray (i was in Pilgrims of Dark covenant). It was though after i talked to the Ancient Dragon. I wanted to check if knights can drop their armor, cuz it looks pretty cool, so i went on and summoned Ray to help me out, and none of them aggro until i attack them.
Funny thing, when i went on the big staircase, hit one of knights with a bow thinking to lure him out, but all 8 rushed towards us xD so yea got rekt there pretty badly lol
 Anonymous
 Anonymous
FYI, the dragon knights will also attack you if you die against the phantom dragon knight

 Anonymous
“I think we should get out of here.”
(Someone please get this reference)
 Anonymous
In SOTFS, these Dragon Knights will not attack you unless you started first. Except the Drakekeepers, they will attack whenever they saw you~

 Anonymous
So are the Drakekeepers on Aldia's payroll? Did he invent the Dragon Knights too? They kinda lost me with this area.

Do the Dragon Knights aggro if you've started the Ancient Dragon fight?

 Anonymous
Poison arrows to cheese the Drake black knights and the swordsman at the top of the stairs. The swordsman follows you down to the bonfire, but does not get off the stairs. No one aggros. Easy least.

My friend and I discovered a way to have a summon without angering the dragon knights. This is very important if you want to co-op the area. First, it is essential that the host has killed the champion dragon knight (the one with the two large swords on the giant staircase). Once the champion is dead, you can go through the area with a summon. Second, as without a summon, you need to defeat the Drakekeepers in a duel to not aggro the dragon knights. Have one player stand outside the 'arena' while the other player fights the Drakekeeper. It does not matter whether the host or summon fights, as long as only one player is fighting the Drakekeeper. I have not done extensive testing to determine the exact triggers to allow co-op, but defeating the champion is what allowed it for me on multiple characters. In case there is more needed, I also retrieved the covenant egg and angered the Ancient Dragon. I don't think those two conditions are necessary, but it is convenient to already anger the Ancient Dragon so you can see full Summon Signs.

 Anonymous
Can somebody add somewhere that if you summon ANY shade ( including players) the Dragon knights get aggro'd.

 Anonymous
People can apparently invade you even when hollowed. Take care; undead.

 Anonymous
 Anonymous
 Anonymous
Drakekeeper with mace (and infinite stamina attack) is easily beatable with melee as long as you get in close and strafe LEFT. Many of his swings will miss. Strafe right and you're toast.

 Anonymous
Bashful Ray can be summoned in the drop-down area with the chest before the fight with the hammer & shield Drakekeeper and the invasion of Dragonfang Villard in the Petrified Egg room. He's very effective, but aggros every Dragon Knight in the visible area though. You've been warned.

 Anonymous
The link above that says: "King Vendrick" goes to a page called "King Vendricks" which doesn't exist. It is in the first paragraph under Dragon Shrine at the end.Vendrick's link: https://darksouls2.wiki.fextralife.com/Vendrick

its seems that if you dont take the "duel event" against the drakekeepers and the dragon warrior in the stairs before the dragon, they will atack you. this only happens if you keep evading the enemies and exploring the places without killing.

Passing the Drake Warrior (passive) guarding the small bridge, drop down till you come across the wood chest containing the titanite slab is his summoning sign as a SHADE in a small corner. However, do note that he is aggressive towards EVERY enemy, so he will attack the warriors and the keepers.


Does the single spawn dragon knight have any drops
0
+10
-1