General Information
- Previous: Shulva - Sanctum City
- Next: Dragon's Rest
- Optional Connecting Area: Cave of the Dead
- Recommended Levels: 110 to 120
- Bosses: N/A
- Bonfires: Hidden Sanctum Chamber, Lair of the Imperfect, Sanctum Interior
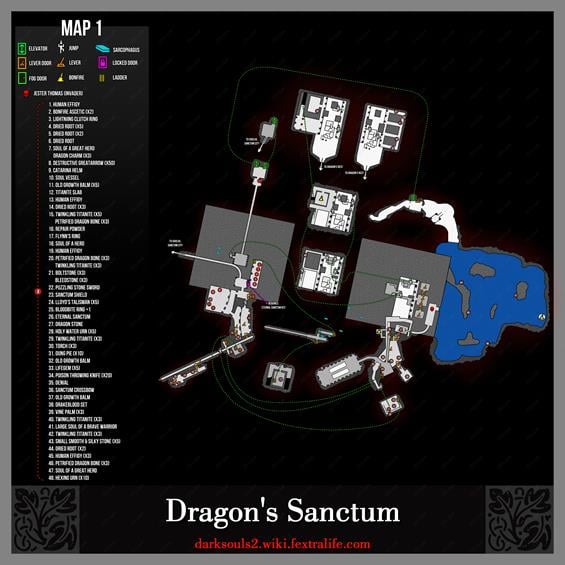
Dragon's Sanctum Map
NPCs
- Jester Thomas (NPC Invasion)
Items
- Soul of a Great Hero
- 3x Dragon Charm
- Bonfire Ascetic
- 7x Old Growth Balm
- Titanite Slab
- Soul Vessel
- 50x Destructive Greatarrow
- Catarina Helm
- 10x Dung Pie
- 20x Poison Throwing Knife
- 5x Lifegem
- Human Effigy
- Repair Powder
- 11 x Twinkling Titanite
- 3x Boltstone
- 3x Bleedstone
- 6x Petrified Dragon Bone
- Human Effigy
- 5x Torch
- 5x Holy Water Urn
- Dragon Stone
- Sanctum Crossbow
- Puzzling Stone Sword
- Miracle: Denial
- Flynn's Ring
- Bloodbite Ring +1
- Eternal Sanctum Key
- Sanctum Knight Helm
- Drakeblood Greatsword
Enemies
Notes
- The Sanctum Soldiers here will have a posionous aura, which will slowly buildup poison if you are close to them.
Full Dragon's Sanctum Walkthrough
Do you believe in Ghosts?
Once you've enter Dragon's Sanctum, you'll find a locked door on your left, and a corridor in front of you. The door can only be accessed via a key you pick up later, so for now go down the corridor to find a switch on the left side, hit it and pick up a Soul of a Great Hero and 3x Dragon Charm, from the body.
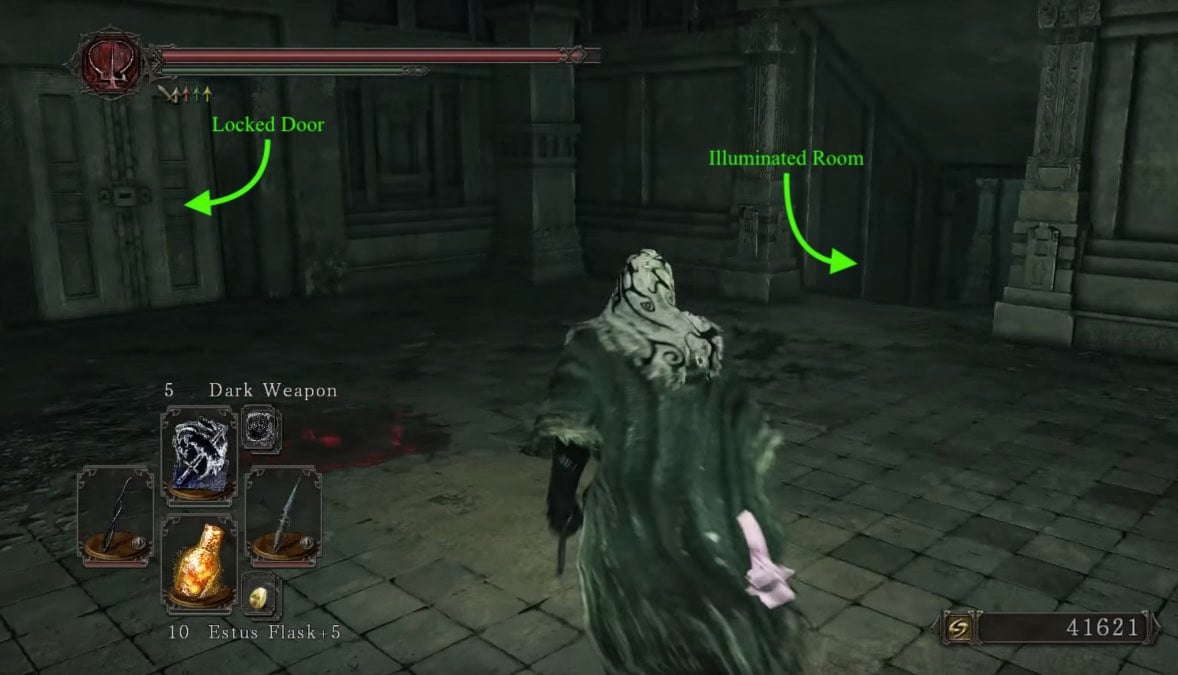
Head into the illuminated room on the right, there are two Sanctum Knights and two statues, emanating a red aura on altars. Those are immune to any physical damage while they are in their spirit form (which makes them look like phantoms). They can still be damaged with elemental attacks (although recive less damage while in their spirit form), or turned back into a physical form by breaking the statues on the altars. Kill them then loot the chests for a total of:
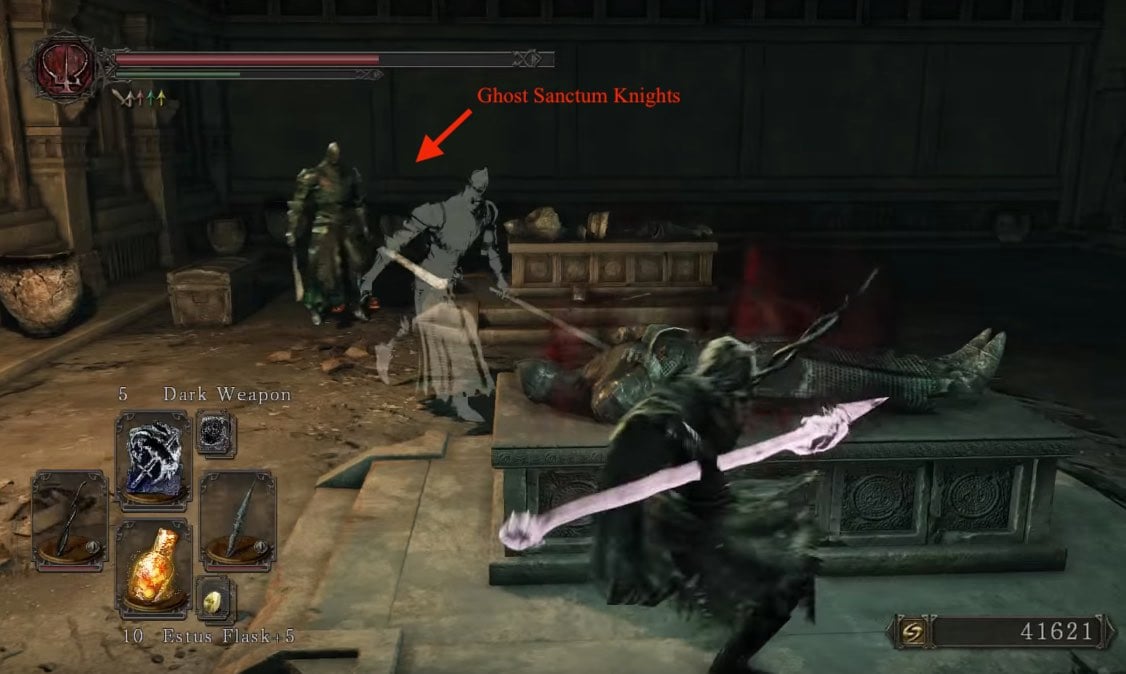
- 5x Old Growth Balm
- 1x Titanite Slab
- 1x Soul Vessel
- 50x Destructive Greatarrow
- 1x Catarina Helm
Exit to the hallway and continue going forward to the next division, past the stairs. A Sanctum Soldier will attack from the left, and there is another one on the right. The raised floor tile triggers a crossbow trap which can be used to kill them. Two more Soldiers lie on the floor and rise as you approach. At the end there is a poison-trapped chest containing 3x Dried Root. Look at the ceiling and shoot an arrow at the switch to raise a wall panel here, revealing a chest that contains 5x Twinkling Titanite and 3x Petrified Dragon Bone.
On the left of the hallway, you may notice the multiple doors leading to the next room, containing another Sanctum Soldiers and a Sanctum Priestess. Deal with them then pick up a Human Effigy. Before stepping onto the pressure plate, take out the Sanctum Archer on the upper platform. Stepping on the pressure plate will rotate the contraption by 90 degrees, so activate it 3 times to be able to go through.
Keep going forward until you reach a junction. To the left there is a body with a Repair Powder, while on the right you'll find a wall that will be a shortcut later. Continue forward and jump over the hole. You will soon come to a small window and closed door, on your left. Shoot an arrow at the switch, visible from the window, to open the passage on the left. However before you enter, go down the end of the hall and shoot the switch, above on the wall ahead, which will open a hidden area in the room at the end of the passage we just opened.
Plunder
Head back and through the door. Kill the Sanctum Soldier on your left, and notice the stairs on the right. Before going down the stairs, notice the standout tile on the floor; this triggers the staircase ahead to be engulfed in spikes, which you can use to kill the 2 Soldiers there. Loot the two bodies as well for a Soul of a Hero and a Human Effigy. Open the three chests at the end for a total of:
- 3x Boltstone
- x3 Bleedstone
- 3x Twinkling Titanite
- x3 Petrified Dragon Bone
- 1x Puzzling Stone Sword.
Egg Den & Spiky Floors
Backtrack out of the room, and back out to the corridor where you jumped over the hole in the stairs, and fall through it. You'll find be a Corrosive Egg Crawler on the right, kill it and equip the Cat Ring or any gear that lowers fall damage as you're in for a bumpy ride. Fall through the hole to land in the middle of an Egg Crawler den; the best way to deal with them is to quickly run up the stairs and make full use of spells. After you kill them all you can loot the bodies in the area for a total of:
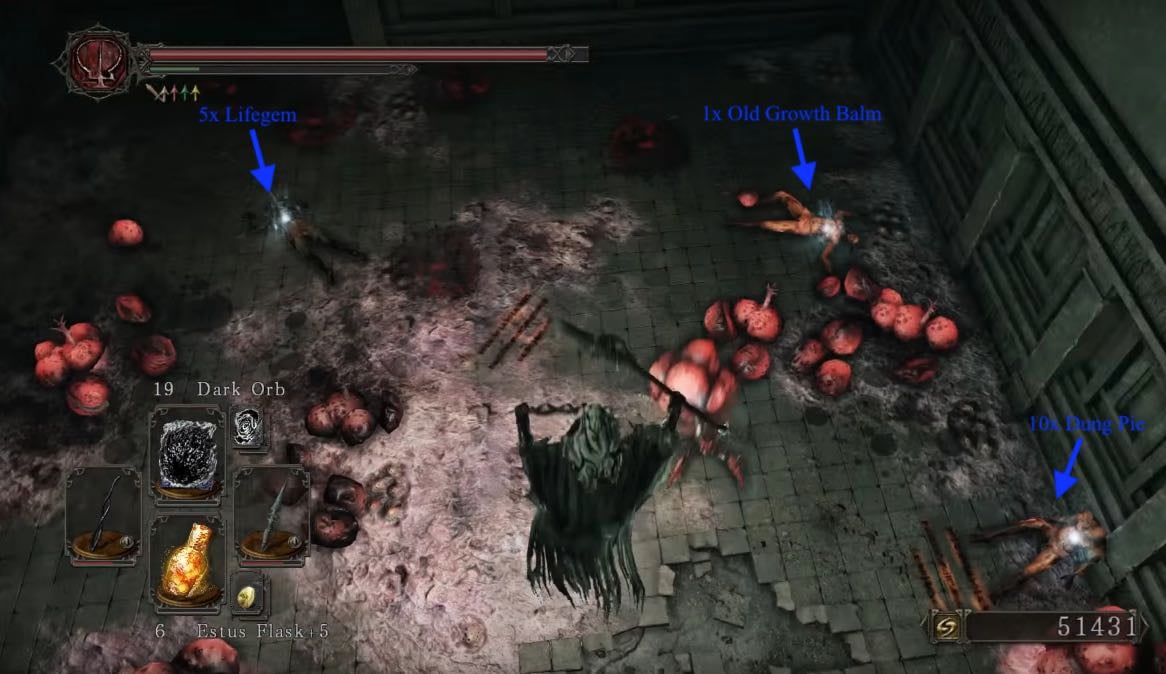
- 10x Dung Pie
- 5x Lifegem
- 1x Old Growth Balm
- 20x Poison Throwing Knife (on the stairs)
Head up the ladder at the top of the stairs, and open the metal chest that contains the Flynn's Ring. Head out the exit to drop back down to where the body with the repair powder was. Once again, go down the stairs and drop in the hole but this time, head left to find a room with the floor covered in spikes.
There is a Sanctum Knight around the corner after the bridge and a Sanctum Priestess above. It is advised to take care of the Sanctum Priestess with ranged attacks before triggering the Sanctum Knight, if you prefer to stay with melee approaches, we will soon be able to go up to her. The Sanctum Knight is immune to the spikes while he is in his spectral form, so lure him back to the stairs and take him out with elemental attacks. The corpse on the spikes contains, but we are ignoring that for now, and instead go forward on the safe path on the right side of the spikes.
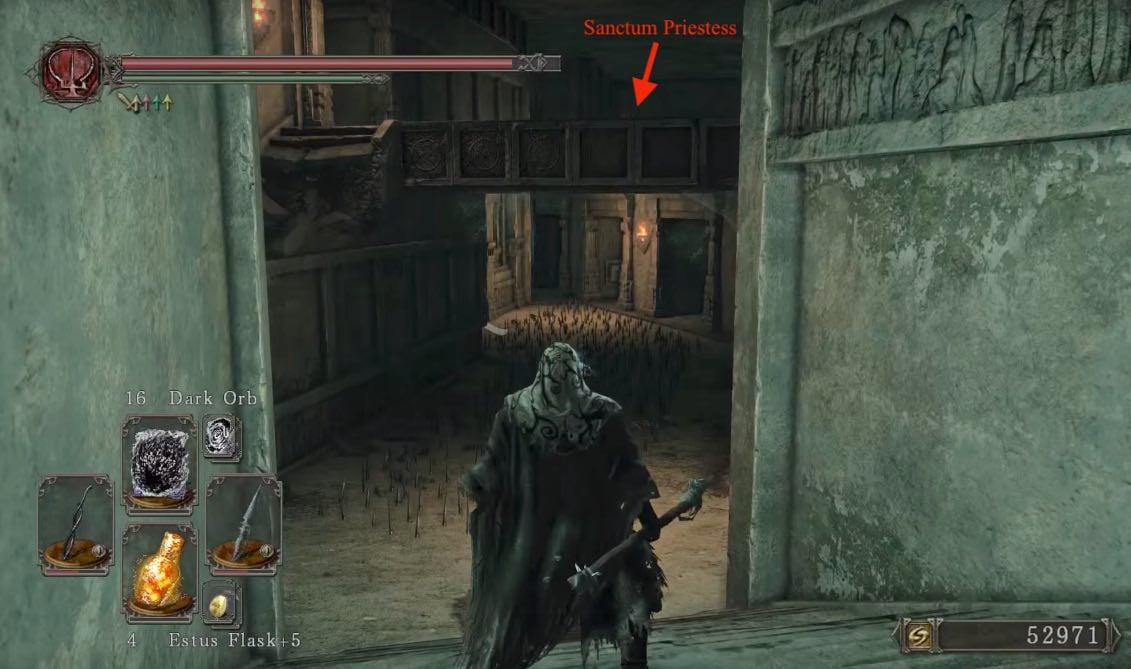
Going through the doorframes on the right, we find another room covered in spikes, another Sanctum Knight, several bodies with items, another rotating contraption and a ladder. Hitting the siwth on the middle doorframe will also open a hidden area with a chest in it. For now, we ignore all the loot and instead go through to third doorway, to reach the ladder without having to take a step through the spikes, up on the ladder, we are now on the pathway above the doorway, near the end of it on the ceiling, there is the switch that finally takes care of the spikes. We can now loot the corpses, the one from the little spike are from before, under the bridge, contains 3x Torch, the corpses in the area with the contraption contain 3x Twinkling Titanite, 5x Holy Water Urn and 1x Human Effigy. The chest in the same are contains 1x Dragon Stone, which we will need later to reach Dragon's Sanctum.
After looting the area, head back up the ladder and go into the room at the end of the pathway, where another Sanctum Knight and another Sanctum Priestess are waiting for us. Lure the Knight outside and down to the now spike-less area to make the fight a bit easier, then go back up and take care of the Priestess. In the room there is a poison trapped chest with 5x Lloyd's Talisman and a switch next to it. Activating it will open the door on the staircase to the left, which acts as a shortcut back to the staircase right before the dropdown. The doorway to the right leads to the path abouve the first spike area, on the left of it before the doorway, there is a chest containing a Bloodbite Ring +1. Since we cant go back up from her again, drop down and, before we go back up, go past the doorframes and down the stairs. Be carefull of another Sanctum Knight around the corner; once you have dealt with him, stand at the bottom end of the stairs and turn back. There is a switch on the wall up high, hit it with an arrow to activate it. This will open up the closed door we have seen right after climbing up the ladder, so head back to the doorframes and up the ladder, then jump over the gap. In the now opened room lies theHidden Sanctum Chamber bonfire, going through the other exit of the room, we will reach a corpse containing the Sanctum Crossbow.
From the First Bonfire to the Key
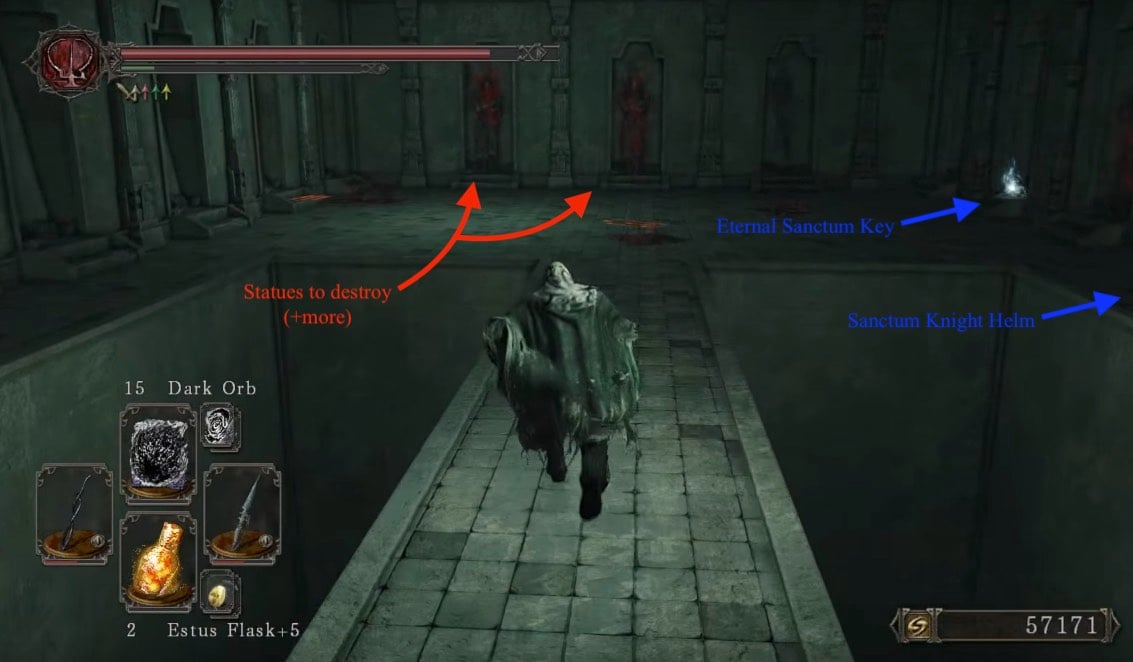
After reaching that checkpoint, head back to where we dropped down for the chest with the Bloodbite Ring +1, but this time, go through the doorframe and head down stairs. We will enter a room with 3 Sanctum Knights. Destroy all the "statues" in the walls in this room to make all the Sanctum Knights in the Sanctum visible and weaker. Kill them and pick up the Eternal Sanctum Key and a Sanctum Knight Helm.
Path to the Second Bonfire
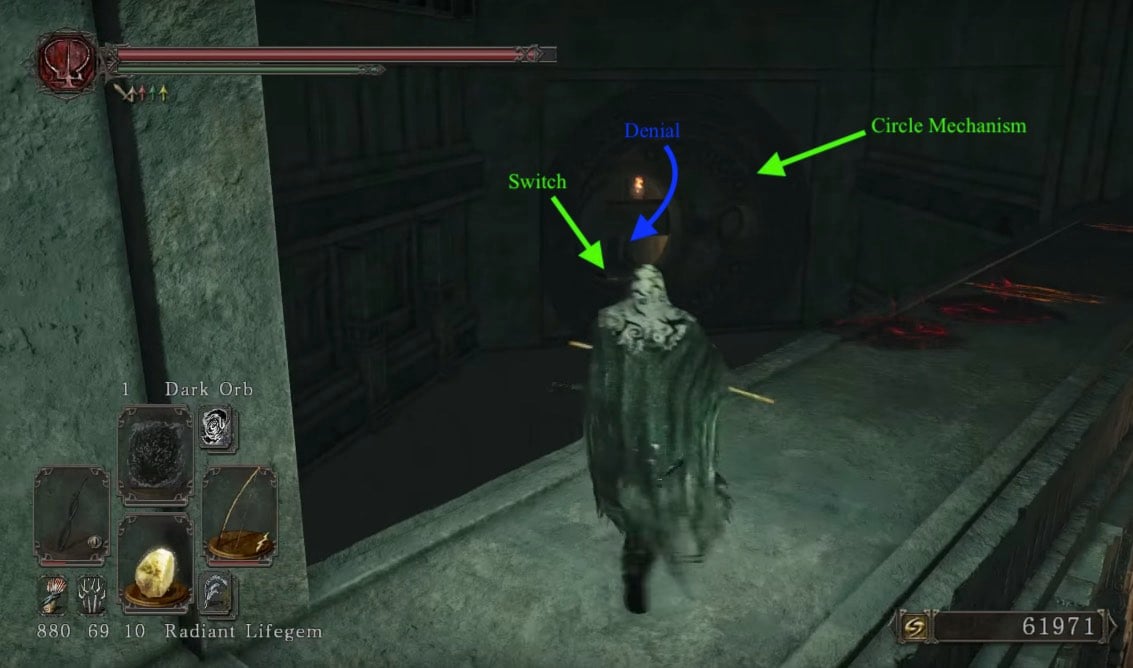
Go back to the bridge where the Priestess stood. Walk till the middle of the walkway and on the left there will a rotating stone with a large and a small hole, like the one you found earlier. Shoot an arrow to the switch on the floor on the other side of the contraption. Drop down and get closer to the small hole, shoot another arrow to the switch. Go back up the ladder and to the end of the walkway, shoot a final arrow to the switch. Drop down and enter that room, inside there will be a chest that contains the Denial miracle.
Head back to the room that had spikes on the floor but this time, head down the narrow steps on the left side. Kill the Sanctum Knight and continue right, down the stairs and into the corridor on the right. Go through the doorway on the right and down the stairs, once again. Pick up the Old Growth Balm here before proceeding down the two subsequent sets of stairs to trigger the Jester Thomas invasion -strong pyromancer, should consider fire resistance before encounter.
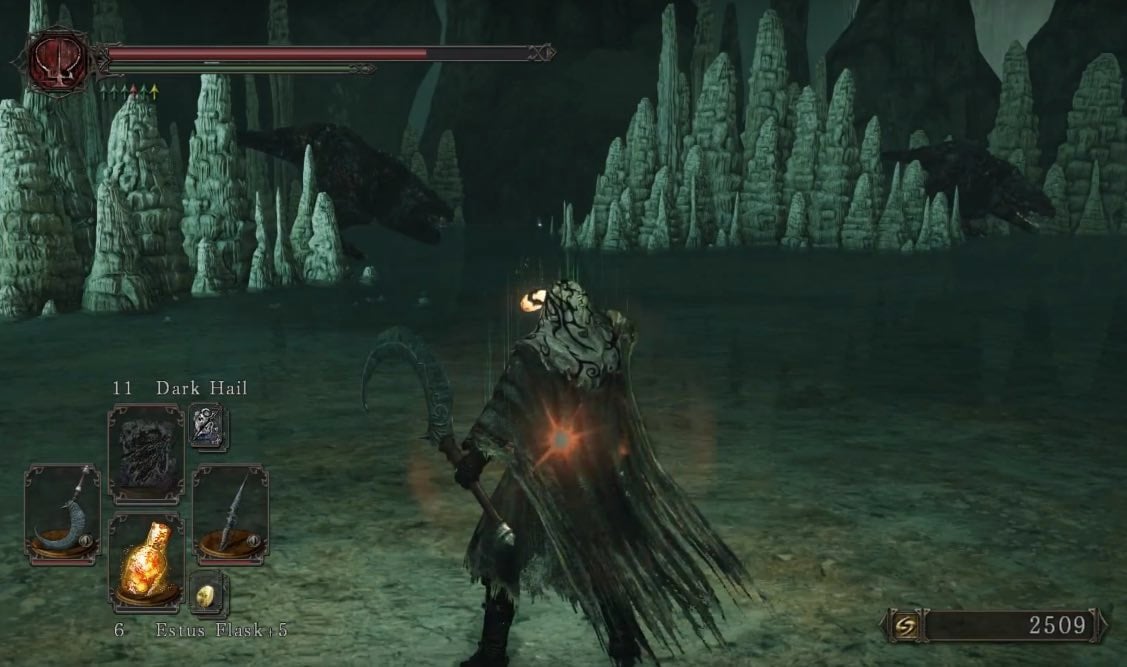
After dealing with the invader, proceed through the Fog Gate and emerge into shallow waters holding four of The Imperfects. Be carefull when fighting them, as they can charge, spit orbs and eat you, but they are a good source for Petrified Dragon Bones and Titanite Slabs. Especially since there is the Lair of the Imperfect bonfire in this area, at the other side of the shallow waters. The easiest way to reach it is to follow the walls of stalgtites on the right; there is also corpse with 3x Petrified Dragon Bone in that way. When facing the pyramide, head to the row of stalagtites to your right, on the other sind, there is a corpse with 1x Soul of a Great Hero. From the bonfire, if you go towards the middle of the pyramide (where the entrence to this area was) you will eventually hit a wall of stalgmites and a corpse with 3x Human Effigy. Following the wall to the right, you will find a corpse with 2x Dried Root, and a path out of the water on the right of you. You also reach that area if you cycle around the shallow water are following the very outer walls of stone and stalagtites counter-clockwise.
Dragon's Rest
When you get out of the water you will see some stairs leading to a circular stone. Use the Dragon Stone here to create a path that will lead to Dragon's Rest. Enter the next building and you will see an obelisk and a cave entrance. Hit the obelisk to enable the elevator and go through the cave to find a body that has the Drakeblood Greatsword. Head back to the elevator and take it up on the next level to find another elevator and an exit.
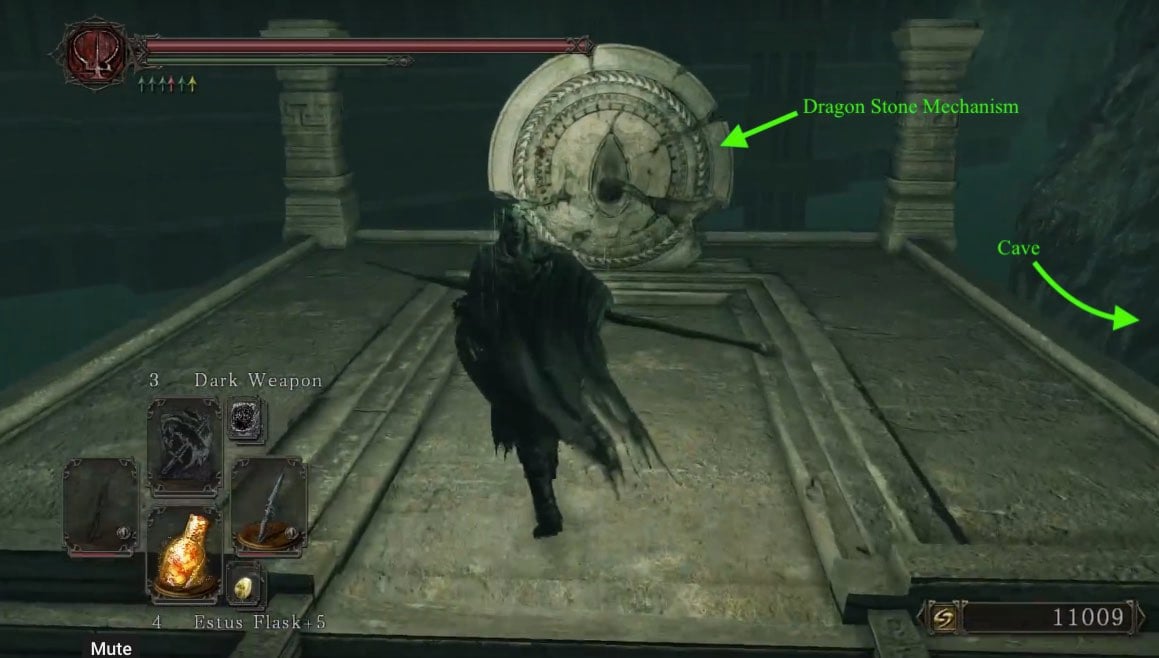
The elevator will take you the first bonfire of Shulva - Sanctum City, the exit will take up a set of stairs. Before the stairs to your left is a corpse containing a Human Effigy. Go up the stairs and you will reach the entrance to Dragon's Rest (the location message saying Dragon's Rest will only show when you reach the bottom, near the Boss fog gate, so consider the whole next walkthrough to be Dragon's Rest area).
Eternal Sanctum Key
With the Key you can now open the door at the start of the Sanctum. Inside are 2 Priestesses along with 5 chests containing: Dried Root x5, Dried Root x2, Dried Root x1, Bonfire Ascetic x2 and Lightning Clutch Ring. Climb up two sets of ladders to encounter 3 Egg Crawlers. Climb the next ladder to obtain the Sanctum Shield. On the outside balcony you can light 2 Sconces. Drop down back to the level below and cross the long bridge (Rockshield Baldyr will invade you on this bridge).
On the other side of the bridge is the Priestess' Chamber bonfire. Hit the obelisk here to activate the elevator, it will bring you down to the building near the first entrance to Dragon's Sanctum (where Sinh bombarded the bridge). However, on your halfway down you can jump off the elevator. On this level locate a corpse with 5x Torch. Further around you'll find a chest with the hex Dark Greatsword. From here drop down to the bridge below (Silvercat Ring is advised) and take the elevator back to Priestess' Chamber bonfire. Proceed forward to the cave and then through the Fog Gate to Cave of the Dead.

